Make a Health Bar with UI Toolkit
Tutorial
Beginner
+10XP
30 mins
132
Unity Technologies
Creating a good user interface (UI) for your game helps to add a level of polish to your application as well as convey important information to the player. In this tutorial, you’ll harness the power of Unity’s UI Toolkit to display a health bar in the provided support project.
Materials
Languages available:
1. Overview
In this tutorial, you’ll learn the basics of how UI Toolkit works and how to create a health bar using it. This tutorial uses a support project that contains a very simple game you will implement the health bar for.
2. Before you begin
To follow this tutorial, you need to have an understanding of how Unity works, what assets are, how to create GameObjects, and how to add components to them.
You’ll also require some basic knowledge of programming; you should know how to create scripts, what functions are, and be familiar with properties and variables in C#.
If you're new to programming, check out the Junior Programmer Pathway before you continue with this tutorial. There you'll learn fundamental programming concepts such as variables, functions, and basic logic through two practical projects.
Download the attached project and open it. The Main scene contains a small prototype where you can move the character around by selecting where on the ground you want it to move to. Walking in the red cubes on the ground will damage the character, but in the current state nothing shows the character's amount of health.
3. What is UI Toolkit
UI Toolkit is one of the two UI solutions in Unity. It takes inspiration from web technologies like HTML and CSS and splits UI into three parts:
- Structure: defines which component the UI Contains (text, button, container, slider etc.) and their hierarchical relationship. This is defined inside an UXML file, which is similar to an HTML file for the web.
- Styling: defines visual properties (color, size, background, etc.) that can be applied to elements. This helps you to reuse style across your whole application or hot swap styles during the application run. This is defined inside a USS file, which is similar to a CSS file for the web.
- Behavior: defines how element values are updated or how they react to interactions (clicking, hovering, etc.). This is defined in your C# Scripts, similar to javascript for the web.
It’s possible to write UXML and USS files by hand. However, this is often unnecessary, as Unity comes with a visual tool to author and style UI called UI Builder.
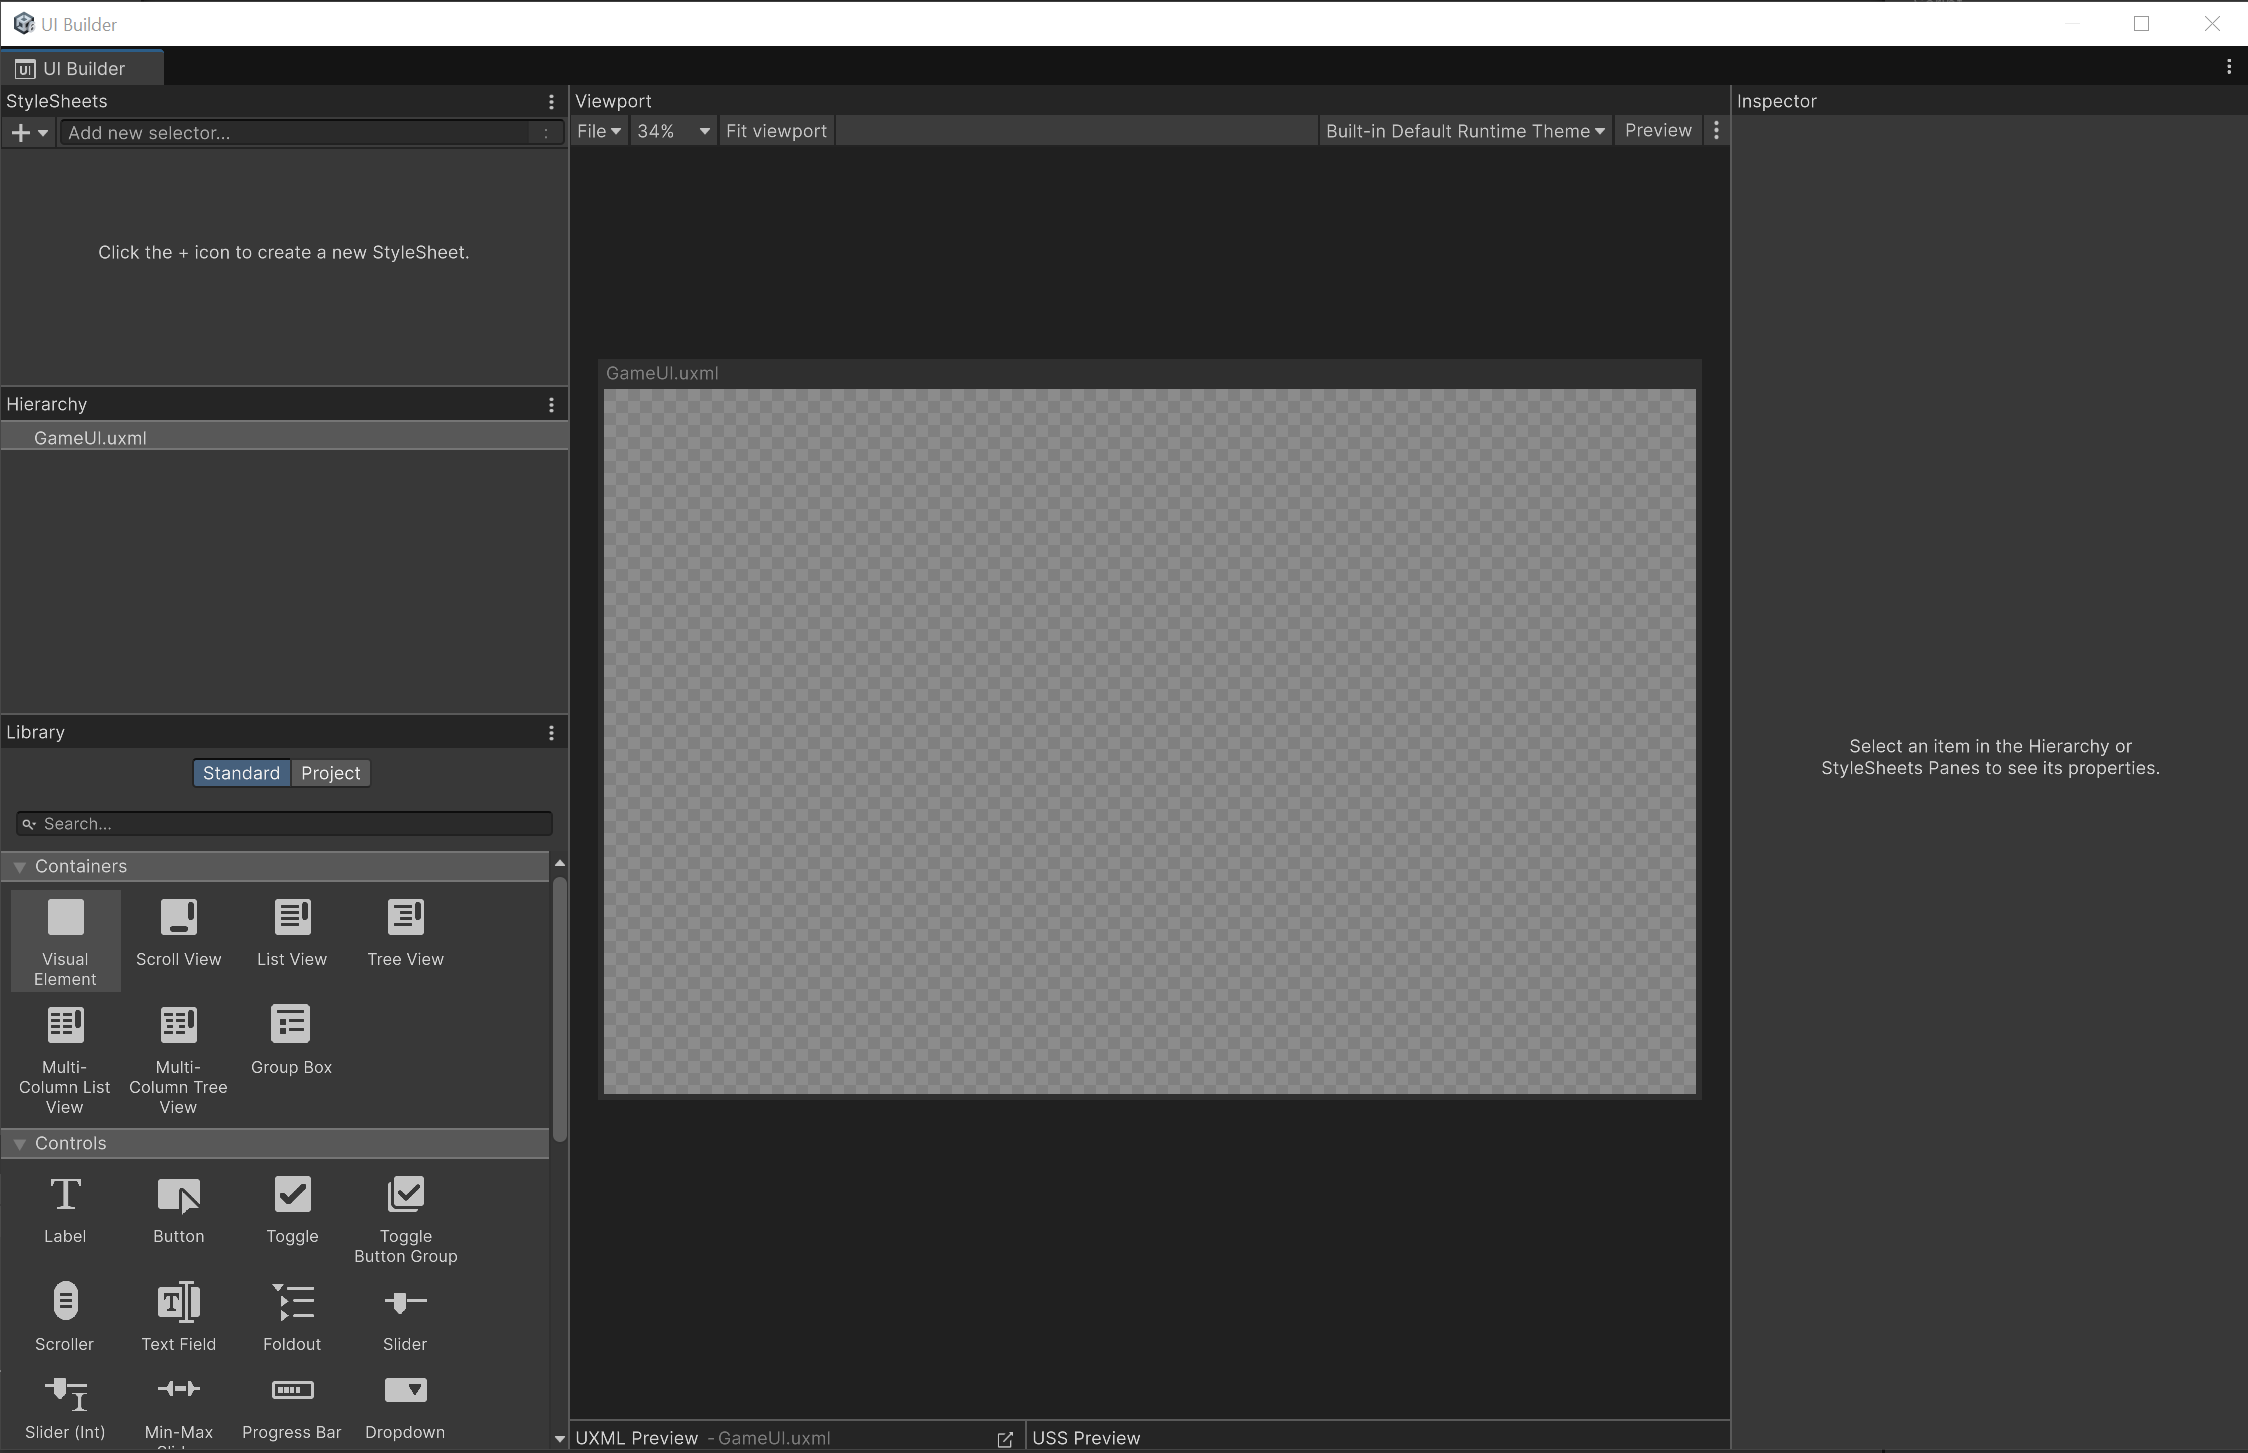
In this tutorial, you’ll use UI Builder to create and style elements directly. However, you’ll also learn how to use a USS file to define styling.
4. Create the UI File and the Health Bar Background
The base of all UI using UI Toolkit is the UXML file that defines its content.
1. To create a new UXML file, in the Project window, right click inside the folder you want to create the file in and select Create > UI Toolkit > UI Document.
2. Name this new file “GameUI”.
3. Double click the GameUI file to automatically open the UI Builder window.
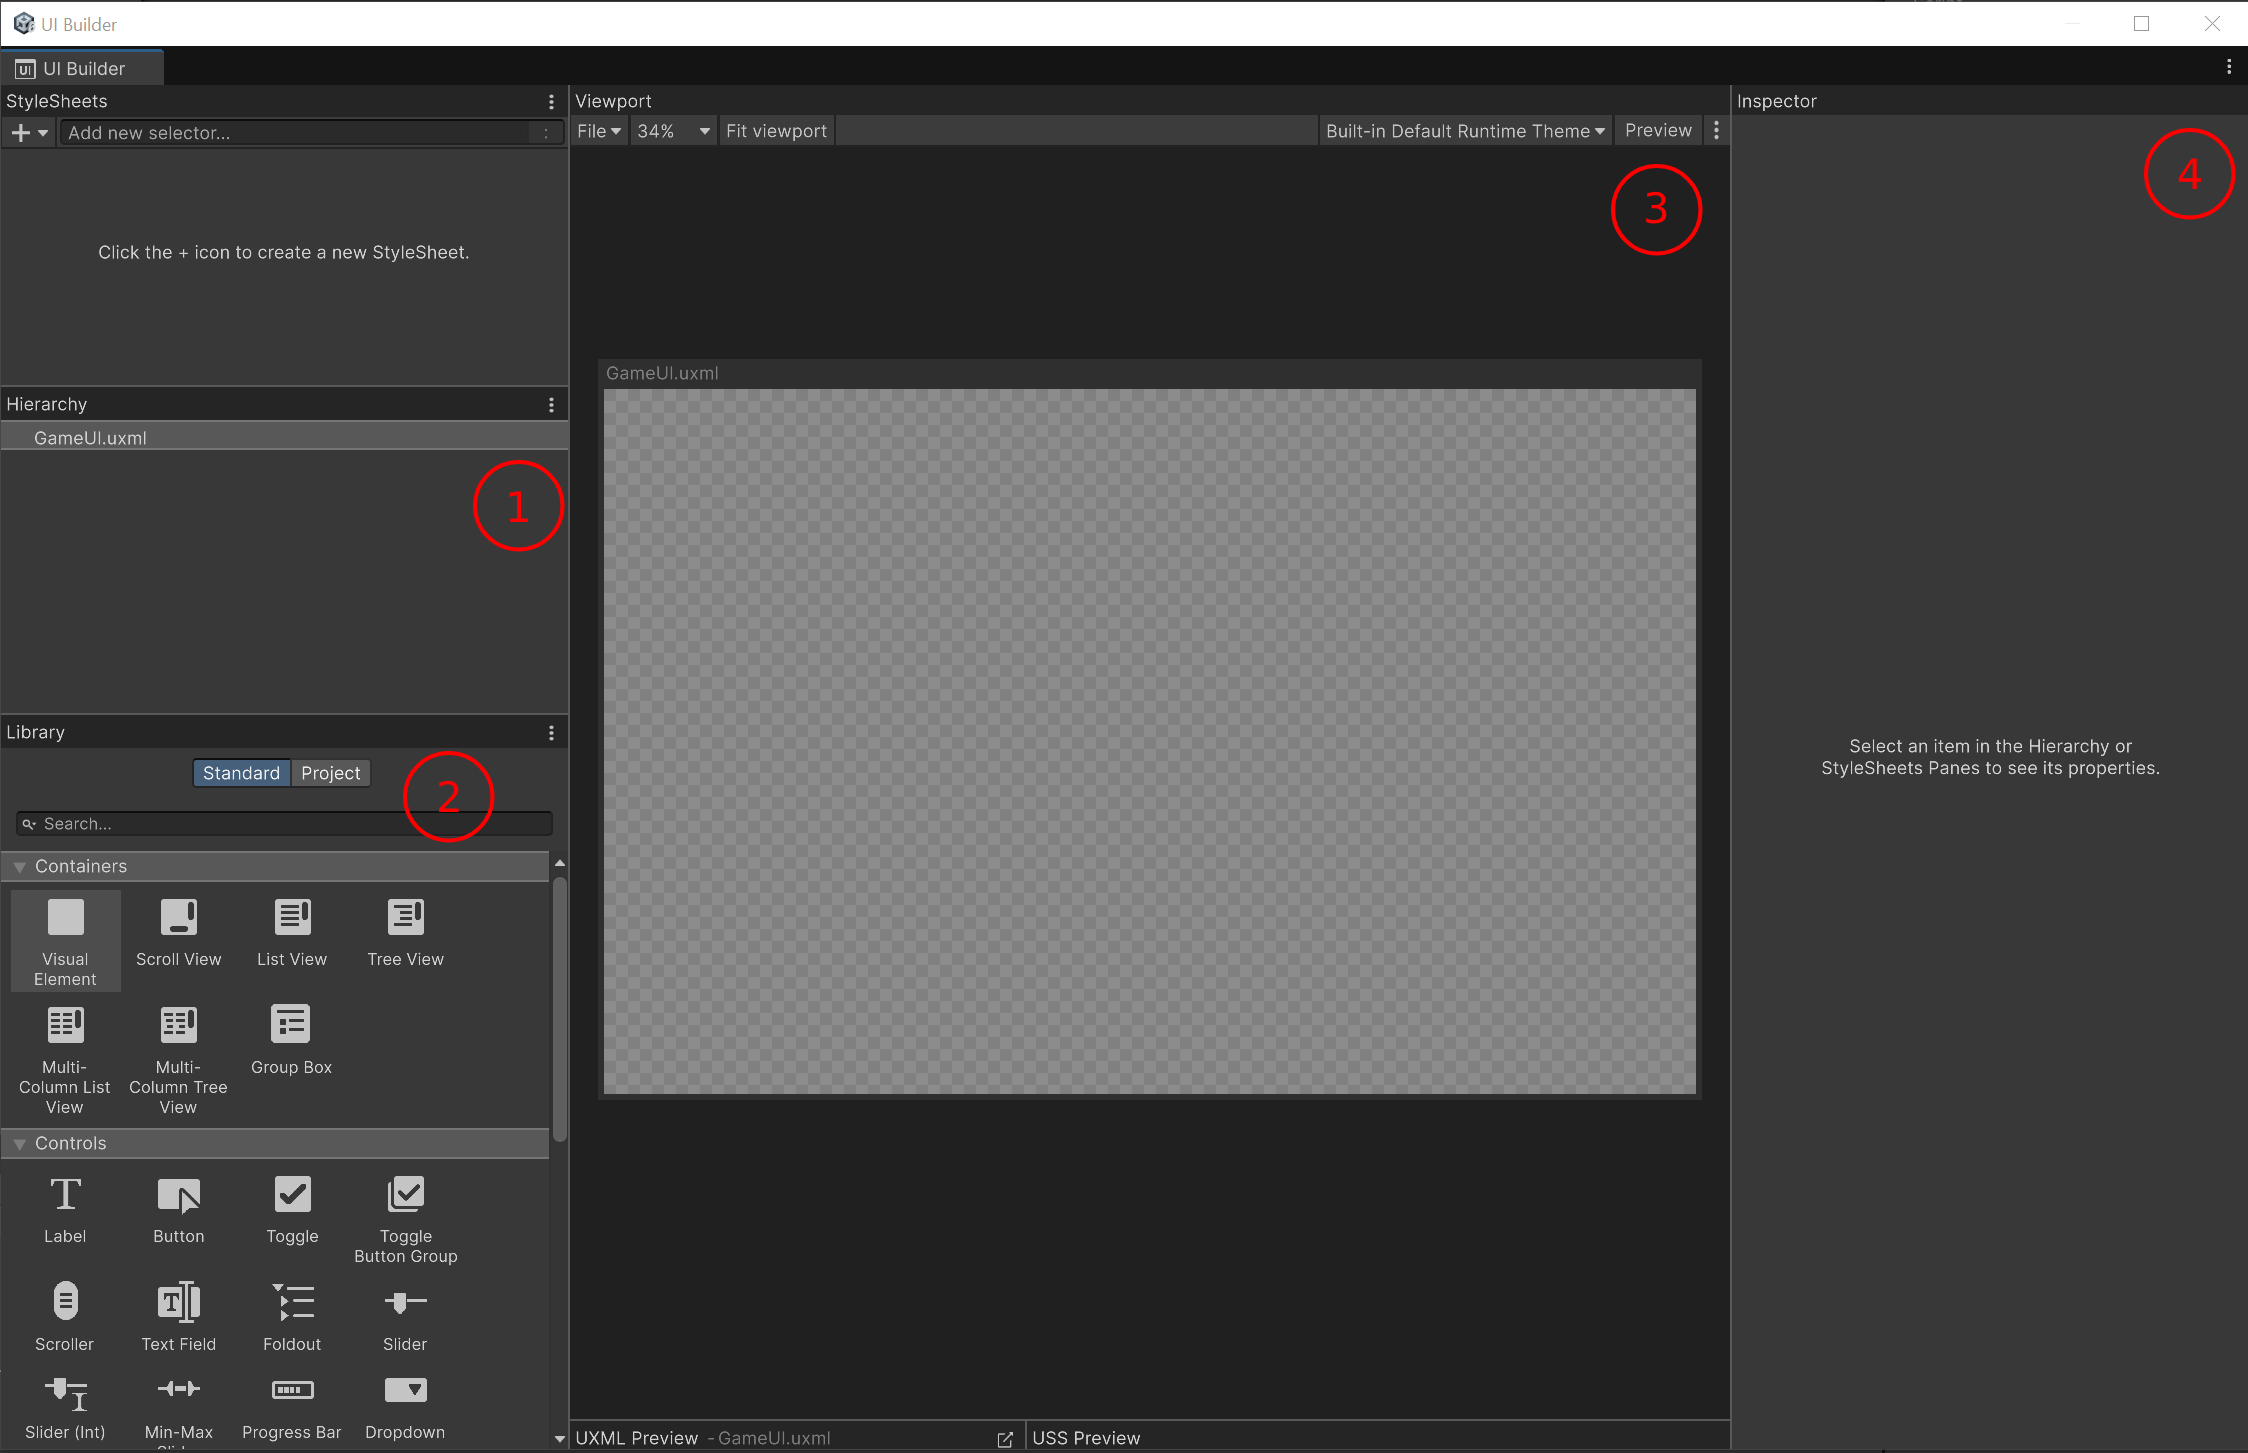
The UI Builder window is made of multiple sections. But for the moment you only need to focus on the following:
- The Hierarchy window: This window lists all the VisualElements in your UI. VisualElements are the base building blocks of UI, like GameObjects are for your scenes.
- The Library window: This window lists all existing types of VisualElement you can add to your UI.
- The Viewport window: This window is a view of what the UI will look like, shown on a square called the Canvas. The Canvas can be resized and panned.
- The Inspector window: This window works similarly to the Inspector window for GameObjects in the Editor: it displays properties for the currently selected VisualElement.
Let’s start creating your UI by adding the background for the health bar.
4. In the Library window, under the Containers section, drag a VisualElement element into the Hierarchy window.
The VisualElement is the base element you’ll use to build your UI, and everything else will be derived from it.
Your Hierarchy window now contains a VisualElement that, when selected, displays a blue selection border around the Canvas in the Viewport window and various properties in the Inspector window.
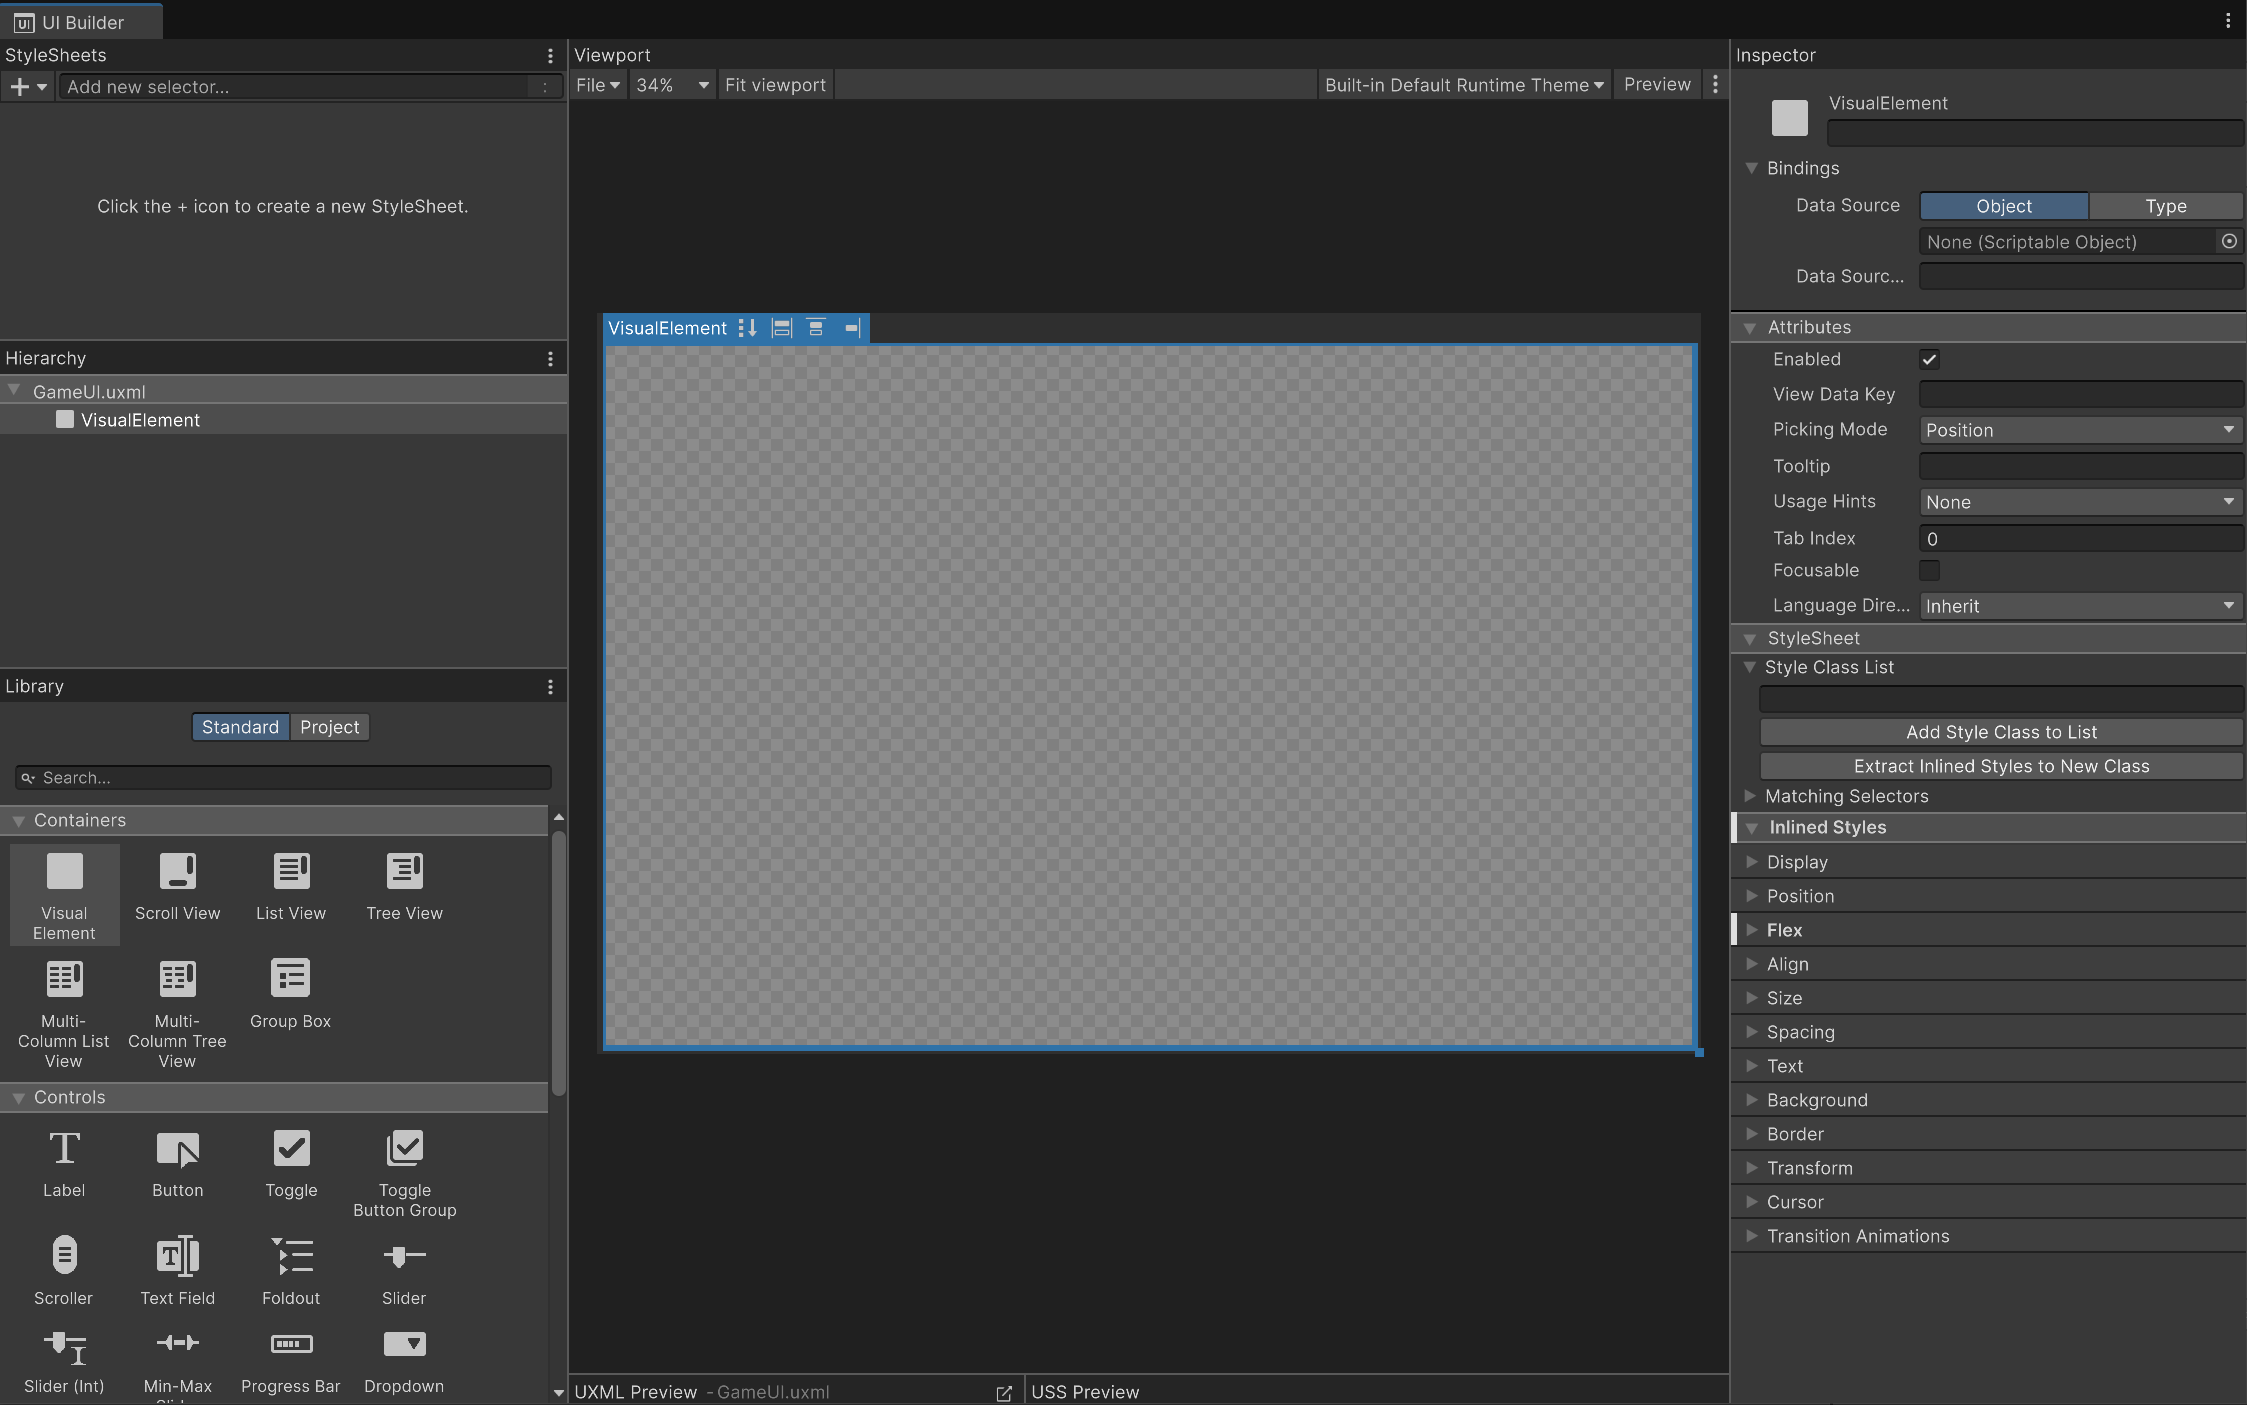
5. Rename your VisualElement “HealthBarBackground”.
The blue selection box around the Canvas is the bounds of the VisualElement. Right now it fills the Canvas because, by default, the layout of elements in UI Toolkit are based on the flexbox model. However, for our purposes, we want to have the health bar in the upper-corner of the screen.
6. In the Inspector window, use the foldouts (triangles) to expand the Inlined Styles > Position section.
The Inlined Styles section allows you to define visual styling properties on these elements, things like color, position, size, borders, etc.
7. Change the Position Mode to Absolute.
You’ll notice that now the bounds of your element are shown as a single point in the upper-left corner. Because the element isn’t handled by the automatic layout system anymore, it has no size by default.
8. To change the dimension of the element, use the foldouts (triangles) to expand the Inlined Styles > Size section and set the following values:
- Width: 500
- Height: 150
Your health bar should now cover a small section in the upper-left corner of the Canvas, but it’s still just a bounding rectangle and has no visuals.
9. Use the foldouts to expand the Inlined Styles > Background section.
The Background section allows you to define multiple properties of the background of the element.
10. In the Image property, use the Image picker (⊙) and select the provided HealthbarBackground texture.
Now your health bar background should have a visual on the Canvas.
11. Save your changes and close the UI Builder window.
Now is the time to actually display the UI in your game. This is done using a UIDocument component. Despite the similar name, this is not to be confused with the UI Document asset, which you created earlier. This is a component on a GameObject that will render the UI on screen.
12. Right click in the Hierarchy window and select UI Toolkit > UI document to create a new UI Document GameObject. Rename it “GameUI”.
13. In the Inspector window, select the SourceAsset picker (⊙) and select the GameUI UXML file.
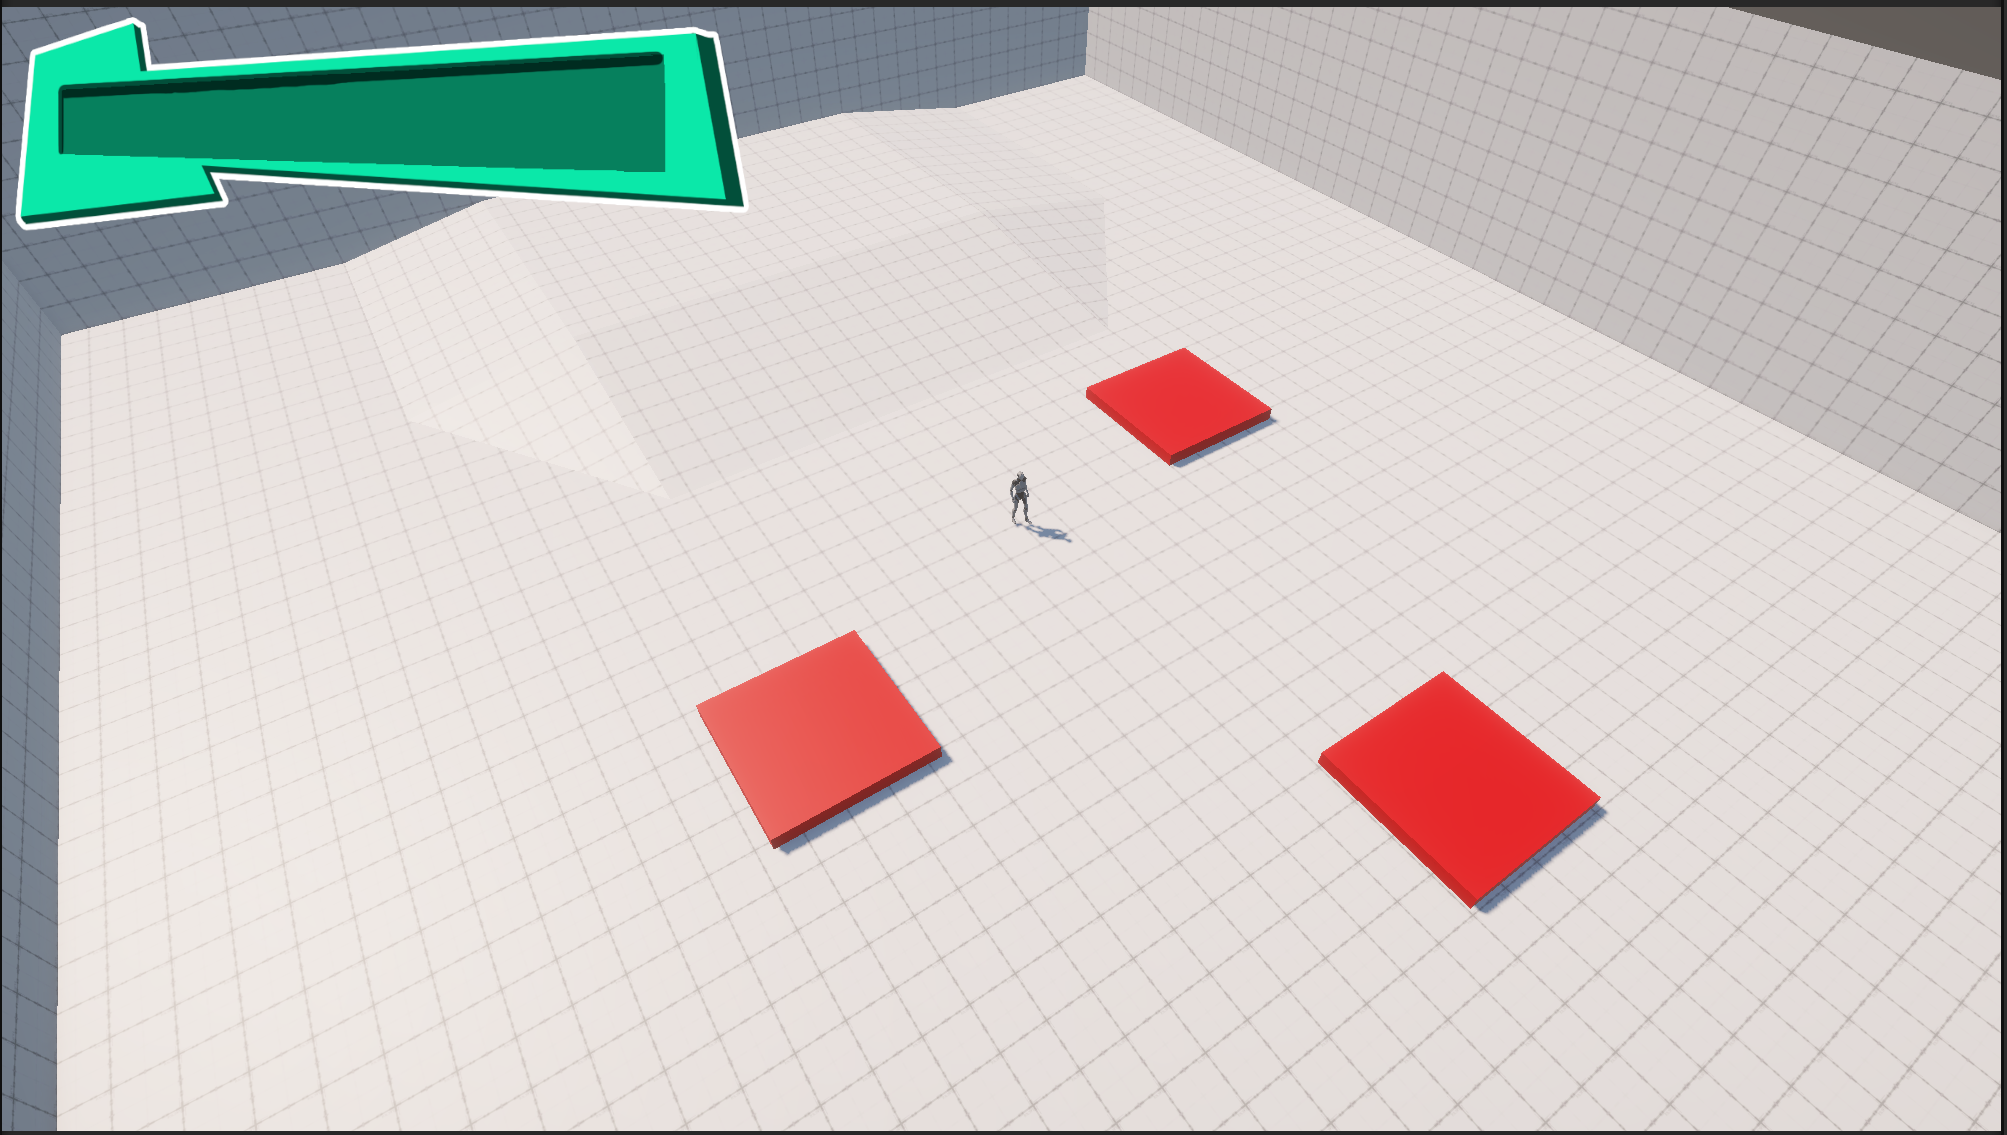
14. Enter Play mode.
Your UI is now displayed in your game!
5. Add a Label to display Health
For now, your UI is a static visual. Let’s add a dynamic label that will display the current health and show any changes over time.
1. In the UI Builder window, in the Library window, under the Controls section, drag the Label element and drop it over the HealthBarBackground element so it gets added as a child element, then rename it “HealthLabel”.

2. In the Inspector window, use the foldouts (triangles) to expand the Inlined Styles > Position section, and change its Position Mode to Absolute.
Note that before changing the bounds, in Auto mode weren’t stretching over all the parent, it stretched horizontally but resized vertically. In Absolute mode, the Label will resize to fit their content.
3. Use the foldouts (triangles) to expand the Inlined Styles > Size section and change width and height to 100%.
Tip: Don’t forget the % sign at the end!
Most size and position values in UIToolkit can be defined in one of the following ways:
- As pixels by only writing a number (what you did with the HealthBarBackground) or adding px after the number (for example, 150 or 150px).
- As a percentage of their parent size, by adding % after the number (for example, 50%).
Setting width and height to 100% ensures that no matter the size of the HealthBarBackground, the label will be stretched over the whole bounds of its parent.
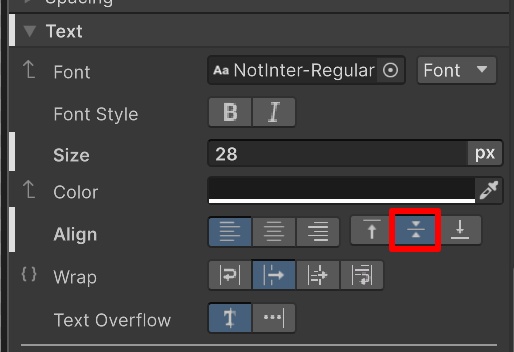
4. Use the foldouts (triangles) to expand the Inlined Styles > Text section and set the Align property to middle and change the Size to 28.
You’ll notice that your text still doesn’t appear completely centered, and the bounding box of HealthLabel is larger than the background, despite setting its size to 100%. This is because, by default, Labels have margins and padding added to them.
- Margins reserve extra space outside the element.
- Padding reserves extra space inside the element
The margins and padding are the green and orange bands you see on the Canvas when you hover your cursor over the HealthLabel in the Hierarchy window.

5. Use the foldouts (triangles) to open the Inlined Styles > Spacing section and set all Margins to 0 and the top, right and bottom Padding to 0, but set the left one to 50px.
Setting the left Padding to 50px reserves space on the left to avoid the Label being on the bar border.
Now you have a Label that you can change its value through code to display the health amount.
6. Save your changes and close the UI Builder window.
7. Right click in the Project window and select Create > Scripting > Monobehaviour Script, name it “GameUIHandler”, and add it to the GameUI GameObject.
8. Add the following code to your script:
using UnityEngine;
using UnityEngine.UIElements;

public class GameUIHandler : MonoBehaviour
{
public PlayerControl PlayerControl;
public UIDocument UIDoc;


private void Start()
{
   PlayerControl.OnHealthChange += HealthChanged;
}


void HealthChanged()
{

}

}
Let’s take a closer look at this script:
- There is a public variable of type PlayerControl, which is the script in the provided project that handles everything player related. Don’t forget to assign it in the Inspector window; it’s on the Character GameObject.
- There’s a public variable of type UIDocument. Don’t forget to assign it in the Inspector window; this is the component you added earlier to display your UI.
- In the Start function, the HealthChanged function is registered to a callback on the PlayerControl script. The PlayerControl script will call that callback when the player’s health changes, so you can react to it and modify the label.
To access and modify your Label using code, you’ll need to retrieve a reference to it in the Start function. A VisualElement can be found using a Query. A Query can be made using the shorthand function Q<>. The UIDocument type has a property called rootVisualElement, which is the root of all elements in the UI Document.
So the function looks like this:
    private void Start()
    {
        m_HealthLabel = UIDoc.rootVisualElement.Q<Label>("HealthLabel");
}Note: m_Healthlabel is a private member of type Label you need to declare in your GameUIHandler script.
This function call will look for child objects of rootVisualElement that are a VisualElement of type Label called HealthLabel.
Now, you can then change the value of the text in the label like so:
m_HealthLabel.text = $"{PlayerControl.CurrentHealth}/{PlayerControl.MaxHealth}";Note: If you’re not familiar with the $”” syntax in C#, it is called string interpolation. When a string starts with $, you can use { } to insert variables or function calls. This is equivalent to the following:
m_HealthLabel.text = PlayerControl.CurrentHealth + "/" + PlayerControl.MaxHealth;Take a moment to review how the final script looks like:
using UnityEngine;
using UnityEngine.UIElements;

public class GameUIHandler : MonoBehaviour
{
    public PlayerControl PlayerControl;
    public UIDocument UIDoc;

    private Label m_HealthLabel;

    private void Start()
    {
        PlayerControl.OnHealthChange += HealthChanged;
        m_HealthLabel = UIDoc.rootVisualElement.Q<Label>("HealthLabel");

        HealthChanged();
    }


    void HealthChanged()
    {
        m_HealthLabel.text = $"{PlayerControl.CurrentHealth}/{PlayerControl.MaxHealth}";
    }
}Note: This example calls HealthChanged manually in the Start function to initialize the text on start, so it avoids having to duplicate the text setting code both in Start and HealthChanged.
Now you can press Play and walk on a damaging zone to see how the label value changes.
6. Add a filling bar
To fill the bar based on the remaining health, you’ll need to use the Overflow property of the Element Display setting to create a masking effect:
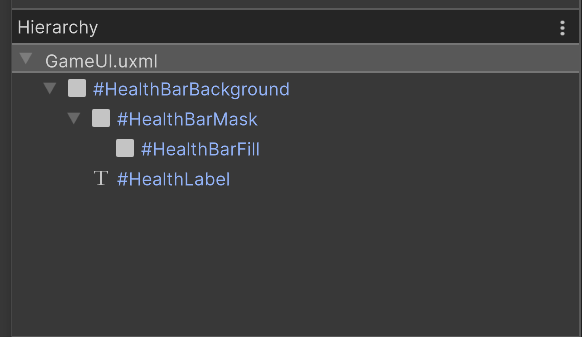
1. In the UI Builder window, add a new VisualElement as a child of HealthBarBackground and rename it “HealthBarMask”.
2. In the Inspector window, use the foldouts (triangles) to open the Inlined Styles > Position section and set the Position Mode property to Absolute
3. Use the foldouts (triangles) to open the Inlined Styles > Size section and set both the Width and Height properties to 100%.
3. Add a new VisualElement as child of HealthBarMask and rename it “HealthBarFill”.
4. Use the foldouts (triangles) to open the Inlined Styles > Background section, then use the Image picker (⊙) and select the provided HealthBarFill texture.
5. Use the foldouts (triangles) to open the Inlined Styles > Position section and set the Position Mode property to Absolute.
6. Use the foldouts (triangles) to open the Inlined Styles > Size section and set its Width to 500px (the same as the background) and the Height to 100%.
Note: Your label might not be visible anymore. If this is the case, it is because your HealthBarMask Element is the last child of HealthBarBackground. VisualElements are rendered in the order they are listed in the Hierarchy window, so the Label is rendered before the HealthBarBackground (and its child the fill bar) are rendered on top, which hides it.
To fix this, drag the HealthBarMask Element so it appears first in the list of child elements.
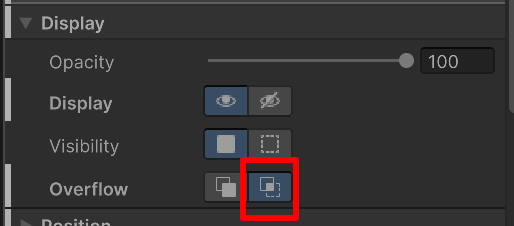
7. To create the masking effect, use the foldouts (triangles) to open the Inlined Styles > Display section and set the Overflow property value to hidden.
Now if you test setting the HealthBarMask width to 50% instead of 100%, your viewport should look like this:
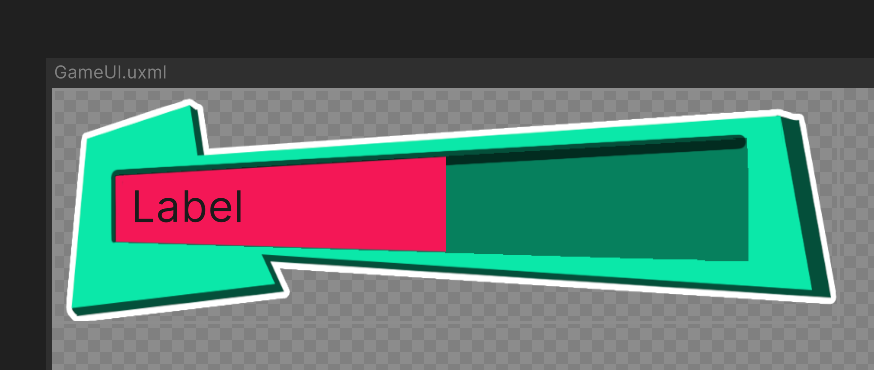
Having the Overflow property value set to hidden makes it so every part of the HealthBarFill element that is outside of the bounds of the HealthBarMask element gets hidden. This is why you had to set the HealthbarFill width to 500px (an explicit value) instead of 100% (a relative value), because otherwise, the HealthBarFill child element would also get resized when you set the mask width to 50% instead of overflowing and being hidden.
While in the Size section, test different values of Width percentage to check how the bar gets hidden. Two important values to notice are the following:
- 88%: the mask reaches the left side of the fill bar background.
- 8%:tThe mask hides the entirety of the fill bar.
This means that if you want to change the width of the mask based on how much health is remaining, you have to set it to 88% when health is full and then all the way down to 8% when the health is empty.
So let’s do this through our code.
Now you need to retrieve the HealthBarMask VisualElement in the Start function of your GameUIHandler like you did before:
m_HealthBarMask = UIDoc.rootVisualElement.Q<VisualElement>("HealthBarMask");Note: You need to declare m_HealthBarMask as a new private member of type VisualElement at the start of your class.
You also need to update its width in the HealthChanged function:
float healthRatio = (float)PlayerControl.CurrentHealth / PlayerControl.MaxHealth;
float healthPercent = Mathf.Lerp(8, 88, healthRatio);
m_HealthBarMask.style.width = Length.Percent(healthPercent);
We interpolate between 8 and 88 based on how much health is remaining, then set that percentage as the Width.
Note: You have to use Length.Percent to define a percentage value, otherwise it would be interpreted as a pixel value. Length.Percent expects a value between (0, 100) not (0.1).
8. Enter Play mode and check that your health bar gets updated properly!
7. Use USS to define styling
For the masking effect to work, the filling bar needed to have its size set manually to the same value as the background. But this means if you want to change the size of the background element, you need to remember to change the filling bar size to match it.
This is likely to produce errors and is also extra work; instead, you can leverage USS files to share styles between the two elements. A USS file defines selectors that will apply their associated style to every element they are assigned to. Here is an example of some USS content:
.class-selector {
    width: 40%;
}

#ElementName {
    overflow: hidden;
    position: absolute;
}
The first code block is called a Class Selector. A Class Selector starts with a dot (.) then everything between the curly braces are the properties to set. You can then apply that class to multiple elements, and every element that has this class will have its width set to 40%.
The second block is a Named Selector. Name Selectors start with a #, and every element whose name is ElementName will have the properties in the block applied to it.
You can create the USS file manually (Create > UI Toolkit > Style Sheet) and write your style manually, but the UI Builder has a functionality to extract an inline style and put it into an USS file.
To extract an inline style into a new USS file, follow these instructions:
1. In the UI Builder window, select the HealthBarBackground element, use the foldouts (triangles) to expand the Inlined Styles > Size section, and select the Width property’s More (⋮) menu.

2. Select Extract Inline Style to Selector > New Class….
3. Name the new class “healthbar-size” and select the Create Class button.
4. Save the new USS file and name it “GameUIStyle.uss”
In the UI Builder window, in the upper-right corner, you will find your new USS file.
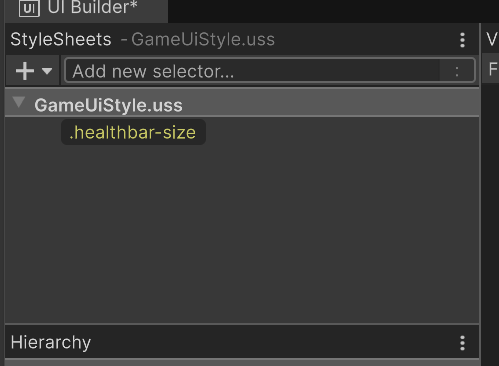
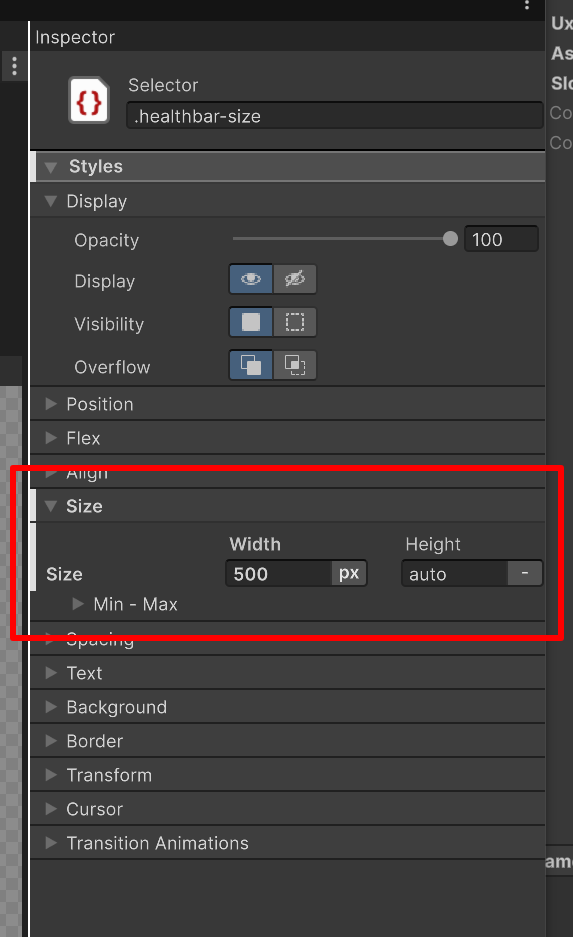
If you select the healthbar-size selector, all the properties that can be set are displayed in the Inspector window, and the ones that are already set will be in bold with a bar on the left side.
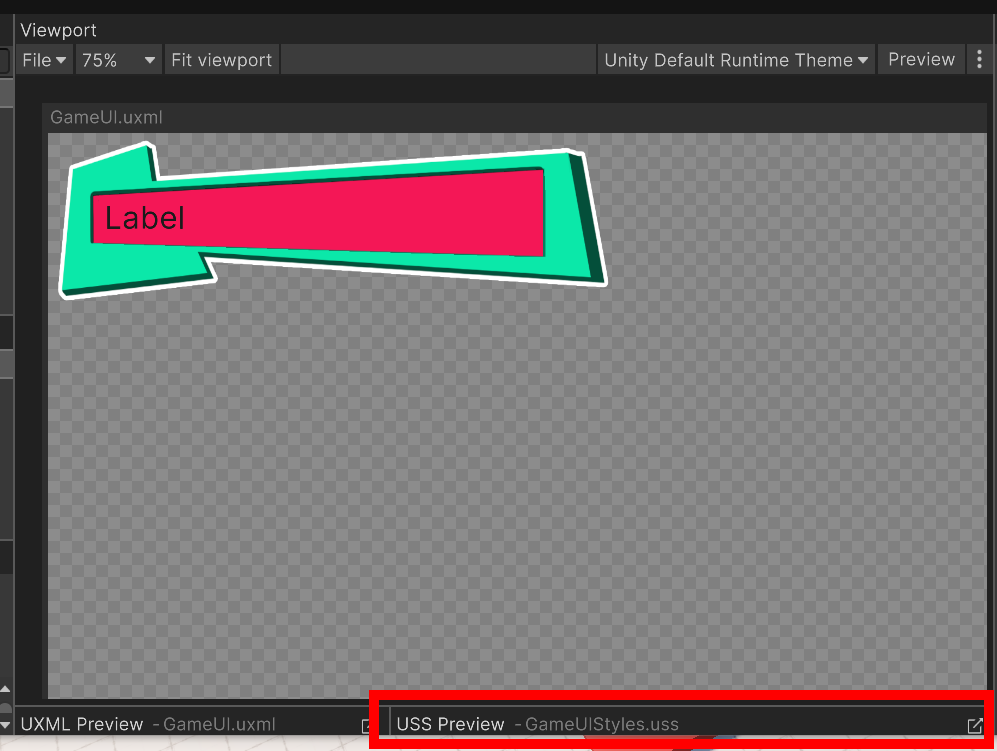
To see the content of the USS file, selecting the Open In New icon in the USS Preview button in the lower-right corner of the Viewport window.
.healthbar-size {
    width: 500px;
}
Finally, if you select your HealthBarBackground element, in the Stylesheet section in the Inspector window, you will see that the healthbar-size class is applied to it.
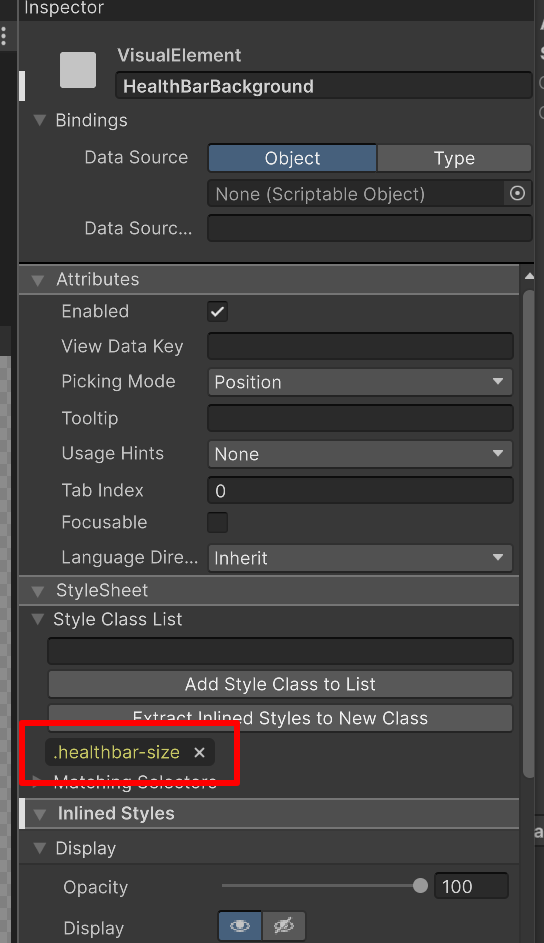
Now if you change the Width value of the .healthbar-size selector to 800 (either by selecting the selector in UI Builder and changing the value in the Inspector window or by entering “800” instead of “500” in the USS file and saving) you’ll see that the the background bar stretches but the fill bar does not.

That’s because right now, the fill bar doesn’t have the selector applied to it, so its Width is still set to 150.
5. In the Hierarchy window, select the HealthBarFill element. Then in the Inspector window, use the foldouts (triangles to expand the Stylesheet > Style Class List section, enter “.healthbar-size” in the text box, and select the Add Style Class to List button.
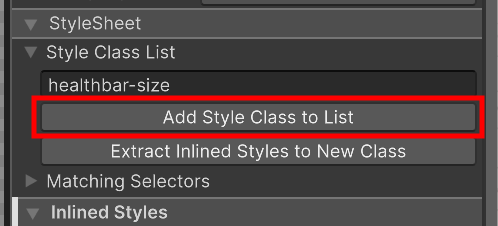
Your fill bar now has the class applied, but it still hasn't resized!
This is because Inline Style takes precedence over USS style. You need to remove the Inline Style that forces the Width to 300 so the Element takes its size value from the USS instead.
6. Select the the select the Width property’s More (⋮) menu in the Size section, and select Unset.
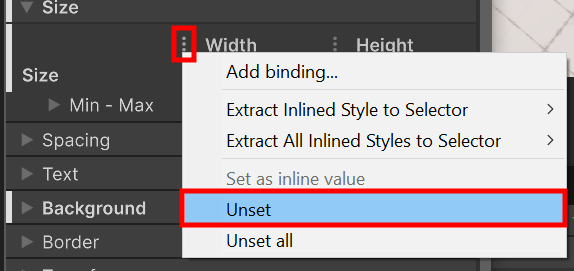
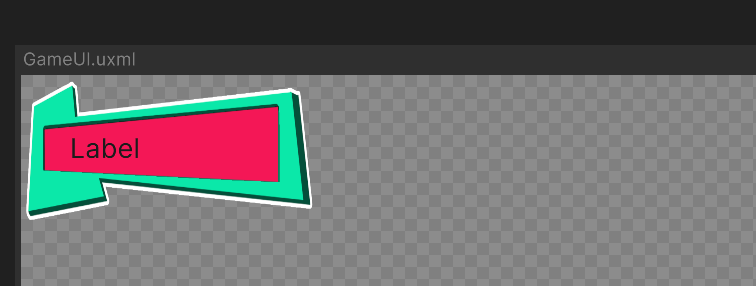
Your fill bar now gets its size from the USS class. Try to play with the selector length to make both the fill bar and background the same size.

8. Animate the health bar filling
To bring some life to your health bar, you can use the Built-in animation system in UI toolkit to auto animate changes:
1. Select the HealthBarMask (be sure to select the HealthBarMask not the HealthBarFill, as the mask is the one that gets changed by code).
2. In the Inspector window, use the foldouts (triangles) to expand the Inlined Styles > Transition Animation section, and change the property values to the following:
- Property: width
- Duration: 0.5
- Easing: Ease Out Bounce
- Delay: 0
This sets up a transition for the Width property. It will interpolate from the old health value to the new value, following the ease out bounce function for 0.5 seconds.
There are a lot of easing functions. The simplest ones are linear: they go at a constant linear speed from start to end. There are also ease ones; these use a curve, so will accelerate interpolating to the midpoint then slow down toward the end. For all the others, you can check out the easings.net website for a sample of each of them.
Now if you enter Play mode, your health bar should bounce as health reduces!
9. Conclusion
You should now have a simple functional health bar for your application!
Feel free to experiment with different ways to fill/empty the bar. Instead of using a mask like you did here, maybe your visual would work better by simply rescalling the fill bar directly.
The mask can be of an arbitrary shape using the experimental vector image support package. Check out documentation on masking with arbitrary shapes for more information.