
Particle Systems: Emissions
Tutorial
Beginner
+10XP
10 mins
48
Unity Technologies
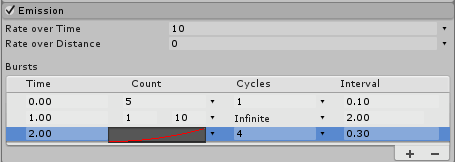
Emission is one of the modules in Unity’s Particle System that’s enabled by default. It affects the spawn rate and timing of Particle System Sprites. The module can be used to control the behavior of the system, from creating smoke signals to one-time explosions.
In this tutorial, you'll control Emission values to improve the overall quality of your particle effects.
Languages available:
1. What is Emission?
Emission is one of the modules in Unity’s Particle System that’s enabled by default. It affects the spawn rate and timing of Particle System Sprites. All particle emitters, when running, will have the Emission module on, or the system will not emit any particles. The module can be used to control the behavior of the system, from creating smoke signals to one-time explosions. Learning how to properly control the different values will improve the overall quality of your effects.
2. Setting Emission Properties
Select your Particle System and in the Inspector window expand the Emissions category.
- Select your Particle System and open the Inspector window.
- Open the Emission module. (Figure 01)
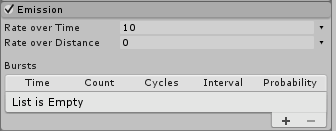
The emissions has only a few properties to keep track of:
- Rate over Time: The number of particles emitted per unit of time
- Rate over Distance: The number of particles emitted per unit of distance moved
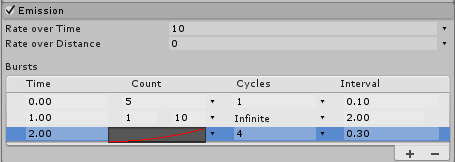
- Bursts: A burst is an event that spawns particles. These settings allow particles to be emitted at specified times. This is broken down into five categories: Time, Count, Cycles, Interval, and Probability.
- Time: Sets the time (in seconds, after the Particle System begins playing) at which to emit the burst.
- Count: Sets the number of particles emitted
- Cycles: Sets how many times to play the burst. This can be set to Infinite for unlimited Cycles.
- Interval: Sets the time (in seconds) between when each cycle of the burst is triggered
- Probability: This property determines the probability of when the burst will trigger, the possible values are between 0 to 1. A value of 0 will cause the burst to never trigger where a value of 1 will cause the burst to always trigger.
The rate of the emission can be constant or can vary over the lifetime of the system according to a curve. If you provide a value greater than 0 for Rate over Distance, a certain number of particles will be released per unit of the distance moved by the parent object that the emitter is tied to. This allows you to create particles that are created by the motion of the object — for example, water falling away from a soaked character that’s in a full sprint.
If Rate over Time is active, then the desired number of particles are emitted each second regardless of the motion of the parent object. You can also add bursts of extra particles that appear at specific times during the lifetime of the Particle System, such as large clumps of smoke or vapor leaving the exhaust pipe of a vehicle. (Figure 02).
3. Some Example Particle Systems
For these exercises, set the Simulation Space of your Particle System to World (Figure 03). This is found in the main section of the Inspector, before Emission.

4. Tiny Bubbles
- Create a Particle System by selecting Effects > Particle System from the GameObject dropdown (Figure 04).

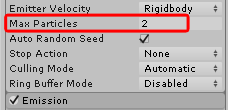
- (Optional) In the first section of the Particle System’s Inspector, set Max Particles to 2 (Figure 05).
- In Emission, set Rate over Time and Rate over Distance both to 0.
- Click the + sign near the bottom right corner of the Bursts List (Figure 06).
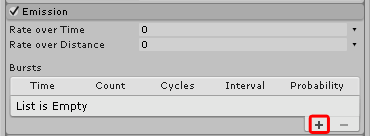
- Leave the Time at 0. Set the Count to 1. Set Cycles to Infinite.Set Interval to 3.0, and leave Probability at 1.0 (Figure 07).

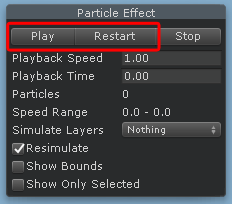
- If the Particle System isn’t already playing, click Play or Restart in the Scene View (Figure 08). The ability to stop the realtime update of a Particle System is useful when making changes to a heavy particle system (a system that spawns many particles over a short period of time).
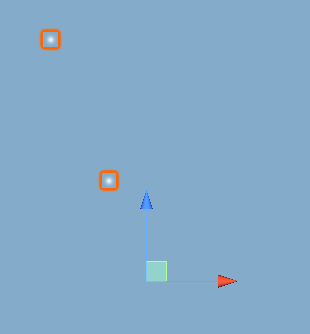
- You may wish to tweak the amount of bubbles in each burst by adjusting Count, or the “breathing rate” of our fish by adjusting Interval.
5. Happy Trails
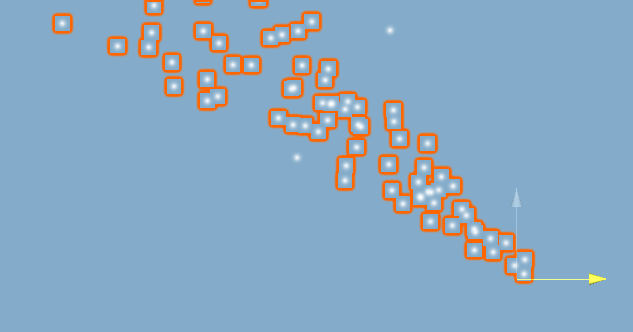
In this exercise. we’ll demonstrate how Rate over Distance can be used for a trail smoke from a train, jets from a starship, or any time you need to emit particles only when the emitter (or its parent object) is moving.
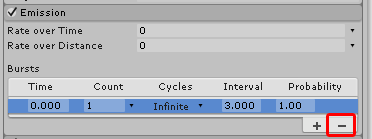
- If you’re reusing the Particle System from the previous exercise, click the right end of our Burst and click the - (minus) sign to remove it (Figure 10). Otherwise, create a new Particle System, setting the Simulation Space to World and Emission Rate over Time to 0.
- Set Rate over Distance to 3.
- With the Particle System playing, grab the manipulator and drag it across the scene (Figure 11).
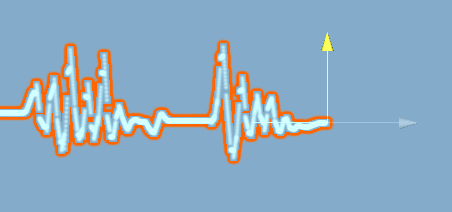
6. Heartbeats
In this exercise, we’ll use particles to make a continuous readout of something like a heart monitor or Richter scale.
- Create a new Particle System.
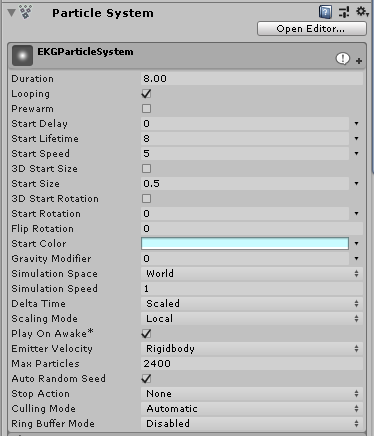
- Set the Duration to 8.0, Simulation Space to World, and Max Particles to at least 2400 (Figure 12). Setting the Max Particles to Duration x Rate over Time (set in the next step) ensures there will be enough particles so that there’s not a break before the loop begins again.
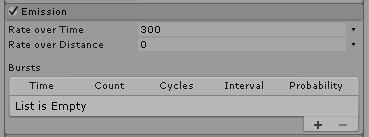
- In Emission, set Rate over Time to 300 (Figure 13).
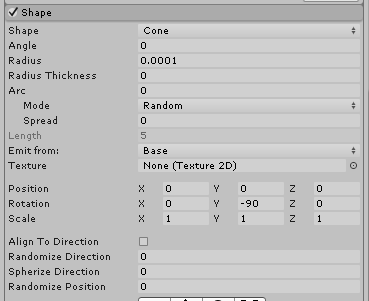
- In the Shape section of the Particle System Inspector, Set the Angle, Radius, and Radius Thickness to 0. Radius can’t actually be 0 so it will auto-correct to 0.0001.
- Using the Transform settings in Shape, rotate the Particle System -90° on the Y axis (Figure 14).
- Click Play or Restart on the Particle Effect window, and try moving the manipulator along the Z axis (highlighted in yellow here) (Figure 15). Try moving the emitter in 2 directions to “write”. Try cloning this emitter a few times, recoloring each, and parenting them to an emitter for light shows.
7. Conclusion
The Emission module plays a vital role in any Particle System. You’ll find yourself constantly tweaking or revisiting the module’s properties to fine-tune and perfect your particle effects. Familiarizing yourself with how Emission module will help bring your particle effects to life.