Post Process Volumes
Tutorial
Beginner
+10XP
20 mins
116
Unity Technologies
Post-process volumes allow you to affect all or just a subsection of your Scene. In this tutorial, we’ll look at using both global and local post process volumes, including how to use both in a single Scene.
Languages available:
1. Post Process Volumes
This tutorial has been verified using Unity 2019 LTS and Post-Processing 2.3.0
Post-process volumes allow you to add effect all or just a subsection of your Scene. In this tutorial, we’ll look at using both global and local post-process volumes, including how to use both in a single Scene.
Post-processing is available via the Package Manager.
1. Open the Package Manager by selecting Package Manager from the Window drop-down.
2. Search for “post processing.”
3. Click to select it and click Install.
4. Close the Package Manager.
2. Enabling Post-Processing in the Editor Camera
1. Click to select the Main Camera in the Hierarchy view.
2. Add a Post-process Layer.
3. To prevent slowdown, you should place your post-process volumes on their own layer and set the Main Camera’s post-processing layer accordingly.
4. In the Inspector, click to set the LayerMask for the Post-process Layer to Nothing.
5. In the upper-right corner of the Inspector, click the Layer drop-down and select Add Layers.
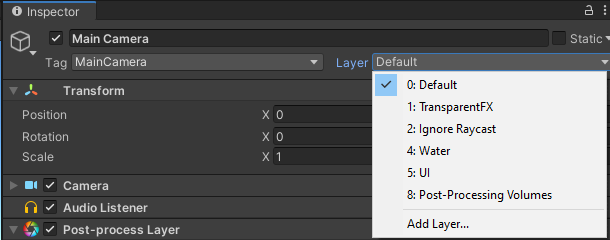
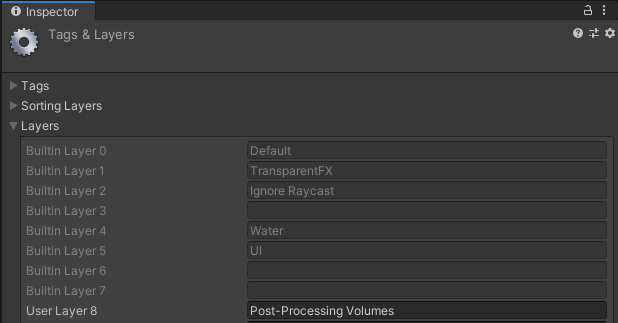
6. Add a new Layer called Post-Processing Volumes.
7. Click the Main Camera in the Hierarchy view.
8. Set the Post-process Layer component to use this new layer.
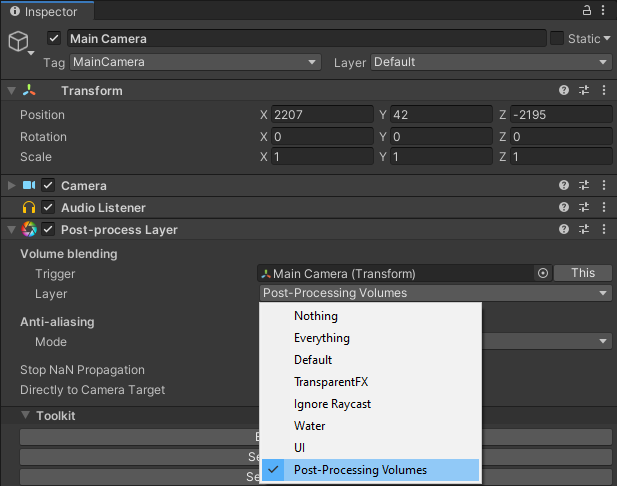
9. Set each post-process volume GameObject to this layer so it participates in post-processing.

3. Post-Process Volume Options
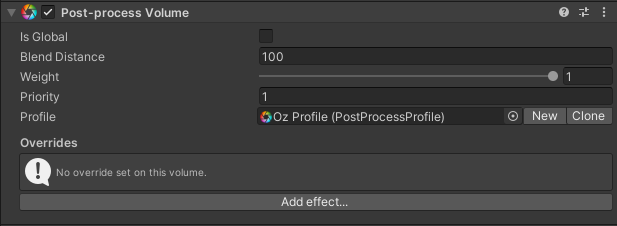
Is Global: If enabled, this post-process volume affects the entire Scene. Any local post-process volume will still take priority when the Main Camera enters them. It’s possible to mix global and local volumes, or to even have multiple global volumes. Conflict between volumes is resolved using the Weight and Priority settings (see below). In cases where these numbers for are the same for two conflicting volumes — for example a local post-process volume and a global post-process volume — priority is given to the volume the Camera is in. For example, if the Camera’s inside the local volume, its effects are applied. If not, the global post-process volume effects are used.
Blend Distance: If set to greater than 0, Blend Distance allows the effect to fade in. We’ll explore this a bit later, when we create a local post-process volume.
Weight: This determines the strength of the post-process volume’s effects. Setting Weight to 0 effectively disables the post-process volume.
Priority: This sets the volume’s priority in the post-processing stack. Negative values are allowed, and will affect the Weight.
Profile: This file holds the set of overrides. Each unique set of overrides should have its own profile, but different post-process volumes can all use the same profile if they should display the same set of overrides.
Overrides: This option is only visible if a profile is applied. This is a list of post-processing effect overrides. Only one instance of each override is allowed per profile.
4. Creating a Global Post-Process Volume
1. Create an empty GameObject by selecting Create Empty from the GameObject drop-down. Name it Kansas and set its Layer to Post-process Volumes.
2. Attach a Post-process Volume component.
3. Check the box labeled Is Global to make this Post-process Volume affect the entire Scene. We can still override this volume by setting another to a higher priority.
4. Click New to create a new Post Process Profile. If we were creating a post-process volume that used the same effects and settings as an existing volume/profile, we could also click the socket to choose an existing Post Process Profile instead.

5. Click Add effect… and select Unity>Color Grading.

6. In the Tone section, click the checkbox to enable Saturation and drag the slider to a value of -75.
7. Let’s add a bit of sepia tone by checking the box labeled Color Filter and setting the color to (255,125,0).

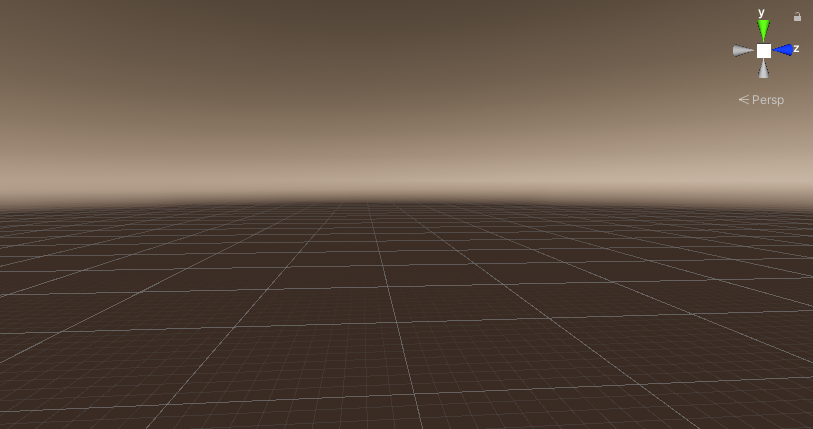
8. Finally, to give our Scene some moody contrast, click the checkbox next o Mode under Tonemapping and set the mode to ACES.
5. Creating a Local Post-Process Volume
1. Create a new empty GameObject. Name it Oz and set its layer to post-process volumes.
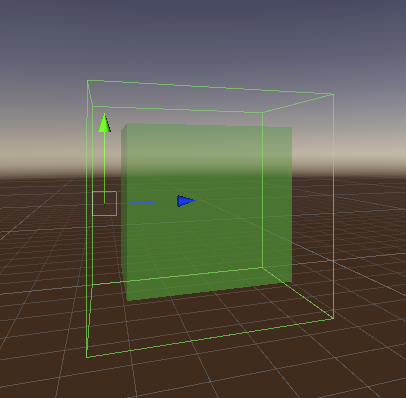
2. Since this volume will be local, we need a way to define its domain. Add a Box Collider component and set it to Is Trigger.
3. Adjust the size of the Box Collider to 1000,1000,1000.
4. Add a Post-process Volume component.
5. Leave Is Global unchecked, but set Blend Distance to 100.
6. Click New to create a new post-process profile.
7. Click Add effect… and select Color Grading.
We have two options when nesting post-process volumes. We can choose to override only some of the effects from the larger (or global) volume, which allows Effect Overrides from both volumes to work. For example, if we have a Grain Override in the larger/global volume, but no Grain Override in the local/nested volume, then the Grain Effect Override will continue to be applied even while the Camera is inside and affected by the smaller volume.
Our other option is to use the same overrides that the global volume uses, enabling the same effects, but setting their default/neutral values. This allows the smaller/nested volume to completely take over. This is what we’ll do for Oz.
8. Enable Tonemapping, and set it to ACES. Though we want to reset most of the global volume’s settings, moving between Tonemapping modes causes a jarring change in dynamic range.
9. Enable Color Filter and set it to white.
10. Enable Saturation and set it to zero. Aside from the Tonemapping mode, this neutralizes the global post-process volume.
Let’s apply a classic super-saturated film look. Though we could simply raise the saturation in the Scene, what we’re about to do is closer to how the effect works in analog film.
11. In the Channel Mixer, select Red and check the boxes next to Red, Green, and Blue. Leave Red at 100, and set Green and Blue to -25.
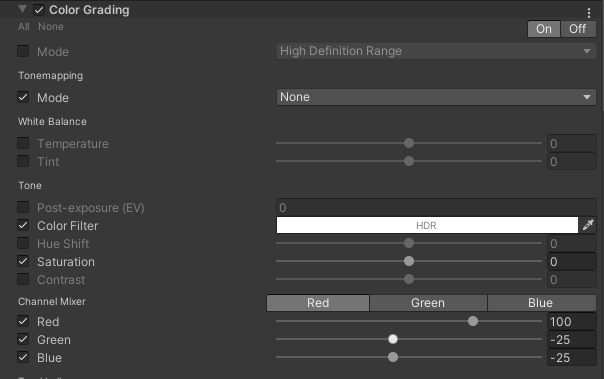
12. Click Green in the Channel Mixer, enable all colors, and set Red and Blue to -25.

13. Select Blue in the Channel Mixer and, again, enable all colors, setting Red and Green to -25.

14. We’re ready to leave Kansas. Position the Main Camera just outside the Blend Zone for Oz so that the global Kansas post-process volume is in full effect.
15. Slowly drag it into Oz. Notice that as you pass through the Blend Zone, the sepia tint and desaturation give way.
6. Next Steps
In this tutorial, you learned how to use multiple post-process volumes in a single Scene. You learned how to apply settings that affect the entire Scene using a global post-process volume, and how to override those with a local post-process volume. For further adventures, try nesting local post-process volumes, or divide a large world Scene into areas that each have their own feel supplied by a local post-process volume.