Publish your project
Exercise
foundational
+60XP
5 mins
Unity Technologies
Let’s see what you’ve made! In this tutorial, you’ll:
- Set the platform for a build of a Unity project
- Create a basic build of a Unity project.
- Share your project with the Unity Learn community.
Languages available:
1. Overview
When your game is ready, it is time to create a build, which is a standalone, playable version of your game. Unity supports most popular platforms, including mobile (Android and iOS), which allows you to quickly publish your project with a few simple clicks.
Keep in mind that while it is easy to publish to different platforms, it is up to you, the game developer, to make sure that your game can run on the target platforms. For example, the resources available on a smartphone are vastly different than those on a Playstation. Just because you can build for a platform, your game will not necessarily run on that platform.
In this tutorial, you will publish to WebGL (HTML5) so that you can share your project on the web with the Foundations community, if you like. The build process is the same for publishing to any other platform such as Windows, Linux or MacOS.
2. Before you begin
To build your project for the WebGL platform, you will need:
- The WebGL Build Support module added to your Unity installation
- The WebGL Publisher package installed via the Package Manager
Follow the steps below to double-check, and to install the resources you need if necessary.
Check for the WebGL Publisher package
- Open the Package Manager by selecting Window > Package Manager.
- At the upper left, use the drop-down menu to select In Project.
- If WebGL Publisher is listed, you’re all set. If not, review the instructions for installing it using the Package Manager.
Check for WebGL Build Support
1. Open the Unity Hub.
2. On the Projects tab, check the version of Unity you are using in the project you will build.
3. On the Installs tab, look for the label for that version. If WebGL Build Support is installed, you will see its icon as shown below.
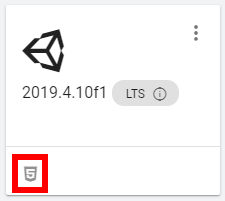
4. If the icon does not appear, review the instructions on how to add modules to a Unity install, and be sure to select WebGL Build Support.
3. Set up your platform build
1. Open the Build Settings with Ctrl+Shift+B or by selecting File > Build Settings. The Build Settings window will open.
2. Select the Add Open Scenes button to set up the current Scene as your starting Scene for the build.
Note: If you have multiple Scenes (which is beyond the scope of this particular project), be sure to add all the Scenes you want to include in the build. Drag them up or down in this list so that the first Scene your user will see is labeled 0 on the right.
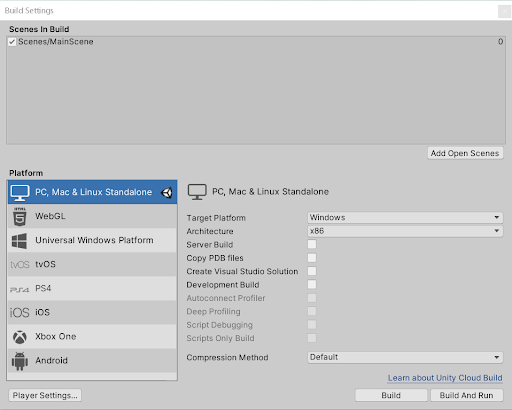
3. Select WebGL from the list on the left.
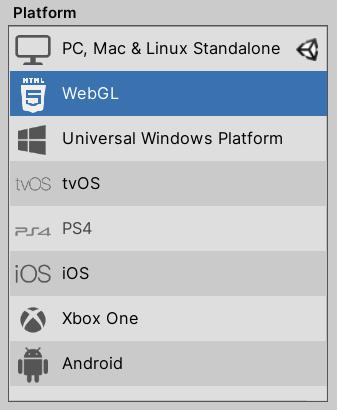
4. Select the Player Settings button.

5. Select the WebGL tab to set the options for that platform.

6. Change the Company Name to a name of your choice, and enter a Product Name.

7. The rest of the settings give you advanced control over the publishing process; they are beyond the scope of this tutorial. Close the Player Settings window to go back to the Build Settings window.
8. Depending on your settings, you might see a Switch Platform button near the lower right corner of the Build Settings window. If you do, select it, and it will change to the Build button.

9. Select the Build button to start the build process. When prompted, select a folder where you would like to save the game. Note: Do not save it in the same folder as your project; select a new destination.
10. Unity will create an index.html file, as well as other folders, files and assets that the game will need to run. The files are dependent on each other and should not be moved or changed. If you need to move the game to a different location, make sure to move the index.html file and all the folders together.

4. Publish your project
We encourage you to share your project with the community of learners who take this course. It’s a great way to get some feedback and interact with the Unity community. The steps below will publish your project on the Unity Connect site, and provide you with a shareable link to your project.
1. From the main menu, select Publish > WebGL Project.

2. The WebGL Publish window will appear. Since you have created a build following the steps above, you can click Locate Existing Build to continue.
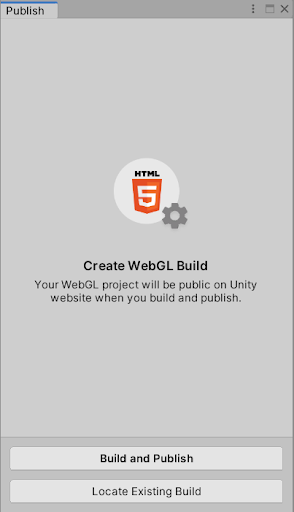
3. Navigate to the folder that contains your WebGL build and click Select Folder.
4. Your build will be added to the Publisher window. Select Publish. Your build will be uploaded to the Unity website.
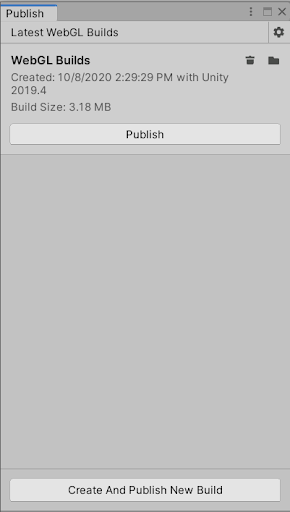
5. A new browser window will open. Here, you can enter the name and description of your game, any assets you used, your thumbnail image, and a video playthrough if you like.
6. Copy and keep the link to this web page. You will use this link to access your game and share it with others. You can also get back to this link on Unity Connect.
Access your project on Unity Connect
To access the link to your game via Unity Connect:
1. Login to Unity Connect.
2. Select your user icon, and then your user name, to access your profile.
3. While you’re here, select Edit Info and fill in some information about yourself.
4. Select Games on the navigation menu below your cover photo.
5. Select the title or image of your game, which will take you to your published game’s page.
5. Share your project
We encourage you to upload your game to the Foundations 3D Project Gallery, to share with others who are starting out, just like you.
Enter the link to your 3D project below. Please also share any "behind-the-scenes" information about how you created it!
Please login to submit
6. Next steps
You have just published an interactive experience that’s Made with Unity. Congratulations! Now that you know the basics of 3D creation, we encourage you to continue to the next learning project, Introduction to 2D. You will learn techniques that are useful in both 2D and 3D projects.
Complete this Tutorial
Submission Gallery
Carefull! danger is Coming 🦂🚨⛔
Ball Roll is a fast, fun, and skill-based mini-game where you control a rolling ball through a series of obstacles. Your goal is simple:
ZapZap
My latest microgame.
Rolling Ball
Just a Rolling Ball
My First Unity Game
My First Unity Game Project with students