
Publishing for PC/Mac
Tutorial
Beginner
+10XP
10 mins
(315)
Unity Technologies
One of Unity’s many great features is the simplification of the publishing process. Unity supports over 25 different publishing platforms, including mobile, console, and desktop among others. Once your project is complete, it’s only a matter of a few clicks to publish a project. In this tutorial, you will learn to publish for PC/Mac.
Languages available:
Overview Video
1. Publishing for PC/Mac
This tutorial has been verified using Unity 2019 LTS
One of Unity’s many great features is the simplification of the publishing process. Unity supports over 25 different publishing platforms, including mobile, console, and desktop among others. Once your project is complete, it’s only a matter of a few clicks to publish a project.
There are two custom images that you may consider preparing for the published version of your application. The first is a custom icon, which would replace the default Unity logo that appears as the icon for an executable. This image should be a power of two (i.e. 128 x 128 px, 256 x 256 px, 512 x 512 px, etc at 72 dpi) texture. (Figure 01)
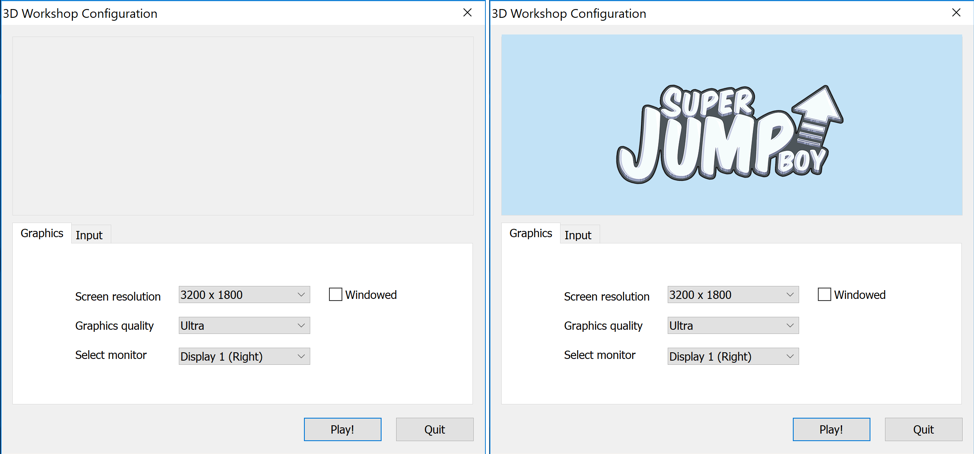
The second custom image is the Splash image for the Unity Application Configuration dialogue box that launches before the application starts. Without it, the top half of this dialogue box is blank. This image should be 432 x 163 px at 72 dpi. (Figure 02)
Before preparing to publish, be sure to save any open scene.
1. From the File menu go to Build Settings. At the top of the window, click Add Open Scenes. If you have more than one scene in your Project that should be included in the final build, drag and drop the scene file from the Project window into Scenes in Build. (Figure 03)
2. Select Windows or Mac as the Target Platform based on your preferences.
3. At the bottom of the window, click Player Settings.
4. To add a custom icon for your executable, drag the desired Icon image from the Images folder and apply it to the Default Icon slot in Player Settings. (Figure 04)
5. To add a custom splash image to the published application config dialogue box, click the Splash Image dropdown to show the image slot for the Application Config Dialog.
6. Drag the desired Splash Image from the Project window into the Application Config Dialog slot. (Figure 05)
7. Click Build and Run in the Build Settings window.
8. When prompted, save the file to the Desktop.
2. Important Note for PC Applications
In addition to an executable file, a data folder will be generated for the application. It will have the name of the project followed by _Data, and inside will be all of the relevant files that will allow the app to run. These two items must be distributed together. The data folder should not be renamed, nor should the executable be placed inside it. Both of these actions will prevent the application from running. The easiest way to distribute the files is to place both the executable and data folder in a parent folder to keep them together.