
Retopology Best Practices in Maya for Unity
Tutorial
Beginner
+10XP
30 mins
(54)
Unity Technologies
In this workflow, we will create new geometry with the Quad Draw Tool by placing vertices and drawing polygons directly on the reference mesh. We will use hotkeys to access enhanced functions of the Quad Draw Tool. In the process, we will demonstrate best practices for modeling and retopologizing that will help you with creating an object model.
Languages available:
1. Retopology Best Practices in Maya for Unity
Creating new topology based on features of an existing model is referred to as retopologizing. Often, the goal is to build a low-poly model from a higher-poly model while minimizing the loss of visual quality. Maya provides a few different ways to do this. We will use the Quad Draw Tool, which relies on a higher-poly object as a reference to create a lower-poly Mesh. (Figure 01)
In this workflow, we will create new geometry with the Quad Draw Tool by placing vertices and drawing polygons directly on the reference Mesh. We will use hotkeys to access enhanced functions of the Quad Draw Tool. In the process, we will demonstrate best practices for modeling and retopologizing that will help you with creating an object model.
2. Retopologizing a Mesh in Maya using the Quad Draw Tool
1. Open or create an object in Maya.
2. Select the object you want to use as your reference Mesh, either from the Outliner window or the main viewport.
3. To make the Mesh easier to see when drawing new polygons on the reference object, turn on the Wireframe on Shaded option under the Shading dropdown in the main viewport menu. (Figure 02)
4. Open the Modeling Toolkit panel. It can be opened a few different ways, but the easiest is to select the vertical Modeling Toolkit tab on the right side of Maya. (Figure 03)
5. To view the model as semi-transparent, in the Modeling Toolkit panel menus, select Object > X-Ray On/Off (Figure 04). The reference Mesh will become transparent, making new topology easier to see.
6. To set the object as live to allow the Quad Draw tool to function, right-click over the object and select Make Live from the Marking menu. When a surface is made live, the object’s wireframe color is dark green. (Figure 05)
Note: An object surface prepared for the Quad Draw Tool is called a “live surface,” and its name is displayed beside the Live Surface icon. (Figure 06)
7. Enable the Quad Draw Tool by locating it in the Tools section of the Modeling Toolkit panel. (Figure 07)
3. Quad Draw Tool hotkeys
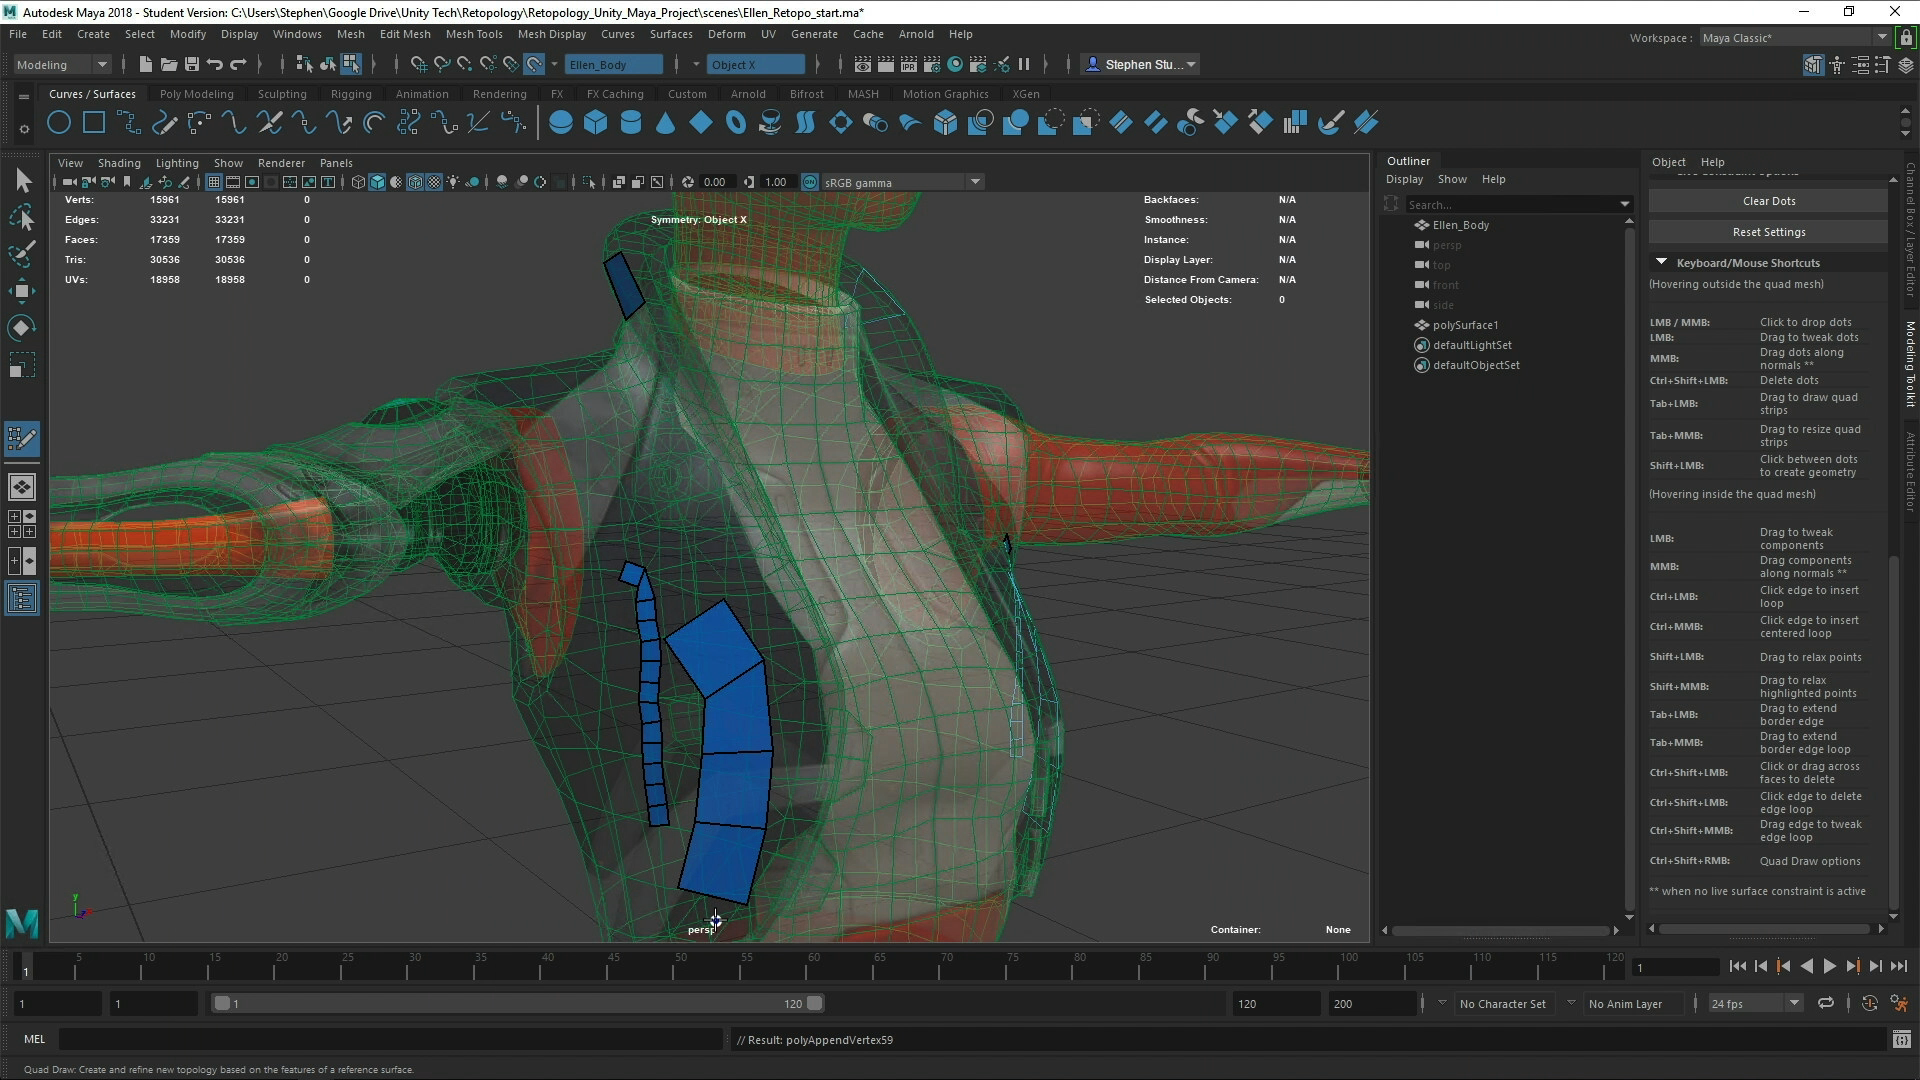
Use the Keyboard/Mouse Shortcuts with the Quad Draw Tool while you work. (Figure 08)
4. Create geometry by placing vertices
Define a polygon with the Quad Draw Tool by using vertices, or “dots” as they’re referred to in the Maya Help documentation.
1. Left-click on the reference Mesh and drag a vertex to a position on the geometry. The vertex will slide along the surface of the Mesh.
2. To remove a single vertex, press Ctrl and Shift, then left-click on the vertex.
3. To create a polygon between three or more vertices, hold down the Shift key and left-click in the area in the center of the vertices. (Figure 09)
5. Create geometry by building polygons
While you can define an area to build a polygon with “dots,” you can also draw polygons directly, or modify existing polygons, with the Quad Draw Tool.
1. While holding the Tab key, left-click on the reference Mesh and drag a polygon to a position on the Mesh. As soon as you start dragging out more than one polygon on the surface of the Mesh, you can release the Tab key. A polygon chain will draw out progressively along the surface of the Mesh. (Figure 10)
2. To adjust the size of the initial polygon, and all subsequent polygons along the chain, hold down the Tab key, then middle-click and drag.
3. Hold down the Tab key and left-drag the edge of an existing polygon to extrude another polygon from the edge along the face of the geometry. To extrude all the edges along an edge loop border in one direction, hold down the Tab key and middle-drag the edge.
6. Clean up the Mesh
Use modifier keys and mouse clicks to modify the geometry created with the Quad Draw Tool.
1. Insert edge loops by holding the Ctrl key and left-clicking on the polygons.
2. Relax a polygon or vertex by holding the Shift key and left-clicking on the polygons or vertices.
3. Delete an edge by hovering over it with the mouse and when it’s highlighted in red, press the Delete key or hold down the Ctrl and Shift keys and right-click on components.
Note: Press Q to exit the Quad Draw Tool when finished. You can press Y to reactivate the Quad Draw Tool.
7. Retopology Best Practices
Only build half of a symmetrical model
When retopologizing, work on half of the model — as you would with any symmetrical model — then duplicate and mirror the geometry. You can also turn on the Symmetry option in the Modeling Toolkit if you want to create symmetrical geometry across an axis of the object.
Go with the flow of the existing geometry
If the reference object model has a good edge flow, use it as your guide to retopologize. Not only will the existing geometry provide you with accurate details of the model, it will keep the geometry organized between the higher and lower poly models.
Start retopologizing major parts first
Start building out the largest parts of the model and work outward to the smaller, more detailed areas. Block out the model first and add details later. Add more edge loops in the areas of the geometry that will need to bend, such as an elbow on a character model.
8. Conclusion
After some practice, you can retopologize in Maya for a Unity project fairly quickly using the Quad Draw Tool and a combination of hotkeys and mouse clicks. With practice, creating a new Mesh from a reference object will be easy.