Set up the scanner
Tutorial
·
intermediate
·
+10XP
·
60 mins
·
(190)
Unity Technologies
With the examples provided in the scene, and the documentation ready for your reference, it’s time to begin development on a custom VR interactable: the scanner.
In this tutorial, you will do the following:
- Set up a new station to hold your custom interactables
- Extend a provided base to inherit default behaviors provided by the XR Interaction Toolkit
- Override provided methods in a script to implement custom behaviors
Languages available:
1. Overview
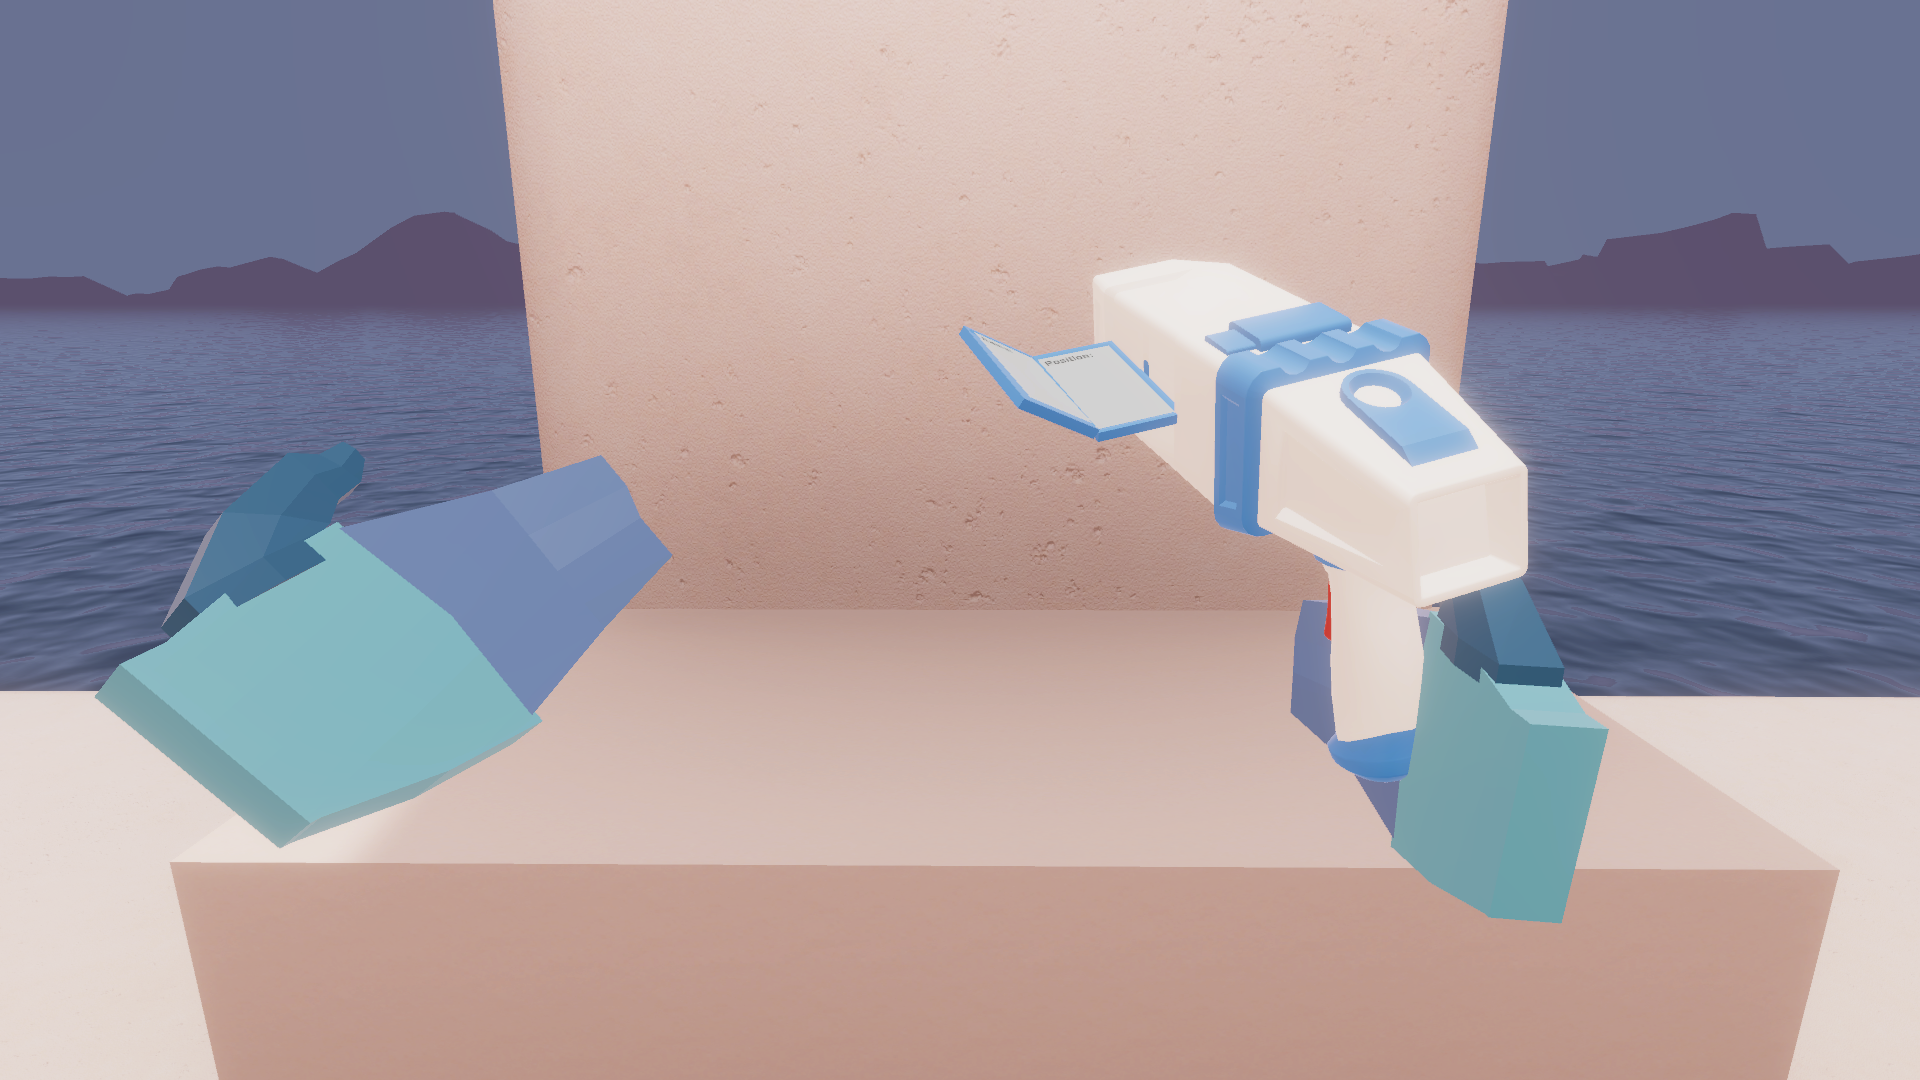
The first object you’ll work on is a custom scanner object that you can point at objects around the room to see information about them, such as their name and position.
By the end of this tutorial, the scanner’s screen will open and close when you pick it up or put it down, and a laser will activate when the trigger is pressed.
Rather than using the exposed events in the Inspector like you might have done previously, you’ll do all of this from within a new custom script.
2. Set up a new station in a new scene
Projects can become a complicated mess quickly. Complete the following steps to get your project organized and set up for experimentation:
1. Create a new table in the scene somewhere near the starting point using a simple scaled cube, and name it “Table”. To make it table or counter height, scale it somewhere between 0.75 and 0.90 on the Y axis.
2. To stay organized, create a new empty heading in the Hierarchy called something like “0 - VR Dev Testing” and set your table as a child object.

Now you’ve got your display table ready to go, let’s put something on it.
3. Extend the basic grab functionality
In this step, you will give the Scanner basic grabbable functionality. In the following steps, you will add the Prefab to the scene and then create a new script to give it interactivity:
1. Navigate to _VRPathway > Assets > Prefabs, and drag the Scanner Prefab onto the new table in the scene.
By default, it will only have a Rigidbody and an Animator component on it. The Animator includes animations for opening and closing the scanner screen.
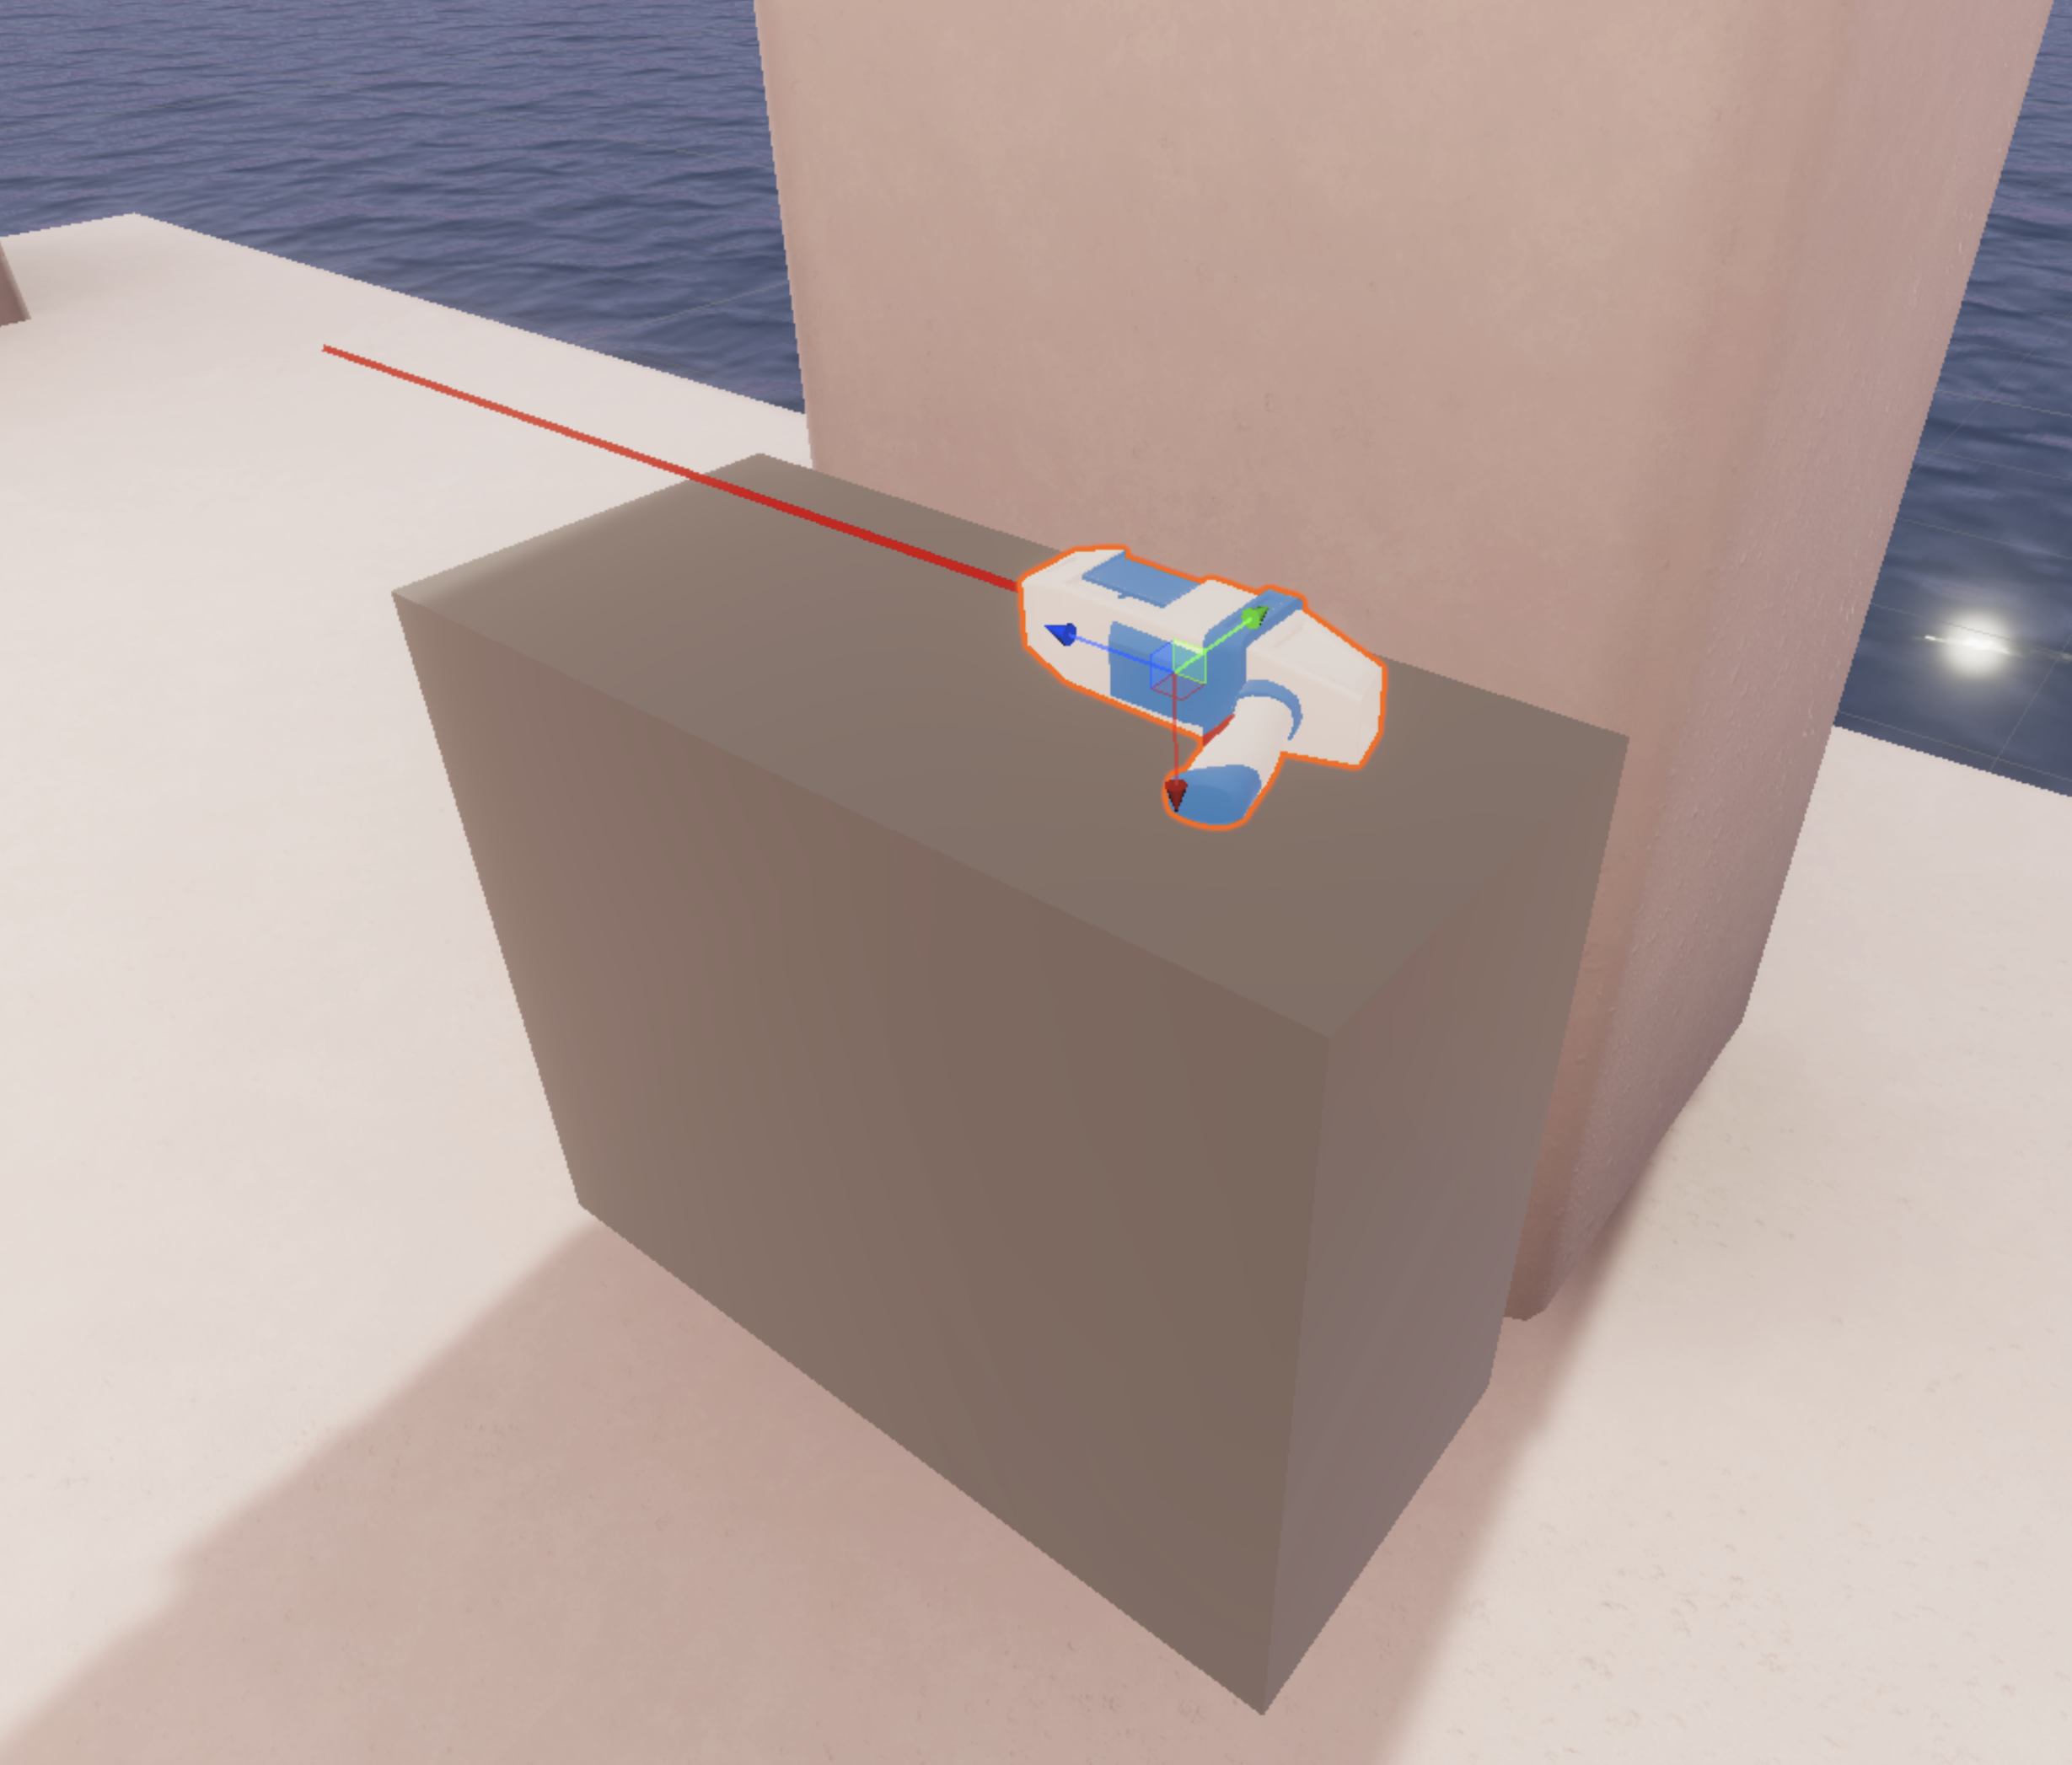
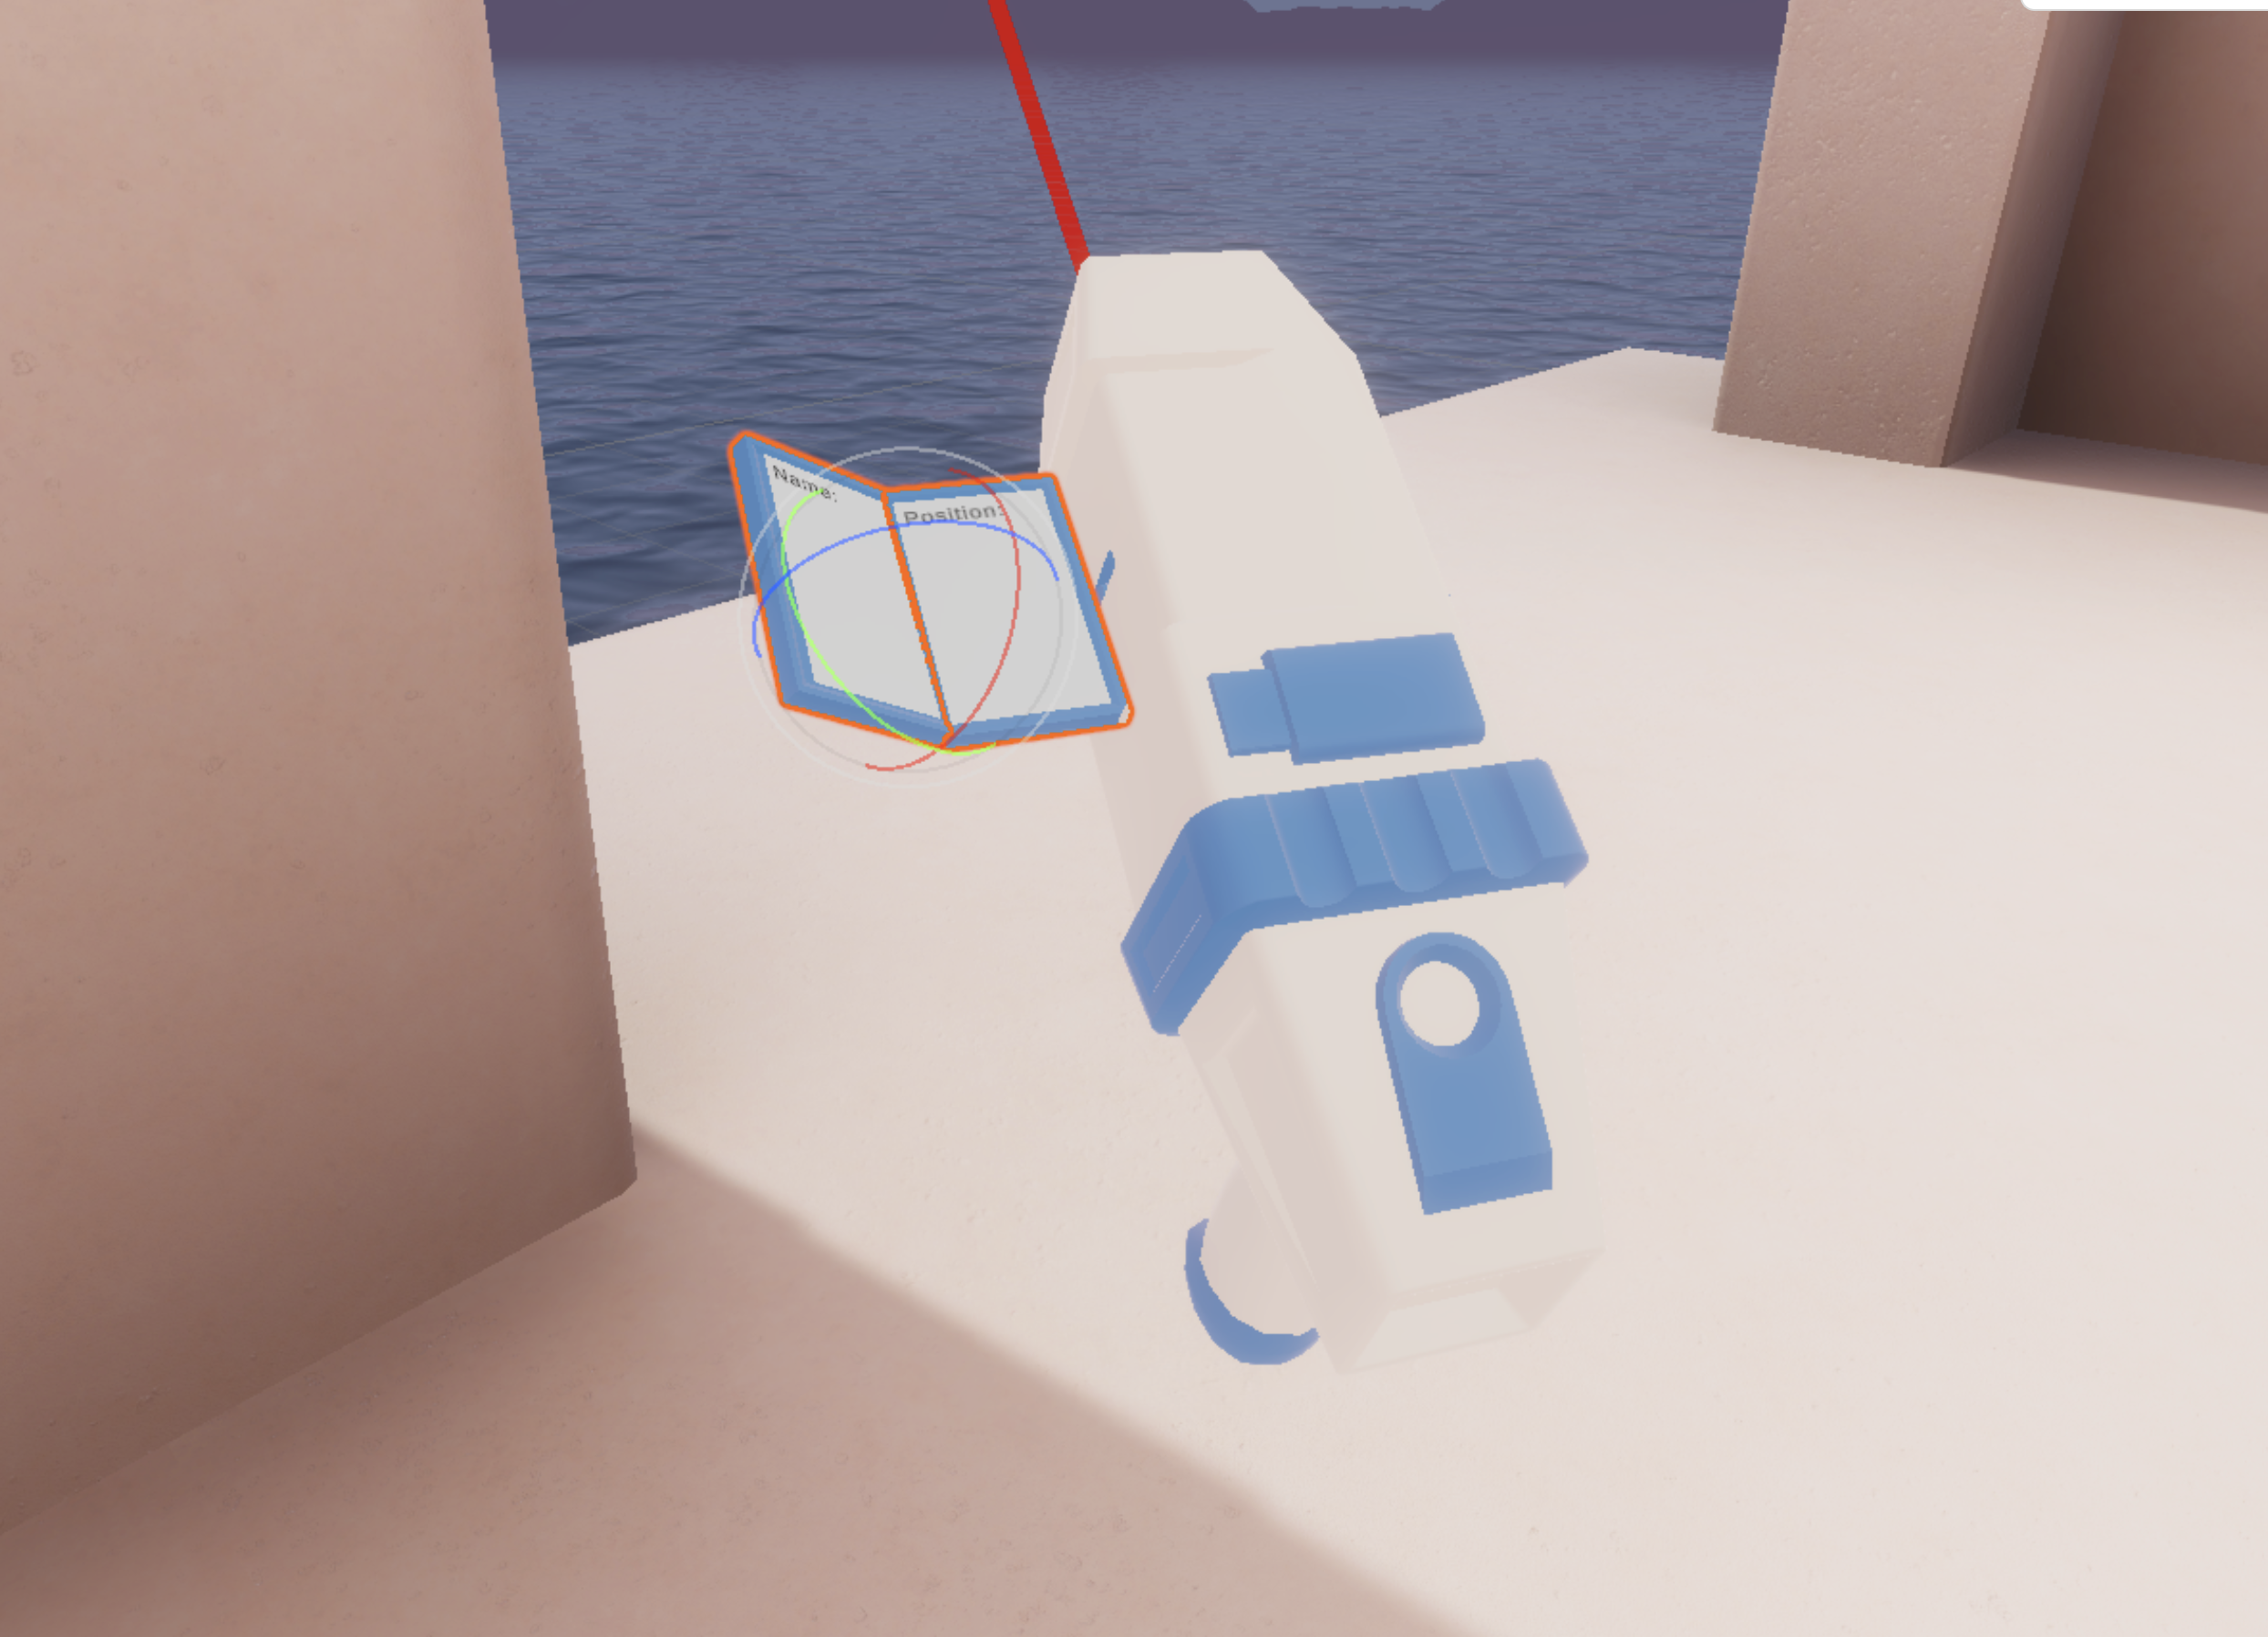
If you expand the Prefab, you will see that it also has a child object named Laser, which shines in the direction of the scanner. However, the scanner does not have any interactable functionality yet – you can’t even pick it up!
2. In the _VRPathway folder, create a new “Scripts” folder, and inside it, add a new C# script and call it “Scanner.cs”. Then attach that new script to the Scanner GameObject. This script will control all the functionality for the scanner.
First and foremost, you want this scanner to be grabbable. Up to this point, to make something grabbable, you have simply added the XRGrabInteractable component. That would work in this case, too. However, in this tutorial, you are going to inherit the functionality directly through a custom script. This will allow you to access other methods that are not already exposed in the Inspector.
To inherit that grabbing functionality, you need to extend (or inherit from) a class that has that functionality. XRBaseInteractable – the class that the XRLever, XRKnob, and XRJoystick scripts extend – doesn’t actually have grabbing functionality. Instead, you’ll want to extend XRGrabInteractable, which is a child class of XRBaseInteractable.
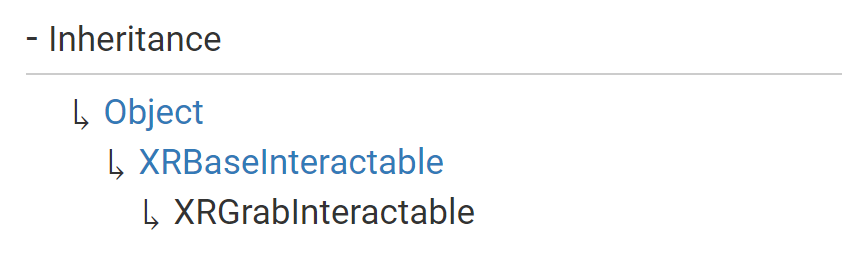
3. Open the Scanner.cs script and in the class declaration of Scanner.cs, replace “Monobehaviour” with “XRGrabInteractable”.
This will produce an error that says, “The type or namespace ‘XRGrabInteractable’ could not be found.” That is because you have not yet specified that you are using the XR Interaction Toolkit library.
If you look at any of the other custom scripts in the scene, you’ll see that they all include “using UnityEngine.XR.Interaction.Toolkit;”. This is the library of classes and helper methods that make it easier to code and develop VR applications.
4. Add “using UnityEngine.XR.Interaction.Toolkit;” to the list of namespaces and the error should be resolved.
This is something you will have to do for most of your scripts when you’re developing with the XR Interaction Toolkit.
5. Save your script and look at the Inspector for the Scanner GameObject. Notice all of the familiar fields that now appear in the Scanner component, identical to the XRGrabInteractable component.
Also, note that since XRGrabInteractable inherits from XRBaseInteractable, it also inherits all the properties and methods from that class too.
6. Test your app and grab the scanner. Your object should now behave like a typical grabbable object.
This is effectively the same as adding the XRGrabInteractable component to your object - but now you can customize the script!
Note: If you are actually building your app using File > Build, remember to add your new scene to the Scenes in Build panel.
4. Trigger the screen opening animation
The scanner we provided has a built-in animation that will open and close the screen located on its side. In order to access that animation, you first need a reference to the Animator component that is already attached to the GameObject.
Complete the following steps to trigger the opening animation from the scanner script:
1. Declare a new Animator variable in the script. Create this variable under a header called “Scanner Data” to keep the Inspector organized.
Save your script and head back to the Unity Editor. Make sure your Scanner GameObject is selected, and in the Inspector you will now see there is a slot where you can assign a GameObject to the variable you created.
2. Assign the Scanner GameObject to the Animator field.

3. To trigger the screen opening animation, go back to your script and add the following line of code to the Start function:
If you are curious how this line of code works, open _VRPathway > Assets > Animation, then double-click on the VRScanner Animation Controller object to view it in the Animator window.
Select the transition arrow going from the ScannerScreenClose to the ScannerScreenOpen state.
Notice in the Conditions section of the Inspector that this transition will be triggered if the Opened parameter is set to true.
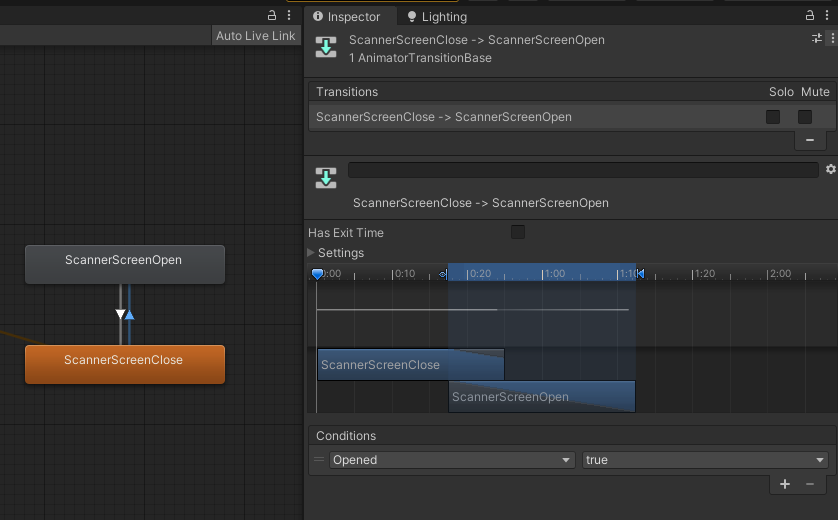
That is why the code Animator.SetBool(Opened, true); will open the scanner screen.
4. Save your script and test it to make sure it’s working. The screen should open by default when the app starts.
5. Open the screen when the scanner is picked up
You have verified that the opening animation works by having it open by default in the Start method, but it should actually open only when the scanner is picked up.
Just like before, you can refer to the documentation to help you find the specific method that is called when the object is picked up.
If you open the scripting documentation for the XRBaseInteractable class, you'll notice that it is organized into categories, including Properties and Methods.
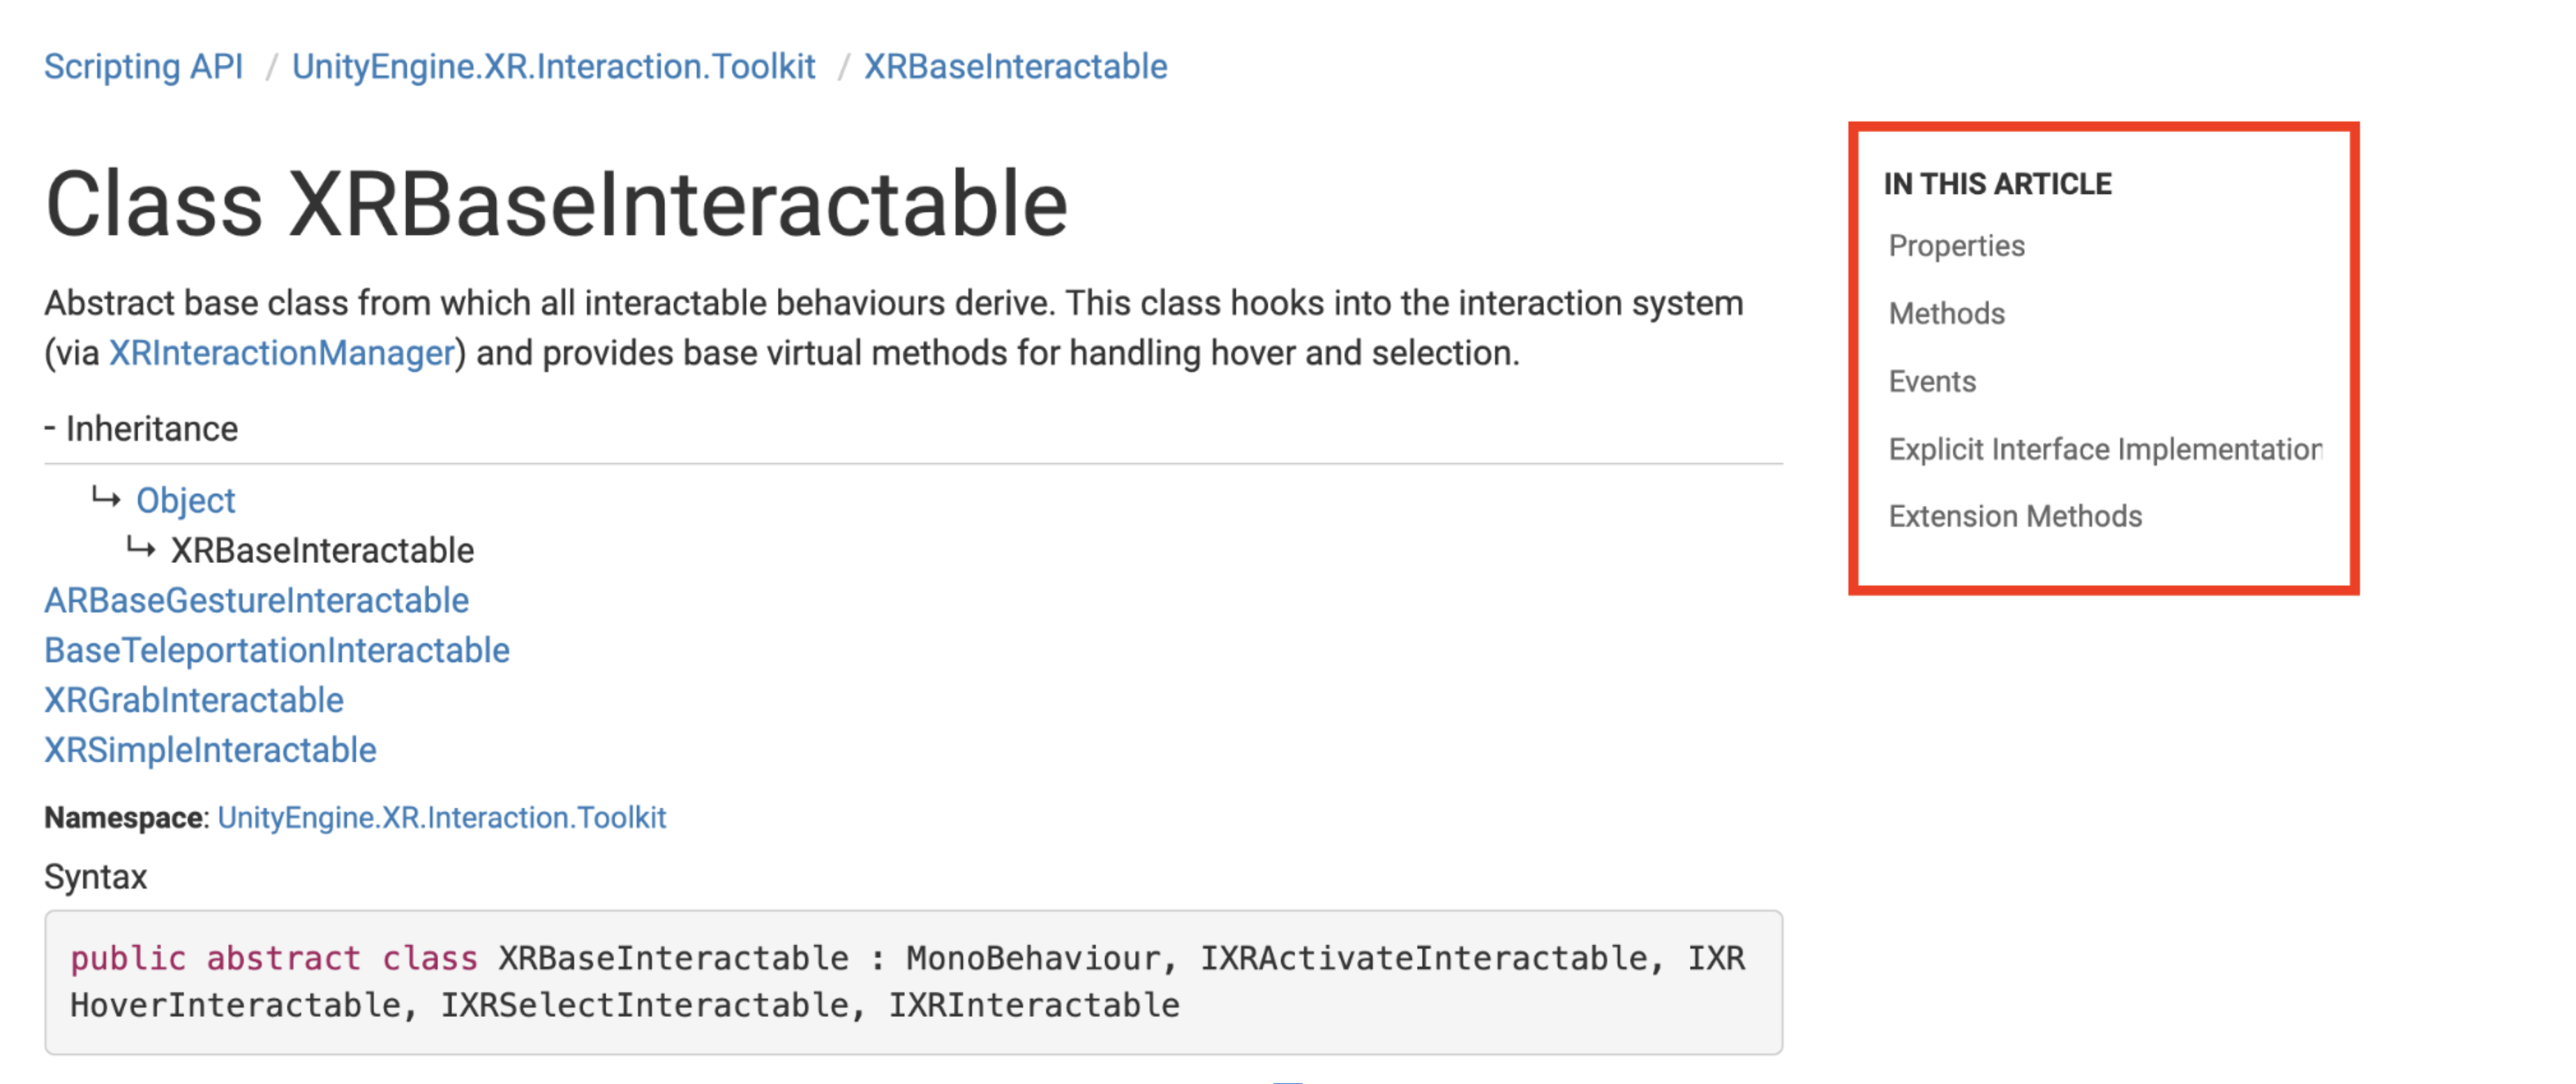
Complete the following steps to override the appropriate method from the base class:
1. Scroll through the documentation and locate the OnSelectEntered method.
If you read the description of the method, you will learn that “The XRInteractionManager calls this method when the Interactor first initiates selection of an Interactable.”
Under the description is a line of code, which is the method’s declaration. The declaration is the line you can use to override this method.
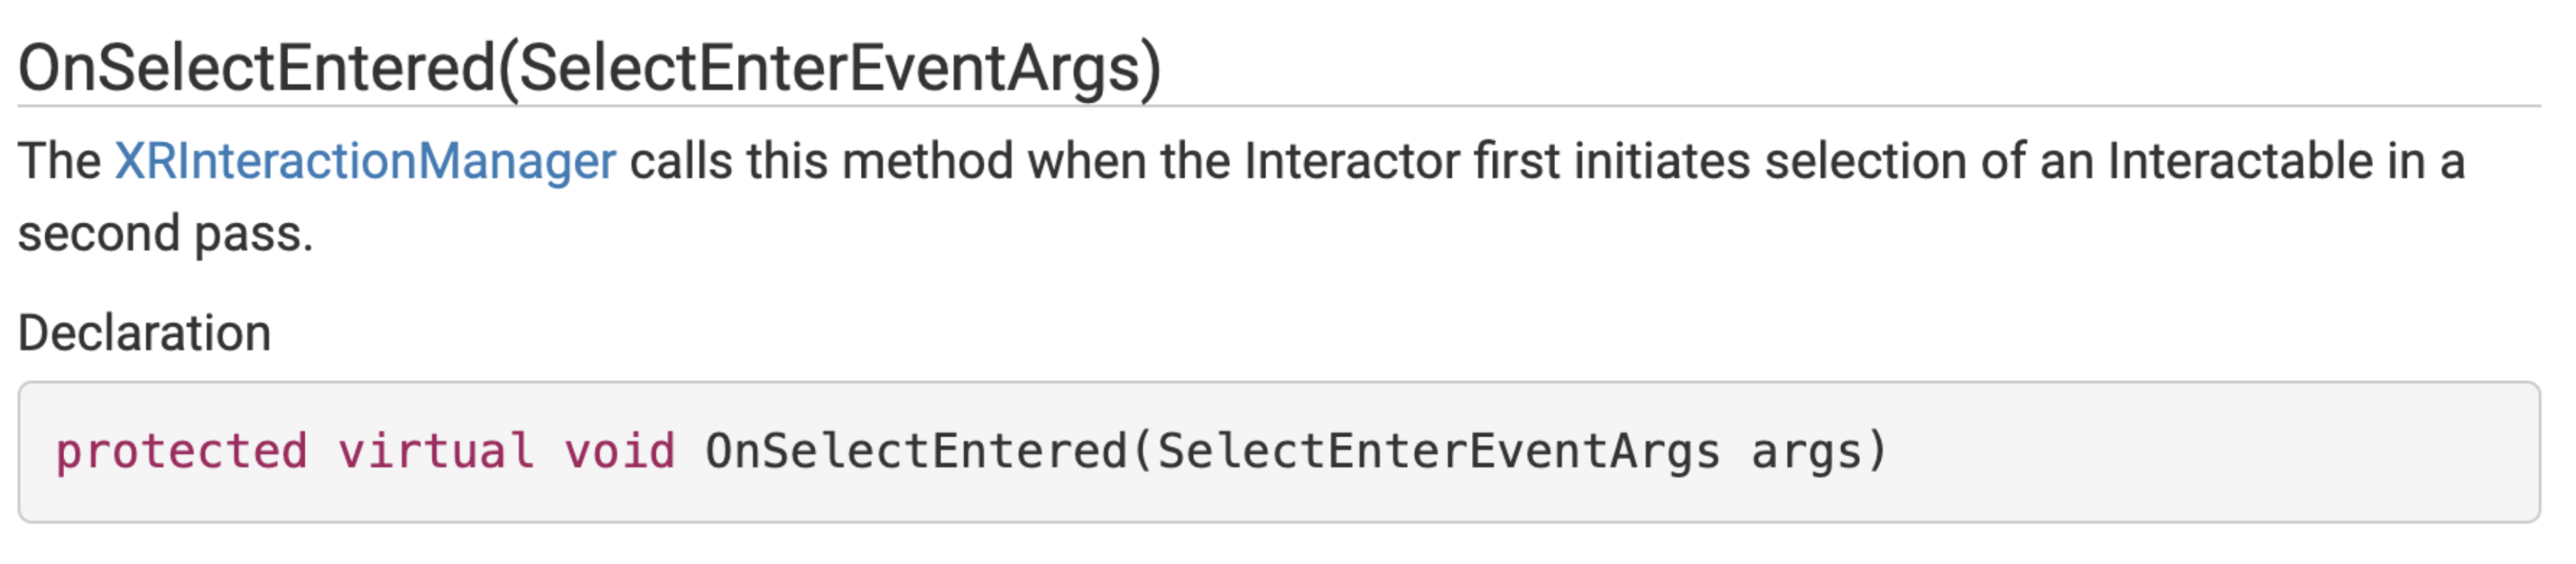
2. Copy the declaration from the documentation into the scanner script and add curly braces to turn it into a usable function.
3. To only open the screen when the object is selected, cut and paste the line of code that triggers the Open animation from the Start method to the OnSelectEntered method:
Test the app and the screen should now only open when you try to select the scanner.
Congratulations! You just used the scripting documentation to override a method in the API!
6. Close the screen when the scanner is dropped
Your screen opening animation is working, but the screen stays open when the scanner is dropped. To make the screen retract when the scanner is dropped, you just have to do the inverse of the previous step. Complete the following steps to do that:
1. Look in the documentation again and locate the OnSelectExited method. Notice that it has the exact same declaration as OnSelectEntered, but with Exit instead of Enter.
2. Copy and paste your code from OnSelectEntered, but replace Enter with Exit in all three places it appears, then change the SetBool method from true to false:
The scanner screen should now close when the object is dropped.
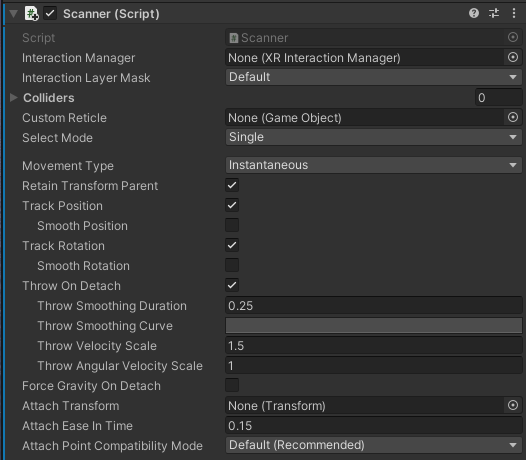
Once again, this functionality could have been done through public methods and exposed events in the Inspector, rather than overriding the methods in the script. You would need to create new methods to open and close the screen, and then call those methods from the dropdown menu in the Inspector’s events. In that case, the Inspector might look like the screenshot below:
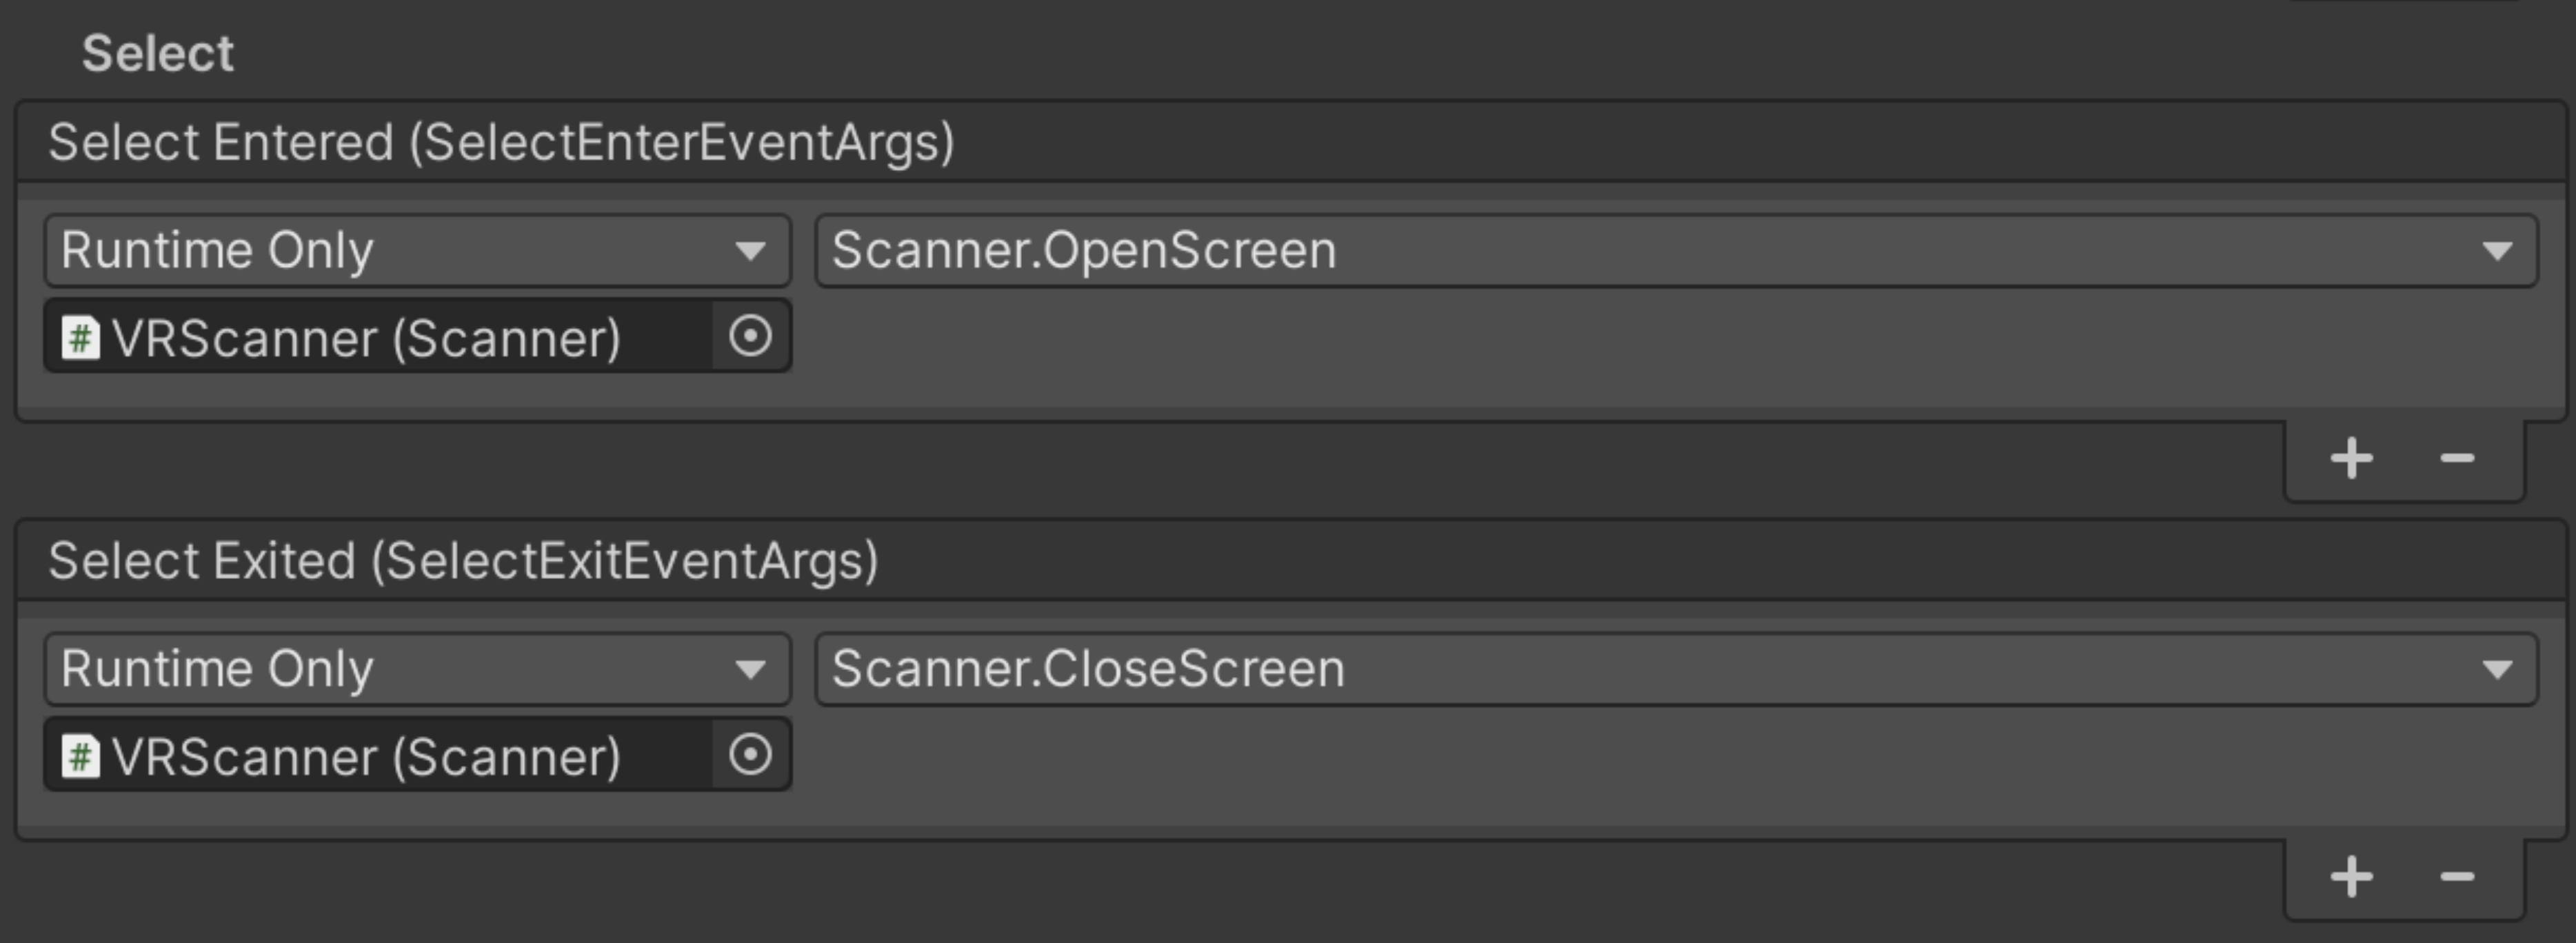
However, some developers prefer keeping all of the functionality in a single script rather than having some of it in the script and some of it in the Inspector. Using a script also saves you from having to remember to assign these objects in the Inspector if you use this script again. With all of the logic and functionality in one place, troubleshooting unexpected behaviors can be easier.
7. Disable the laser on Awake
Your scanner is starting to resemble something usable. Next, you need to make the scanner laser turn on and off when you pull the trigger.
Before that, though – the laser should be disabled by default when the scene starts. Complete the following steps to do that:
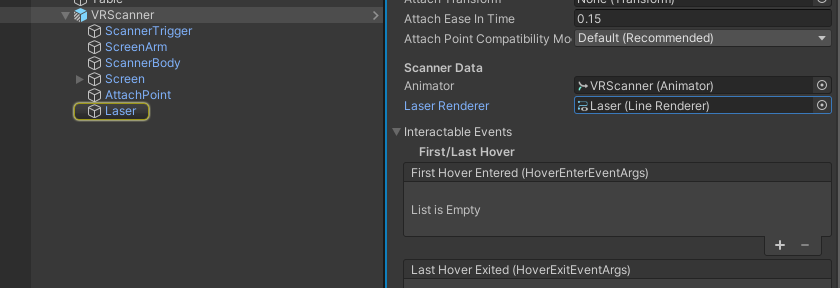
1. Open Scanner.cs and declare a new LineRenderer variable called laserRenderer under the “Scanner Data” header:
The laser is displayed using the Line Renderer component. The Line Renderer component takes an array of two or more points in 3D space and draws a straight line between each one. You can use a Line Renderer to draw anything from a simple straight line to a complex spiral.
2. Save the script and back in the Unity Editor assign the Laser GameObject to the Laser Renderer field.
3. To disable the laser when the scene starts, you should use the Awake function. Add this to your script.
When you use the default “private void Awake()” declaration though, you will get a warning under “Awake”, which says that this method “hides inherited member XRGrabInteractable.Awake();”.
This error means that the base class, XRGrabInteractable, already uses the Awake function. It’s warning you that if you just call the Awake function, you might lose some functionality from the base class. If you want to inherit the functionality of that base class, you need to explicitly say that you want to override that method using the override keyword.
4. Add the override keyword to your Awake declaration.
After you add the override keyword, you’ll get yet another error saying that you can’t use a different access modifier than the base class, which uses “protected”.
5. To fix this, change “private” to “protected” and you should no longer have any errors.
6. Now you can disable the laser by setting the GameObject to inactive on Awake():
If you test your app now, the laser will be deactivated by default, which is good, but everything else will appear to be broken! It’s no longer hoverable, selectable, or grabbable.
Do you have any ideas why? We’ll fix that in the next step.
8. Call the base method
If you override a virtual method using the override keyword, by default, you will completely erase and replace any and all functionality declared in that method by any parent classes. If you want to include that inherited functionality and then add to it in your override, you need to explicitly call the method in the base class.
You can call the base method using base.[methodName(args)]. Complete the following steps to call the base method where appropriate:
1. In the Awake method, call the Awake method in the base class before the line that disables the laser:
If you test your app now, you should once again be able to pick up the scanner.
Even though it didn’t cause any errors, you should call the base class in your OnSelectEntered and OnSelectExited overrides, too. If there is any inherited functionality in those methods, you wouldn’t want to lose it.
2. Call the base method in OnSelectEntered and OnSelectExited before the lines that trigger the screen animations. In these base method calls, you’ll need to pass the required “args” parameter, as shown below:
Test your project and make sure everything still works as expected. The laser should be disabled by default. When you pick up the scanner, the screen should open; when the scanner is dropped, the screen should close.
9. Identify the method for activating an object
Next, you need a way to turn the laser on and off with the trigger. Follow the steps below to locate the appropriate code documentation to do so:
1. Go back to the documentation and see if you can locate a method that could be useful for detecting the trigger press.
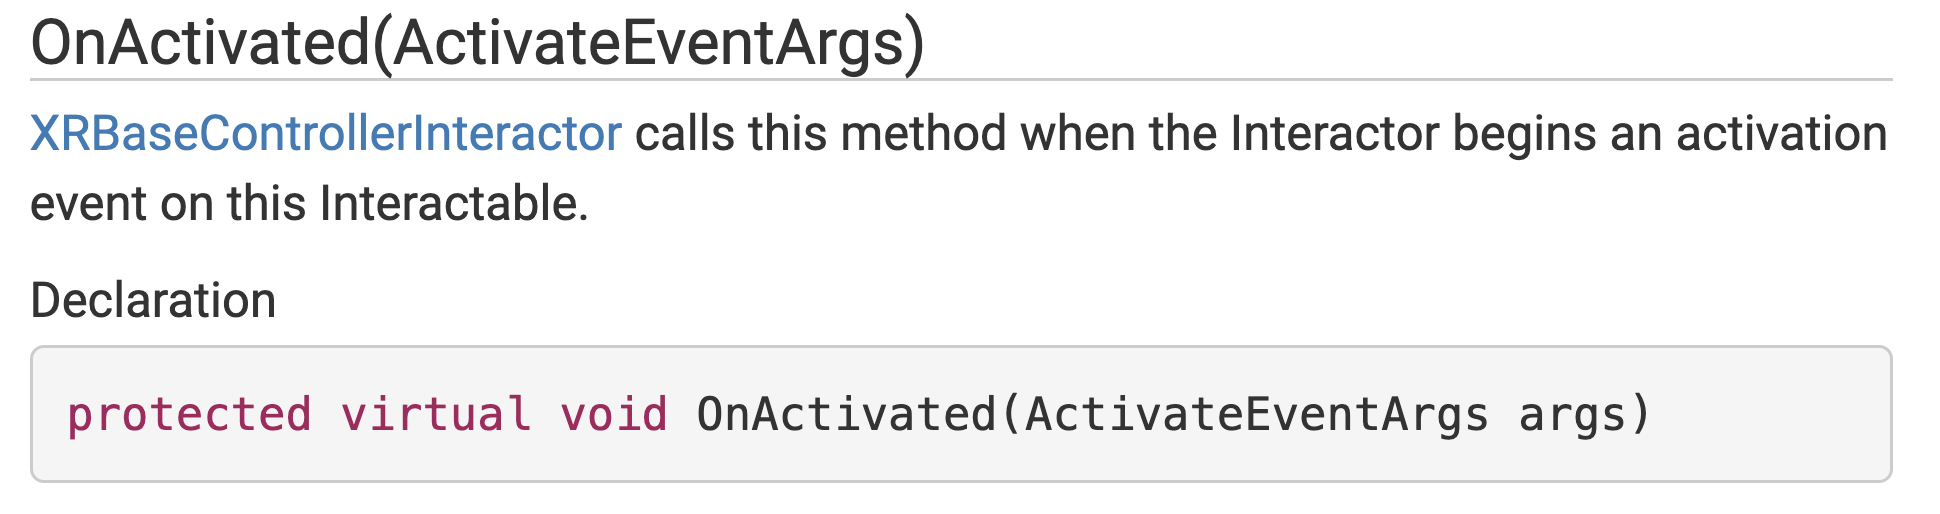
What you are looking for is a method named “OnActivated”, which is also located in the parent class of XRGrabInteractable: XRBaseInteractable.
2. Find the declaration of the OnActivated method, then copy it to your clipboard. You’ll be overriding that method in the next step.
10. Turn the laser on and off with the trigger
With the method you need in hand, you’re ready to override and add to the Activation functionality:
1. Copy and paste the OnActivated method declaration from the previous step into your Scanner script as a new method.
You will get a warning suggesting you need to use the “override” keyword instead of “virtual”. A virtual method is declared when it is meant to be overridden in child classes.
2. Replace “virtual” with “override” to override the method. Then, just like before, call the base method to include the inherited functionality.
Now that you have the method ready, you can set the laser GameObject as active when the OnActivated method fires.
3. Add the code below to set the Laser GameObject as active when the trigger is pulled.
Next, you’ll set up the method to turn the laser off when it's deactivated, or, in hardware terms, when the trigger is released.
4. Copy and paste the entire method to create a new function, changing all three instances of “Activate” to “Deactivate”, then change SetActive(true) to SetActive(false).
Test your application. The laser should now turn on when the trigger is pressed and turn off when it is released.
11. More things to try
If you want to further develop your skills, explore new concepts, or improve your project, check out some of the optional activities below. Each one is tagged as either [Easy], [Medium], or [Difficult] so you can choose the level of challenge.
These activities are entirely optional, so if you’re not interested, no problem – just skip this step.
We do recommend attempting at least one of them in order to get the most out of this learning experience. Good luck!
[Easy] Add a UI sign for your station
To make your new station match the others a little better, you could duplicate the UI above each of the stations. You could also try and figure out where the code is that moves you between stations and add your station as the last one on the list of stops!
[Medium] Add additional functionality on select and activate
To make the scanner more interactive, you can add additional functionality in the methods you are overriding. For example, you could add a sound when the object is picked up to accompany the screen opening or you could play a continuous scanning sound effect when the laser is active. You could also add haptics to these events, change a material, or add some other feature.
[Difficult] Add an outline or material highlight on hover
If you look at the other example objects, such as the megaphone or the launcher, their materials change when they are hovered over to help with the user experience. This is achieved using a couple of custom scripts on the child object, called “HoverStateVisuals”. Try to replicate this functionality when you hover over your scanner object.
12. Next steps
You have successfully set up the screen to open and close and the laser to turn on and off with the trigger. In the next tutorial, you’ll code the actual scanning functionality that will show the scanned information on the screen.