Set up your Unity Project for UI development
Tutorial
Beginner
+10XP
15 mins
482
Unity Technologies
In this tutorial, you’ll:
- Review requirements for UI development using the XR Interaction Toolkit
- Configure the VR Beginner Unity Project for UI development
Languages available:
1. Overview
There are some specific setup requirements for creating UI elements for VR experiences. In this tutorial, you’ll configure the VR Beginner learning project for VR UI development. You’ll add a UI canvas to review how this works, but you won’t develop any custom UI in the tutorial.
The tutorial is for learners with some experience creating UI in Unity, who wish to apply this in this learning project. If you don’t have any experience creating UI, you can continue directly to Next steps or Explore the Escape Room.
2. Before you begin
In this tutorial, you’ll use the VR Beginner Unity Project and your VR hardware. Before you begin:
1. Open the VR Beginner Unity Project.
2. Check that your hardware is ready. If you’re using Oculus Link with the Oculus Quest, enable and connect this now through the Oculus app.
3. Requirements for UI development with the XR Interaction Toolkit
To create UI elements using the XR Interaction Toolkit, you need the following three things:
- A GameObject with the XR Ray Interactor component attached for each controller, that will cast a ray to interact with the UI (the XR Direct Interactor you use to grab objects is not compatible)
- A normal UI Canvas GameObject, with an additional component called Tracked Device Graphic Raycaster
- An XR UI Input Module
In this tutorial, you’ll configure these in the VR Beginner Unity Project.
4. Check the XR Ray Interactors
The XR Ray Interactor is already present in your Scene by default. To check this:
1. In the Hierarchy, select the grey arrow to the left of the XR Rig GameObject to expand its child GameObjects.
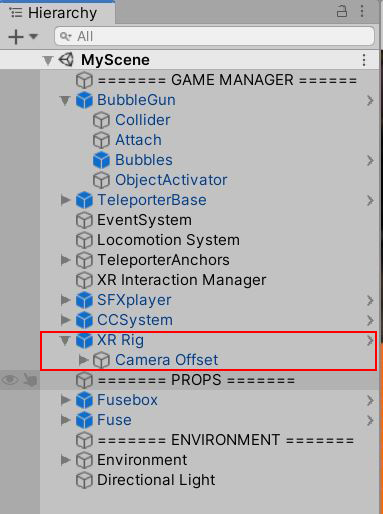
2. Select the arrow to the left of the Camera Offset GameObject to expand its child GameObjects.
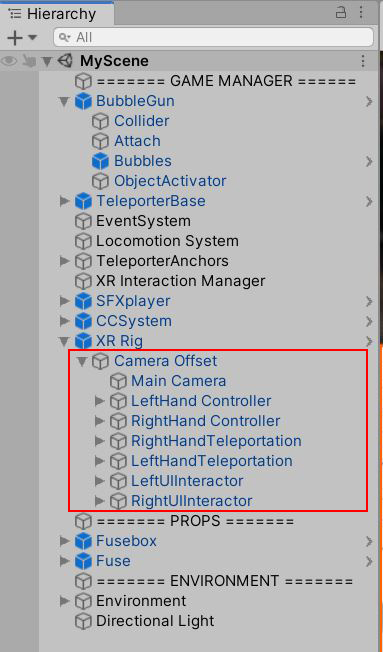
3. The two child GameObjects RightUIInteractor and LeftUIInteractor are set up to only interact with:
- The UI layer
- The ray along the fingers of the hand, for a short distance
This means that players can interact with UI elements using the fingers of the VR hands. The Interactor GameObjects are set up so that they can only interact with UI, and not other XR Objects that have the XR Offset Grabbable component attached.
5. Add a UI Canvas
Next, add a UI Canvas with an XR Input Module:
1. In the Hierarchy, right-click and select XR > UI Canvas.
Alternatively, go to the top menu and select GameObject > XR > UI Canvas.
This creates:
- A GameObject called Canvas with the Tracked Device Graphic Raycaster component automatically added
- A GameObject called EventSystem with the XR UI Input Module component automatically added
NOTE: If you already had a non-XR UI Canvas in your Scene, an EventSystem will already exist. This EventSystem has a Standard Input Module component rather than the XR UI Input Module component, and will not work properly. To make this XR-compatible, remove the Standard Input Module component and replace it with the XR UI Input Module component.
2. In the Hierarchy, select the Canvas GameObject.
3. In the Inspector, find the Layer field in the header. Select UI from the drop-down menu.
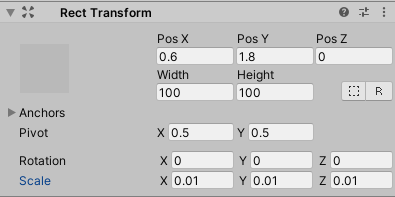
4. You can now position the Canvas in your Scene using the Move Tool. In the Rect Transform component, set the following fields:
5. In the Rect Transform component, set the following fields:
- Scale X to 0.01
- Scale Y to 0.01
- Scale Z to 0.01
6. Set Blocking Mask to Nothing

7. Right click on the Canvas in the Hierarchy and choose UI > Slider to add a Slider child GameObject.
8. You can now reposition the Canvas GameObject, with the visual aid of the slider for precise placement. Make sure you move the Canvas GameObject and not the Slider child GameObject.
9. Select Ctrl + S to save your changes.
10. Now you can test the UI Canvas in VR. When you have prepared to test the Scene with your hardware, approach the Slider.
11. Point your hand straight at the Slider Handle, using the UI Pointer as reference.
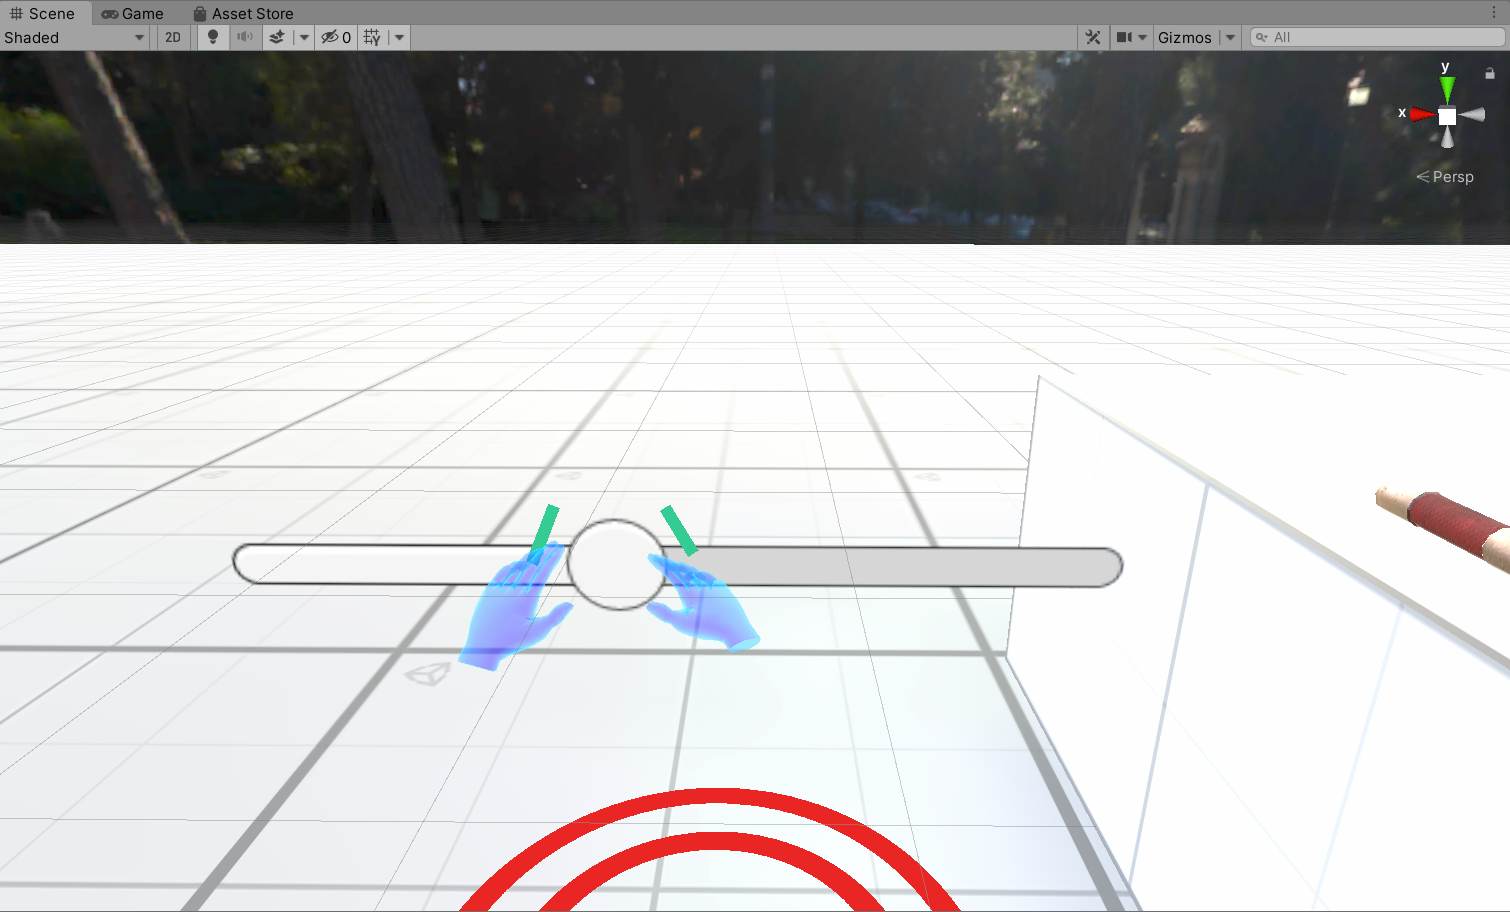
12. The UI Pointer will change colour when you are close enough to interact with the Slider.
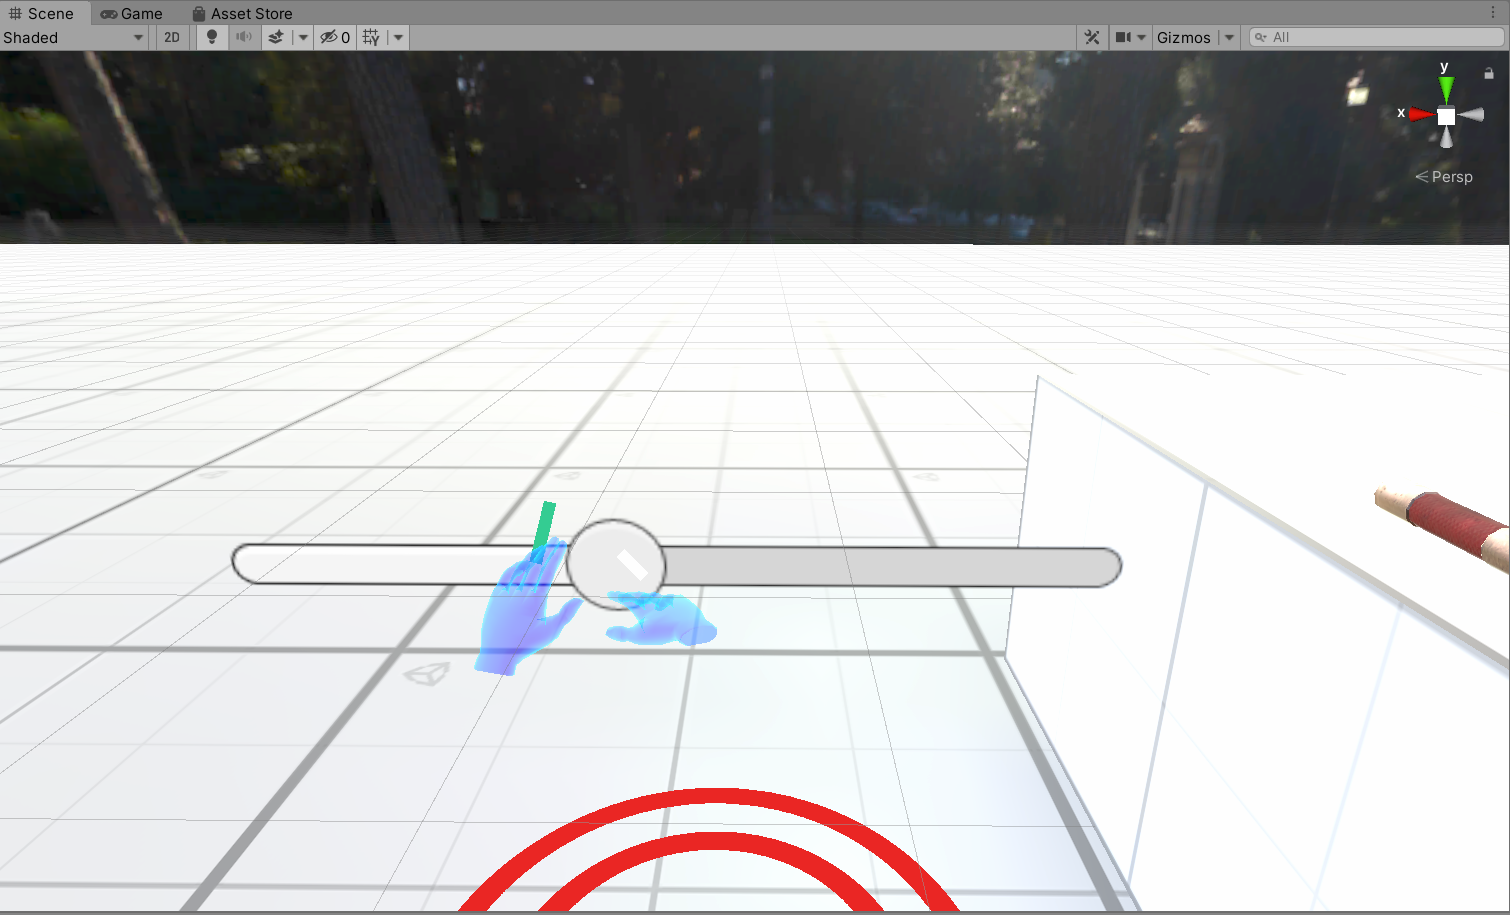
13. Press and hold the trigger on your controller to move the Slider.
6. Summary
In this tutorial, you have reviewed the setup requirements to create UI in VR, and set up your Unity project for UI development.
You’ve now completed the main part of the VR Beginner learning content. Next you’ll review how to continue your learning journey and explore the Escape Room example VR experience in detail.