
Setting Up AR Foundation
Tutorial
intermediate
+10XP
20m
(1808)
Unity Technologies
In this tutorial, you will learn how to set up AR Foundation in Unity.
Languages available:
1. Setting Up AR Foundation
This tutorial has been verified using Unity 2019.4 LTS
AR Foundation enables the construction of Augmented Reality applications targeting both iOS and Android devices. This means you can use AR Foundation to build an AR Unity application and deploy it to either an iOS or Android device without changing any of the Scene’s scripts or components.
Prior to AR Foundation, a developer needed to build multiple Scenes with critical ARKit or ARCore scripts (depending upon the target platform), which slowed the development cycle or completely blocked development teams from building applications to both platforms. Now AR Foundation enables developers to literally “build once, deploy everywhere.”
In Unity 2019.4, AR Foundation supports:
- Multi-platform deployment: iOS and Android
- Vertical and horizontal plane detection
- Feature point detection
- Light estimation
- Hit testing
- AR Anchors
- Image Tracking
- 3D object tracking
- Environment Probes
- World Maps
- Face Tracking
- Cloud Anchors
- AR Remote
- Lightweight Render Pipeline
In this tutorial, you’ll review the steps needed to set up AR Foundation in your project. The AR Foundation package, in addition to either ARKit and ARCore packages (depending on your target deployment platform), are critical to include when building an AR Unity application and pushing builds to both your Android and iOS devices.
Setting up and employing AR Foundation requires importing the AR Foundation package from the Package Manager, and configuring your Scene appropriately with two GameObjects and their related scripts: AR Session and AR Session Origin.
2. Importing the AR Foundation Package
1. Open a new 3D Unity project with version 2019.2 or later
2. Navigate to the Package Manager (Window > Package Manager) (Figure 02).
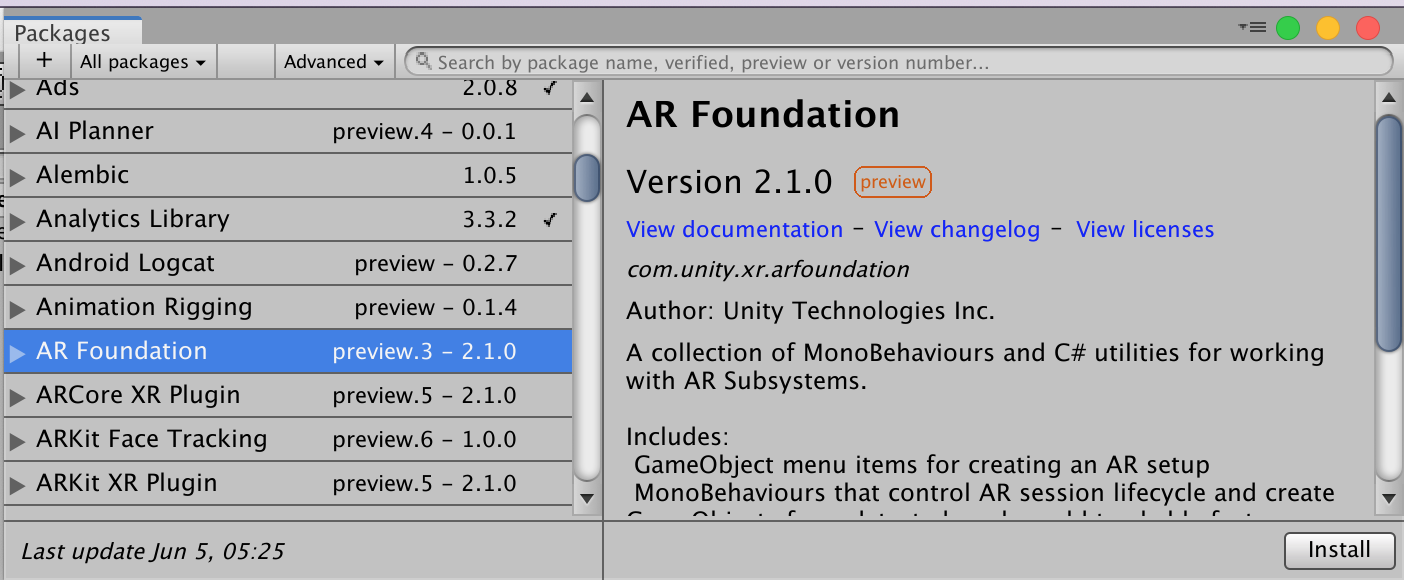
3. Install “AR Foundation” from the list (Figure 03).
4. If deploying to iOS, install ARKit (Figure 04).
5. If deploying to Android, install ARCore XR Plugin (Figure 05).
6. If deploying to both iOS and Android, install all of these packages:
- AR Foundation
- ARKit XR Plugin
- ARCore XR Plugin
7. Delete the default Main Camera GameObject from your Scene. Since we will use a special AR Camera with important scripts in our project, the default Main Camera is no longer needed.
8. Add an AR Session GameObject (Create > XR > AR Session) (Figures 06 and 07).
The AR Session must include an ARSession component on one of the GameObjects. By adding an AR Session GameObject, Unity adds a GameObject with the AR Session component automatically attached.
The AR Session controls the lifecycle of an AR experience, enabling or disabling AR on the target platform. The ARSession can be on any GameObject.
If the Scene doesn’t contain an ARSession, the application will not be able to track features in its environment.
Learn more about the AR Session component in the Unity documentation.
9. Add an AR Session Origin GameObject (Create > XR > AR Session Origin) (Figures 08 and 09).
The purpose of the ARSessionOrigin is to transform trackable features (such as planar surfaces and feature points) into their final Pose (Position & Orientation) and Scale in the Unity Scene. This enables virtual object interaction and manipulation with these transformed features.
AR devices provide their data in session space, an unscaled space relative to the beginning of the AR session. As such, the ARSessionOrigin must transform this data so it is appropriate for the Unity application in Unity “space.”
Read more about the AR Session Origin in the Unity Documentation.
10. Navigate to Build Settings (File > Build Settings…) (Figure 10).
11. In Build Settings, change the project Deployment Target to either iOS or Android (Figure 11).
3. Conclusion
That’s it! Congratulations on successfully setting up your project with AR Foundation. When you are ready, add your Scene to the Build List, build the Scene, and then deploy it to your device to test your project. Though we haven’t added any AR-specific functionality (yet), your Scene will deploy and run.