
Setting Up the Development Environment for AR Applications
Tutorial
intermediate
+10XP
20 mins
150
Unity Technologies
There are a few tools we must set up before developing Unity applications for either iOS or Android devices. If developing for iOS, this involves setting up Xcode (Apple’s integrated development environment (IDE)) on your development machine. Xcode is required to deploy our Unity builds onto our iOS devices.
Languages available:
1. Setting up the Developer Environment for AR Applications
This tutorial has been verified using Unity 2019.4 LTS
There are a few tools we must set up before developing Unity applications for either iOS or Android devices. If developing for iOS, this involves setting up Xcode (Apple’s integrated development environment (IDE)) on your development machine. Xcode is required to deploy Unity builds onto iOS devices.
If developing for Android, we must add the Android SDK and NDK components to our Unity version and turn on developer mode in our respective mobile devices. Although Android Studio (the Android IDE) can be used to deploy the builds and retrieve helpful profile and performance information, we do not actually need an IDE to deploy our applications and thus will omit this step from our walkthrough below.
2. iOS account setup
You need an Apple ID (free) and the latest version of Xcode to test your build on any iOS devices you own. However, to publish your application to the store, you must register with the Apple Developer Program. You should also be aware that you cannot use services such as Game Center or In-App Purchases with the free version.
1. Retrieve an Apple ID on the Apple site (if you don’t yet have an Apple ID), or register with the Apple Developer Program.
2. Install the latest version of Xcode (available from the Mac App Store). Xcode is required for development on Macs and contains a suite of tools for developing software for OS X, iOS, WatchOS, and tvOS.
3. Adding your Apple ID to Xcode
1. Open Xcode, and open the preferences window (Xcode > Preferences).
2. To display information about the Apple IDs that have been added to Xcode, select Accounts at the top of the window.
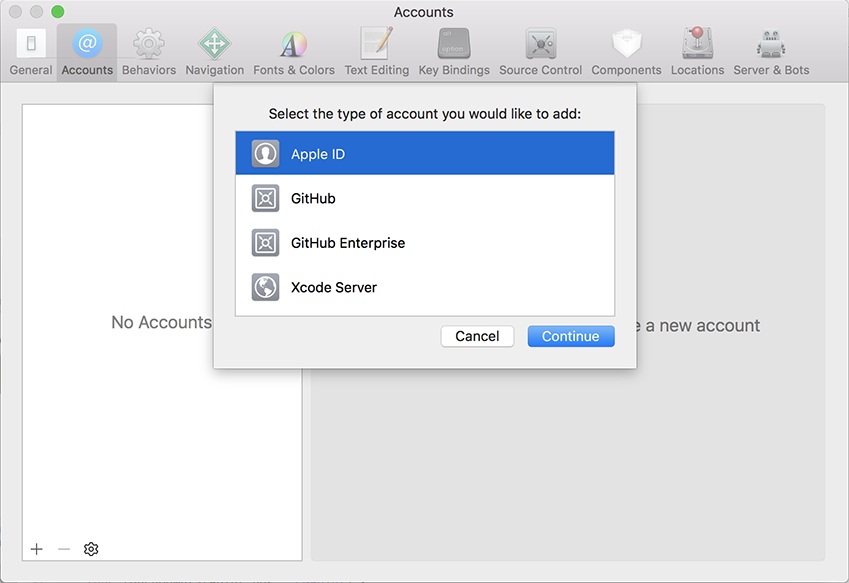
3. Click the plus sign in the bottom-left corner. Choose Apple ID from the window that appears and click Continue (Figure 02).
4. Enter your Apple ID in the pop-up window. Then click Next.
5. Enter your password. Click Next.
6. If you’d like to see more information associated with your Apple ID, select it and click View Details.
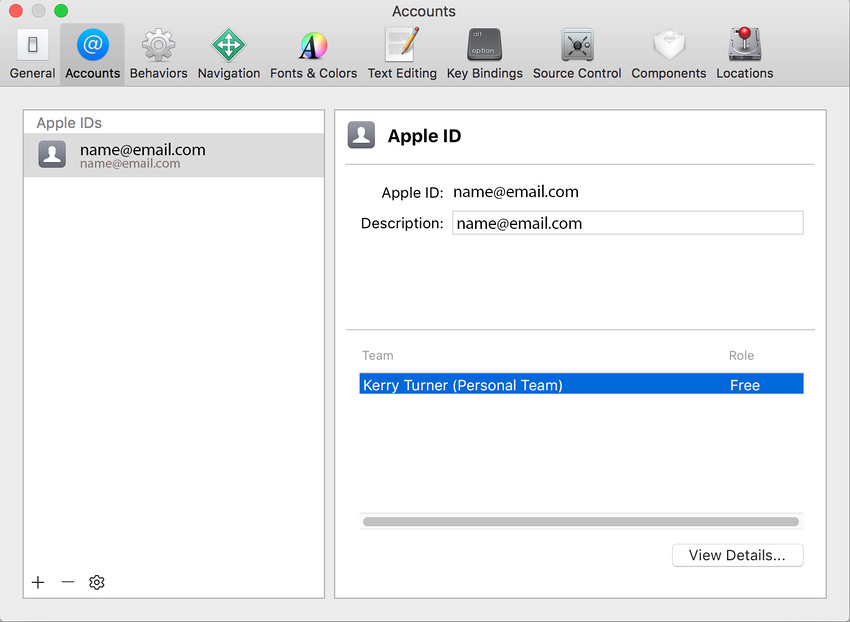
The bottom Team section shows all of the Apple Developer Program teams of which you are a member. Apple automatically creates a personal team using your Apple ID if you’re using a free Apple ID that isn’t enrolled in the Apple Developer Program.
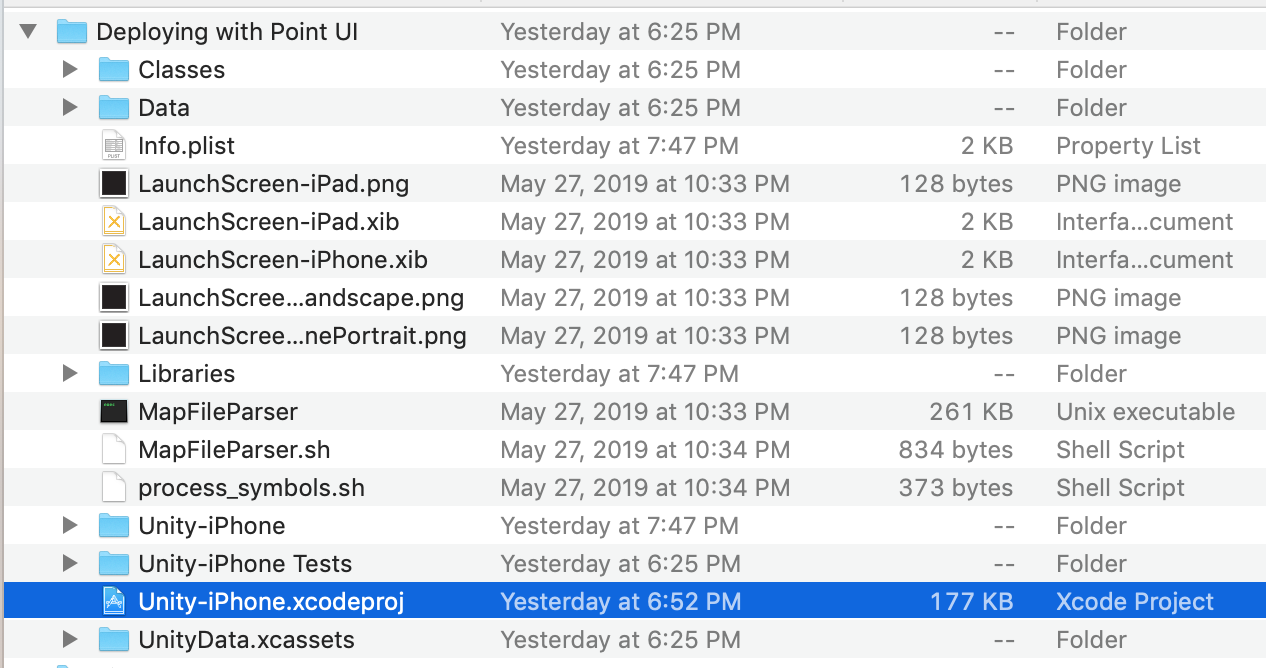
7. Double-click on your build file to open it in Xcode (Figure 04).
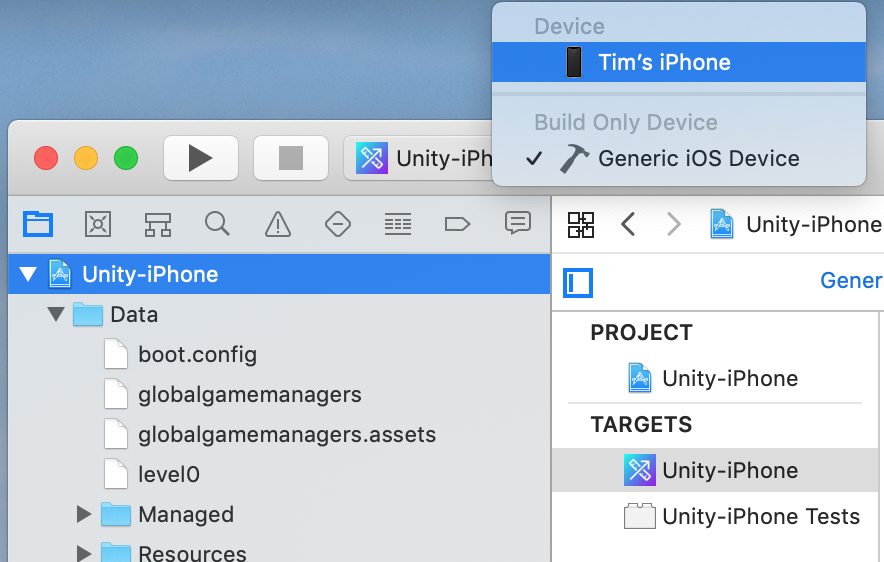
Select your project in the left window panel and select your target device (plugged into the computer) on the top nav bar by clicking on Generic iOS Device.
Note: By default, Xcode sets the device to Generic iOS Device (Figure 05).
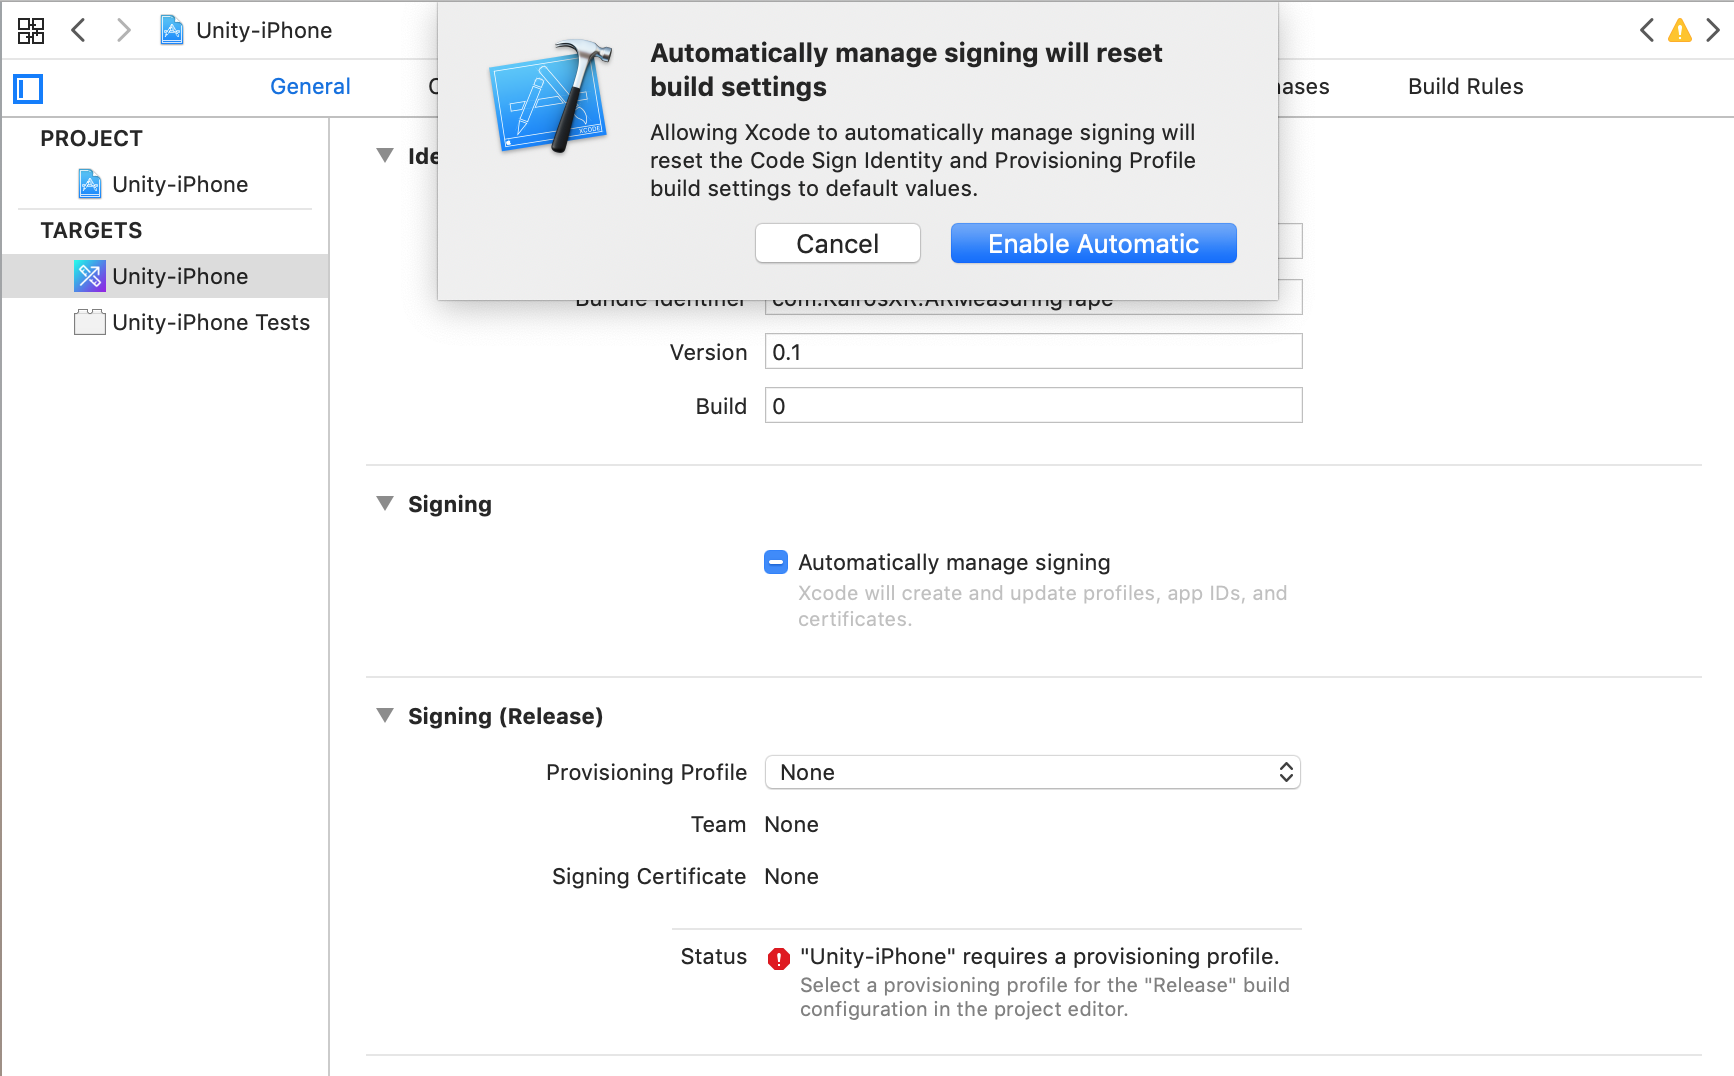
9. Back in the main window, select Automatically manage signing to automatically create and update profiles, app IDs, and certificates. This is typically a manual process through the Developer Portal, but Xcode now automates this if your Apple IDs are properly set up (Figure 06).
10. Select your name as the team, and hit Run (the play button) in the upper left corner.
4. Android Setup
To build a Unity application targeting Android, you must install the Unity Android Build Support platform component with your Unity Editor. You’ll also need to install the Android Software Development Kit (SDK) and NDK, which are required to build and run any code on your Android device. By default, Unity installs a Java Development Kit based on OpenJDK, and as of the 2019 series, provides direct access to the SDK and NDK.
5. Install Android Build Support and the Android SDK & NDK tools
1. If you’ve already downloaded and installed a Unity version, locate the Unity version in Unity Hub by selecting Installs (Figure 07).
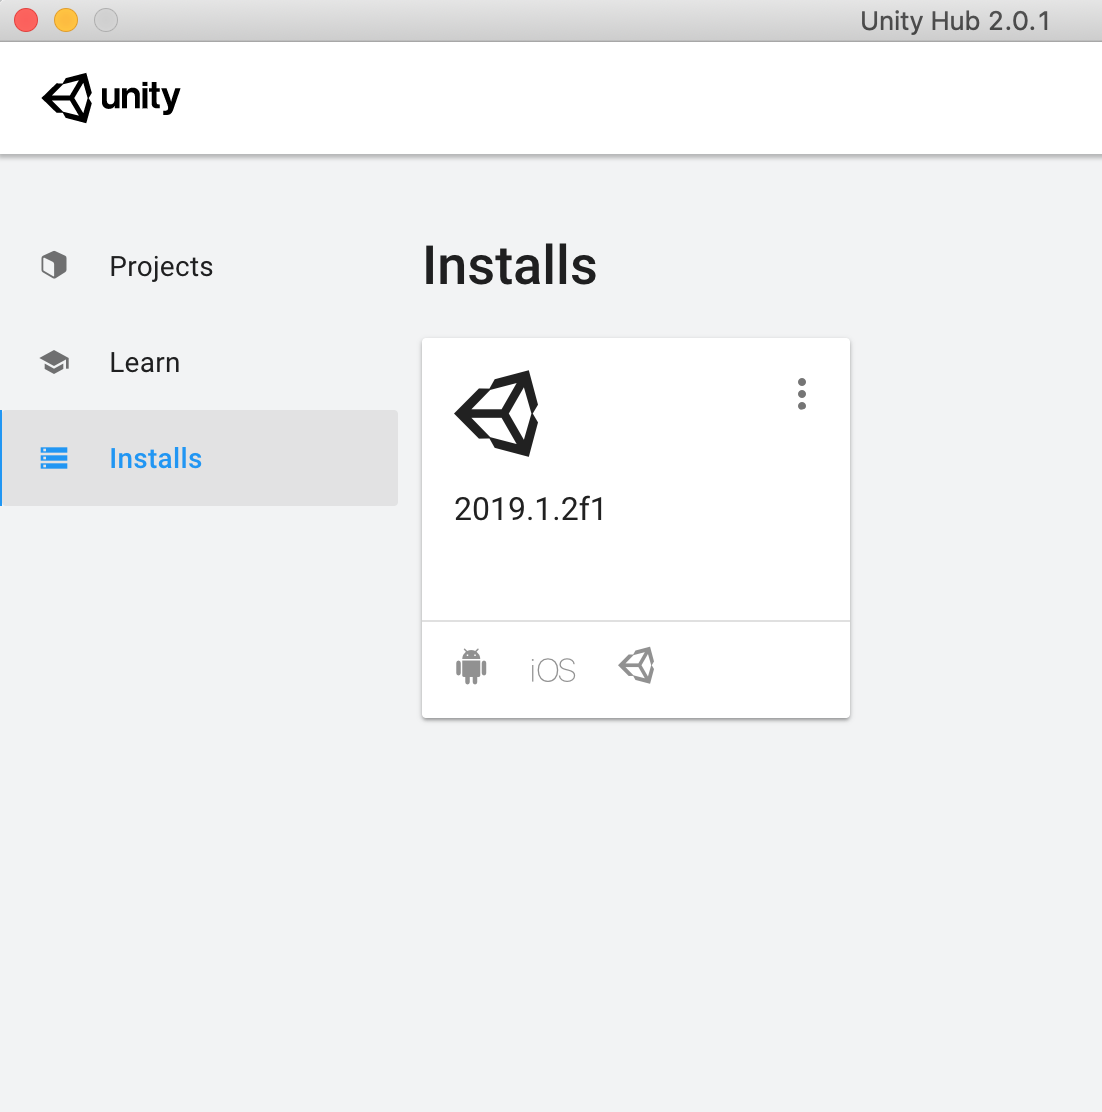
2. Select the three dots on the bottom right of the Unity version and select Add Modules. This will open the install page and allow you to select platform components to include (Figure 08).
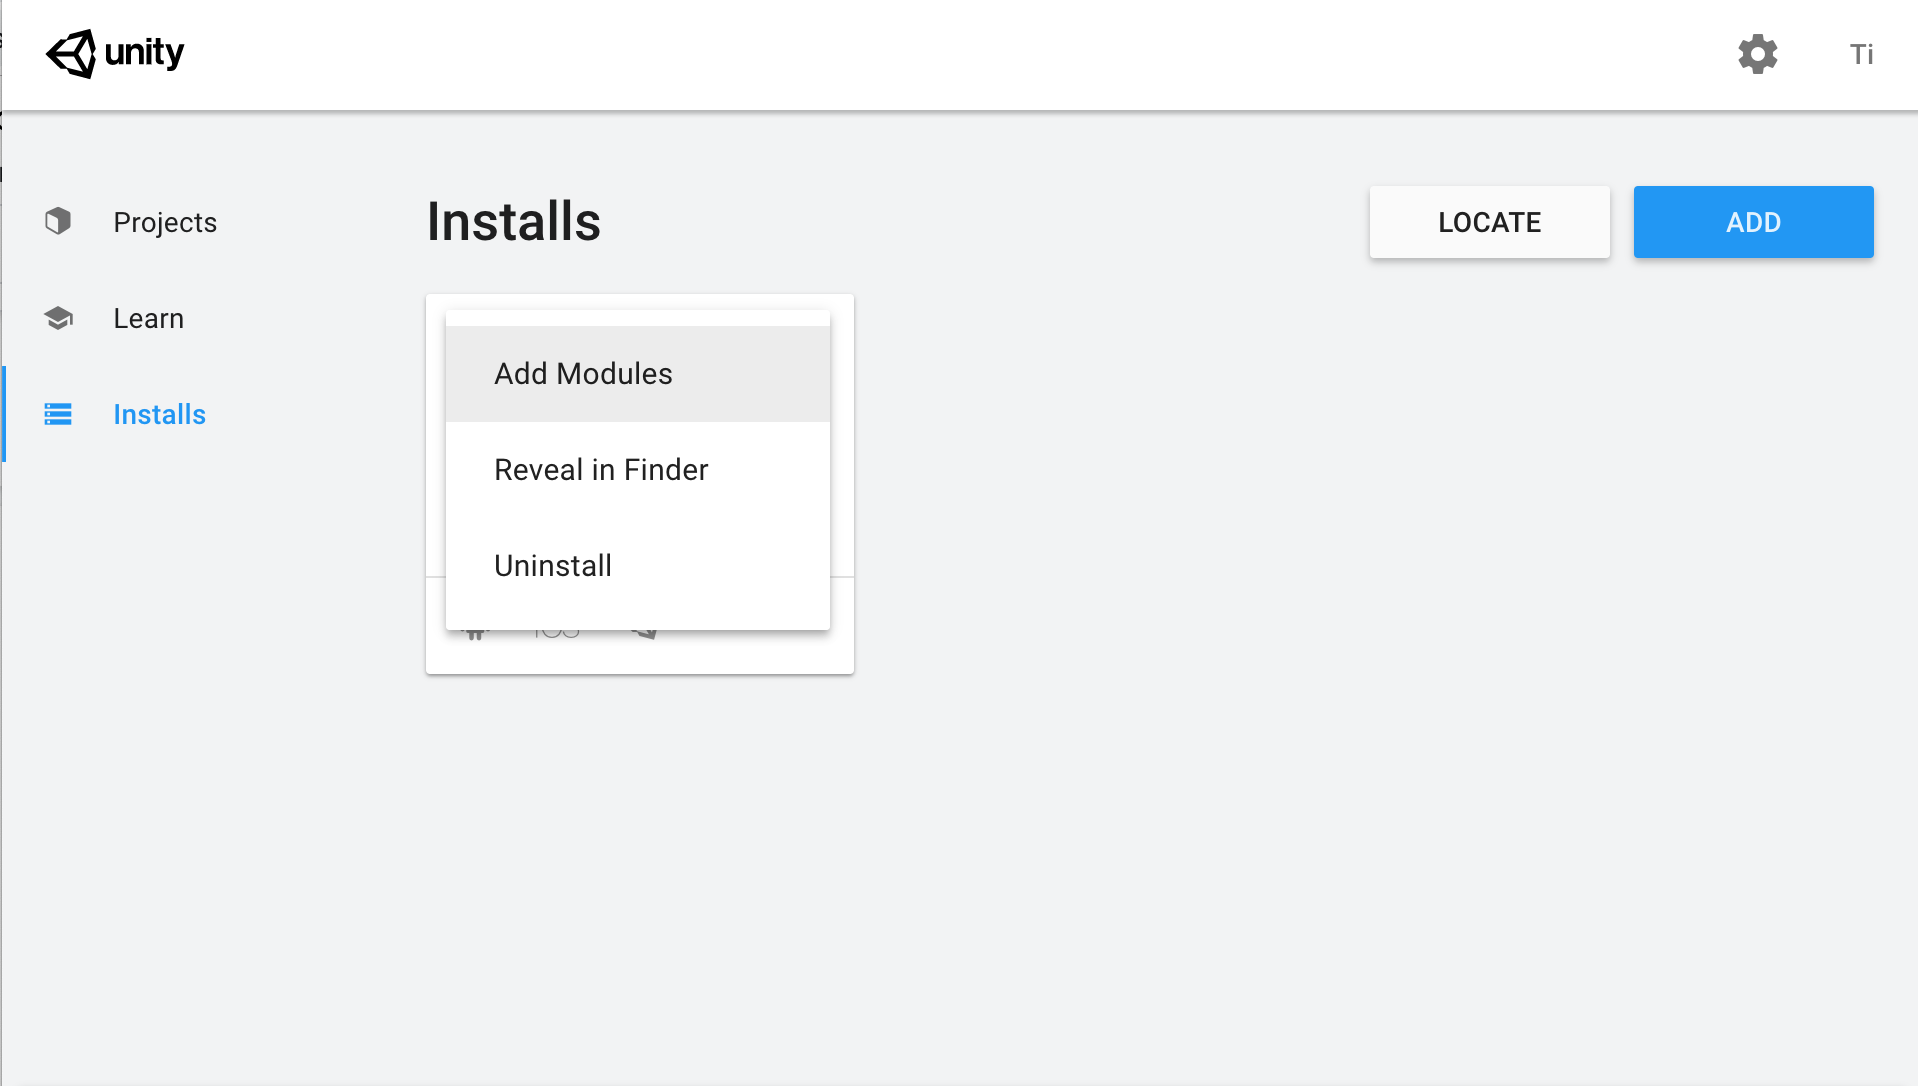
3. Use the Unity Hub to install an Android Build Support and the required Android SDK and NDK tools. For information on adding the Android components at install time, see Adding Components (Figure 09).
4. If you prefer to download your own Android SDK and NDK, refer to the Android Environment Setup documentation for additional steps.

6. Enable USB debugging on your device
Enabling USB debugging allows the Unity editor to receive information pertaining to the application that is running on your phone or tablet. It allows you to take full use of the debugging tools available within Unity, including the Profiler and Console.
1. First, enable Developer options on your device. You must do this before enabling USB debugging.
a. To do this, find the build number in your device’s Settings menu. The location of the build number varies between devices; for stock Android, it’s usually
Settings > About phone > Build number. For specific information on your device and Android version, refer to your hardware manufacturer.
2. After finding the build number, tap on it seven times.
Note: A pop-up notification saying “You are now X steps away from being a developer” will appear, with X being a number that counts down with every additional tap. On the seventh tap, Developer options are unlocked. Note: On Android versions prior to 4.2 (Jelly Bean), the Developer options are enabled by default.
3. To enable USB debugging, go to Settings > Developer options and check the USB debugging checkbox. Android will now enter debug mode when it’s connected to a computer via USB.
4. Connect your device to your computer using a USB cable. If you are developing on a Windows computer, you might need to install a device-specific USB driver. See your device manufacturer’s website for additional information.
7. Honorable Mention: Ensure ARCore is update to date (if using ARCore)
If you are building an AR application with ARCore, make sure Google Play Services for AR is up to date on your Android device. If it’s not, the application may not ask for camera permissions and, in turn, will not use your camera.
1. Search for and locate Google Play Services for AR in Google Play.
2. Ensure the Google Play Services for AR version installed on your device is up to date.
8. Conclusion
And that’s it! Great work on setting up your developer environments for both iOS and Android. It takes quite a few steps to set everything up, but thankfully you will only need to do this once. You are now ready to deploy your builds to your target devices.