Setting up the Play Area
Tutorial
Beginner
+10XP
10 mins
7236
Unity Technologies

In this tutorial, you’ll configure the play area for your game by:
- Creating and configuring one wall
- Duplicating and placing it to create a contained game area
Materials
Languages available:
1. Overview
In this tutorial, you’ll configure the play area for your game by:
- Creating and configuring one wall
- Duplicating and placing it to create a contained game area
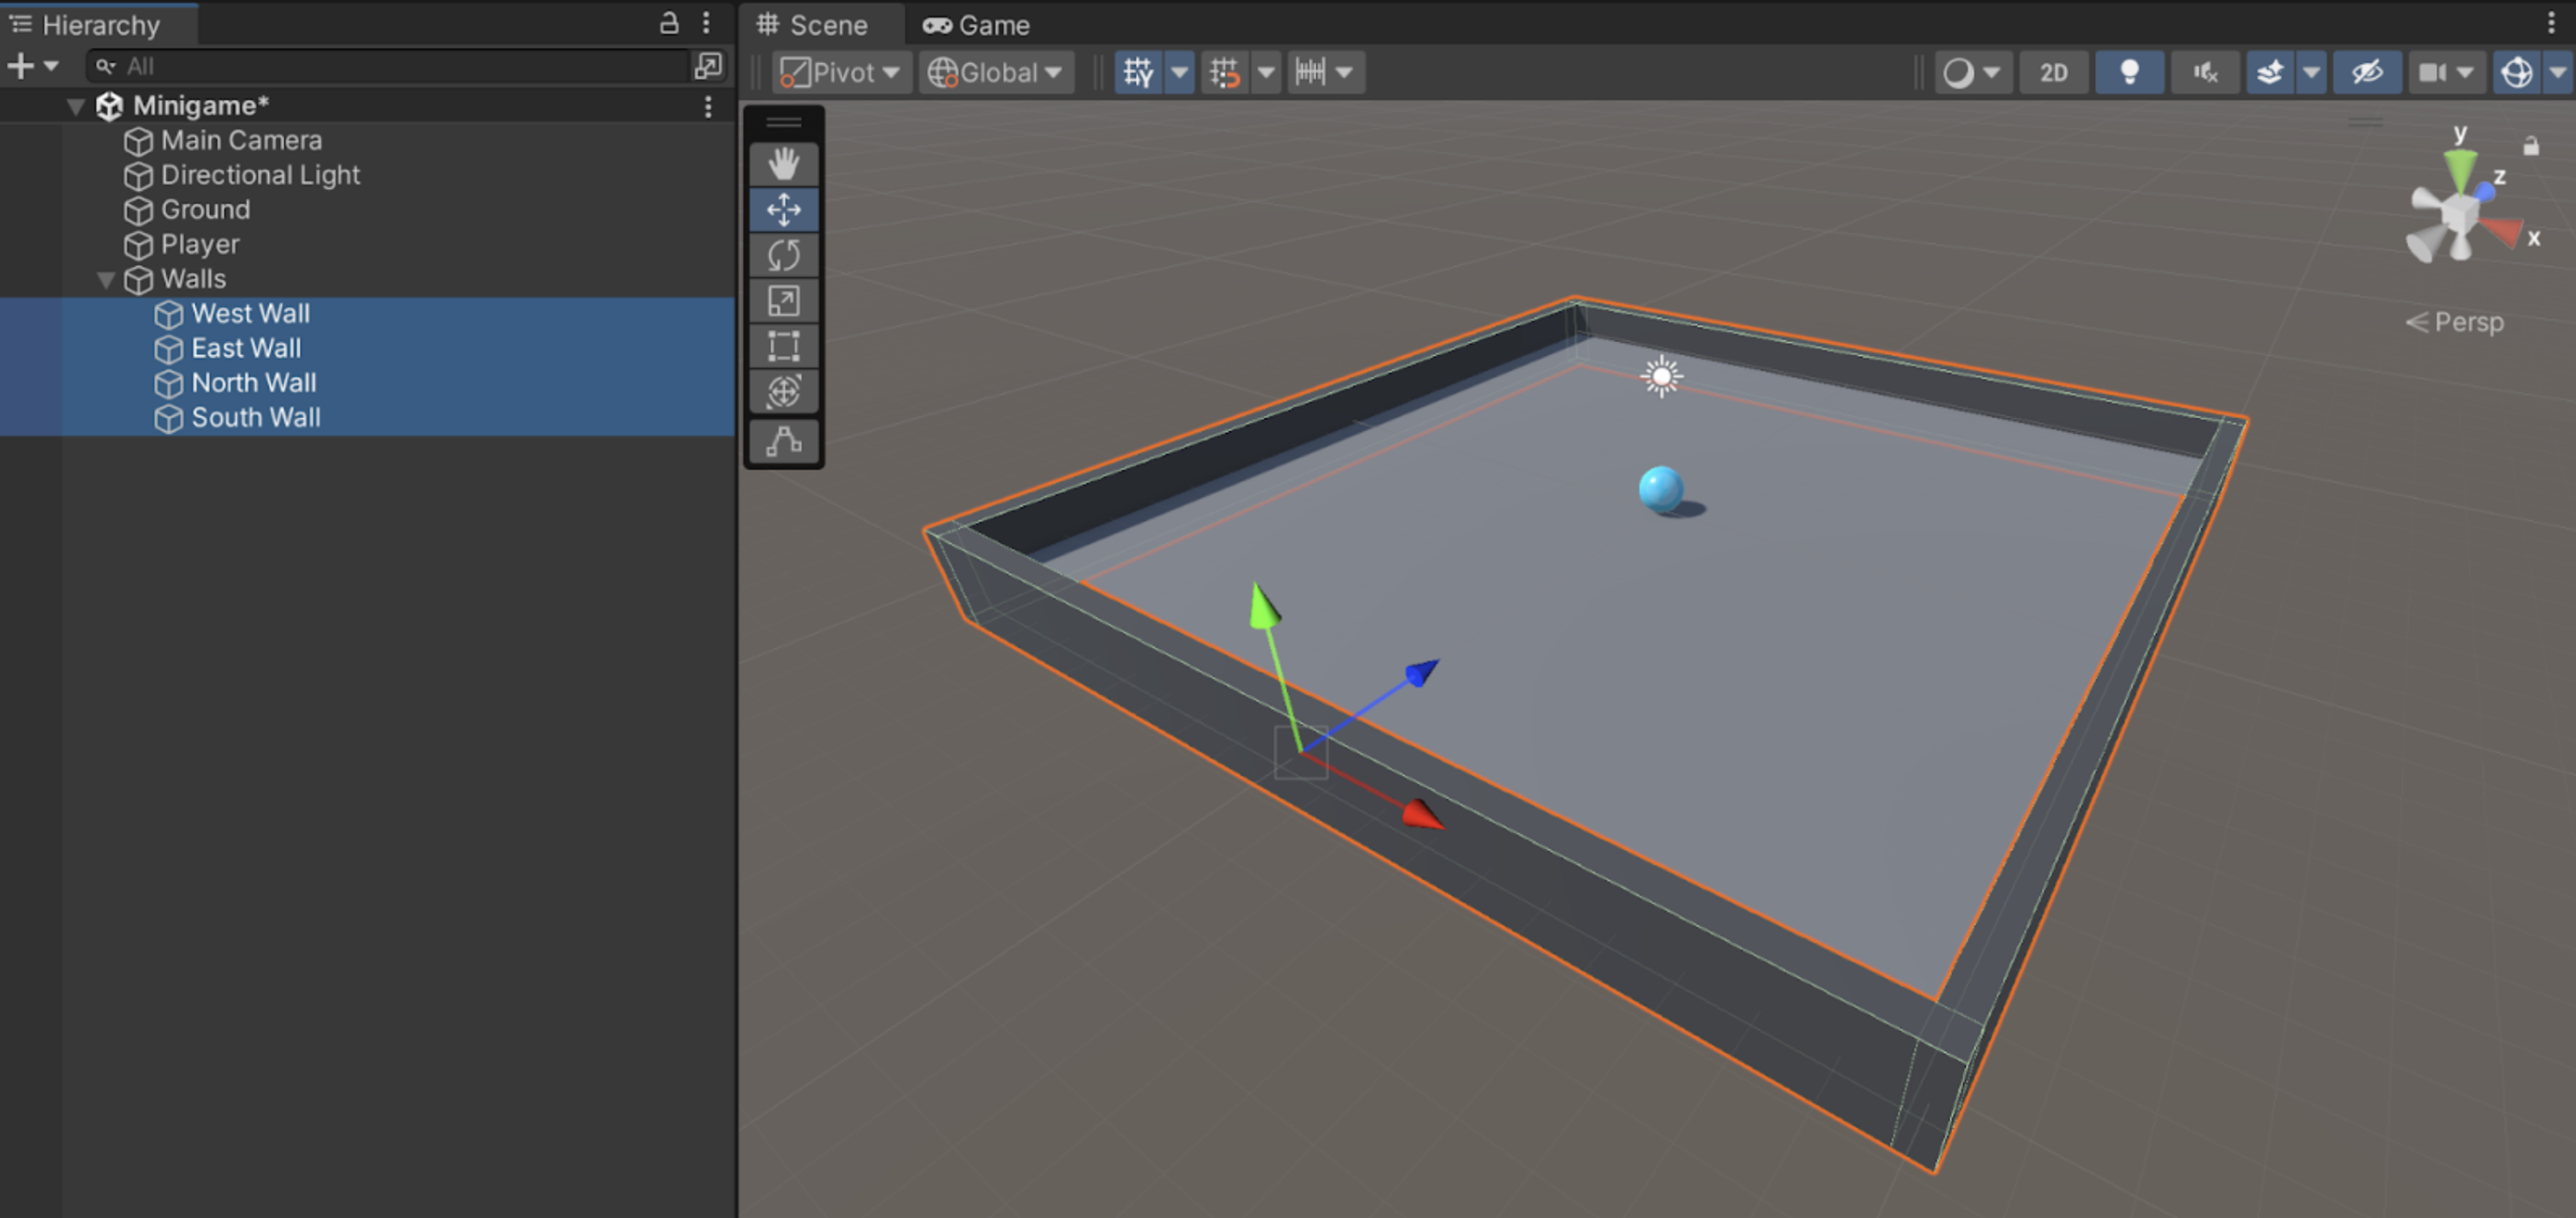
By the end of this tutorial, your game will look something like this:
2. Create a wall for the play field
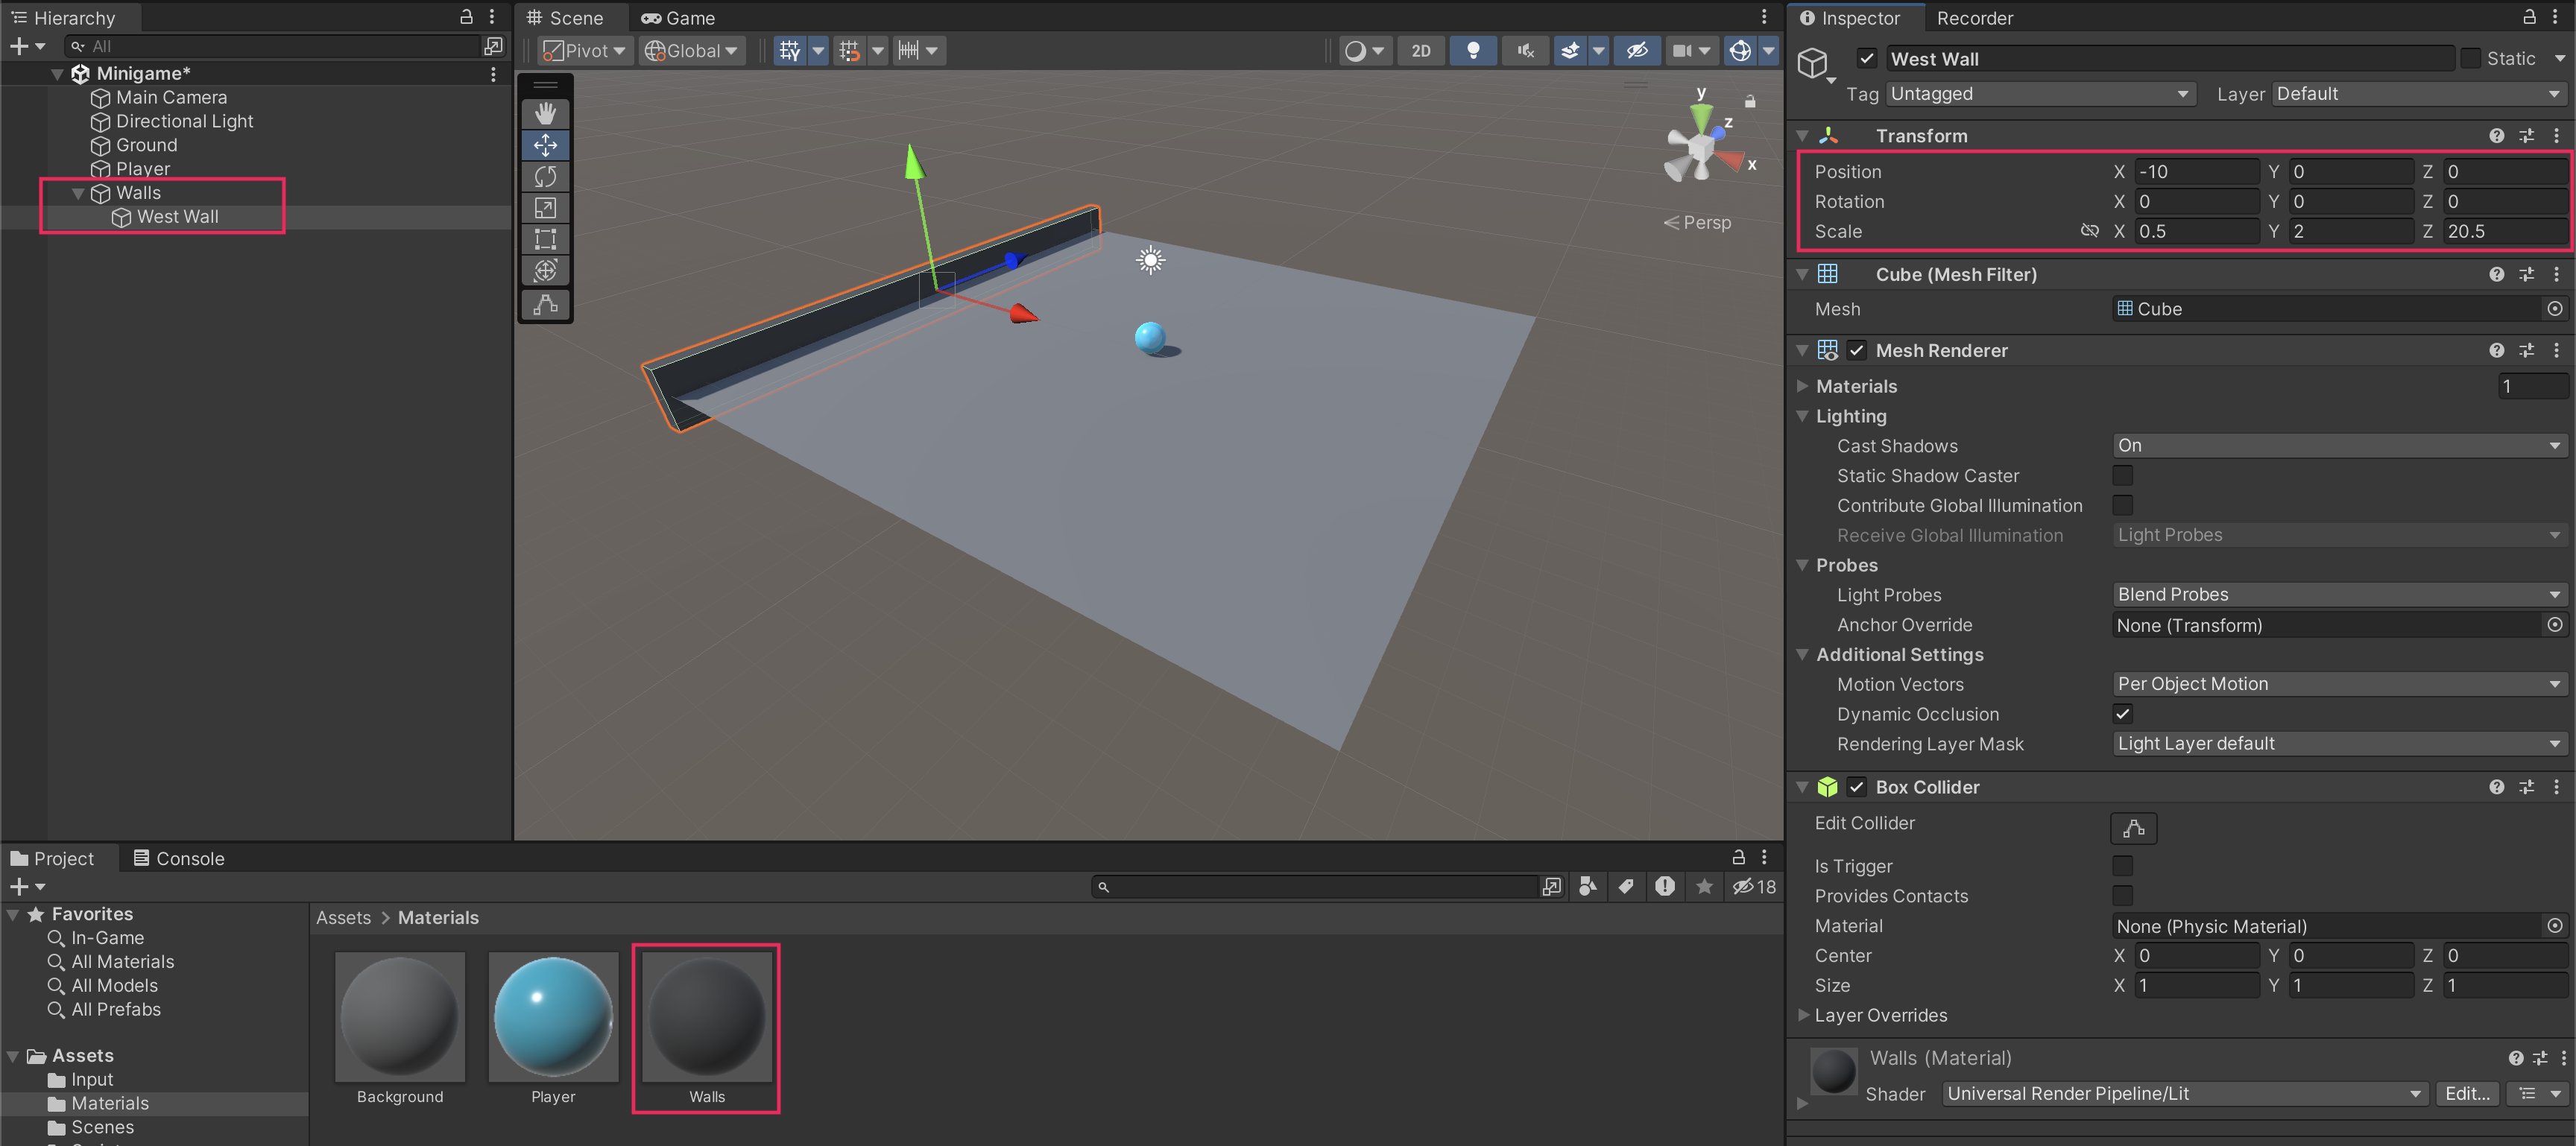
Follow the video or text instructions below to create an empty parent GameObject, create a Wall child GameObject, set the Wall GameObjects’s transform values, and create a material for the Wall GameObject:
1. Create an empty parent GameObject.
- In the Hierarchy window, right-click > Create Empty, then rename it “Walls”.
- In the Inspector window, reset its Transform component.
2. Create a Wall child GameObject.
- In the Hierarchy window, right-click > 3D Object > Cube, then rename it “West Wall”.
- In the Inspector window, reset the West Wall GameObject’s Transform component.
- Drag the West Wall GameObject onto the Walls GameObject. This makes the West Wall GameObject a child GameObject of the Walls GameObject.
3. Set the Wall’s transform values.
- Press the F key while the cursor is over the Scene view to frame the West Wall GameObject in the view.
- In the Inspector window, change the wall’s Transform Scale values to X=0.5, Y=2.0, Z=20.5.
- Set the Transform's Position X value to -10.
- This places the West Wall GameObject neatly on the edge of the play area.
4. Create a material for the walls.
- In the Project window, go to the Materials folder, then right-click > Create > Material.
- Rename this new material “Walls”.
- In the Inspector window, select the Base Map color field to open the color picker, then set the RGB values to 79, 79, 79 for a darker gray.
- Set the Metallic Map to 0 and change the Smoothness to 0.25, for a matte finish.
- Drag the Walls material from the Project window onto the West Wall GameObject in the Scene view.

3. Finish the play field walls
Follow the video or text instructions below to create the East wall, the North wall, and the South wall, then test the game:
1. Create the East wall.
- Right-click the West Wall GameObject and select Duplicate.
- Rename the new GameObject “East Wall”.
- To reposition the wall, remove the negative sign in the Position X value of the Transform component.
2. Create the North and South walls.
- Duplicate the East Wall GameObject and rename the duplicate “North Wall”.
- Set the Rotation Y value to 90.
- Set its Position X value to 0 and its Position Z value to 10.
- Duplicate North Wall GameObject, rename it “South Wall”, and set its Position Z value to -10.

3. Test the game.
- You should now be able to roll around and bump into the walls.
- If the ball is going through the walls, make sure that the IsTrigger property in the Collider component is disabled.