[Android] Setting up your Android device for AR development
Tutorial
Beginner
+10XP
20 mins
438
Unity Technologies
![[Android] Setting up your Android device for AR development](https://connect-mediagw.unity.com/h1/20201105/learn/images/3ace07f9-1509-470d-808b-5e162d013482_63.png)
In this tutorial, you will learn how to connect your android device and deploy a simple AR Project that uses the mobile camera.
Languages available:
1. Overview
In this tutorial, you will connect your Android device to your computer and configure your device for development. Finally, you will export your Project to your device and see your camera view.
2. Connect your Android Device
Enable a USB connection from your device to computer
- NOTE: These steps may vary based on the type of Android device you are using
- Connect your Android device to your computer’s USB port.
- NOTE: if your computer is not recognizing your phone, make sure you have the necessary device drivers. You can also swipe down your phone screen and see if there is an option that says “Charging this device via USB”. If you see this option, tap on it (Figure 1)
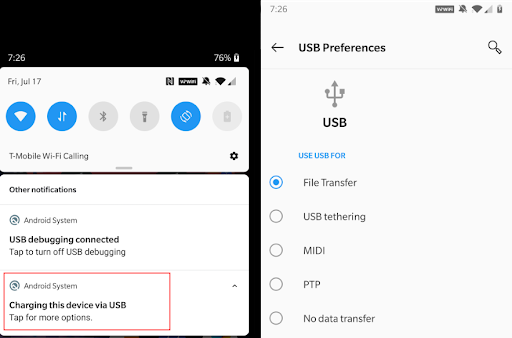
- Select the File Transfer option (Figure 2)
- NOTE: If you are unable to connect to your phone, check out these guides
3. Enable USB Debugging
Enable USB debugging on your device
1. These steps may vary based on the type of Android device you are using. But in general, the following steps should enable USB Debugging:
a. Go to your phone’s Settings
b. Tap on About Phone
c. Tap on Build Number 7 times
d. Go back to the Setting’s main page
e. Tap on System
f. Tap on Developer Options
g. Enable USB debugging
4. Save the Unity Project Build
Save your Unity Project to export it to your device
1. Go back to the Unity Editor
2. Click on File > Build Settings
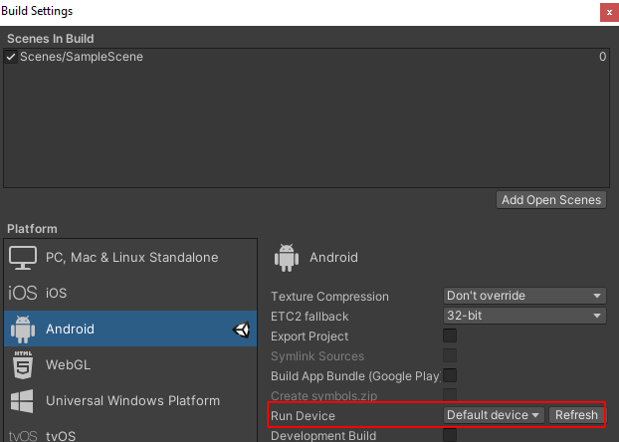
3. Click on the Refresh button
4. Click on the drop down menu next to Run Device and select your Android device (Figure 3)
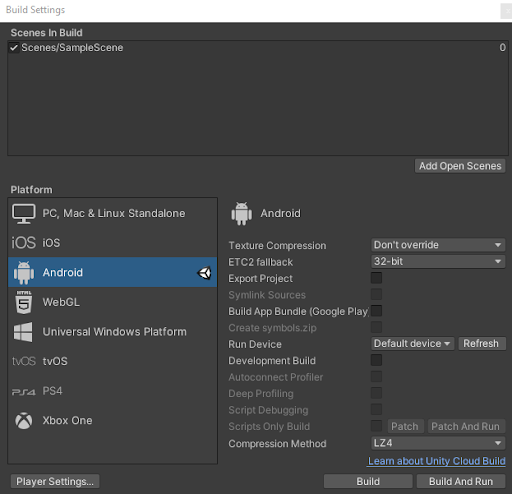
5. Click on the Build and Run button (Figure 4)
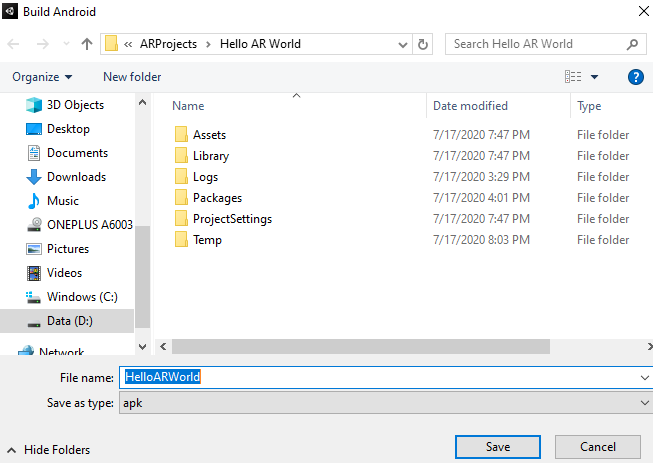
6. You will be prompted to save an apk file. You can save this file in the default location and enter any name. For example, “HelloARWorld”. Click Save (Figure 5)
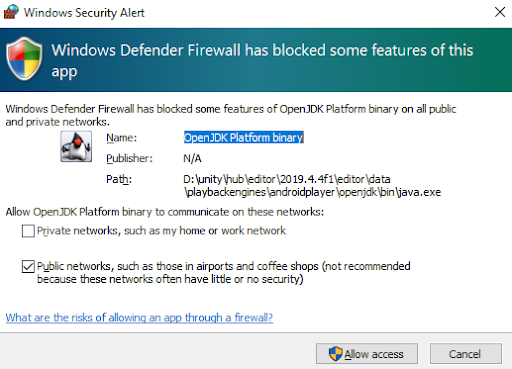
7. Note: If a pop window for security reasons appears, click on the Allow access button (Figure 6)
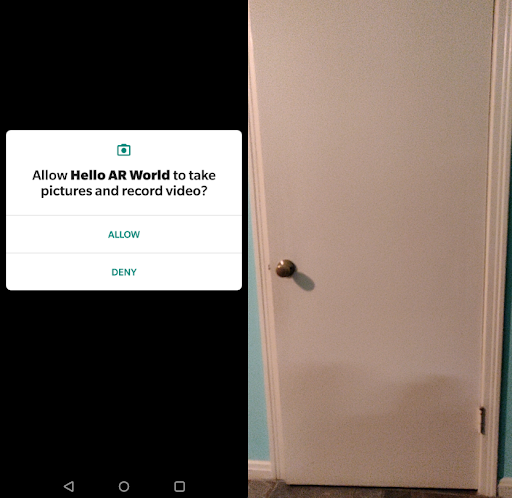
8. If you do not see any errors, the Hello AR World application will run on your device. Your device may ask you to allow the application to take pictures and record video. Tap on Allow. (Figure 7)
5. Conclusion
You have learned how to connect your android device to your computer, enable USB debugging, and save/build your Project to your device.