
ShaderLab: Anatomy of a Shader
Tutorial
Beginner
+10XP
20m
(197)
Unity Technologies
In this tutorial, you will learn the Anatomy of a High-Level Shading Language (HLSL) Shader.
Languages available:
1. Anatomy of a Shader
Verified with Unity 2019.4 LTS
When writing Shaders, it’s crucial to understand the parts that compose their functionality. In this tutorial, we will be creating the “Hello World” of Shaders: an unlit Shader with a color input. By the end of this tutorial, we will be able to use this Shader to apply an RGB color to an object.
Any Shader can be broken down into the following blocks (Figure 01):
- Properties: These are similar to the user-defined global (or uniform, per OpenGL) variables that will be used to drive the functions within the Shader.
- SubShader: This block is similar to a Main() function, it is where the Shader’s logic and operations are performed. It usually consists of multiple functions.
- Fallback: In the event that a Shader can not run on the target system, this path directs Unity to an alternative (often less complex) Shader instead.
The string that follows the Shader keyword is the path of the Shader.
We can access this Shader by creating a Material, then assigning the Shader to it by navigating to Custom > NewUnlitShader in the Shader drop-down.
Let’s demonstrate this now:
1. Right-click in the Project window and navigate to Create > Material (Figure 02).
2. Select the Material and in the Inspector window, navigate to Shader > Custom > NewUnlitShader (Figure 03).
3. To visualize our changes, create a new GameObject (an ordinary Cube will do) and orient it within your Scene. Then apply the new Material to it (Figure 04).
Unlit Shaders do not take lighting into account, hence the flat appearance of our cube. Usually, Unlit Shaders are reserved for UI elements or highly artistically driven objects that do not rely on mathematical shading models to compute lighting.
We must explicitly define properties in our Shader so they can be modified in the Inspector.
To add a user-defined property to our property block, we must follow the following syntax (Figure 05).
The property we want to add will be responsible for defining the Shader’s primary color (or tint if it’s used to influence other Shader properties, such as Textures).
4. Next we will add a color value to our property block (Figure 06).
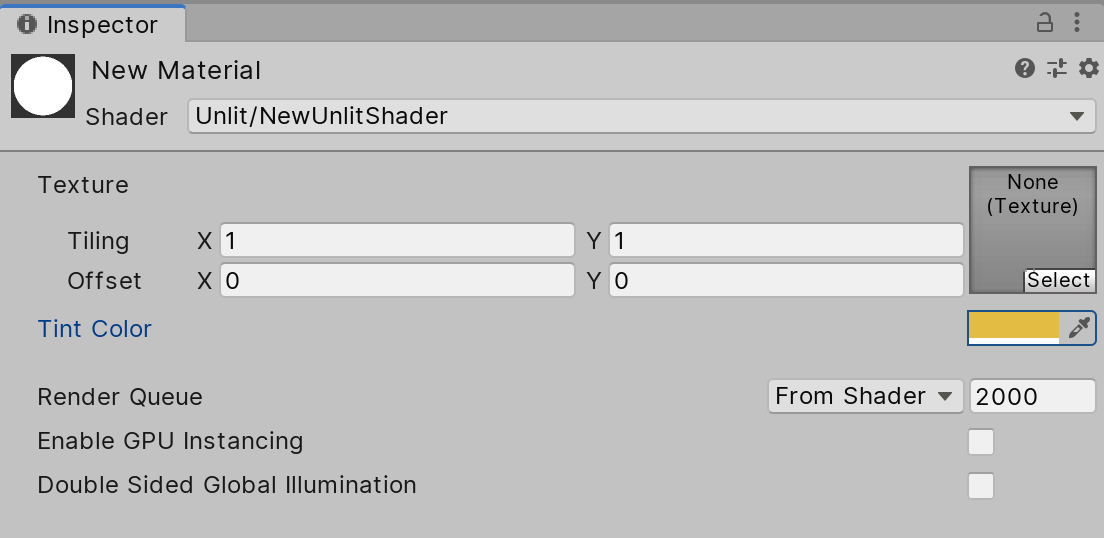
If we save the Shader and return to the Material in the Inspector, you will notice that the tint color property has appeared (Figure 07).
Currently, it doesn’t do anything as we haven't told the Shader how to use it. We will address this now:
5. Above the SubShader block, create a variable for the _Tint property we declared earlier (Figure 08).
6. Navigate into the SubShader block then to the fixed4 frag function. The frag function is responsible for calculating the final color output of our Shader (Figure 09).
We want to pay attention to the fixed4 col variable. This variable defines how the color will be calculated and is returned at the end of the function to display the results to the screen.
Currently, the variable stores the color and UV information of a Texture. The return call then displays this Texture on the surface. When a Texture is not defined in the Inspector, it will default to the color white. We want to have our tint color property influence the color of the Texture as well.
7. Multiply the value in the col variable by _Tint (Figure 10).
After modifying the tint color and Texture in the Inspector, we can view the results on our cube in the Scene view (Figure 11).
2. Conclusion
Shaders can help you create various looks for the surfaces in your project. We’ve taken a very simple look at the process in this tutorial. For a more in-depth look on how Shaders in Unity are written, please refer to the documentation on Writing Shaders.