
ShaderLab: Introduction to Shaders
Tutorial
Beginner
+10XP
15 mins
(398)
Unity Technologies
In this tutorial, you will learn the basics of High-Leveling Shader Language (HLSL) Shaders.
Languages available:
1. What is a Shader?
Verified with Unity 2019.4 LTS.
A Shader is a program that runs on the GPU to define how objects are rendered on screen. This program requires several inputs to process an output—sometimes via multiple passes or “steps.” These inputs vary depending on the type of shader you wish to create:
Surface Shaders: What we primarily think of when we discuss Shaders. They are responsible for defining the surface detail of objects, such as reflection, refraction, and texture blending.
Vertex Shaders: Displaces the vertices of geometry. When combined with time, these can be used to produce procedural animations.
Compute Shaders: Instance many (sometimes millions of) objects to simulate crowds, vegetation, and various other simulations.
Geometry Shaders: Tessellate existing geometry to provide higher resolution detail to models.
In this tutorial, we will be creating a Standard Surface Shader and assign it to a new Material. In Unity, Materials are what link Shaders to objects.
2. Creating a Surface Shader
1. Right-click in the Project window and navigate to Create > Shader > Standard Surface Shader (Figure 01).
Once created, you should have a new Shader in your project (Figure 02).
Once we have created our Shader we can assign it to a Material.
3. Creating a Material
1. Right-click in the Project window and navigate to Create > Material (Figure 03).
Alternatively, you can right click on the Shader and select Create then Material.
Once created, you should have the following Material Asset in the project (Figure 04).
2. Select the Material and view it in the Inspector (Figure 05).
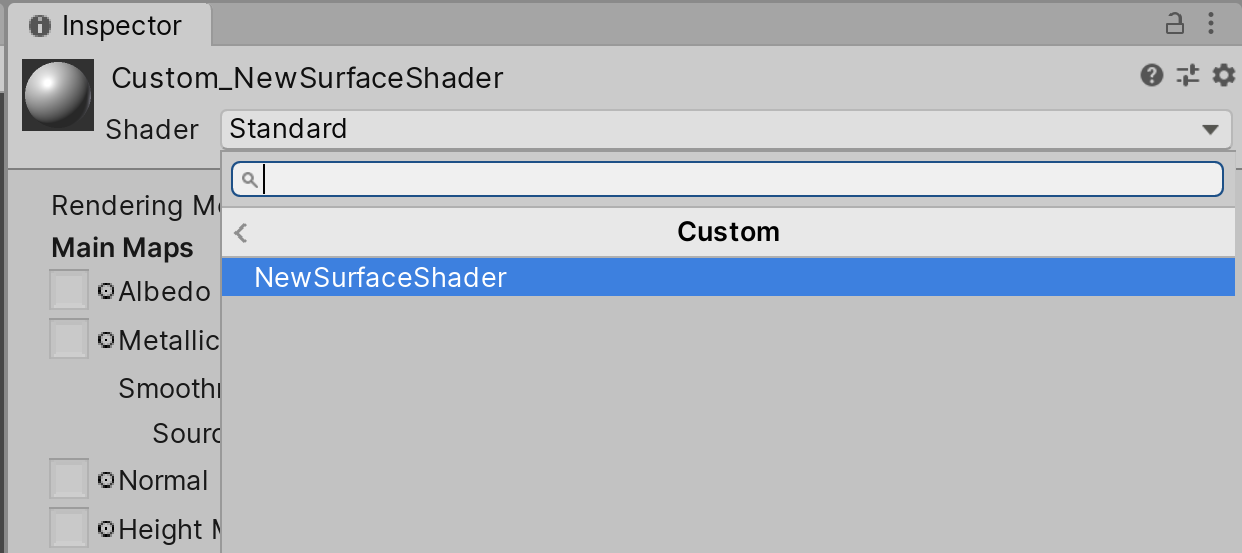
3. In the Material Inspector view, click on the drop-down next to Shaders (Figure 06).
4. Select the Shader to use by navigating to Standard > MyShaders > MySurfaceShader (Figure 07).
4. Conclusion
In this tutorial, you’ve learned how to create a Shader and assign it to a Material. Now, experiment with how Shaders can be used for a variety of effects by selecting different Shaders from the Shader drop-down. In order to view the results, you must assign the Material to a GameObject in the Scene. From here, you should be prepared to learn how to write different types of Shaders such as the ones outlined above.