VR Snap Zones (using VRTK)
Tutorial
Beginner
+10XP
45 mins
114
Unity Technologies
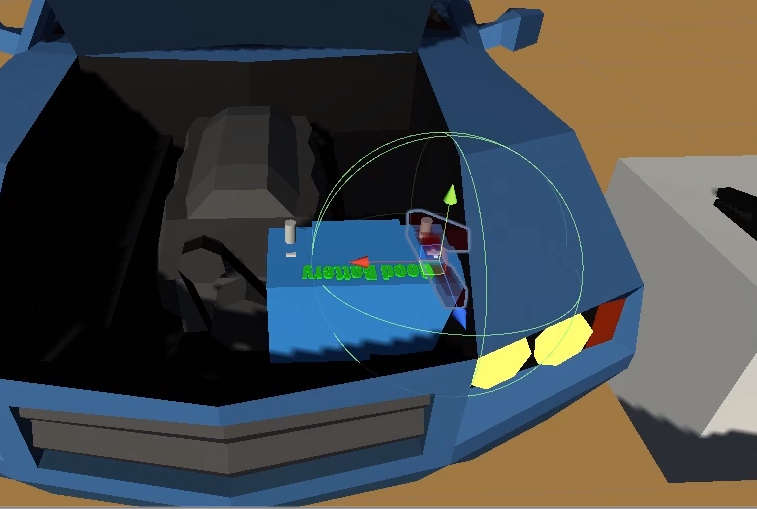
A Snap Zone (or "Snap Drop Zone") is a designated area where you can place an object near it, illuminating a shape to indicate you can place it there. Upon releasing the held object, it will "snap" into place.
This is handy for guiding the player on where certain objects should be placed, and also allows us to only allow certain objects to be dropped in the Snap Zone.
Languages available:
1. New Snap Zone Testing

- Navigate in the Project folder to Assets > VRTK > Prefabs > Interactions > InteractableSnapZone, and drag the prefab into the scene, off to the side (any empty space)
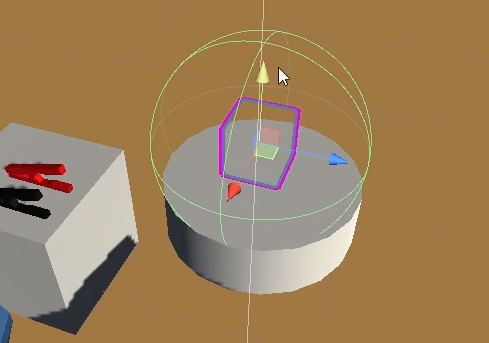
- To remind ourselves where the SZ is, insert a Cylinder to use as a table (GameObject menu >3D Object > Cylinder), and move it to table height near the SZ.
- Ensure the SZ is directly above the cylinder.
2. SZ Activation Area
- In the Hierarchy, expand the InteractableSnapZone and select Activation Area.
- Locate the Sphere Collider in the Inspector. This is the Activation Area. Try changing the value to 0.2
- Play test to see that you now must place an object much closer before the SZ activates.
3. Changing the Snap Zone Highlight Mesh
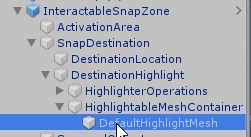
- In the Hierarchy, Expand InteractableSnapZone > SnapDestination > DestinationHighlight > HighlightableMeshContainer and select DefaultHighlightMesh
- In the Inspector, locate the Mesh component. Select the target circle and select the Clamp mesh.
- Optional: Change scale to 0.5, 0.5, 0.5.
4. Changing Highlight from Outline to Translucent
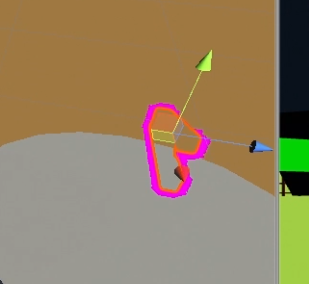
- With DefaultHighlightMesh still selected, locate in the Inspector the SnapZoneHighlight component.
- In the Shader dropdown, choose Standard.
- Click the color box to optionally change the color, and drag the slider marked "A" (for alpha, meaning transparency) to alter how "see-through" the highlight is. I chose 41.
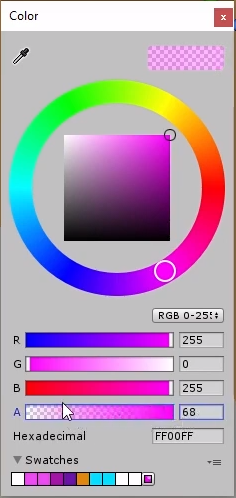
5. Transition,Scale, and Rotation of SZ's
- In the Hierarchy, select the parent InteractableSnapZone. In the Inspector, modify the Transition Duration to 0.5. This means when let go, an object will take a half second to float into position.
- To experiment with Scale and Rotation, select in the Hierarchy InteractableSnapZone > SnapDestination > DestinationLocation. Modify the Transform values in the Inspector. (These are just to see the effect, use any values you want) I used Scale: 5,5,5 Rotation: 70,70,70
- In play testing, you'll notice that a clamp dropped in the SZ results in a HUGE clamp at a strange angle. Now we just need to control that.
6. Snap Zone Validity
Some Housekeeping first:
- In the Hierarchy, rename the red and black clamps closest to the Good Car as "RedClampGood" and "BlackClampGood" respectively.
- Rename the 2 clamps by the Dead Car to "RedClampDead" and "BlackClampDead".
- Reset the DestinationLocation Transform values back to their original values (Scale 1,1,1)
To only allow the Red Clamp to be dropped in the SZ, ignoring all other objects:
- Select the InteractableSnapZone. In the Inspector, Add Component called "List Contains Rule"
- Add another component called, "Unity Object Observable List" to hold the list of objects that can be dropped in the SZ.
- At the bottom of the "Unity Object Observable List" component, change the Element size from zero to one.
- Drag the RedClampGood from the Hierarchy into the Element 0 field.
- Drag the "Unity Object Observable List" onto the Objects field on the "List Contains Rule" component.
- Now Drag the "List Contains Rule" into the Snap Validity field on the "Snap Zone Facade" component.
- Play testing will show that the SZ ignores the black clamp, but activates for the RedClampGood.
7. Positioning the Red SZ
- Duplicate our test InteractableSnapZone, naming one "Test SZ", and the other "GoodRedSZ".
- Move the GoodRedSZ into position on the positive terminal of the Good Battery (rotating it -90 on the Y. I also rotated the Z about 13 degrees)
- In the Hierarchy, in GoodRedSZ > Activation Area, reduce the radius to about 0.25.
- Change the DefaultHighlightMesh to a Red color (if you didn't already in the previous step)
The result lets us drop the Red Clamp into position...but the scale and position are off! We'll fix that next.
8. Positioning in Play Mode
- Enter playmode, and drop the RedClampGood onto the battery. It's too big and positioned wrong! DON'T EXIT PLAY MODE.
- In the Hierarchy, withing the GoodRedSZ > Snap Destination > DestinationLocation, scrub the values of the position and scale to make it appear as realistic as possible. I used values: Position X- .11 Scale: .5, .5, .5
- Exit play mode.
- The values changed in play mode are reverted back, but you can now enter them back in and they will stay.
9. Duplicate Red to Black SZ
- Duplicate the GoodRedSZ, and rename to "GoodBlackSZ".
- Move it over on the negative side of the battery
- In the Hierarchy, Expand InteractableSnapZone > SnapDestination > DestinationHighlight > HighlightableMeshContainer and select DefaultHighlightMesh
- Change the Albedo color to Black
- Select the root "GoodBlackSZ" and in the component called "Unity Object Observable List" Drag in the BlackClampGood, replacing the RedClampGood.