
Swapping Materials at Runtime
Tutorial
intermediate
+10XP
15 mins
Unity Technologies
In this tutorial we’ll explore how to swap an object’s Materials at runtime via a C# script.
Resources
Languages available:
1. Introduction
In this tutorial we’ll explore how to swap an object’s Materials at runtime via a C# script.
Materials can be manually changed in a Scene just like any GameObject (Note that Materials changed during runtime will revert back to the original after the project ends). Materials manually changed in the Editor will remain unless the Reflect project is updated, in which case it will revert back to the Materials imported from Revit.
Changing Materials at runtime allows you to build functionality that can highlight certain design decisions or the current status of an object in the viewer and is a more scalable approach than manually changing objects.
For this tutorial, you will need:
- The Reflect viewer project from Github
- A Pro license for the Unity Editor
- The Unity custom package SwappingMaterials.unitypackage that forms part of this tutorial.
2. Setting Up
1. Download and open the Unity Reflect viewer project from Github (Figure 01).
3. Adding the Script to the Scene
1. Create a new empty GameObject in the Scene Hierarchy by right-clicking and selecting Create Empty (Figure 02).
2. Rename this new object to “ChangeMaterials” (Figure 03).
3. Drag the SwapMaterials.cs script from Assets > Scripts onto the new ChangeMaterials object (Figure 04).
4. With ChangeMaterials selected in the Hierarchy, go to the Inspector. You will see that there are two slots in the newly applied script, one for Category To Change and one for New Material (Figure 05). The Category To Change slot is where you specify which category of object will be changed. This can be hardcoded into the script if you want, but this way you can experiment with it. The New Material slot is where you specify which Material will be applied as an override at runtime. You can create your own Material or use the RedMaterial provided in the Assets folder. To apply the Material, you drag into the New Material slot.
5. Run the Reflect viewer and open any of your projects.
6. While the project is running, type in a category of object you would like to override. Note that the category needs to match the spelling and case exactly as it is in your Revit project.
7. Right-click on the script component gear icon and select Change Materials (Figure 06).
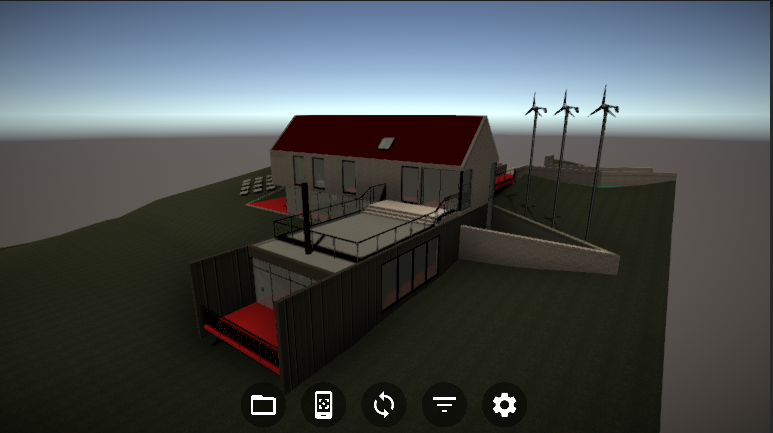
8. Your model will now update to reflect the new Material applied to all objects of your specified category. In the example below, the RedMaterial was applied to all objects of the category Floors (Figure 07).
4. Understanding the Script
The script used in this project is extensively commented to allow you to understand what each step does. Open it and read through the comments to gain a better understanding of how everything fits together.
As a general overview, the script takes the loaded model and iterates through everything to build a list of all the metadata. It then finds all the objects that have the specified metadata key — in this case it’s “Category.”
The script then loops over the list. When it finds an object with the category, it applies the new Material.
5. Next Steps
You should now have an understanding of how to access the metadata of a loaded object. The script could be linked to a button in the Scene by creating a new UI element, but it should be run only after the complete model is loaded. Running it early may result in some objects being missed.
Selecting objects by metadata is a powerful option that will allow you to customize your Reflect applications.