
The Package Manager
Tutorial
Beginner
+10XP
10m
(246)
Unity Technologies
Prior to Unity 2018.2, official Unity packages, including features such as engine extensions, were located in many different places such as Github and the Asset Store. Unity decided to make these packages centrally located and created the Unity Package Manager.
In this tutorial, you'll learn how to use the Package Manager so you can customize Unity with exactly the functionality you need.
Languages available:
1. The Package Manager Intro
If you are using Unity 2019.3 or above, click here.
2. What is the Package Manager?
Prior to Unity 2018.2, official Unity packages, including features such as engine extensions, were located in many different places such as Github and the Asset Store. Unity decided to make these packages centrally located and created the Unity Package Manager. The Unity Package Manager is used to view which packages are available for installation or already installed in your project (Figure 01). In addition, you can use this window to install, remove, or update packages for each project.
A package is a container that holds any combination of Assets, Shaders, Textures, plug-ins, icons, and scripts that enhance various parts of a project. Unity Package Manager packages are newer, more tightly integrated versions of Asset Store packages, able to deliver a wide range of enhancements to Unity.
3. Opening Package Manager
Instead of searching the Asset Store to locate a Unity Packages for a Project, we can navigate to the Package window to view Packages we wish to install or remove from our Project.
1. From the Window dropdown select Package Manager (Figure 02).
2. The Package Manager window launches (Figure 03).
3. You can now dock the window in the Editor.
4. Finding Packages
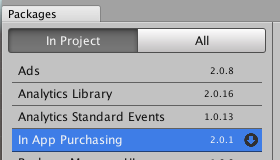
In the left pane The Package Manager lists Packages from the dropdown arrow, In Project and All packages. The In Project dropdown lists all the Packages currently installed in your Project, and the All packages dropdown lists Packages available to install (Figure 03).
When selecting a Package in either the In Project or All tab, the right pane of the Package Manager will display details about the selected package. Details include: Name, Version number, Links, Author, Published Date, Install and Remove buttons.
5. Installing, Removing and Updating Packages
To install a package:
1. Select the package name in the All packages dropdown arrow in the left pane.
2. Select the Install button in the right pane (Figure 04).
To remove a package:
1. Select the package name in the In Project dropdown menu in the left pane.
2. Select the Remove button in the right pane (Figure 05).
To update a package:
1. Select the package name in either the All packages or In Project dropdown menu in the left pane.
2. Select the Update to x.x.x button in the right pane (Figure 06).
The Package Manager now makes it quicker and easier to locate, install and manage additional features and tools, for all your production requirements.