
UI Navigation - 2019.3
Tutorial
Beginner
+10XP
15m
(218)
Unity Technologies
In this tutorial, you will learn how to set-up UI Navigation within your project.
Languages available:
1. UI Navigation
This tutorial has been verified using Unity 2019 LTS
UI components in Unity have an implicit order and flow. To explore this, let’s break down a simple in-game menu (Figure 01).
UI navigation essentially defines the spatial relationship between components. It’s the “flow” of UI components when using any non-pointer or touch-based device, such as a keyboard or gamepad. For instance, in the example above, if a user were to begin at “Resume,” a flick of a joystick to the right or a tap on the right arrow key would advanced them to “Options,” then “Audio,” then “Graphics,” then “Input,” and, lastly, “Quit” before cycling back to “Resume.”
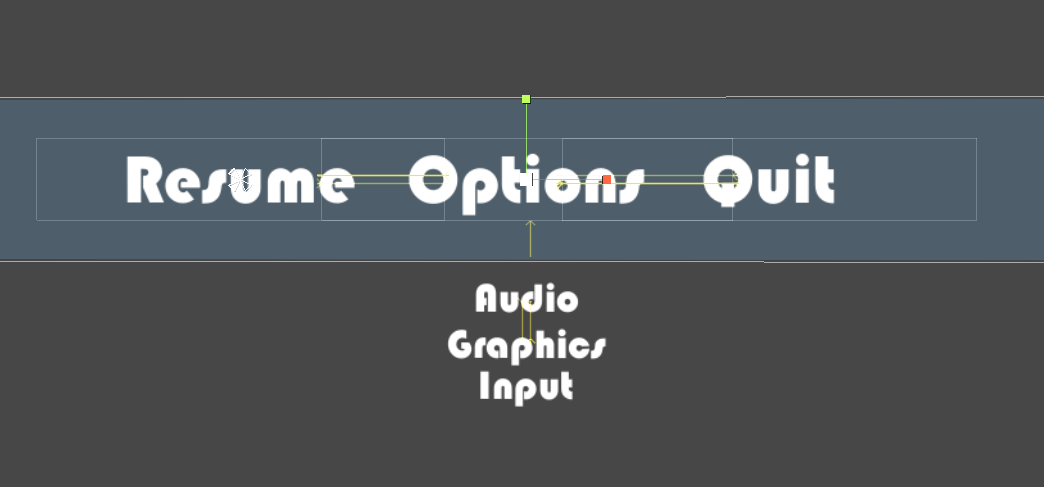
Unity automatically creates this intuitive navigation flow (Figure 02).
2. Setting Navigation Properties
Navigation properties are available on every interactable component within your UI. When you click on a UI component in the Inspector, you will see that Navigation is set to Automatic by default. This produces the behavior illustrated above.
1. Click the drop-down menu next to Navigation and explore the various options for the selected component. To view the flow diagram, toggle the Visualize button beneath the drop-down (Figure 03).
There are five navigation modes in Unity:
Horizontal: Restricts navigation to the horizontal axis.
Vertical: Restricts navigation to the vertical axis.
Automatic: Attempts to achieve an intuitive navigation relationship between components.
Explicit: Maps out exactly which components should lead to each other.
None: No keyboard or joystick navigation.
While Unity’s predictive navigation works by default, a user could inadvertently navigate to an undesired component in this current setup. We can more clearly define this UI’s navigational relationships based on its layout.
2. Set the Navigation properties for “Resume,” “Options” and “Quit” to Horizontal.
3. Set the Navigation properties for “Audio,” “Graphics,” and “Input” to Vertical.
If the Visualize toggle is on, we see that by defining our navigational relationships, we have a clearer flow between UI components (Figure 04).
3. Conclusion
While Unity’s predictive navigation works by default, it can cause unwanted jumps in the menu system for the user. Good menu navigation is an essential part of the user experience and the sign of a well-designed game. Taking the time to test and adjust the UI navigation to be intuitive and responsive will ensure a great user experience.