
Understanding Light Shapes in HDRP - 2019.1
Tutorial
intermediate
+10XP
20 mins
(27)
Unity Technologies
It’s important to understand light shapes because the shape determines how a Light affects the area it illuminates. When working with lights, using the right shape can make a noticeable difference in the fidelity of your project.
Languages available:
1. Understanding Light Shapes in HDRP
This tutorial has been verified using Unity 2019.4 LTS
It’s important to understand light shapes because the shape determines how a Light affects the area it illuminates. When working with lights, using the right shape can make a noticeable difference in the fidelity of your project.
In this tutorial, we will go over the possible shapes of each light and briefly review their attributes.
2. Changing the Shape
To understand how light shapes work, you’ll want to create a light and modify its shape property.
1. Create a Spot Light by selecting the GameObject drop-down and clicking
Light > Spot Light.
2. Move the Light to a place in the Scene where it will be interacting with a couple of walls or other objects.
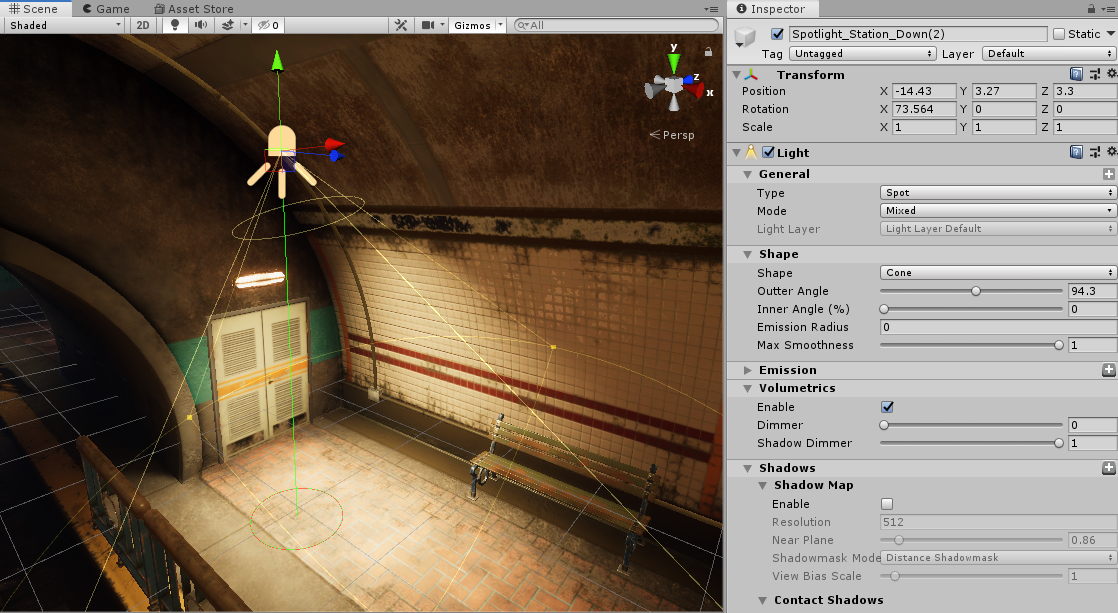
3. In the Inspector window, with the Light selected, expand the Shape category. The default Shape is Cone (Figure 01).
As you explore each Light shape, adjust the settings to get a better understanding of how they affect the lighting in your Scene.
3. Spot Light (Cone)
The Spot Light is constrained to an angle, resulting in an adjustable shape that can be adjusted. The possible shapes are Cone, Pyramid, and Box. The Spot Lights diminish at the edges of the shape. If you widen the angle, it increases the width of the shape and the size of its fade. This is known as the penumbra.
- Shape: This determines the shape of your Spot Light.
- Outer Angle: This determines the angle of the light in degrees.
- Inner Angle (%): This determines where the attenuation between the inner cone and the outer cone starts. Higher values will cause the edges of the Spot to fade out, while lower values will prevent the light from fading at the edges.
Radius: This sets the softness of the core of the Punctual Lighting to create fill lighting. This is equivalent to the size of the light bulb of the Spot Light.
4. Spot Light (Pyramid)
With the Pyramid shape, the light bounds have hard corners. This shape shares the same settings as the Cone, but the Outer Angle and Inner Angle are changed to Spot Angle and Aspect Ratio. This shape can be used to simulate industrial lights (Figure 02).
- Spot Angle: This controls the angle in degrees at the base of the Spot Light’s cone.
- Aspect Ratio: This adjusts the aspect ratio of the Pyramid’s light; a value of 1 results in a square.
5. Spot Light (Box)
The Box shape changes the bounds of the Spot Light to a box. This can be used to fake sunlight coming through a window. The shadows cast from this light are parallel, like the shadows the sun would cast. The shape settings are replaced with only Size X and Size Y (Figure 03).
- Size X: This determines the width of the light.
- Size Y: This determines the height of the light.
6. Point Lights
A Point Light sends light out equally in all directions (Figure 04). Point Lights are useful for adding ambient lighting to a Scene, but if they are casting any shadows, they can affect performance because they use six Shadow Maps.
- Radius: Sets the softness of the core of the Punctual Lighting to create fill lighting. Punctual Lights are Point, Directional, and Spot Lights. This is equivalent to the size of the Spot Light’s light bulb.
7. Directional Lights
Directional Lights are useful for creating effects such as sunlight. This light behaves in many ways like the sun. Directional Lights can be thought of as distant light sources that exist infinitely far away. All objects are illuminated in the Scene as if the light is always from the same direction. The light does not diminish with distance and there can be only one Directional Light per Scene.
- Angular Diameter (degrees): The diameter of the emissive celestial body represented by this light, as seen by the camera. This setting is used to render the sun/moon disk.
8. Area Lights
Rectangle
Rectangle is the default Shape of the Area light. This light is useful when you're trying to create soft lighting, similar to studio lighting. Although this light doesn’t cast shadows unless it's baked, you can use light cookies to mimic window panes or other obstructions and patterns (Figure 06).
- Size X: This determines the width of the light.
- Size Y: This determines the height of the light.
Tube
A Tube-shaped Area Light acts like a fluorescent tube. It casts light in all directions except at its poles. This is useful for creating neon lights or emulating fluorescent lighting. This lighting shape has only one property, the length of the light (Figure 07). Tube lights can only be used in Real-time mode.
- Length: This controls the length of the Tube Light.
Disc
A Disc Area Light projects light from a disc shape of a specified radius at the GameObject’s position and orientation, in a perpendicular direction, out to a certain Range (Figure 08). This shape is only for Baked Mode at the moment.
- Radius: Defines the radius of the Disc Light
9. Conclusion
Now that you have a better understanding of light shapes and how they illuminate Scenes, you’ll be able to choose the best shape for your Scene.