
Unity Asset Manager: Quick start guide
Tutorial
Beginner
+0XP
1h
(99)
Unity Technologies
Unity Asset Manager is a cloud-based digital asset management solution that streamlines how you upload, manage, transform, share, and access your complex real-time 3D assets. It simplifies discoverability, collaboration, versioning, and security access across 3D assets to ensure better optimize workflows across the asset’s entire lifecycle. Unity Asset Manager seamlessly integrates with your existing workflows and tools to help you keep your projects on track and released quickly. It also effortlessly integrates with the Unity Editor and Pixyz, Unity’s proprietary dataprep solution.
By the end of this tutorial, you’ll have learned how to access Unity Asset Manager via the Unity Cloud Dashboard, create a new project in Unity Asset Manager, upload your assets, and add collaborators to your project.
Languages available:
1. Navigate to Unity Asset Manager
To get started with Unity Asset Manager, follow these instructions:
1. Log in to the dashboard with your Unity ID.
2. On the left side of the dashboard, select Products > Tools.
3. Select Asset Manager and then select Launch.
2. Create a project
To create a new project, follow these instructions:
1. Select Manage Projects located in the lower left of the navigation bar.
2. Select the Create project button.
3. Enter your project name in the Project name box.
4. Select Create project.
3. Upload your assets
Note: For this step, feel free to use some of the available models on the Unity Asset Store or you can use your own assets!
First, you need to choose how you’d like to upload your assets; there are three ways to do this:
Option 1: Upload using the web dashboard
1. Select your newly created project from the Asset Manager sidebar then select the + Add button.
2. Select Add asset (select Add multiple assets if you want to upload more than one asset at the once.)
3. Select Upload, then File upload or Folder upload, and select the assets you want to upload or drag your files or folders onto the Source component.
4. Select the Save button.
Note: Asset Manager allows you to add descriptions, status, and tags to your asset to help you easily find and keep track of progress.
Option 2: Upload directly from the Editor
1. Install the Asset Manager as a Unity package from the Package Manager.
Detailed instructions can be found here. If you have Unity 6 or 2022.3.50f1 LTS, you can search for the Asset Manager directly in the Package Manager instead of installing the package by name.
2. From the main menu, select Window > Asset Manager to open the Asset Manager in the Editor. You can dock the Asset Manager window, if you’d like.
3. Go to Edit > Project Settings > Services > Unity Cloud, and make sure your project and Unity Cloud Dashboard use the same organization.
You can check your active organization in the upper right of the Unity Cloud page by selecting the name of the account, followed by the account name from the submenu. The organization labeled as CURRENT is the active one.
4. Select the project you previously created in the previous step or create a new one to store your assets.
5. Select Link Unity project to cloud project / Create new cloud project and link to Unity project.
6. Select the assets you want to upload from the Project window.
7. Right click and select Upload to Asset Manager or drag and drop the files to the Asset Manager window.
8. Select Upload Assets.
It might take a few seconds to upload the assets. Once the assets are uploaded, you will be able to see a list of all the assets in your project. You will then also be able to see them in the Unity Cloud Dashboard.
For more details on uploading assets directly from the Editor, check out the Upload Unity Editor assets to Asset Manager in Unity Cloud documentation.
Option 3: Upload using the Unity Cloud Python SDK
1. Download the latest version of the Python SDK.
2. Follow the instructions in the Bulk asset creation documentation.
4. Collaborate
To simplify how you collaborate with your team, you can invite members to your project in the Asset Manager and work better together:
1. Navigate to the Administration tab located on the left navigation bar.
2. Select Organization members.
3. Select the Invite organization members button.
4. Enter your collaborators’ email addresses and specify their user type.
You can choose from three types based on the level of access you want them to have on the project data (Guest, User, Owner).
Note: Make sure to use the same emails your teammates have associated with their Unity ID accounts.
5. Select the Send invites button.
5. Video tutorial: A quick guide to the Asset Manager in Unity
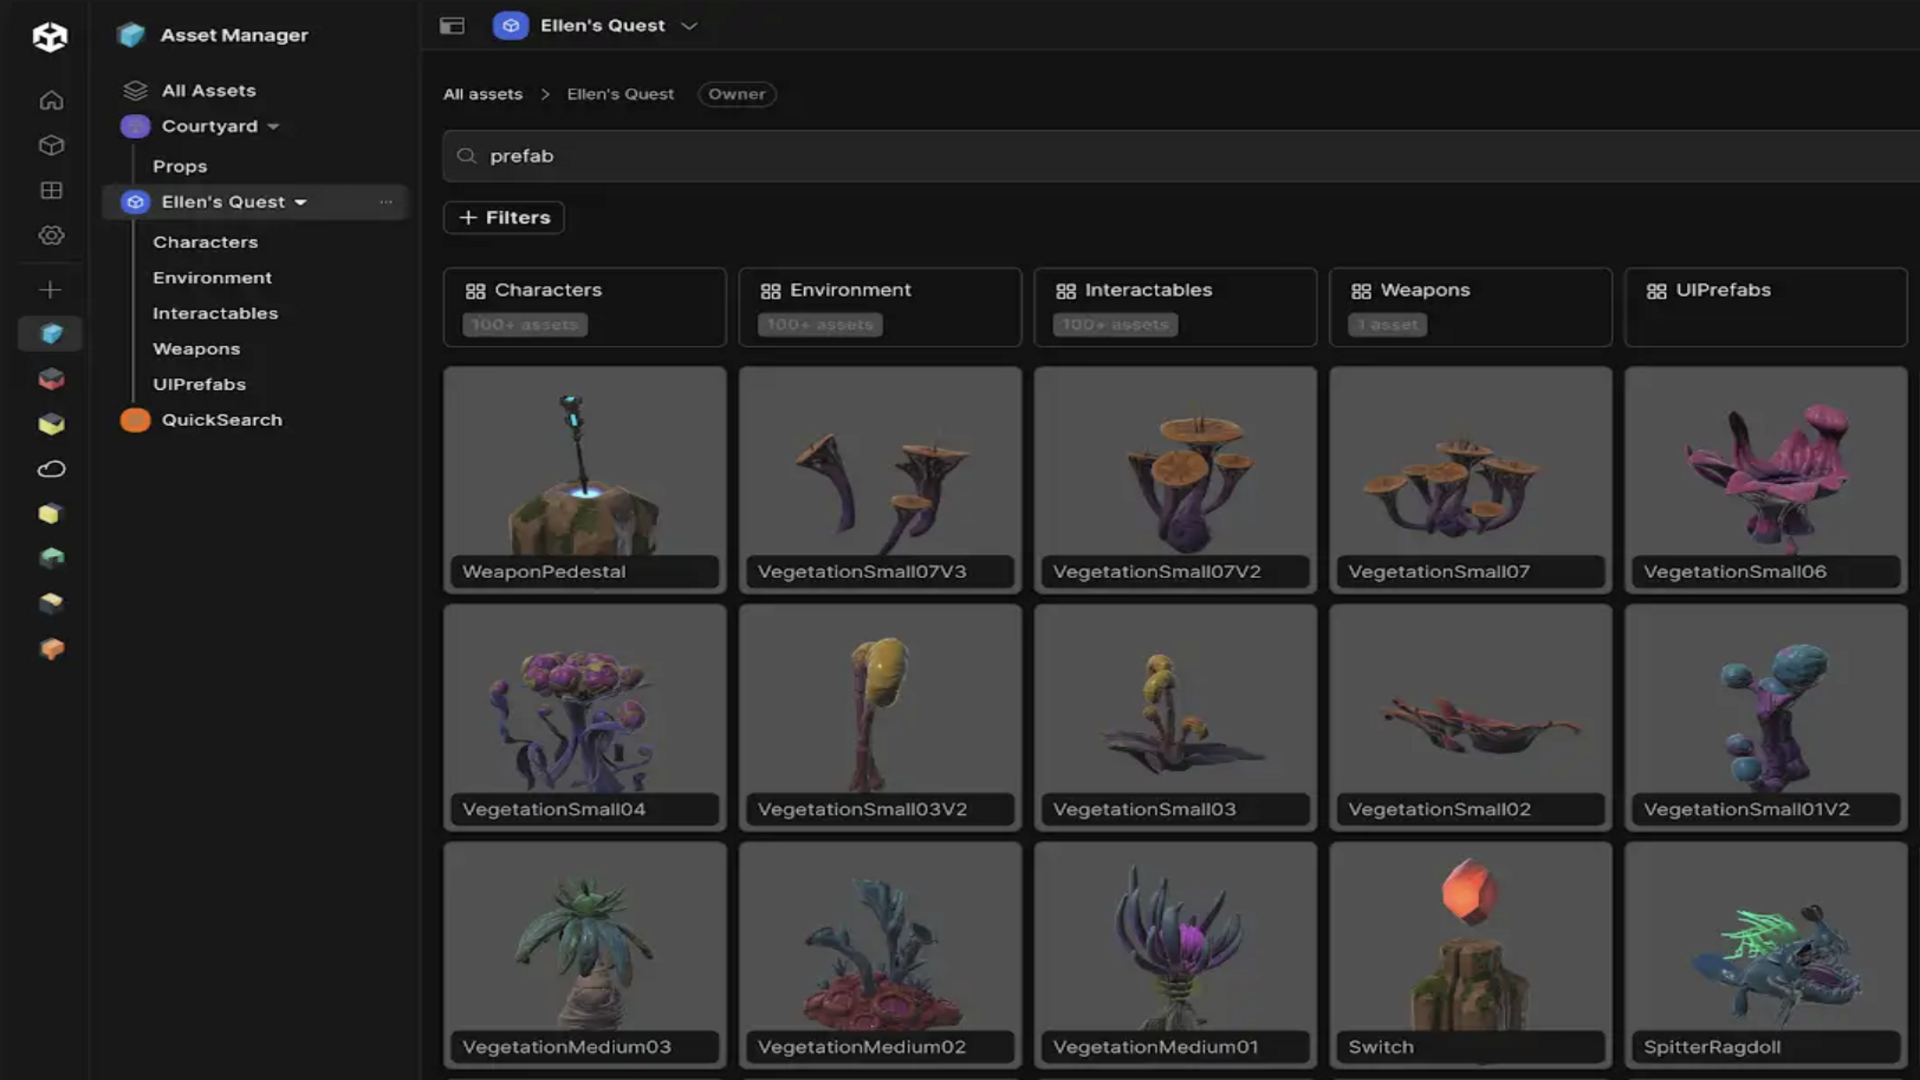
As you’ve learned so far, the Unity Asset Manager supports a wide range of asset types, including 3D models, textures, materials, prefabs, sound files, and more. In this video tutorial, you’ll learn how to get started with the Asset Manager, edit your assets, and how to use search filters.
If you want to ensure your team collaboration is smooth and efficient, make sure to check out the Best practices for project organization and version control guide (Unity 6 edition).
6. Next steps
Congratulations, you did it! You’ve taken your first steps into the world of the Unity Asset Manager.
For more detailed information on getting started with Asset Manager, including integrating Asset manager using the rest API or Python SDK, or other more complex asset library features, read the documentation.