URP recipe: Compute shaders
Tutorial
intermediate
+0XP
0 mins
21
Unity Technologies
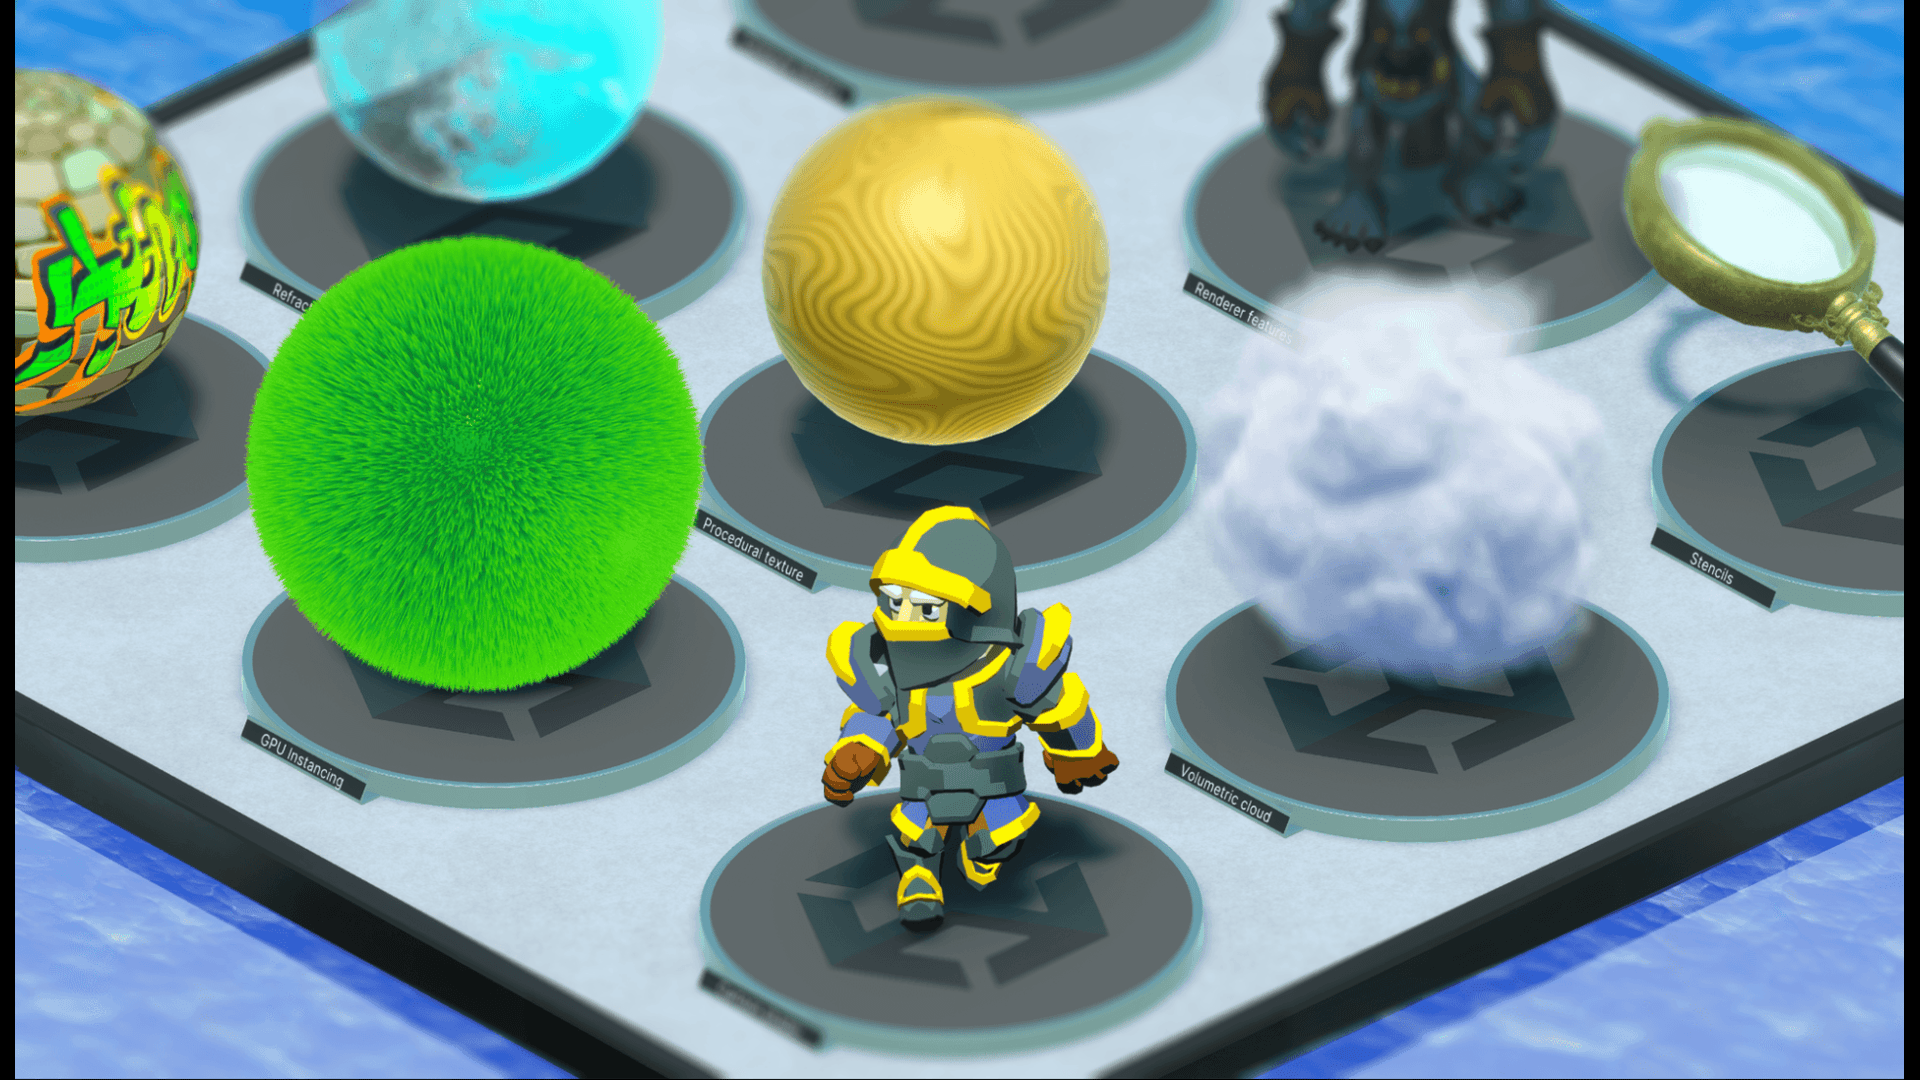
This tutorial is based on a Universal Render Pipeline (URP) recipe from the Create popular shaders and visual effects with Universal Render Pipeline (Unity 6 edition) technical e-book.
By the end of this tutorial, you’ll have written your own compute shader that will create particle effects. This tutorial is aimed at intermediate Unity users who have developed projects in Unity, know how to use URP features, and have some knowledge of writing HLSL-based shaders.
If you’re new to compute shaders, make sure to check out the Compute Shaders section of the documentation.
Languages available:
1. Introduction to compute shaders
Compute shaders are shader programs that run on the GPU of your device, outside of the normal rendering pipeline. A compute shader can be used for any computationally intensive task that involves the same calculations being applied to multiple entities.
Even though Unity provides VFX Graph for GPU-based particle effects, in this tutorial you’ll create your own. This will help you understand the techniques necessary to create shaders that work with instanced meshes, allowing you to create visual effects featuring tens of thousands of meshes. Depending on your GPU, a million low-polygon meshes are feasible. These techniques can be used to create grass, hair, water, and crowds.
2. The ParticleFun recipe
The ParticleFun recipe teaches you how to instantiate particles that follow your mouse cursor.
In this section, you’ll first download the sample project so that you can see the functionality of the finished script you’ll create.
Note: This project requires Unity 6.
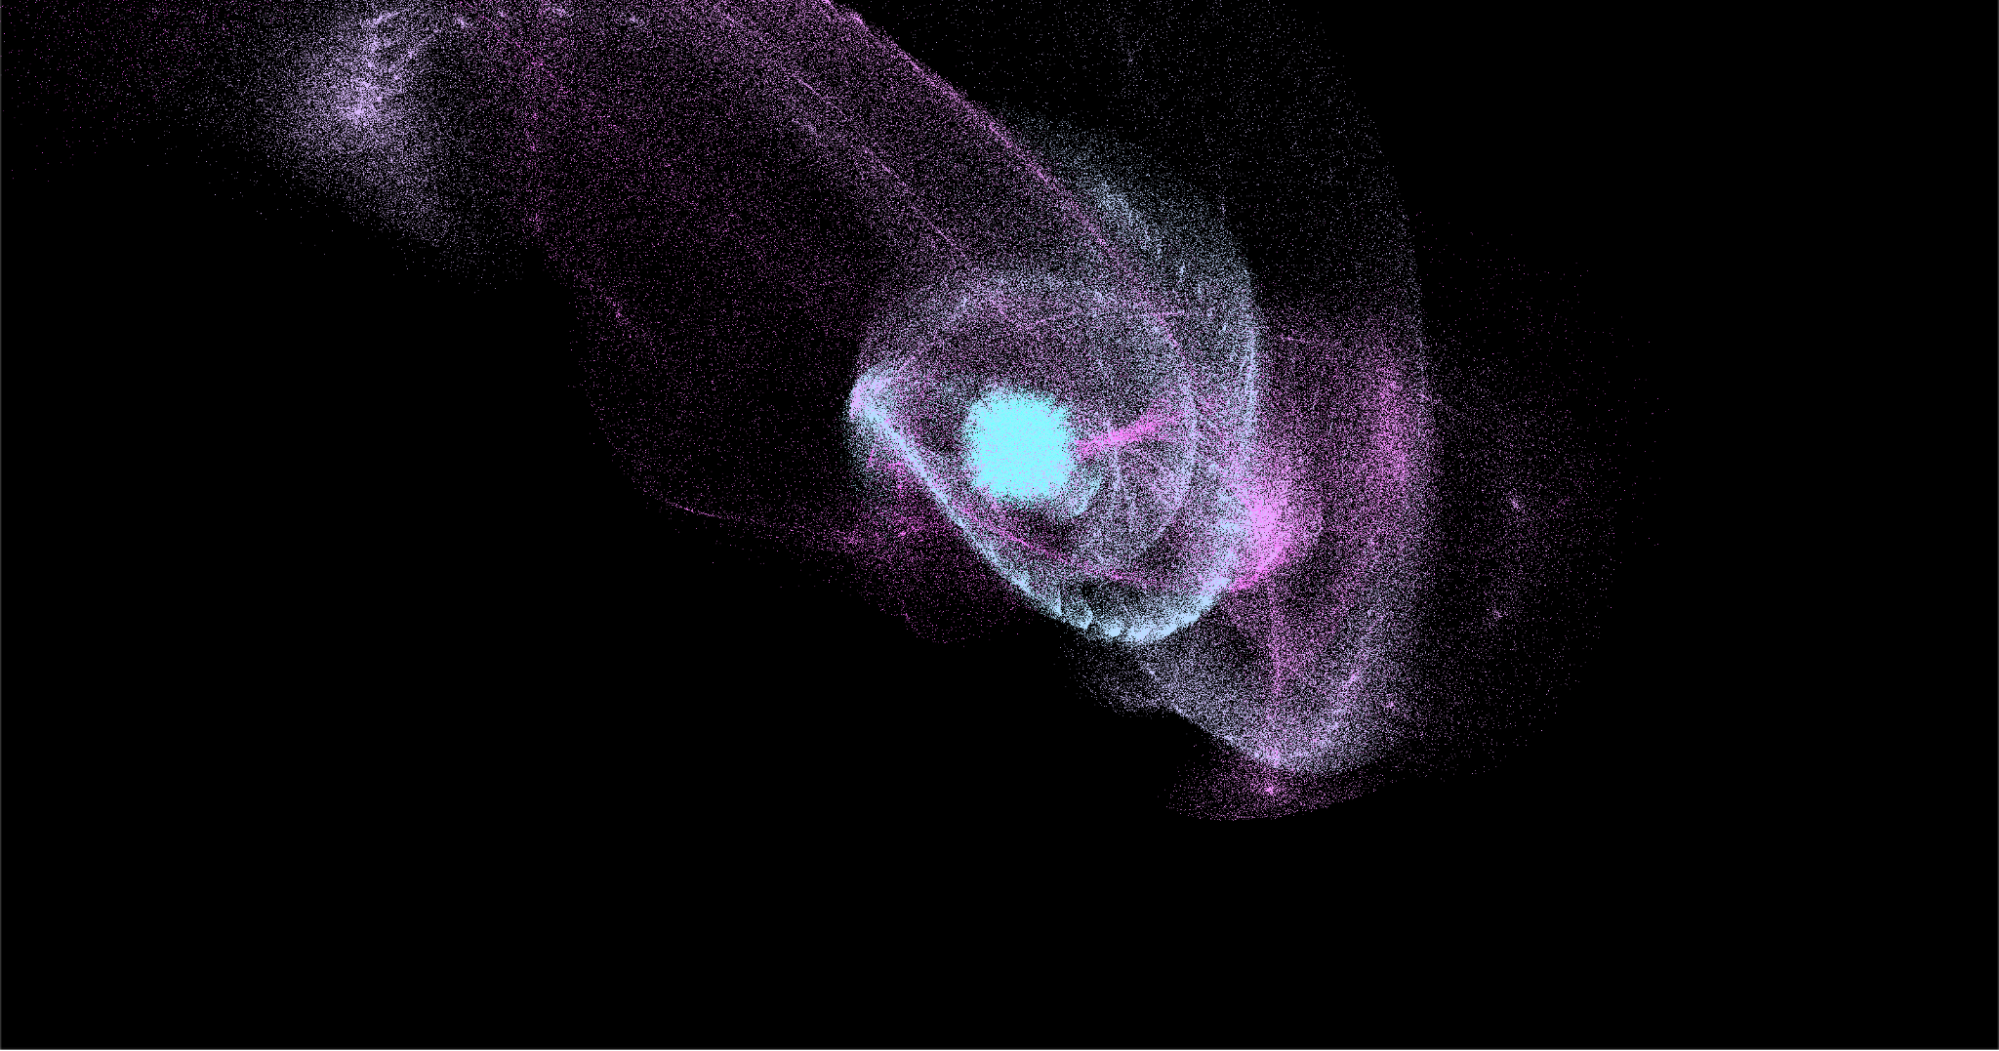
To download the sample project and check out the finished shader, follow these instructions:
1. Download the GitHub project and open the ParticleFun scene located in Scenes > Compute Shaders > Particles folder.
2. In the Editor, enter Play mode.
You’ll see that the particles begin moving, but then slow down over time. If you move your cursor around the Game view, you’ll see that the particles in the scene move toward the cursor position and change color over time.
3. Start scripting
Now that you have an idea of what the shader will do, it’s time to start scripting. You’ll start by creating a MonoBehaviour script that will initiatilize your particles. To begin writing the script, follow these instructions:
1. Right-click in the Assets folder, select Create > Folder, and name the new folder “Particles”.
2. Right-click in the Particles folder and select Create > Shader > Compute Shader.
3. Rename the new .cs file “ParticleFun” and open it in an IDE.
4. Add the following lines of code to the ParticleFun.cs file:
public class ParticleFun : MonoBehaviour
{

    private Vector2 cursorPos;

    // struct
    struct Particle
    {
        public Vector3 position;
        public Vector3 velocity;
        public float life;
    }

    const int SIZE_PARTICLE = 7 * sizeof(float);

    public int particleCount = 1000000;
    public Material material;
    public ComputeShader shader;

    int kernelID;
    ComputeBuffer particleBuffer;

    int groupSizeX;
   RenderParams rp;
}
Let’s take a closer look at the code you just added:
- The particle has position, velocity, and life values. The data for an individual particle uses seven floats, so the size of a particle is seven times the size of a float.
- Then, you declare a number of public variables that you can adjust in the Inspector window. The material will be the Particle material that uses the ParticleFun.shader and the shader will be ParticleFun.compute.
5. In the Start method, create and call an Init method that initializes each particle.
The position is set to Homogeneous Clip Space, a value between -w and w for each axis; w is the fourth component of the coordinate. Assuming w = 1, then -1, -1, -1 is lower-left at near frustum and 1, 1, 1 is upper-right, far frustum. The value for the position of each particle will be a randomized value within that range.
void Init()
{
// initialize the particles
Particle[] particleArray = new Particle[particleCount];

     for (int i = 0; i < particleCount; i++)
     {
      float x = Random.value * 2 - 1.0f;
      float y = Random.value * 2 - 1.0f;
      float z = Random.value * 2 - 1.0f;
      Vector3 xyz = new Vector3(x, y, z);
      xyz.Normalize();
      xyz *= Random.value * 5;

      particleArray[i].position.x = xyz.x;
      particleArray[i].position.y = xyz.y;
      particleArray[i].position.z = xyz.z;

      particleArray[i].velocity.x = 0;
      particleArray[i].velocity.y = 0;
      particleArray[i].velocity.z = 0;

      // Initial life value
      particleArray[i].life = Random.value * 5.0f + 1.0f;
}
}
6. Create a Vector3 with x, y, and z set to a random value between -1 and 1. Then, normalize this vector.
Remember to set the vector to have the length 1.
7. Expand the length by 5. Using this vector, set the position of an individual particle in the particle array. Set the Velocity to 0 and life to a random value between 1 and 6.
In the next step you’ll set up and bind the compute buffer to the compute shader.
4. Create a ComputeBuffer
In this step, you’ll create a compute buffer for your initialization method.
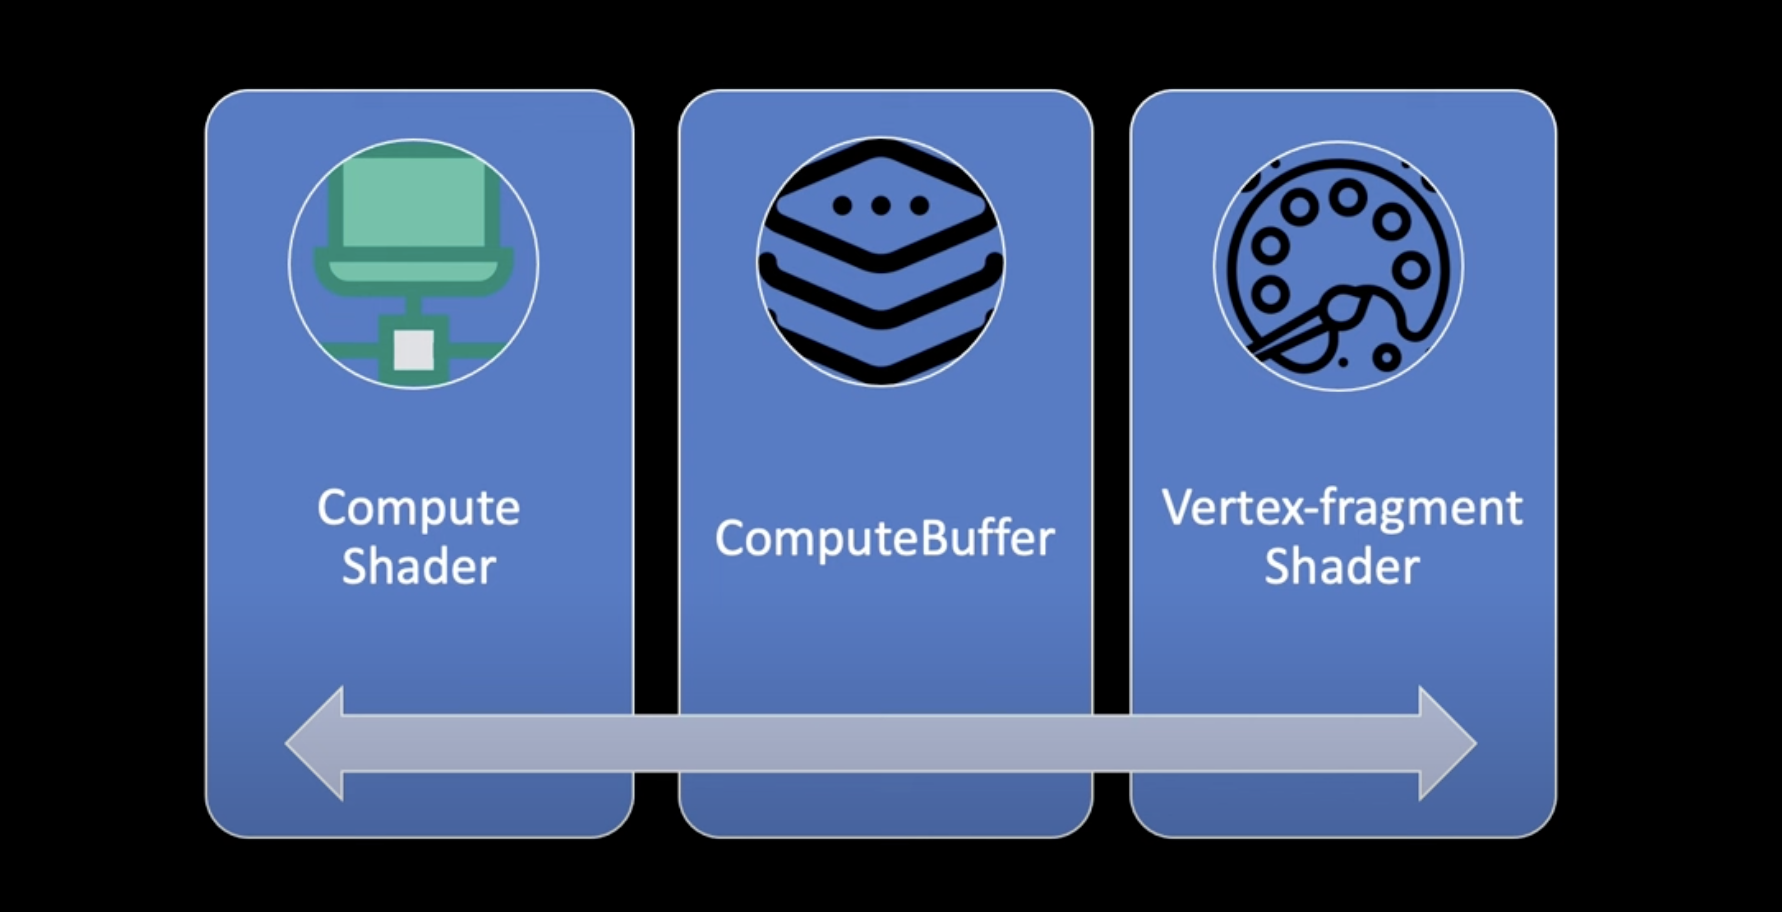
The compute shader will be used for positioning the particles based on the mouse cursor position and the Vertex-fragment shader will do the rendering. The information for positioning will be sent to the vertex-fragment shader through a compute buffer.
To learn how to populate the buffer and how to call code in a compute shader, follow these instructions. A ComputeBuffer is a class that you can create and fill from script code and use it in compute shaders or regular shaders.
ComputeBuffers have two parameters:
- The number of elements (particleCount)
- The size of each element (SIZE_PARTICLE)
Once you’ve created the ComputeBuffer, you need to populate the buffer using the SetData method. This transfers data from RAM to the GPU memory. To be accessed by a ComputeShader, all data must be in GPU memory. You’ll then call code in a ComputeShader using a special type of function in the ComputeShader code called a kernel. Each kernel has a unique ID. You can find the ID of each kernel by calling the FindKernel method using the function name as a parameter.
  // create compute buffer
 particleBuffer = new ComputeBuffer(particleCount,SIZE_PARTICLE);

 particleBuffer.SetData(particleArray);

 // find the id of the kernel
 kernelID = shader.FindKernel("CSParticle");
Each kernel has three thread parameters: x, y, and z. The magic of compute shaders is the way they work in parallel. In this example, the thread group sizes are set as 256, 1, and 1. To get the best performance from the GPU you’ll need to know about the actual device architecture.
From a C# script you can access the thread group sizes using the compute shader method GetKernelThreadGroupSizes. To make sure you have a thread covering every particle you’ll need to dispatch the kernel for the number of times as shown in this code, which should follow the previous code in the initialization:
uint threadsX;

shader.GetKernelThreadGroupSizes(kernelID, out threadsX, out _, out _);
groupSizeX = Mathf.CeilToInt((float)particleCount / (float)threadsX);
For this example, all the work is in the x thread. Notice that the particleBuffer is passed to the material as well as the compute shader.
// bind the compute buffer to the shader and the compute shader
shader.SetBuffer(kernelID, "particleBuffer", particleBuffer);
material.SetBuffer("particleBuffer", particleBuffer);
This is the principle trick of this example. You can use a shared ComputeBuffer, resident on the GPU, across the compute shader and a vertex-fragment shader. That way you can manipulate the content of the buffer in the compute shader, and when it’s time to render the object using a vertex-fragment shader, it makes use of the same buffer in the render.
You’ll need to initialize a RenderParams instance; simply set a large Bounds instance. This will be needed when you use Graphics.RenderPrimitives to actually render the particles.
rp = new RenderParams(material);
rp.worldBounds = new Bounds(Vector3.zero, 10000*Vector3.one);5. The Update method
In this step, you’ll add the Update logic to your script that will pass the cursor information to the script and shader.
To learn how to send data to the compute shader, follow these instructions:
1. In the Update method, set the deltaTime and mousePosition for the compute shader as follows:
float[] mousePosition2D = { cursorPos.x, cursorPos.y };

// Send data to the compute shader
shader.SetFloat("deltaTime", Time.deltaTime);
shader.SetFloats("mousePosition", mousePosition2D);
2. Dispatch the kernelID you found earlier in Create a ComputeBuffer.
When you Dispatch, you set the number of work groups for the x, y, and z dimensions.
shader.Dispatch(kernelID, groupSizeX, 1, 1);Since you want to run the kernel for particleCount times and the x thread group size is 256, you need to precalculate groupSizeX to be the integer ceiling of particleCount / 256. An integer ceiling means if it was 7/2, the floating point value is 3.5. By taking the integer ceiling, you raise this to the next whole number, which in this example is 4.
Using groupSizeX for the x dimension ensures the kernel will run with the x value having each index value from 0 to particleCount-1 and higher, if particleCount is not an exact multiple of 256. Once the Dispatch has completed, the particleBuffer will contain the new position values for each particle.
From here, you’ll use a method of the Graphics interface.
6. The RenderPrimitives method and shader
In this step, you’ll create a RenderPrimitive method to display the particles in the script, and create the shader.
To create a RenderPrimitive method, follow these instructions:
In the Update method, you’ll lastly create a RenderPrimitive method. The RenderPrimitives method takes four parameters:
- A RenderParams instance that at a minimum defines a Bounds area.
- The type of mesh topology (here you’re rendering points, but you could be rendering lines of triangles).
- The vertex count in a single instance; for points, this will always be just one.
- The instance count; for this example that is the number of particles.
  ...

Graphics.RenderPrimitives(rp, MeshTopology.Points, 1, particleCount );
The actual rendering will be handled by the shader attached to the material. Let’s look at that now.
1. Select Create > Shader > Standard Surface Shader, and name it “ParticleFun”.
It will include some boiler plate code that you’ll overwrite with the code at the end of this section.
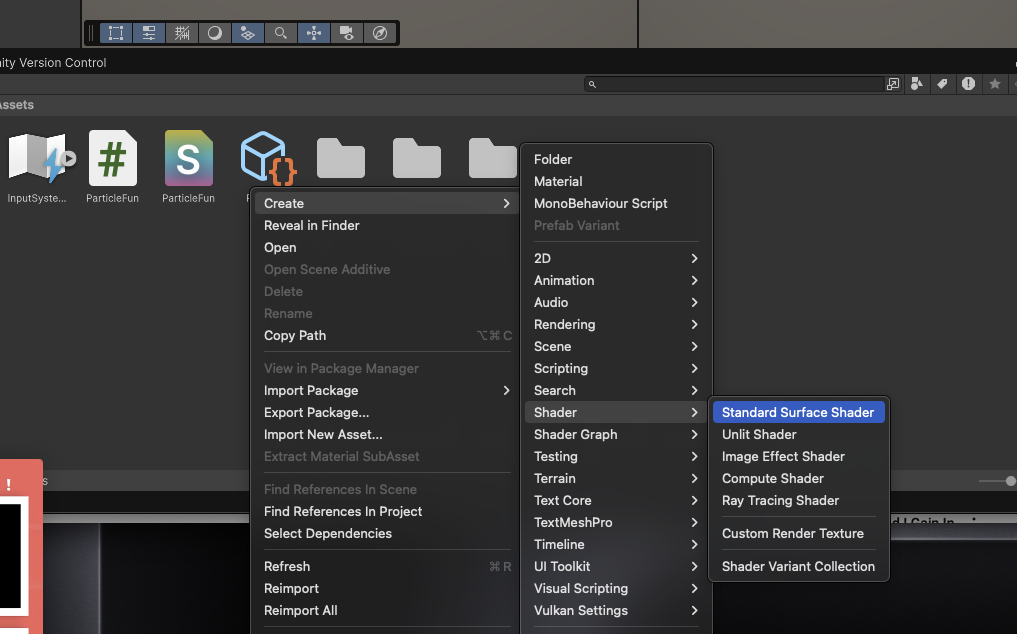
In the ParticleFun.shader file you have to add a reference to the buffer. You’ll also need to define the particle struct.
struct Particle{
float3 position;
  	float3 velocity;
  	float life;
};
StructuredBuffer<Particle> particleBuffer;
2. Set the buffer as a StructuredBuffer, not a RWStructuredBuffer.
The shader won’t be writing to this buffer, the compute shader will do that.
The shader code contains a _PointSize property. Notice that the Attributes struct, an instance of which is passed to the vert function, has an instanceID property. For a point shader, the instance id will be set to 0 through to particles count – 1. You’ll use this value as an index into the buffer. Since the compute shader is going to update this position value, you have a way of using the compute shader for positioning and the vertex-fragment shader to do the rendering. When using MeshTopology points, the shader must set the input parameter with the semantic PSIZE to the pixel point size of a point. Here you set it to the variable PointSize, which was passed by the script.
3. Replace the HLSL code in the ParticleFun shader with the following lines of code:
Shader "Custom/ParticleFun"
{
    Properties
    {
        _PointSize("Point size", Float) = 5.0
    }

    SubShader
    {
        Tags { "RenderType" = "Opaque" "RenderPipeline" = "UniversalPipeline" }

        Pass
        {
            HLSLPROGRAM

            #pragma vertex vert
            #pragma fragment frag

            struct Particle{
                float3 position;
                float3 velocity;
                float life;
            };

            StructuredBuffer<Particle> particleBuffer;

            #include "Packages/com.unity.render-pipelines.universal/ShaderLibrary/Core.hlsl"

            CBUFFER_START(UnityPerMaterial)

            float _PointSize;

            CBUFFER_END


            struct Attributes
            {
                float4 positionOS   : POSITION;
                uint instanceID : SV_InstanceID;
                UNITY_VERTEX_INPUT_INSTANCE_ID
            };

            struct Varyings
            {
                float4 positionHCS  : SV_POSITION;
                float4 color : COLOR;
                float size: PSIZE;
            };

            Varyings vert(Attributes IN)
            {
                Varyings OUT;

                Particle particle = particleBuffer[IN.instanceID];

                // Color
		  float lerpVal = particle.life * 0.25f;
		  OUT.color = half4(1.0f - lerpVal+0.1, lerpVal+0.1, 1.0f, lerpVal);

		   // Position
                OUT.positionHCS = TransformObjectToHClip(particle.position);

                OUT.size = _PointSize;

                return OUT;
            }

            half4 frag(Varyings IN) : SV_Target
            {
                return IN.color;
            }
            ENDHLSL
        }
    }
}
The shader will fill each particle mesh with color, it follows the structure of a common HLSL program, you can learn more about it in the Write an unlit basic shader in URP documentation page.
7. Create the compute shader
In this step, you’ll create a compute shader.
To create and set up a compute shader, follow these instructions:
1. In the Editor, right-click in the Project window and select Create > Shaders > Compute Shader.
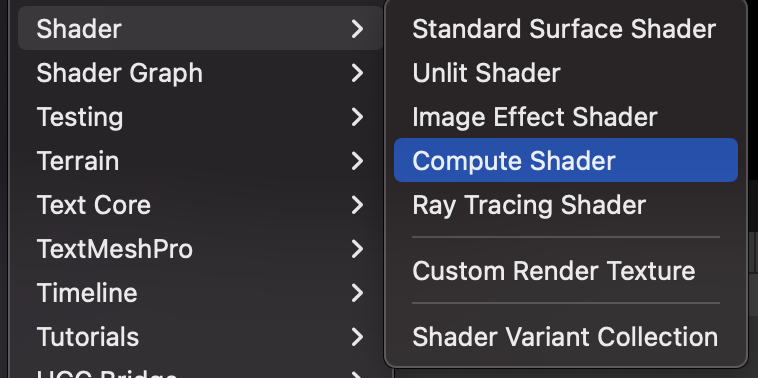
You’ll notice that this shader also includes some boiler plate code.
2. Name your function or kernel “CSParticle”.
You need to define a buffer for your particles. It needs a struct that matches the one in the script and you need to declare a RWStructuredBuffer because this shader is going to write to the buffer.
3. Add the following lines of code to your compute shader:
// Particle's data
struct Particle
{
  	float3 position;
  	float3 velocity;
  	float life;
};

// Particle's data, shared with the shader
RWStructuredBuffer<Particle> particleBuffer;
4. Set up the variables that will come from the CPU and the fast random number generation algorithm Xorshift that you’ll use in the next step.
// Variables set from the CPU
float deltaTime;
float2 mousePosition;

uint rng_state;

uint rand_xorshift()
{
	// Xorshift algorithm from George Marsaglia's paper
	rng_state ^= (rng_state << 13);
	rng_state ^= (rng_state >> 17);
	rng_state ^= (rng_state << 5);
	return rng_state;
}
Now you have a vector you can use to accelerate the particle away from the mouse position. Then use the particle's velocity modulated by deltaTime.
If a particle's life is less than 0, then respawn the particle and use a fast-random function to generate the random values necessary.
void respawn(uint id)
{
	rng_state = id;
	float tmp = (1.0 / 4294967296.0);
	float f0 = float(rand_xorshift()) * tmp - 0.5;
	float f1 = float(rand_xorshift()) * tmp - 0.5;
	//float f2 = float(rand_xorshift()) * tmp - 0.5;
	float3 normalF3 = normalize(float3(f0, f1, 0.0)) * 0.8f;
	normalF3 *= float(rand_xorshift()) * tmp;
	particleBuffer[id].position = float3(normalF3.x + mousePosition.x, normalF3.y + mousePosition.y, 0.0);
	// reset the life of this particle
	particleBuffer[id].life = 4;
	particleBuffer[id].velocity = float3(0,0,0);
}
The particle is positioned within a sphere of radius 0.8, centered around the mouse position and z = 0.
5. Reset the life of a new particle to four seconds and reset the velocity to zero.
6. Create the CSParticle kernel and add the following lines of code:
[numthreads(256, 1, 1)]
void CSParticle(uint3 id : SV_DispatchThreadID)
{
Particle particle = particleBuffer[id.x];

particle.life -= deltaTime;

float3 delta = float3(mousePosition.xy, 0) - particle.position;
float3 dir = normalize(delta);

particle.velocity += dir;
particle.position += particle.velocity * deltaTime;

particleBuffer[id.x] = particle;

if (particle.life < 0) respawn(id.x);
}
7. Grab the particle from the buffer whose index is id.x, then, use the deltaTime property passed with each screen update to decrement its life.
In the method you add the delta and velocity of the mouse position, but if the life becomes less than 0 you respawn the particle using the function in the previous step.
8. In the ParticleFun.cs file, use an OnGUI event by adding the following lines of code:
void OnGUI()
    {
        Vector3 p = new Vector3();
        Camera c = Camera.main;
        Event e = Event.current;
        Vector2 mousePos = new Vector2();

        // Get the mouse position from Event.
        // Note that the y position from Event is inverted.
        mousePos.x = e.mousePosition.x;
        mousePos.y = c.pixelHeight - e.mousePosition.y;

        p = c.ScreenToWorldPoint(new Vector3(mousePos.x, mousePos.y,
                                  c.nearClipPlane ));

        cursorPos.x = p.x;
        cursorPos.y = p.y;
    }
This detects a mouse click, and a bit of code converts this into a screen position. Screen coordinates use bottom as 0, whereas Event.mousePosition uses top as 0.
To invert the y value, subtract mousePosition.y from the Camera pixelHeight. Then use the Camera method ScreenToWorldPoint (this method requires a z value) and finally, nearClipPlane ensures a successful result.
The final cursor position is used by the Update function to send the values to the compute shader.
8. Particles in action
In this step, you’ll apply a fading color effect in the shader and get your scene working.
To change particle colors, follow these instructions:
To give the particles a nice effect, you’ll use the life property to control the color of the particle.
Back in the vertex-fragment shader in the vert function, note the following lines of code to the color assignment:
Particle particle = particleBuffer[IN.instanceID];

// Color
float lerpVal = particle.life * 0.25f;
OUT.color = half4(1.0f - lerpVal+0.1, lerpVal+0.1, 1.0f, lerpVal);
Now the particles change color. The lerp value will be a value between 1 and 0 because life is set to 4 by the respawn function and this value is multiplied by 0.25. The red channel will start at 0.1 and increase to 1.1 as life decreases, while the green channel starts at 1.1 and decreases over time to 0.1. Blue is always 1 and alpha decreases over time, causing the pixel to fade away.
This example shows how useful it can be to combine a compute shader and vertex-fragment shader when rendering multiple instances of the same asset. The simplest asset of all is used: a single pixel color value.
Finally, let’s get the scene ready for our particles.
1. Create a new GameObject and add the ParticleFun.cs component to it.
To add the references to the shader, you’ll need to create a material for it and also include the reference to the compute shader.
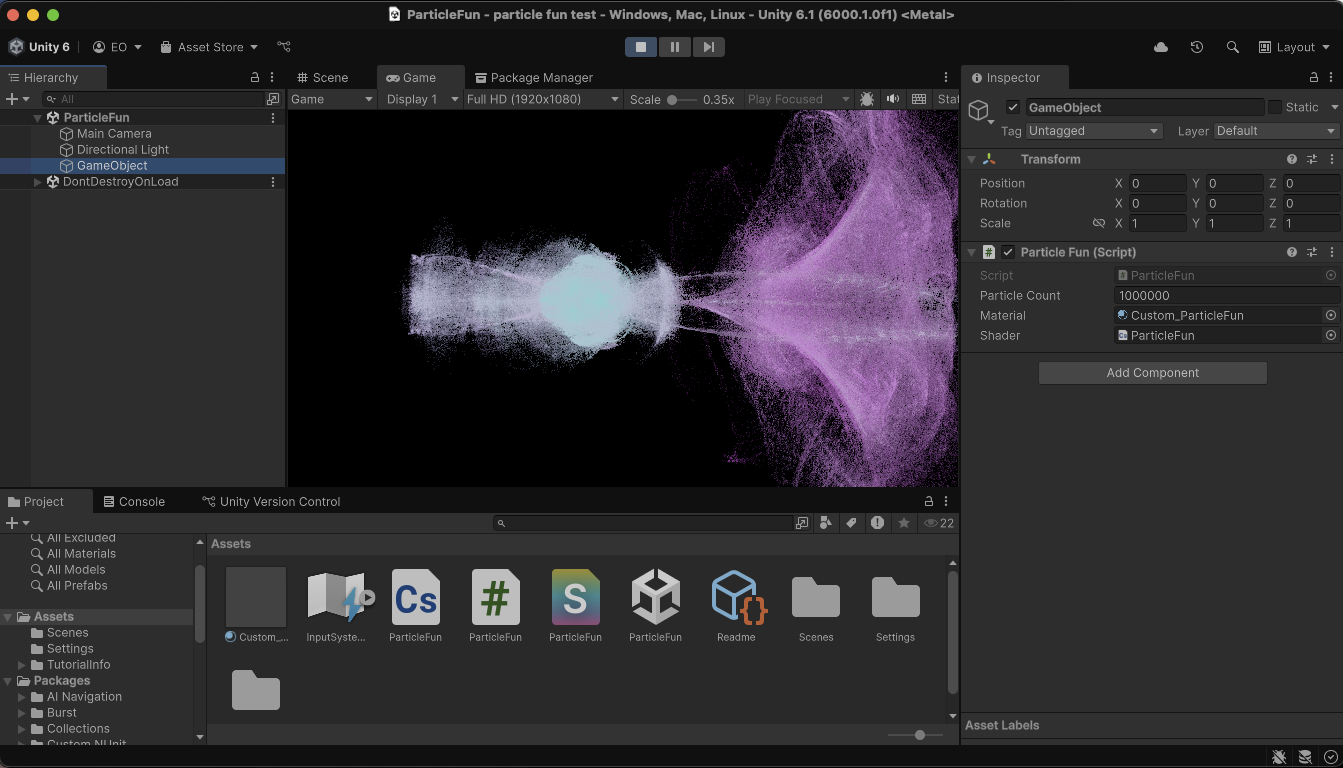
For the final result, you can change with the size of the particles from the material or adjust the number of particles from the component.
To check out the complete shader and compare your work, download the GitHub repository.
To follow this tutorial in video format and expand on the topic, we recommend watching the video tutorials shared in the next section.
9. More resources
Download the Create popular shaders and visual effects with the Universal Render Pipeline (Unity 6 edition) technical e-book for more recipes on shaders and visual effects. Or, check out the Introduction to URP for advanced Unity creators (Unity 6 edition) for a comprehensive guide on how to develop as efficiently as possible with the Universal Render Pipeline (URP) in Unity 6.
Make sure to also check out these video tutorials: