
Use Animation Generator to bring your character to life
Tutorial
Beginner
+0XP
0 mins
(27)
Unity Technologies
Use Animation Generator to bring your character to life
Languages available:
1. Overview
In this tutorial, you’ll learn how to use the Unity Animation Generator to quickly bring your characters to life using AI-generated animations.
You’ll start by writing an animation prompt to generate a looping animation (like idle or dance), and apply it to your character in the scene. Then, you’ll create additional animations and configure your Animator Controller component so the character cycles through them automatically — efficiently adding personality to your prototype.
2. What can the Animation Generator do?
The Animation Generator lets you create animations from scratch using just a text prompt — or even a video reference. Whether you're building a game prototype or experimenting with visual ideas, it can be a fast and powerful way to bring your characters to life.
3. Best practices for writing animation prompts
To get the best results with the Animation Generator, it's important to write clear, descriptive prompts. Keep your prompts concise but specific — mention the type of motion, pace, and specific movement requirements. For example:
- “Slow idle animation while swaying side to side”
- “Confident dance loop with energetic arm movements”
4. Generate an animation for your character
Now you'll use the Animation Generator to create your first animation.
Instructions
1. Open the Animation Generator:
- Open the AI dropdown from the top toolbar and select Generate New > Animation.
- When prompted, name your animation clip appropriately, depending on your goals (for example, “Idle anim”, “Dance anim”, etc)
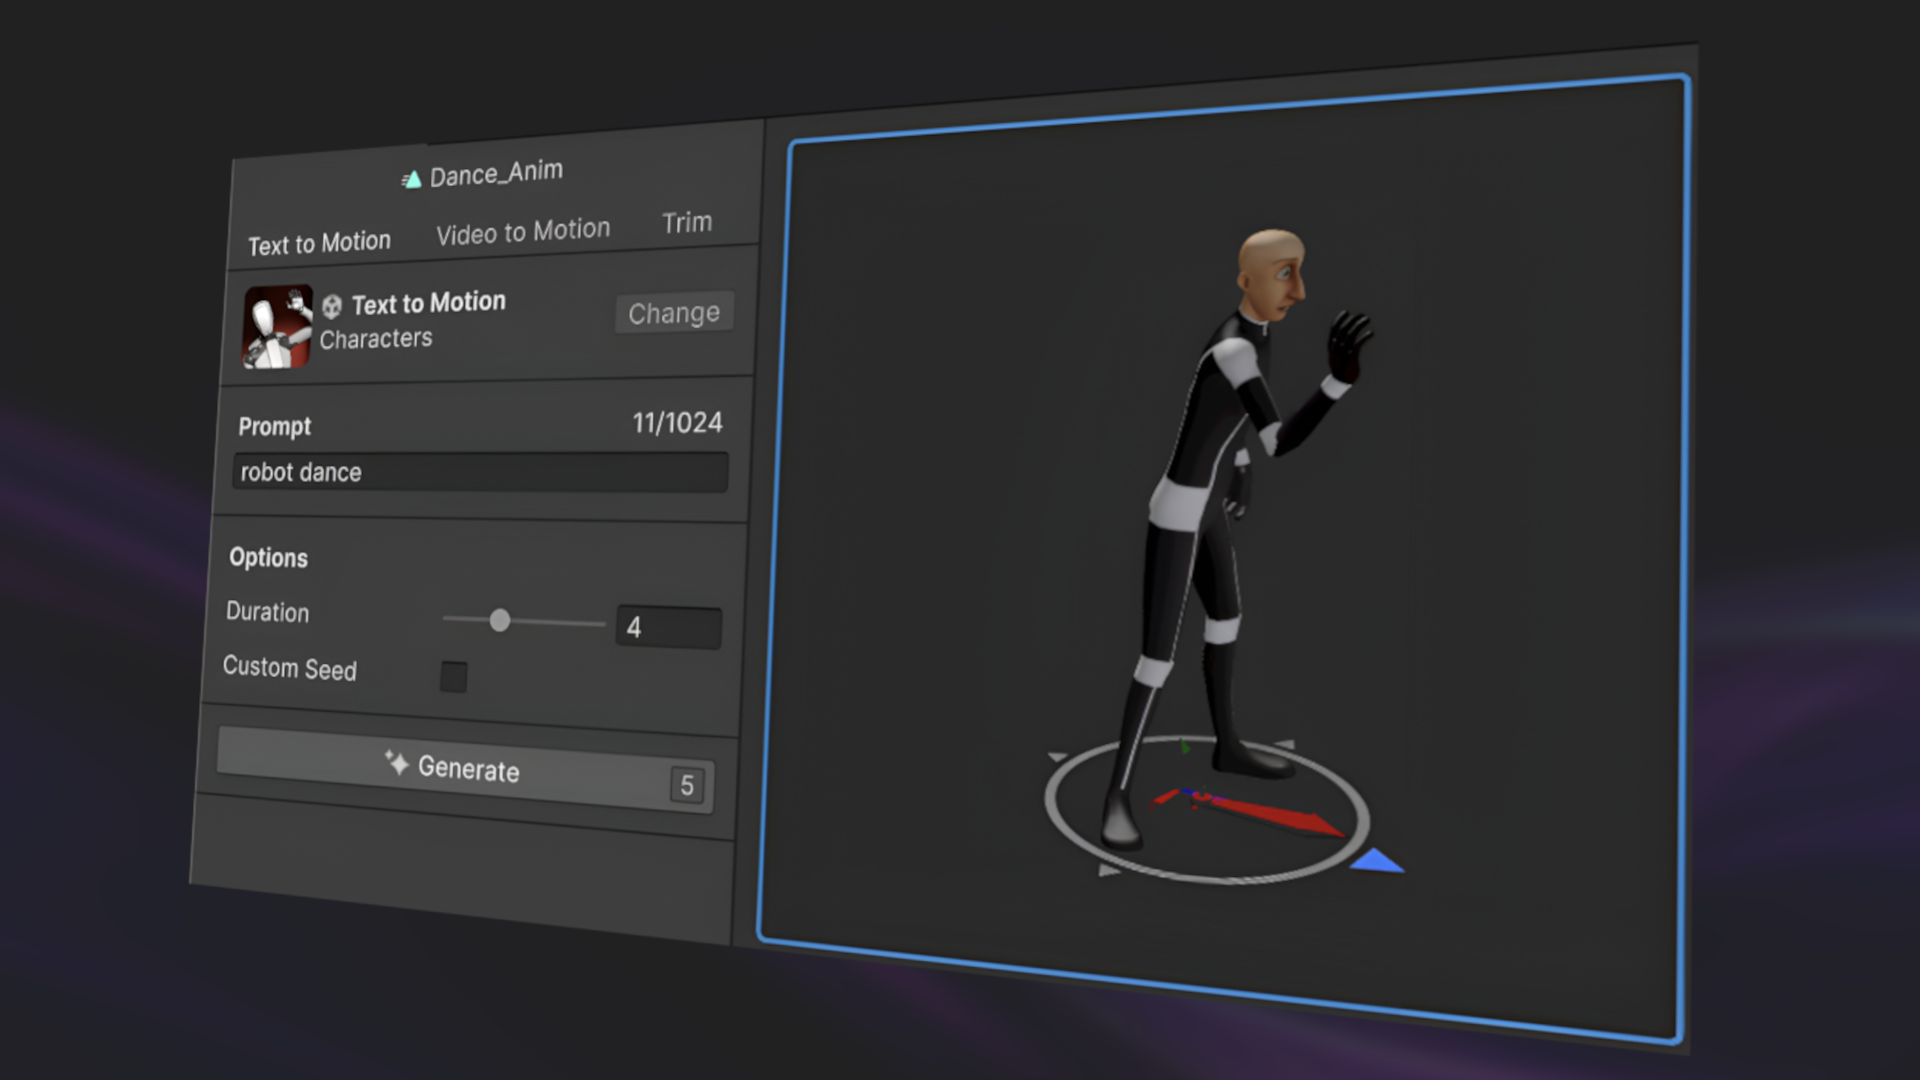
2. Describe the animation you want:
- In the Generator window, in the Prompt box, enter a prompt to describe the animation; for example:
Standing still, gently breathing and swaying- Use this prompt or write your own based on how you want your character to move.
3. Adjust generation settings (optional)
- Set the Duration slider to control how long the animation lasts.
- Leave Custom Seed disabled for now. This allows you to create consistent results across multiple generations. To learn more, check out the documentation on custom seeds.
4. Generate and select your animation:
- Select Generate to generate an animation clip.
- Hover over each generated animation in the Generations panel to preview them.
- When you find one you like, right-click it and select Promote to current asset to save it in your Assets folder.
5. Trim and modify your animation clip:
- With an animation clip selected, select the Trim (or Edit) tab to further refine your animation. This tab helps you ensure that your character is facing the correct direction, stays in the same place, and loops smoothly.
- Hover over the various properties in this tab to understand what they do, but we recommend leaving Root motion disabled to keep your character in one spot and Best loop enabled to ensure a smooth loop.
- Select Trim, then right-click on the new trimmed clip and select Promote to current asset to overwrite your previously selected one.
When you select Trim, the character will also be reoriented to face its local forward direction.
Your new animation clip will now appear in the Assets folder and is ready to use.
5. 3.5 - Apply the looping animation to your character
After generating the animation, you need to apply it so the character performs it during Play mode.
Instructions
1. Add the animation to your character:
- Drag the animation clip from the Project window onto your character in the Hierarchy window.
- Unity will automatically create an Animator Controller and assign it to the character’s Animator component, with your new animation clip as the default animation.
2. Enable looping for the animation
- Select the animation clip in the Project window.
- In the Inspector window, enable the Loop Time and Loop Pose properties to make the animation loop smoothly.
3. Preview the animation
- Enter Play mode to see your animated character.
Note: You can always adjust the animation clip’s rotation if needed, just select the animation clip, go to the Inspector window, and modify the Offset under Root Transform Rotation.
6. Add multiple animations for one character
In this step, you’ll create even more animations and set up a looping sequence between those animations using Unity’s Animator Controller asset.
Instructions
1. Open the Animator Controller asset:
- In the Project window, double-click the Animator Controller asset that was created earlier. This opens the Animator window.
2. Add more animations:
- Generate and promote new animations (for example, idle, wave, dance) as you did earlier.
- In the Animator window, drag these new clips into any empty space. This will add the animation clips as new States.
3. Set up transitions:
- Right-click the first animation and select Make Transition, then connect it to the second animation.
- Repeat for each animation to create a cycle, then connect the last one back to the first.
Note: If you’re interested, you can also use the Video to Motion feature in the Animation Generator to animate your character. You could record yourself performing a movement or import an existing video of a favorite dance move into the project. Check out the video below to see this tool in action.
Now when you enter Play mode, your character should cycle through a series of animations, creating a loop like idle → wave → dance → idle.
7. Organize your animation assets
By default, generated assets are saved in the folder you have selected when you initially generate the file — often the root Assets folder. Let’s organize your animation files now to keep things tidy as your project grows.
Instructions
1. Create a new Animations folder:
- Right-click in the Assets folder and select Create > Folder.
- Name the new folder “Animations”.
2. Move your animation assets into the new folder:
- Drag all of your generated animation clips and the Animator Controller into the Animations folder.
You’ve now organized your project’s animation assets into a dedicated folder—ready for reuse, updates, or expansion.
8. Next steps
After completing this tutorial, your character is now animated and can loop through multiple poses or actions without any manual scripting.
To learn more about animation workflows and generator features, check out the Animation Generator documentation.
In the next tutorial, you'll generate textures and materials to give your environment a distinct look.