Using Animation Rigging: Damped Transform
Exercise
Beginner
+10XP
10 mins
Unity Technologies
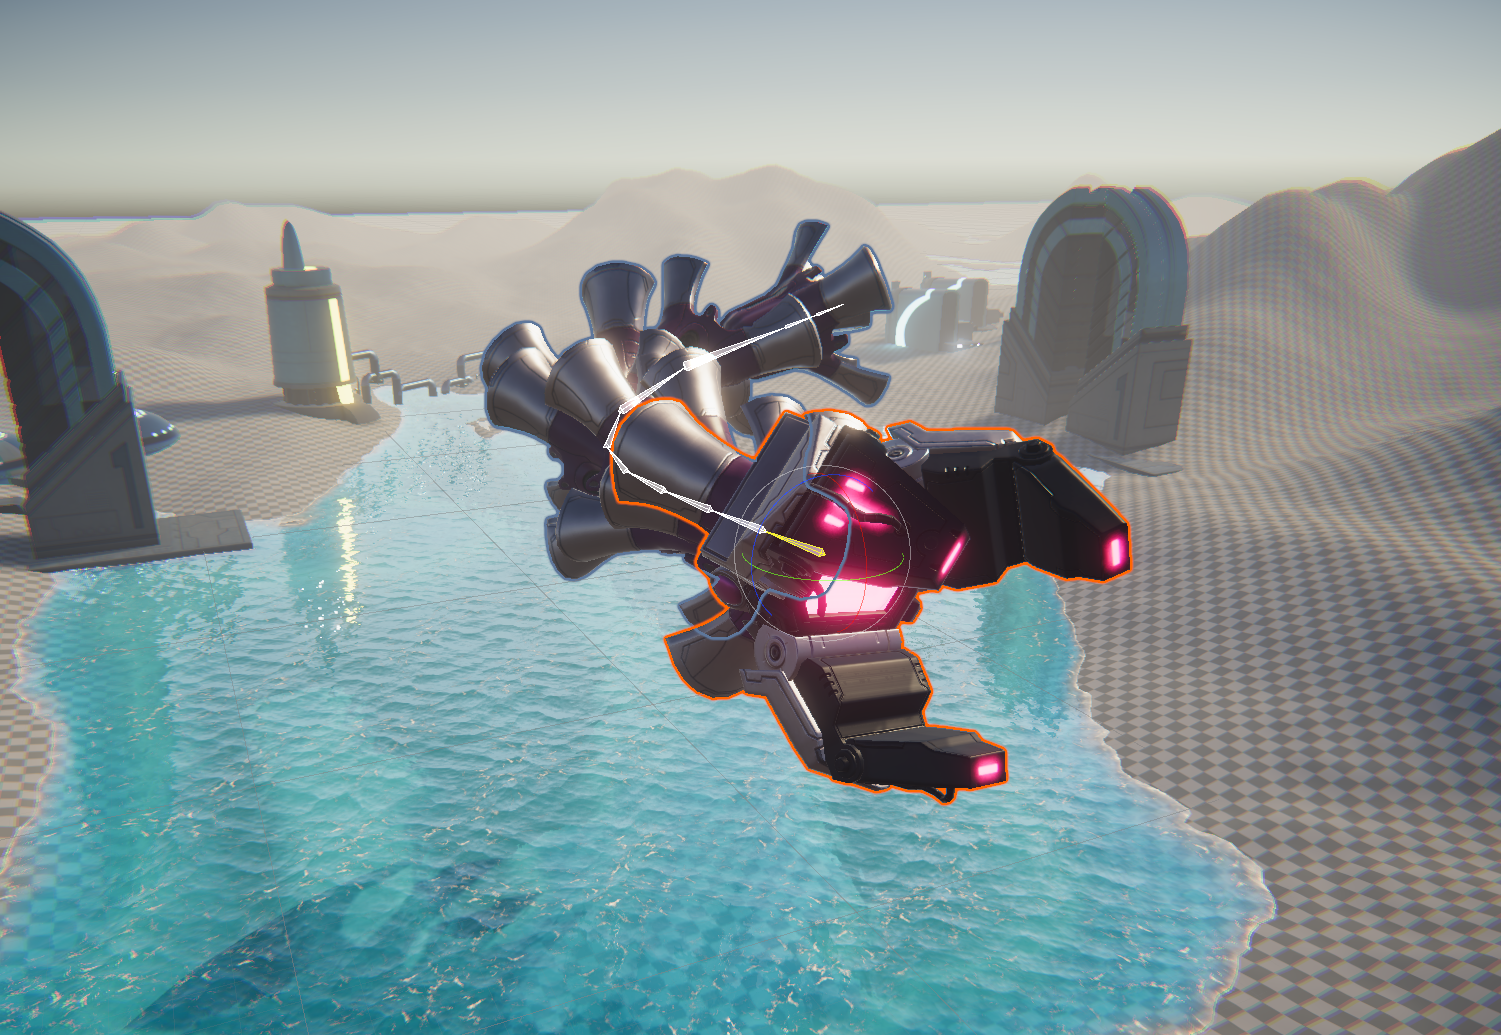
The Animation Rigging package enables users to set up procedural motion on animated skeletons at runtime. One of the predefined animation constraints is called Damped transform, this constraint allows damping the position and rotation transform values from a source GameObject to a constrained GameObject. In this tutorial, we will look into how to set up that within the Prototype Series - Procedural Boss project!
Materials
Languages available:
1. Introduction
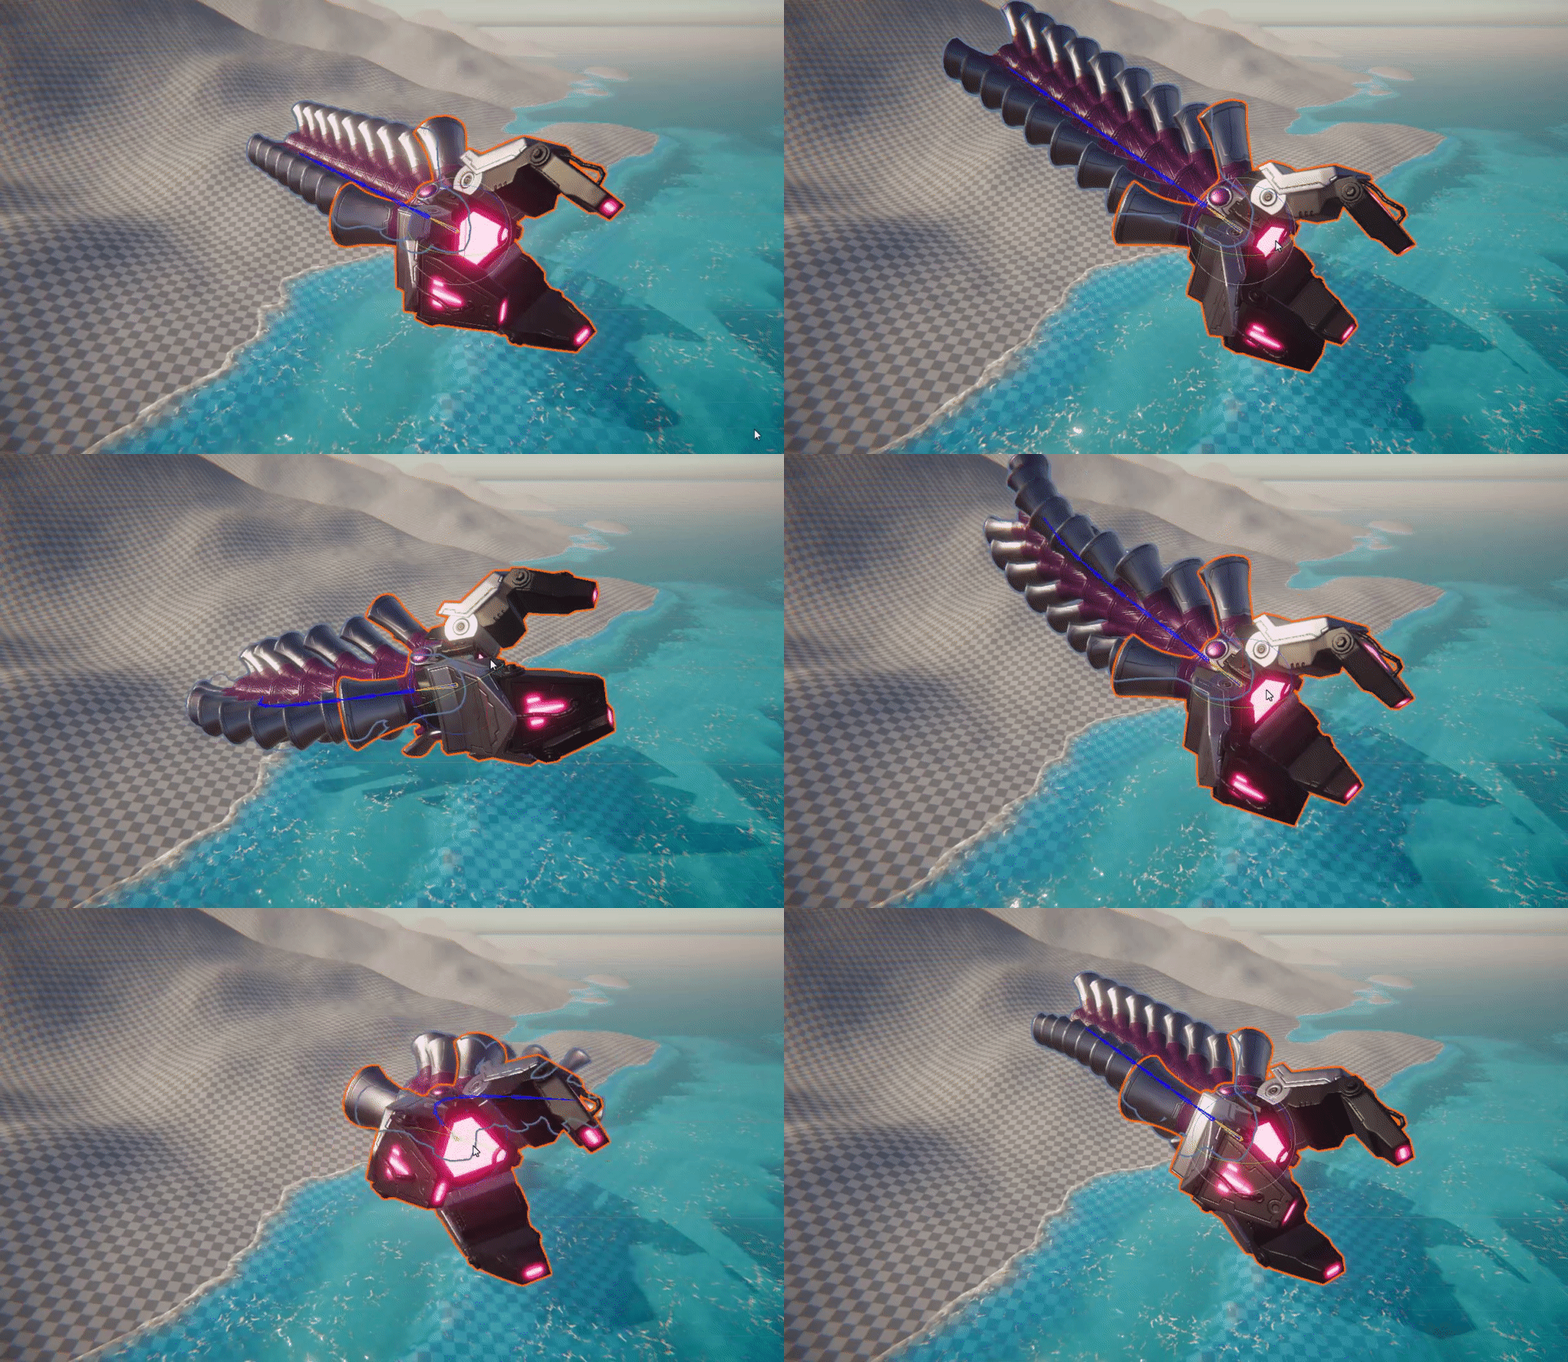
In this tutorial, we will teach you how to use the Damped Transform constraint using the Animation Rigging package. At the end of this tutorial, you will have a similar result to the project from Unity's Prototype Series!
2. Animation Rigging Overview
To begin, install the Animation Rigging package from the Package Manager. The Animation Rigging Package is available for Unity 2019.1 and above. (These tools are still in preview and may change as updates are added.)
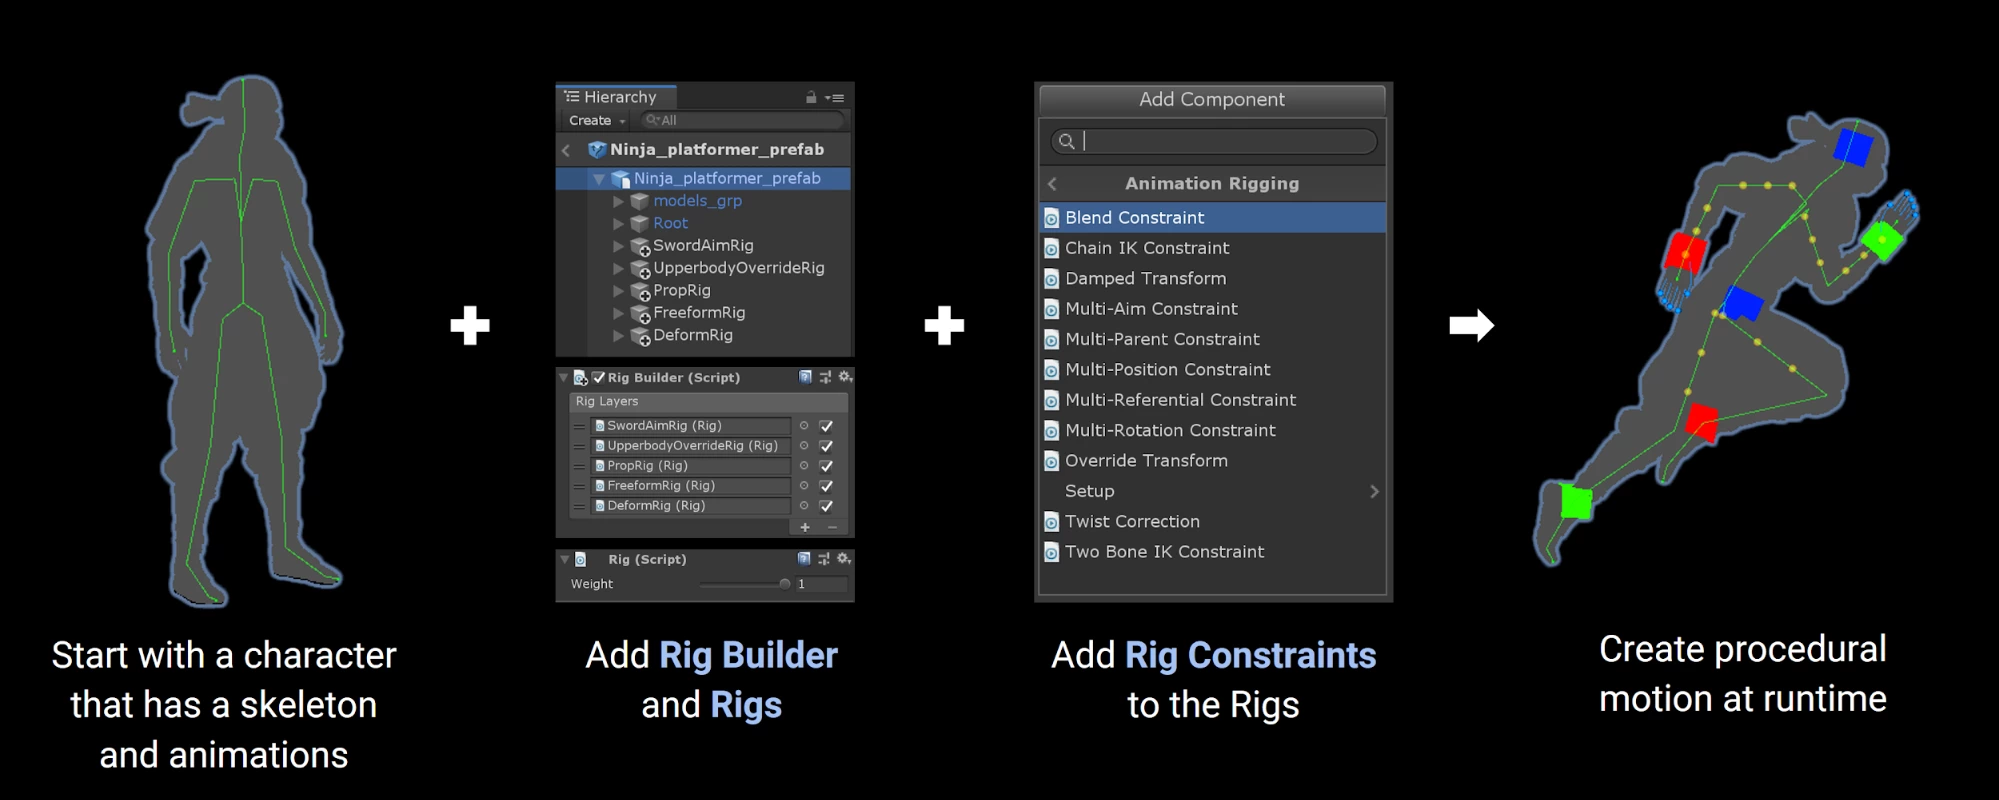
The Animation Rigging package provides a library of rig constraints that you can use to create procedural motion at runtime. This is commonly known as “runtime rigging.” The constraints are set up in groups called rigs, which are assembled in the Rig Builder component that is assigned to the Asset’s Animator Root. This allows users to do powerful things with animated skeletons during gameplay, such as world interactions. The Animation Rigging tools can help create higher quality rigs using procedurally controlled bones that can help with twist correction for shoulders and wrists on skinned mesh characters. Physics-based constraints can be used for dynamic secondary motion on character rigs.
3. Visualizing the character's bone
Before you start implementing the Animation Rigging, you'll make things a little bit easier by visualizing the bones from the 3D model - which in this case is the worm boss from the Prototype Series!
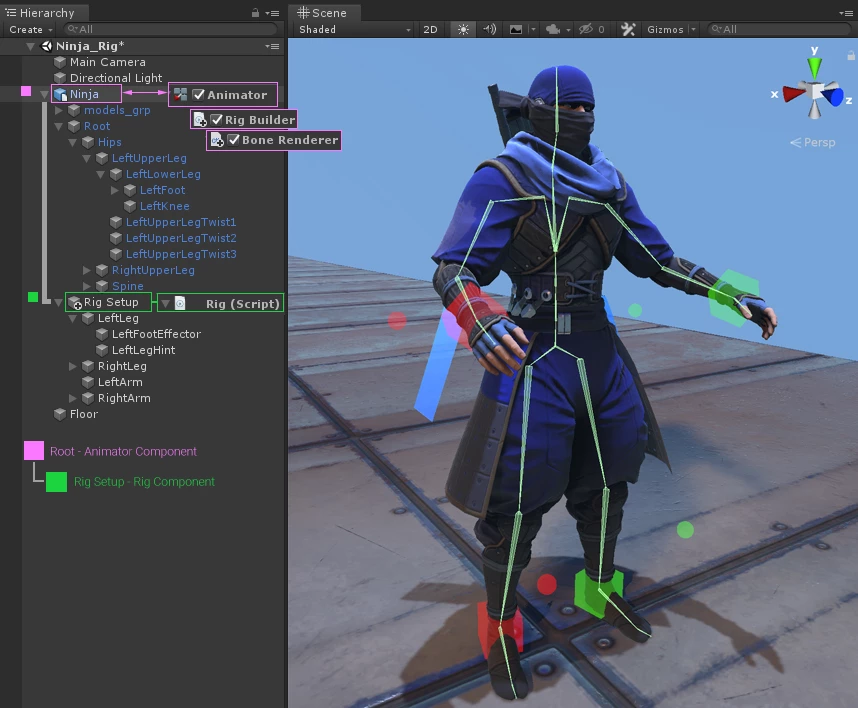
On the main parent object of the character (the one that holds the animator), you need to add a new component called Bone Renderer.
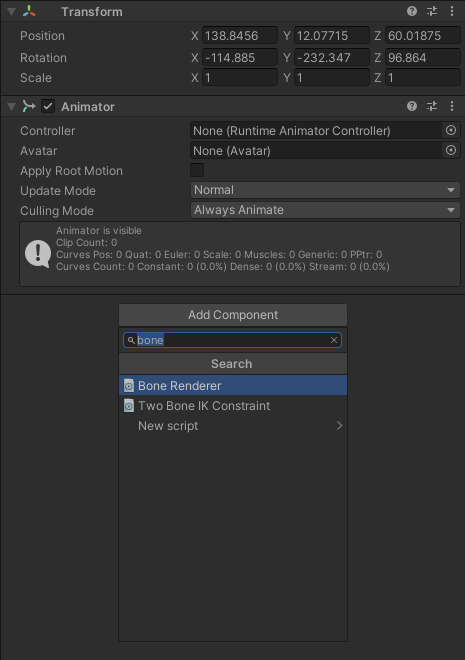
Inside the component, you will notice that the last parameter is a list of transforms, indicated in the image:
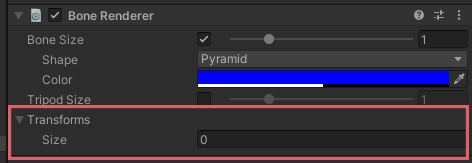
This is the list in which you are going to drag all the bone hierarchy from the model in order for the component to render the model's rig properly.
Here's a great tip to make filling this list easier: Lock the current inspector window using the lock icon on the top right corner of the window. This will allow you to drag elements from the hierarchy without losing track of the bone renderer component.

Once the window is locked, just drag all of the bone structure from the model into the Transforms list!
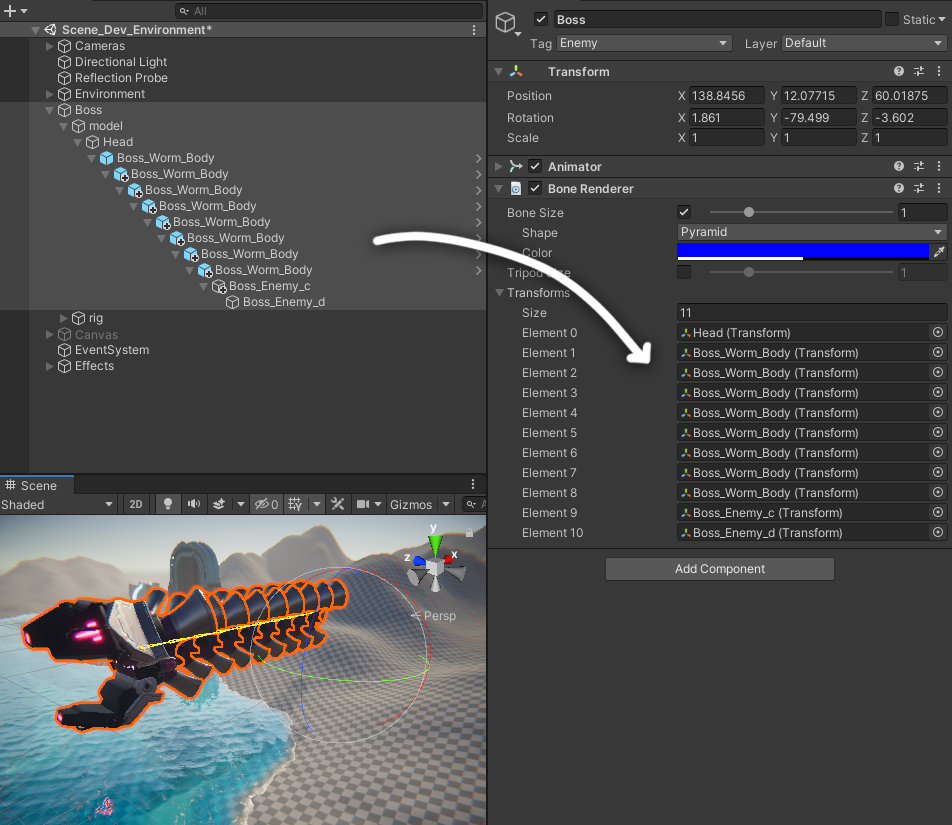
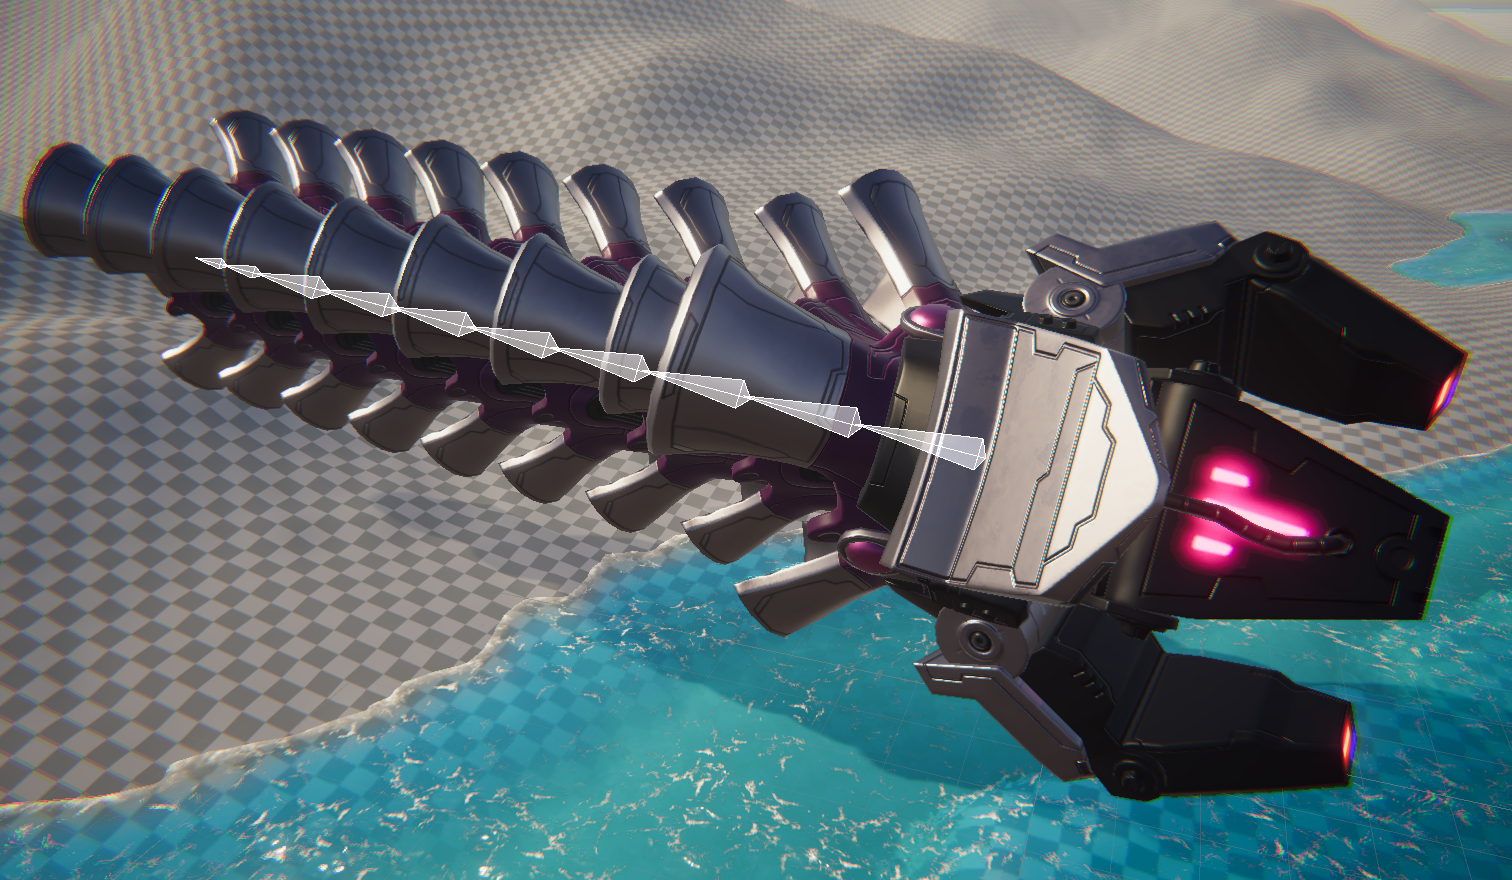
Great, now we can see the bone structure in the scene view! This will make it easier to select any bone that we want!
You can also change the shape, thickness, and size of the bone to whatever you prefer!
4. Rig setup
Now you can actually start implementing the Animation Rigging constraint behaviors.
Let's add the Rig Setup component in the same GameObject as the Bone Renderer, that will basically store any layers of Rigs you setup in the next steps.
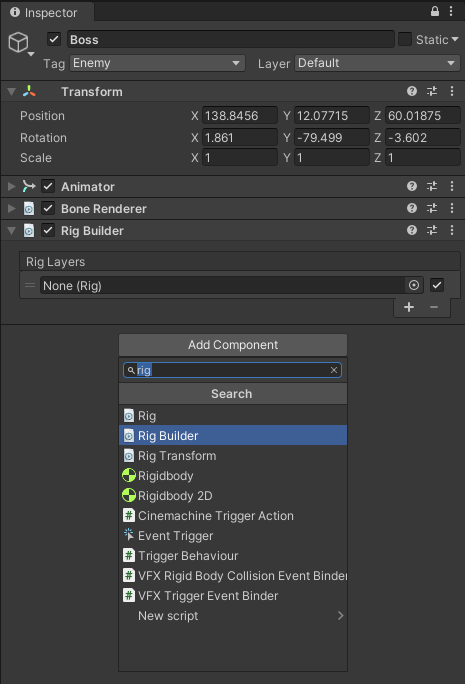
As you can see, the layer list is currently empty, so let's change that by creating our main Rig layer.
To do that, create an empty GameObject as a child of the Boss GameObject. You can do this by right-clicking the Boss object in the hierarchy and clicking Create Empty.
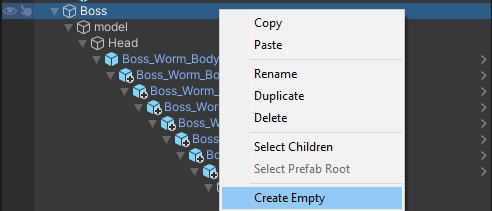
Rename that empty GameObject to "rig", here's how the structure should look like:

Add a Rig component to the newly created rig GameObject.
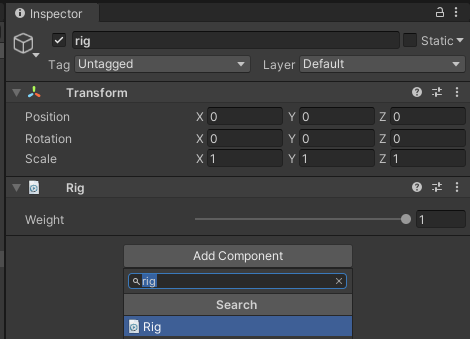
You have now basically created a rig layer, so we can go ahead and fill that Rig Layer list on the Rig Setup component that we created earlier.

Perfect! Now you are ready to add our Animation Rigging constraints!
5. Adding the Damped Transform constraint
Let's click back into the rig GameObject. Create an empty GameObject as a child of it and call it "damped".
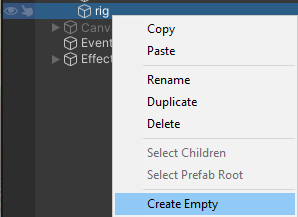
The structure should look like this:

And now you can finally add the Damped Transform constraint to the damped GameObject!
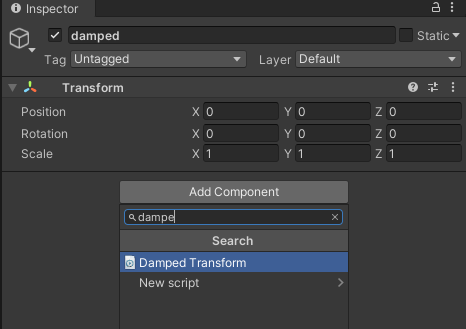
This is how the component looks like:
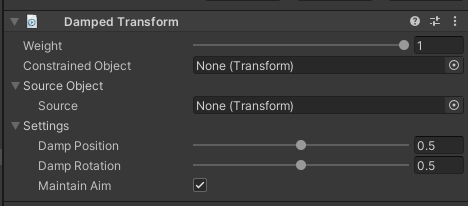
Constrained Object - The GameObject affected by the Source GameObjects.
Source - The GameObject that affects the constrained GameObject.
Damp Position - Damp position weight. If set to 0, no damping is applied object follows source while if set to 0, full damping is applied.
Damp Rotation - Damp rotation weight. If set to 0, no damping is applied object follows source while if set to 0, full damping is applied.
Basically, whatever transform you set to be the Source object will slow down and interpolate the following of the constrained object by the values that you set in the component.
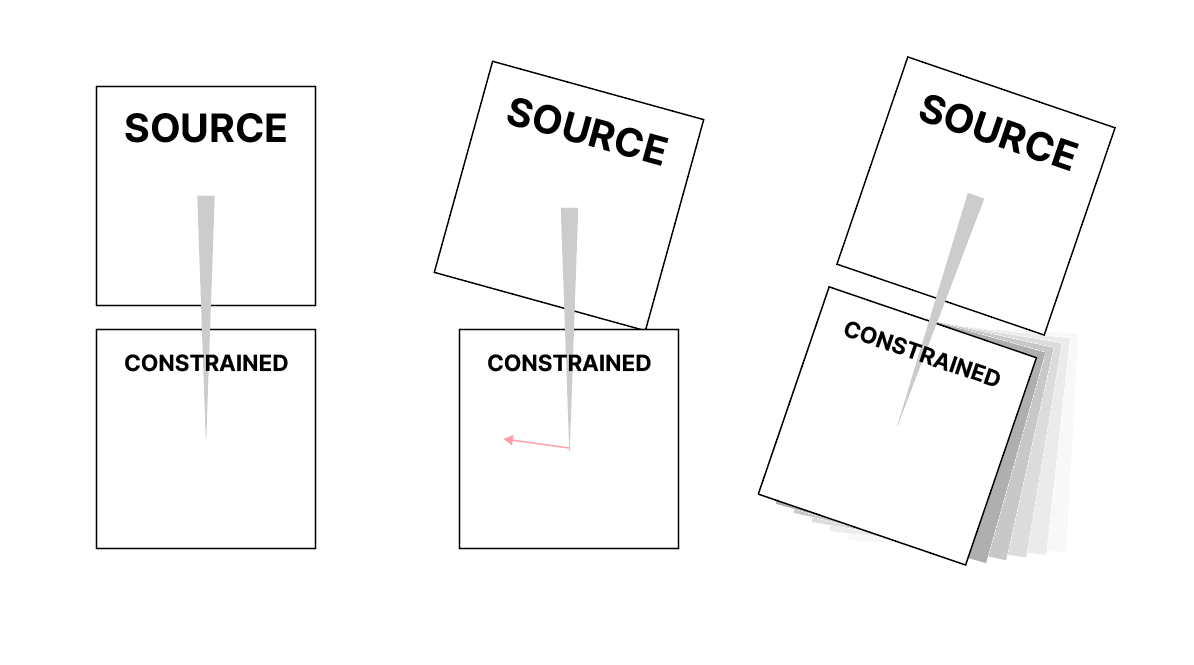
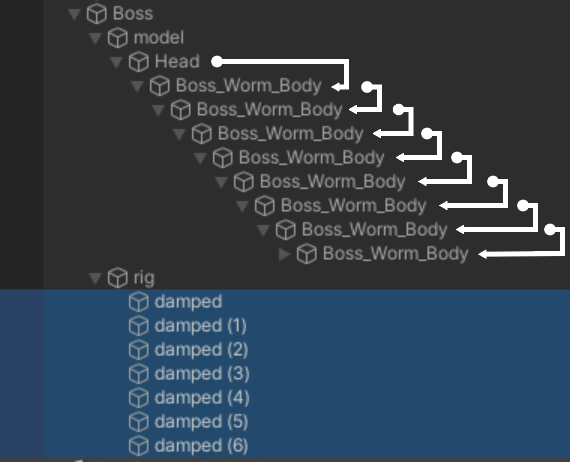
This means that in the case of the worm, the first damped constraint we have to setup has the Head GameObject as the Source Object and the very first "Boss_Worm_Body" GameObject underneath the "Head" GameObject as the Constrained Object.
Since the pivot should only rotate in this case, we can set the Damp Position parameter to 0.
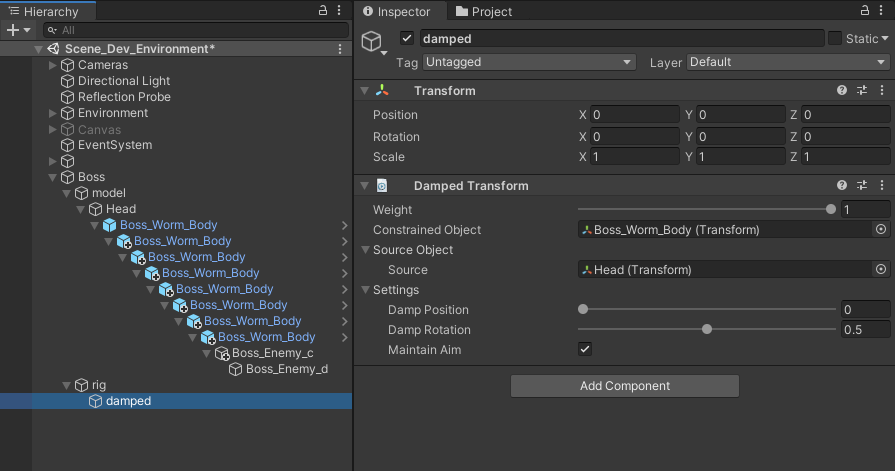
Currently, you only have on damped transform constraint, meaning that currently, the boss looks like this:
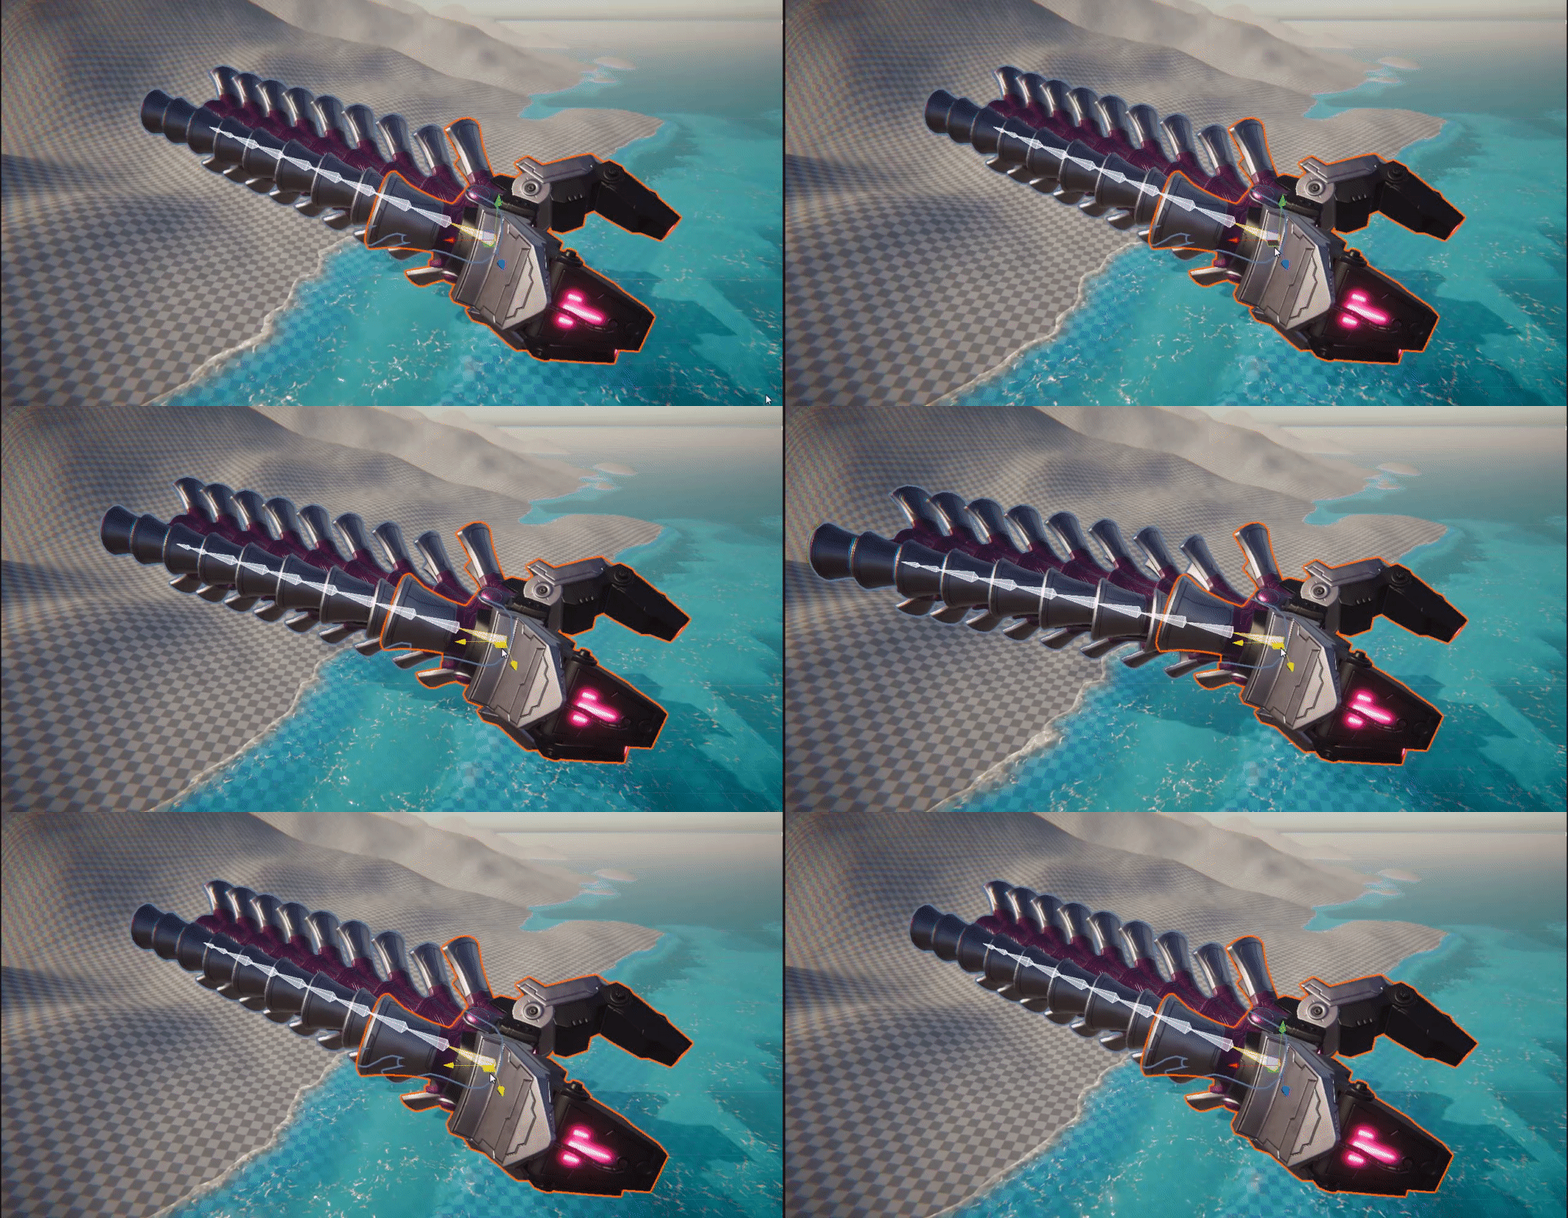
To fix this, all you need to do is create more GameObjects as children of the rig GameObject, add the Damped transform component to them and follow the model hierarchy to define the Source and Constrained Objects, indicated in the image:
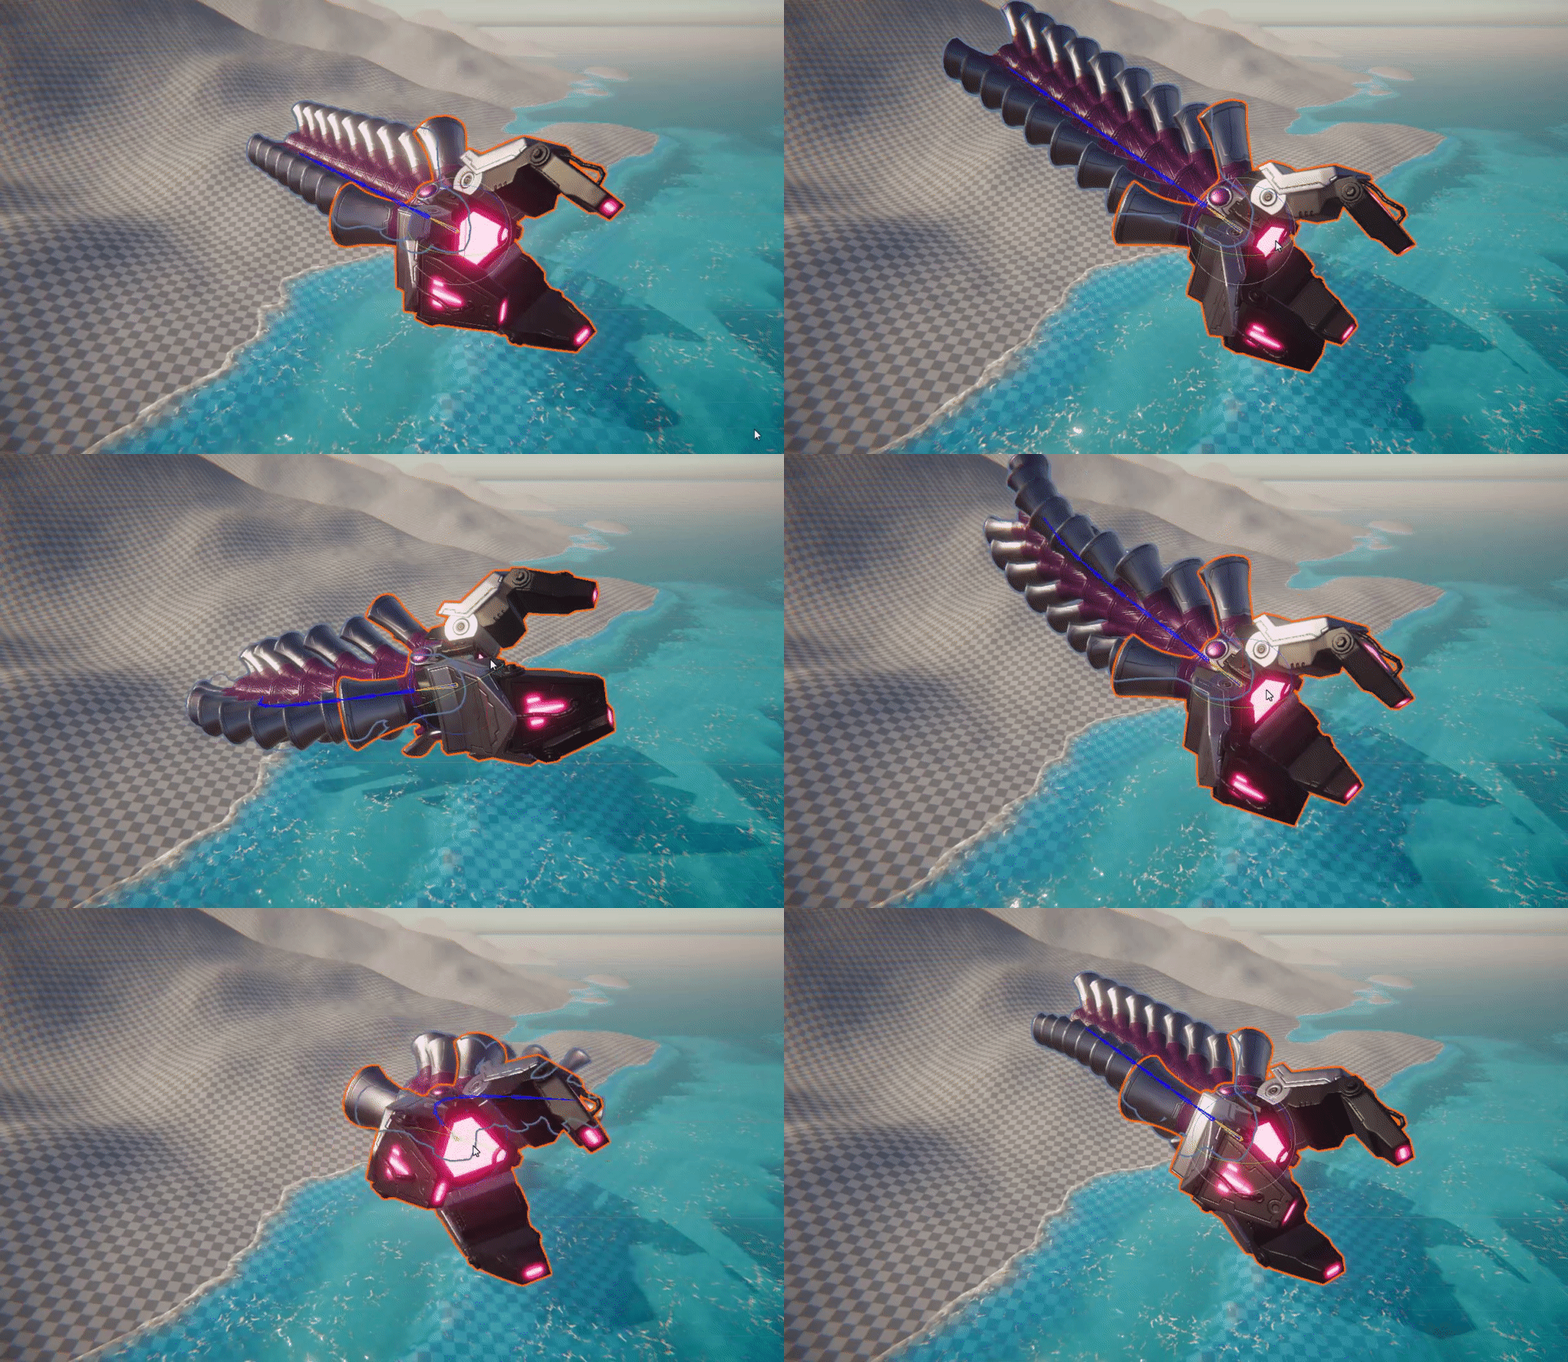
And that's pretty much if, if you have set up everything correctly, you should have a result like this when you move the boss transform in play mode:
6. Share your Prototype!
We would love to see what you've come up with in your prototype! Please take a screenshot of views of your project or do a screen-recording walking us through it, then post it here to share your creation.
Please login to submit
Complete this Tutorial
Submission Gallery

wormm
it's too simple but works perfectly fine

boss damped
Animation Riging : constraint damp

Tutorial result
Disabled worm AI and un parented it from the worm cart to put it there.

Rig Practise
After I understand that sourse object is head not tail)

My procedural animation
Awesome

Forgot to animate the tail, this tool came in handy and looks good
And my tail looks like something bite it raw xd.. more tail bone will fix it.