Using C# to launch projectiles
Tutorial
Beginner
+0XP
30 mins
435
Unity Technologies
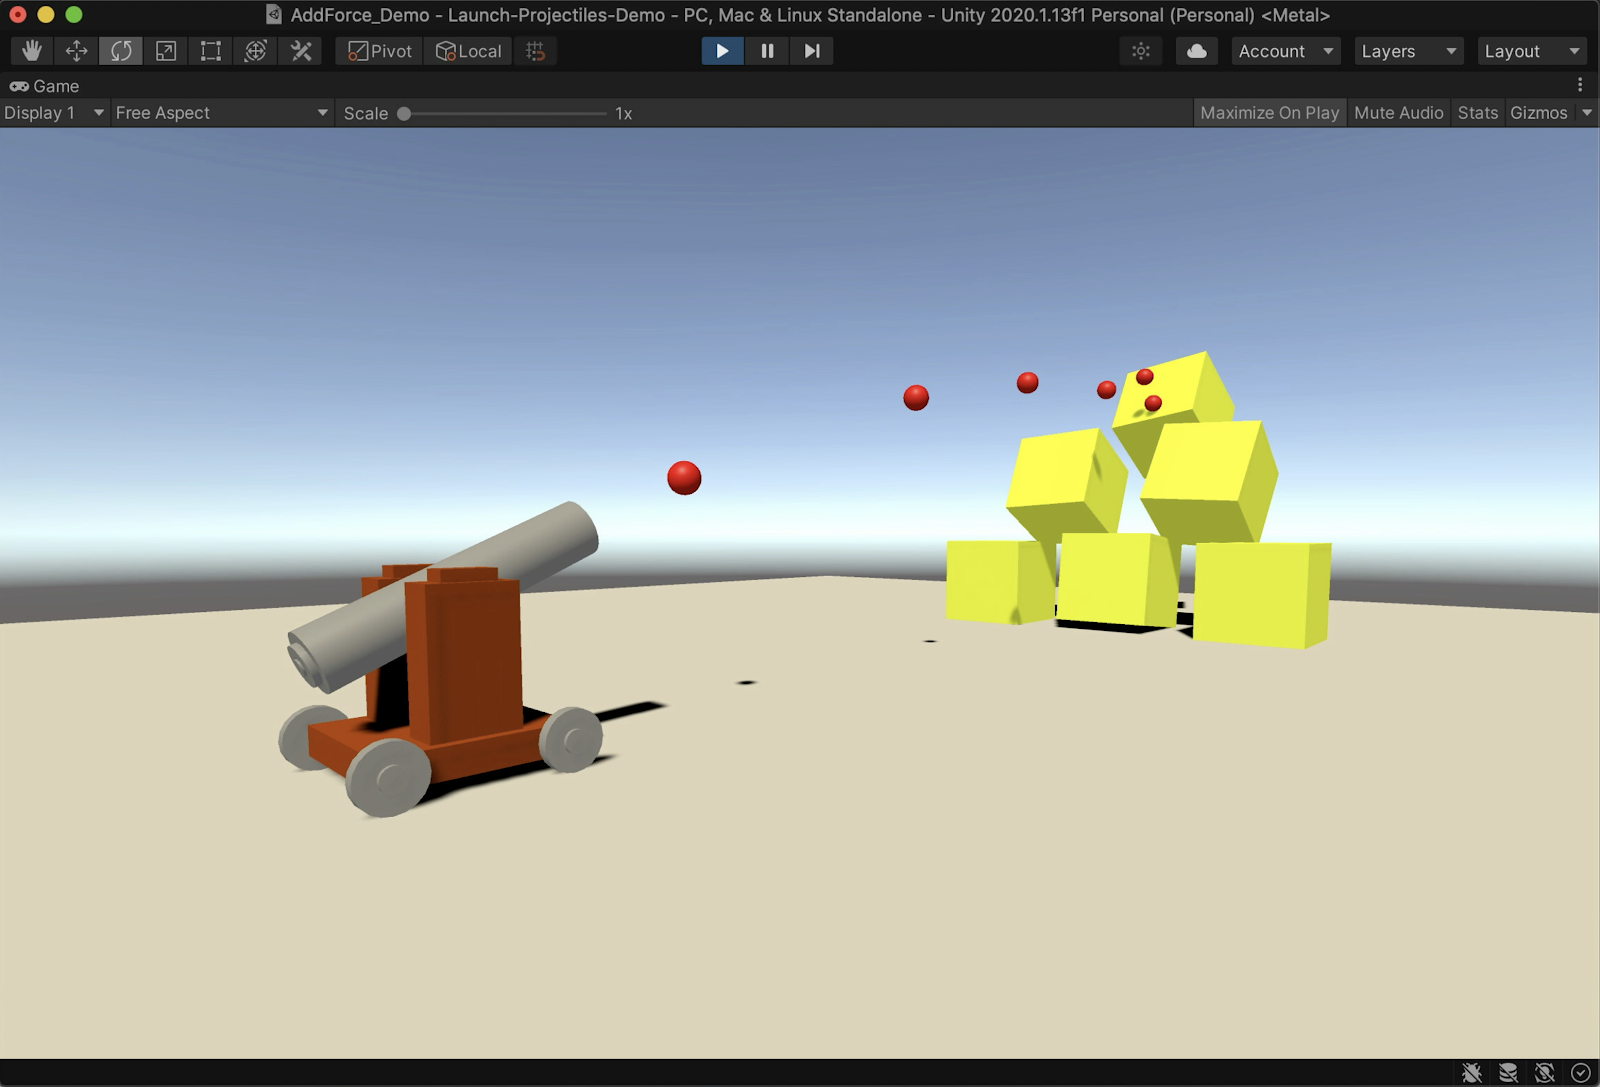
In this tutorial, you will create a C# script which takes advantage of the Rigidbody component’s physics properties to launch projectiles from a cannon.
Materials
Languages available:
1. Setting Up The Scene
This tutorial offers a prepared example Scene. To take advantage of the example Scene, you will create a new project using the Universal Render Pipeline (URP) Template, and download the provided .unitypackage file to add the example assets into your project. Alternatively, you can practice with the provided example assets by importing them into an existing project with a custom Scene already prepared.
1. From the Unity Hub, either create a New Universal Render Pipeline project, or open up an existing URP project.
2. Download the file named “Projectile_Demo.unitypackage”.
3. Install the Unity Package file in your downloads folder by double-clicking the Projectile_Demo.unitypackage file. The Unity Editor will prepare the package and open a pop-up window. Select the Import Button at the lower-right corner of the Import Unity Package window to load the example assets into your project.
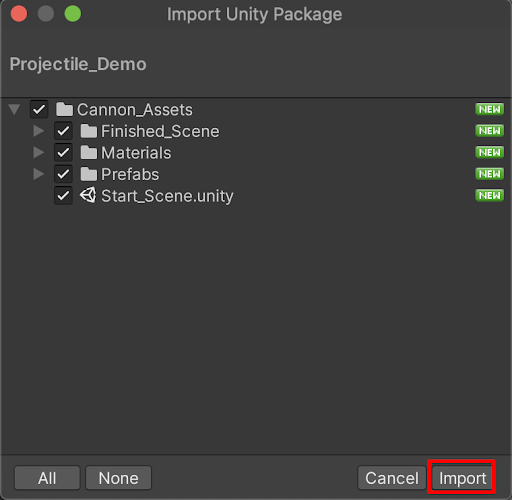
A new folder named “Cannon_Assets” has now been added to your Assets folder.
4. Within the Cannon_Assets folder in the Project window, select by double-clicking the Start_Scene to open up the example Scene.
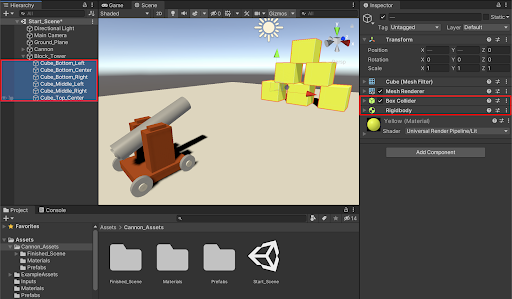
In this example Scene, a cannon GameObject is aiming at a stack of blocks. The block GameObjects have Box Collider and Rigidbody components attached to them, so that they will react when force is applied to them.
2. Setting Up The Canon and Cannonball
In order to get the cannon set up to shoot projectiles, you will first create a GameObject to reference the origin at which projectiles are launched from. This will be a cube that you can visually place into any position within the Scene. You will next position the cube to be at the end of the cannon’s barrel. You will also line up the cube’s axis to match the directional axis of the cannon’s barrel.
1. From the top menu drop-down, select: GameObject > 3D Object > Cube. Rename it to: “Launch_Origin”. Set its X, Y, and Z Scale values to 0.2.
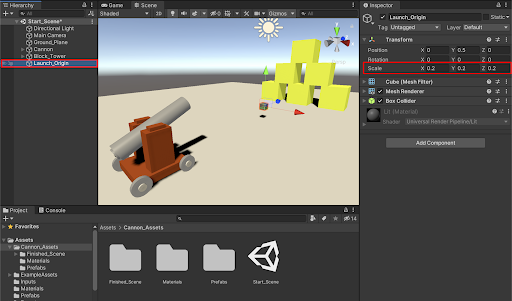
2. Move the position of the Launch_Origin cube GameObject to the front of the cannon. Set the Cube’s Transform Position in the Inspector to be: X=0, Y=1.12, and Z=-3.21. Ensure that the axis of the cube’s rotation also matches and lines up with the cannon’s aim, by setting the X Rotation to 66.
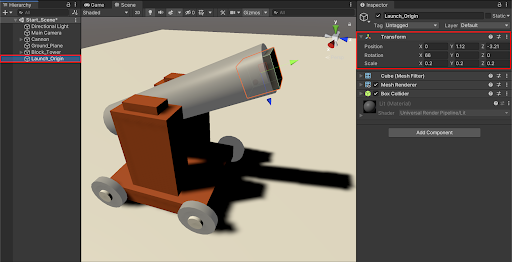
3. Place the Launch_Origin GameObject to be a child of the cannon’s barrel in the Hierarchy window. The Launch_Origin will now be locked to the position and direction of the cannon in case it is moved later on.
4. Since we won’t need the Launch_Origin to be visible any more, disable its Mesh Renderer component in the Inspector by deselecting the checkbox. Also, deselect the checkbox next to the Box Collider as well.
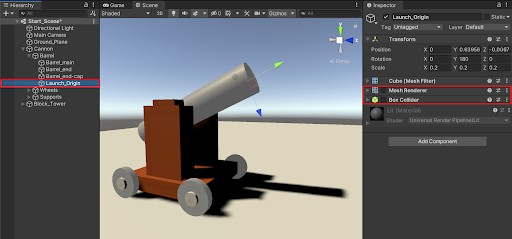
Now preparations will be made to create the projectile cannonball itself, and then saving it as a Prefab.
5. From the top menu drop-down, select: GameObject > 3D Object > Sphere. Rename it to: “Cannonball”. Set the Cannonball GameObject’s Position coordinates to X=0, Y=0.5, and Z=0. Set the Cannonball’s X, Y, and Z Scale values to 0.2.
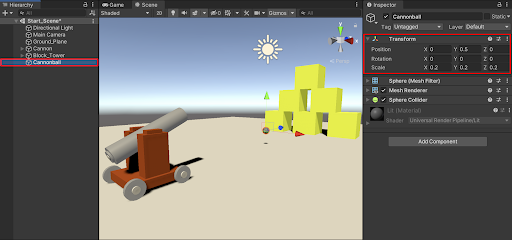
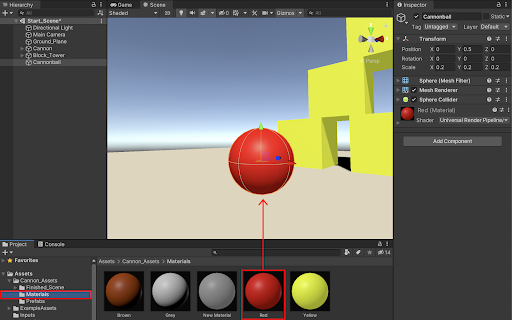
6. Assign the Cannonball GameObject a material. Open the materials folder in the Project window by navigating to Assets > Cannon_Assets > Materials. Next, drag and drop the Red material onto the Cannonball GameObject in the Scene window.
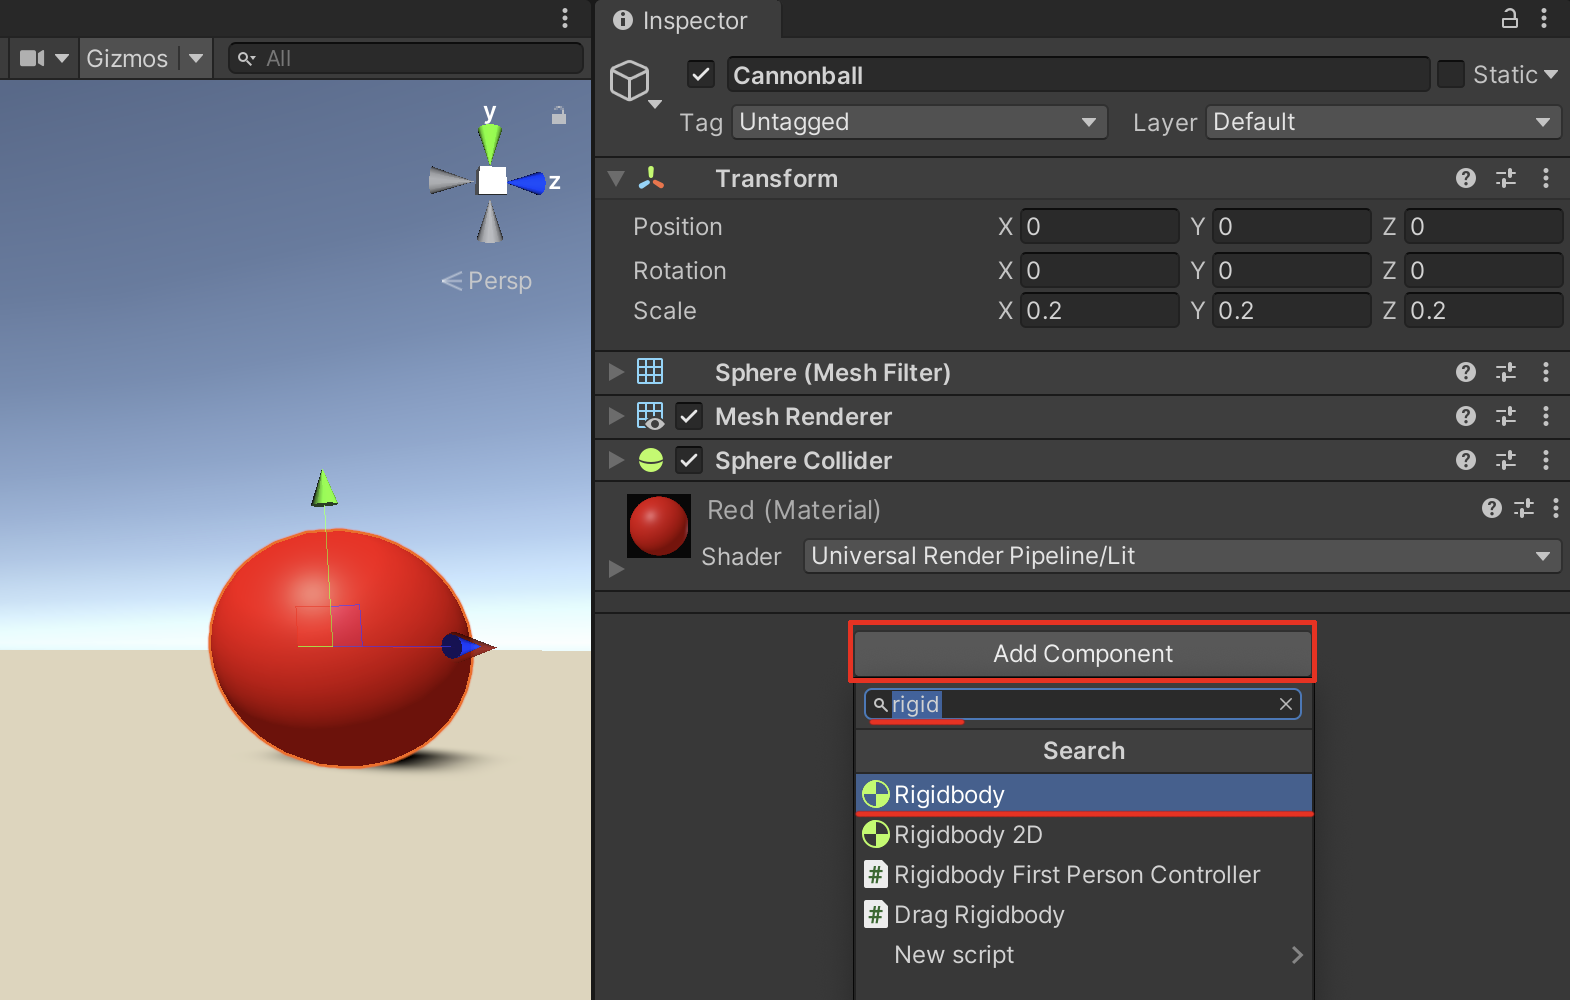
7. Attach a Rigidbody component to the Cannonball to give it physics properties. First ensure that the Cannonball GameObject is selected in the Hierarchy window. Next, select the Add Component button in the Inspector, type “rigid” in the search field, and then select Rigidbody.
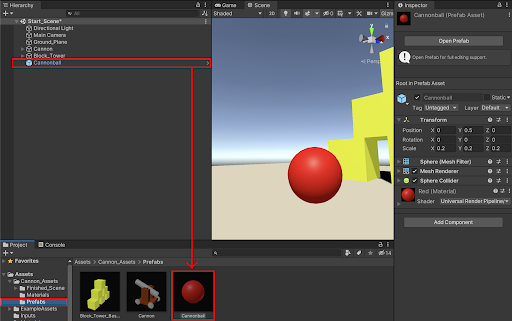
8. Next, save the Cannonball GameObject as a Prefab. Select the Cannonball in the Hierarchy window, and drag it into the Project window, inside the folder named “Prefabs”.
9. Since we will instantiate, or spawn, the projectile using code, delete the Cannonball GameObject from the Scene by right-clicking on the Cannonball GameObject in the Hierarchy window, and selecting Delete.
3. Scripting The Character Controller To Shoot Projectiles
Now that you are all set up, you are ready to write some code. Begin by creating a C# script, and editing it in your script editor.
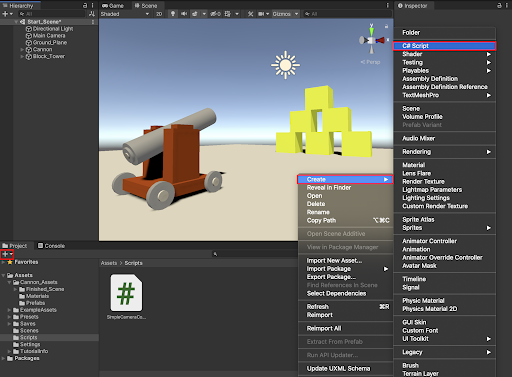
1. Create a new C# script by either selecting the + button at the top-left of the Project window, or by right-clicking in a Project window’s folder, and then selecting: Create > C# Script.
2. Rename the C# script to “LaunchProjectile” in the Project window.
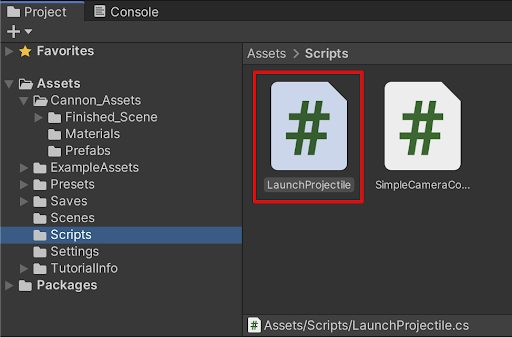
3. Double-click the LaunchProjectile.cs script in the Project window to open it in your script editor.
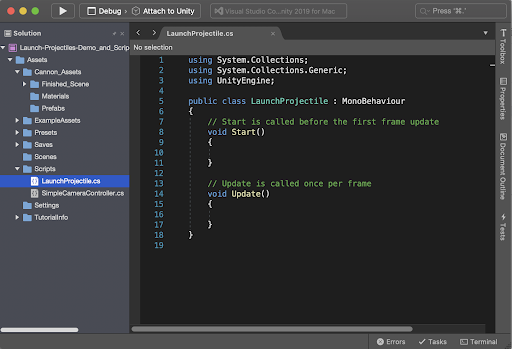
4. Starting on line 7 beneath the Class opening brace, define a public variable of the type: GameObject, and name it projectile. On the next line, define another public variable of the type float, and call it launchVelocity. Assign it to have the value of 700. Type in the code to appear as:
public class LaunchProjectile : MonoBehaviour
{
   public GameObject projectile;
   public float launchVelocity = 700f;
You will give your script some logic of course, however at this point, save it, and attach the script to the Launch_Origin GameObject in your Scene so you can understand how it is structured.
5. Save your script in the code editor by selecting from the top menu drop-down: File > Save, or by using the keyboard shortcut Cmd+S (Mac), or Ctrl+S (Windows).
6. Switch back to the Unity Editor. Select the LaunchProjectile.cs script in the Project window, and drag to attach it to the Launch_Origin GameObject in the Hierarchy window. You are able to see the script’s public variable fields within the script component shown in the Inspector window. You are now able to set and modify their values directly from the Unity Editor.
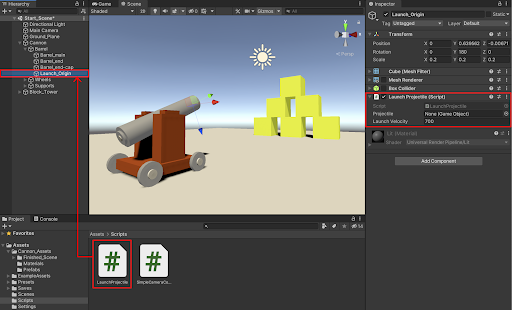
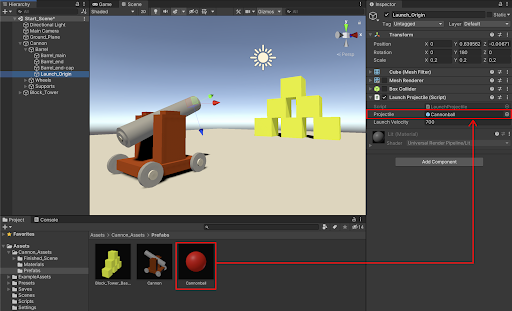
7. To assign the Cannonball to the C# script’s Projectile field, first select the Cannonball Prefab in the Project window, and then drag / drop it into the LaunchProjectile (Script) Projectile field in the Inspector.
You will now give your script some logic.
8. Switch back to the C# script that is still open in the code editor. Within the Update method, on the line after its opening brace, create a conditional statement, sensing whether the mouse button is pressed. Type in the code:
    void Update()
    {
        if (Input.GetButtonDown("Fire1"))
        {

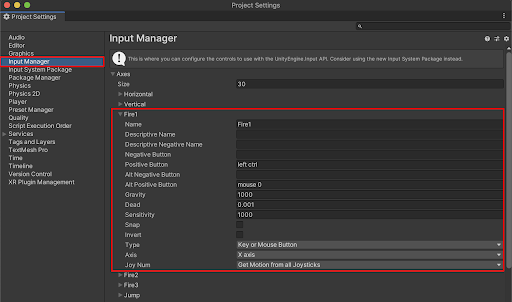
}9. The Fire1 command has been established with the built in Input Manager API. If you are instead working with the new Input System package, refer to this tutorial to set up your inputs. The Fire1 command corresponds to the left mouse button, as well as the left Control key on the keyboard. To check this specific input, or refer to other input commands, select from the Unity Editor’s top menu drop-down: Edit > Project Settings, and then select the
Input Manager on the left column of the Project Settings window.
10. With the C# script open in the code editor, you will next script some logic. Inside the conditional if statement braces, write the following code:
  void Update()
   {
       if (Input.GetButtonDown("Fire1"))
       {
           GameObject ball = Instantiate(projectile, transform.position,
                                                     transform.rotation);
       }
   }
11. Next, use the command: GetComponent<Rigidbody>(). This will reference the Cannonball Prefab’s Rigidbody component. To add force to the Cannonball, use the .AddRelativeForce() function.
   void Update()
   {
       if (Input.GetButtonDown("Fire1"))
       {
           GameObject ball = Instantiate(projectile, transform.position,
                                                     transform.rotation);
           ball.GetComponent<Rigidbody>().AddRelativeForce();
       }
   }
Inside the .AddRelativeForce() function, create a new Vector3 object. You will pass in the launchVelocity variable (which you earlier assigned the value of 700f) into either the X, Y, or Z axis of the Vector 3 object, depending on which axis direction your Launch_Origin GameObject is facing.
12. Since the example Launch_Origin GameObject is facing along the Y axis to line up with the cannon’s aim, pass in the Vector3 values to read: (0, launchVelocity, 0). The Vector3 parameter’s Y axis, now has a force value applied in the Y direction, and will immediately have a velocity of 700 upon instantiating.
   void Update()
   {
       if (Input.GetButtonDown("Fire1"))
       {
           GameObject ball = Instantiate(projectile, transform.position,
                                                     transform.rotation);

           ball.GetComponent<Rigidbody>().AddRelativeForce(new Vector3
                                                (0, launchVelocity,0));
       }
   }
13. Save the C# script. Switch back to the Unity Editor, and enter Play Mode to test your game. Activate the left mouse button or left control key during Play Mode to successfully launch the projectiles.
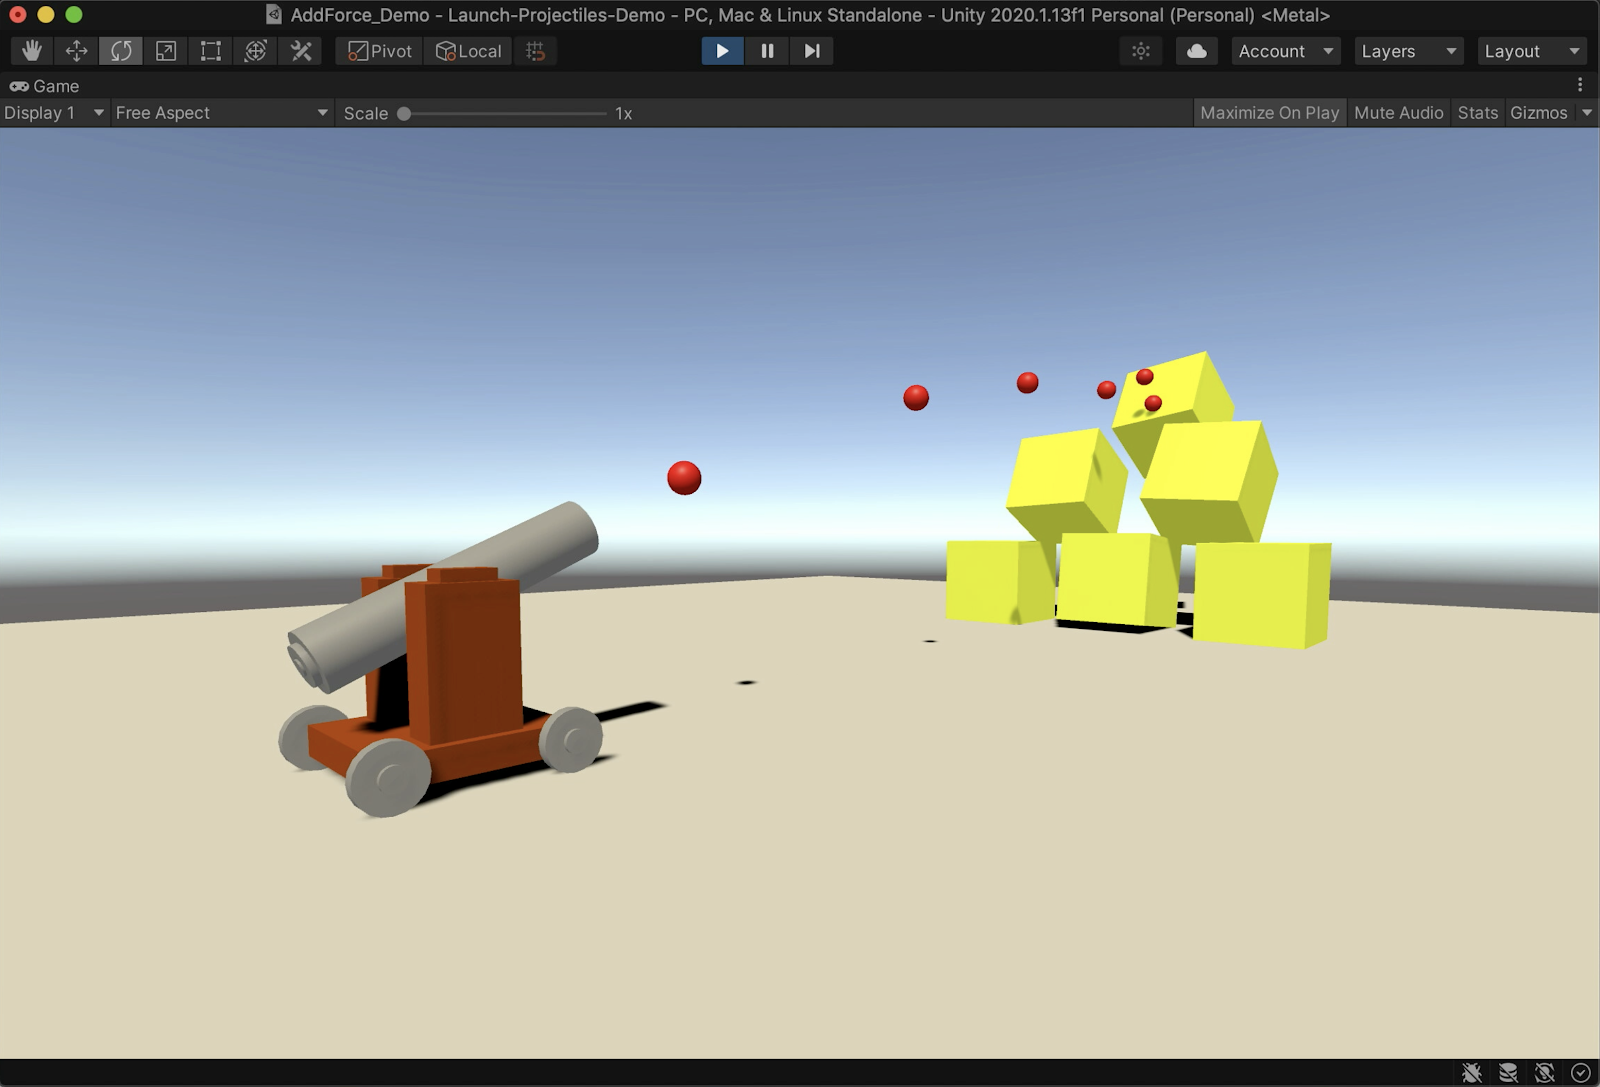
The full LaunchProjectile C# Script reads:
using System.Collections;
using System.Collections.Generic;
using UnityEngine;

public class LaunchProjectile : MonoBehaviour
{
   public GameObject projectile;
   public float launchVelocity = 700f;

   void Update()
   {
       if (Input.GetButtonDown("Fire1"))
       {
           GameObject ball = Instantiate(projectile, transform.position,
                                                     transform.rotation);
           ball.GetComponent<Rigidbody>().AddRelativeForce(new Vector3
                                                (0, launchVelocity,0));
       }
   }
}
4. Next Steps
Programming a Unity game to launch projectiles using the Rigidbody component is a satisfying skill. Practice further refinements on your projectile. For example, adjust the mass and drag properties of your projectile by opening up the Cannonball’s Rigidbody component, and adjusting the Mass and Drag values. Make adjustments to the Cannonball’s velocity to more finely tune how far your projectile will launch. Additionally, practice game enhancements by configuring your launch_origin onto movable or controllable players.