
Using Interactors and Interactables with the XR Interaction Toolkit
Tutorial
Beginner
+10XP
30m
(272)
Unity Technologies
In this tutorial, we’ll explore Interactors and Interactables in the XR Interaction Toolkit. Interactors allow the user to interact with the virtual world. Interactables are GameObjects with which the user can interact.
Languages available:
1. Using Interactors and Interactables with the XR Interaction Toolkit
This tutorial has been verified using Unity 2019.4.12f1 LTS, XR Interaction Toolkit 0.9.3-preview, and Oculus XR Plugin 1.4.3
In this tutorial, we’ll explore Interactors and Interactables in the XR Interaction Toolkit. Interactors allow the user to interact with the virtual world. Interactables are GameObjects with which the user can interact.
Interactors offer the user a way to hover, select, and grab objects. They consist of the Interactor component, which works with the Interaction Manager to handle events and interactions; some way of detecting Interactables (via a Collider, or Raycaster); and some way to provide sound, visual, and/or haptic feedback about interactions.
The XR Interaction Toolkit includes the Grab Interactable, a component that allows the XR user to grab a GameObject as one would a physical object.
2. Anatomy of an Interactor
An Interactor is made up of a GameObject with the Interactor component and some way of detecting Interactables that are close enough to interact with. The Direct and Socket Interactors use Colliders for this, and the Ray Interactor uses raycasting, with the developer able to set the maximum distance.
Direct Interactor
The Direct Interactor, not surprisingly, allows the user to directly interact with elements in the VR world. This allows for greater immersion and a more natural interface. Example uses for the Direct Interactor include flipping switches or pressing keys. It’s a great fit for puzzles or maintaining immersion with interactive elements.
Ray Interactor
The Ray Interactor has a greater reach than the Direct Interactor, with a ray that acts as an extendable interactor and a Line Renderer that provides visual feedback. The Line Renderer changes color when the user is aiming at an interactable object. This trades off some immersion for greater range and a clearer indication of both aim and possibilities for interaction. This is especially useful for navigating user interfaces in the virtual world.
Socket Interactor
The Socket Interactor holds an Interactable in place and fires an event when the Interactable is snapped into (OnSelectEnter) or removed from (OnSelectExit) the Socket. This is great for traps (e.g., triggering a boulder that chases the player when the idol is removed from the Socket) or puzzles (e.g., unlocking a door when the proper key is inserted). We’ll explore the Socket Interactor and Interactor Events in greater depth in a later tutorial.
Grab Interactable
The Grab Interactable allows a user to pick up (and drop or throw, or place into a Socket Interactor, etc.) a GameObject using either the Direct or Ray Interactor.
3. Interactors and Interactables in Action
We’ll explore Interactors and Interactables using a Scene from the XR Interaction Toolkit VR Example project. This isn’t meant to be an exhaustive walkthrough, so we’ll focus on the most important parts of each component. We’ll cover Interactor Events in more depth in a later tutorial.
Load the Scene named “WorldInteraction.” This Scene includes an XR Rig with Ray and Direct Interactors and a sword with a Grab Interactable component, resting in a Socket Interactor. We’ll use this Scene as an example as we explain the Interactor and Interactable elements; afterward, we’ll create our own (simpler) version.
1. In the Hierarchy View, expand XR Rig and its child CameraOffset (Figure 01).
2. By default, there are no visualizers for the position of the hand controllers/interactors. In an actual production scenario, you would likely have a visual component to the XR Rig to represent the avatar. For this exercise, create a Sphere by selecting 3D Object > Sphere from the GameObject dropdown, scale it to .1 in all dimensions, and place it as a child of the Left Ray Interactor in the hierarchy. Set its local position and rotation to 0 in all axes.
3. Repeat for the Right Direct Interactor. You may wish to assign a different material to each, to aid in telling them apart.
4. Click to select the Right Hand Controller, here named Right Direct Interactor, and turn your attention to the Inspector.
5. The Right Hand Controller consists of the XR Controller, the XR Direct Interactor, and the Sphere Collider.
XR Controller: The XR Controller handles the interactions from the Interactor and allows the developer to reassign which buttons the Interactor uses to select or activate Interactables or press UI buttons.
XR Direct Interactor: The Direct Interactor is fairly simple (Figure 02).
We’re primarily concerned with the following options:
Interaction Manager: This is the Interaction Manager assigned to the Interactor. By default, there is one Interaction Manager that handles all interactions. For special cases, you may wish to have multiple Interaction Managers, each handling different sets of Interactions.
Interaction Layer Mask: The developer can exclude or include Interactables based on their layer. By default, Interactables on all layers are valid for Interaction.
Attach Transform: This is the Transform to which an Interactable attaches. If none is specified, the Interactor’s Transform is used.
Sound, Haptic, and Interactor Events: When an Interactor selects, deselects, hovers over, or stops hovering over an Interactable, sounds and haptic (force feedback) effects can be played. If more complex functionality is needed, these events can be provided as Interactor Events in code (Figure 03). We’ll cover Events in a later tutorial.
Sphere Collider (trigger): When an Interactable object enters a Direct Interactor’s Collider it becomes “visible” to the Interactor.
6. Let’s turn our attention to the Ray Interactor. Left-click to select the Left Ray Interactor in the Hierarchy view and examine the XR Ray Interactor component in the Inspector. We won’t cover the elements that are shared by both Direct and Ray Interactors.
7. The Ray Interactor (Figure 04) works by casting a ray or sphere to find valid Interactables.
If casting a Ray, there are three options for the trajectory:
Straight Line: A simple raycast
Projectile: The path depends on the angle of the Interactor and specified projectile properties. Reference Frame is populated automatically (Figure 05).
Bezier Curve: The path is a Bezier curve with the Attach Transform as the start point and a specified control as the end point. The control point forms the peak of the curve (Figure 06).
Hit Detection Type can either be a Raycast or Sphere Cast. Options include the ability to hover over an item to select it and to allow the Interactor to use UI GameObjects.
8. Finally, let’s look at the Sword (Figure 07). Grab Interactables need a Rigidbody and Collider (with Is Trigger set to False) and an additional Collider with Is Trigger set to True to define the Interactable area.
4. Setting the Scene
Let’s create a simple Scene using the Grab Interactable and Ray and Direct Interactors. We’ll cover working with the Socket Interactor in a separate tutorial.
1. Create a new Scene.
2. Let’s create our ground plane by selecting 3D Object > Plane from the GameObject drop-down. Scale it by 50-100 along the X and Z axes.
3. Select 3D Object > Capsule from the GameObject menu. Name it Throwable.
4. With Throwable selected, use the Component drop-down and select Physics > Rigidbody.
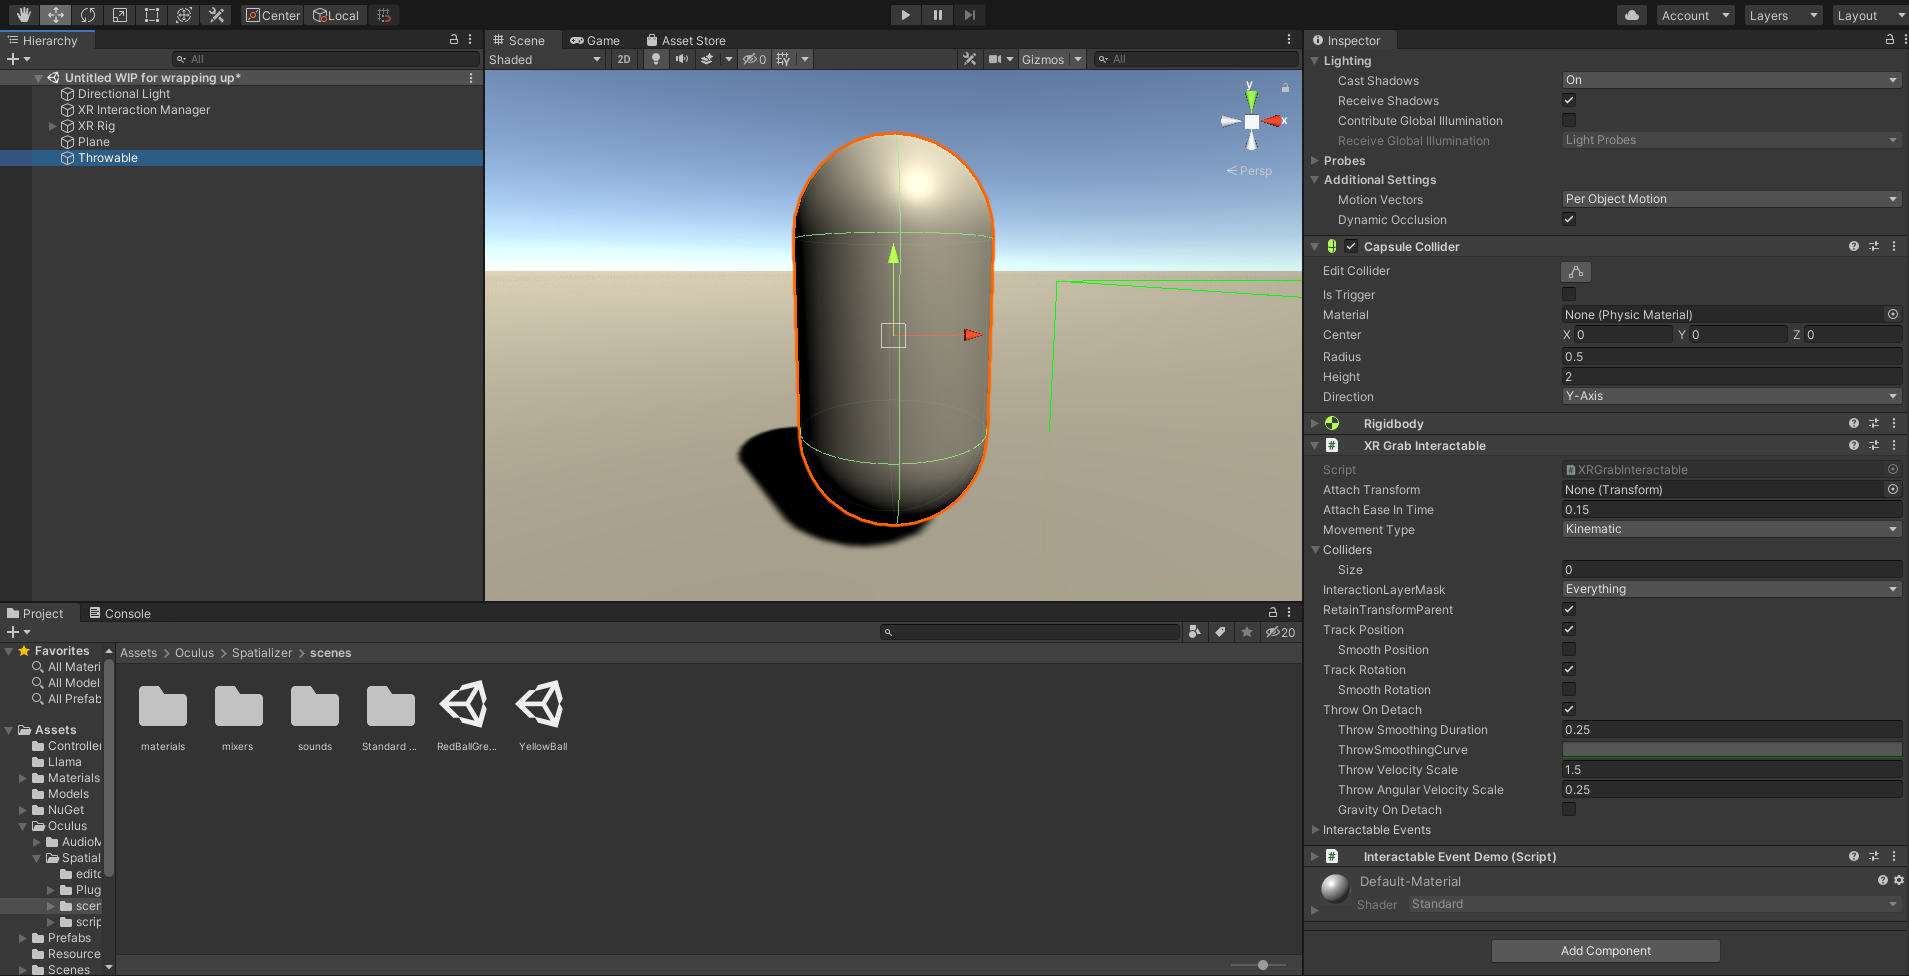
5. Next, add the XR Grab Interactable component by selecting from the Component drop-down XR > XR Grab Interactable (Figure 08).
6. If desired, duplicate this GameObject and distribute it throughout the Scene.
7. Finally, create a Room-Scale XR Rig by selecting XR > Room-Scale Rig from the GameObject drop-down.
8. Expand it in the Hierarchy and select either the Left or Right Hand Controller.
9. In the Inspector, remove all components except the XR Controller. The XR Interactor Line Visual depends on the Line Renderer, so it must be deleted before the Line Renderer. The order of deletion otherwise doesn’t matter.
10. Add the XR Direct Interactor component. For our purposes, the default settings are fine (Figure 09).
11. Create a Sphere by selecting 3D Object > Sphere from the GameObject dropdown.
12. In the Hierarchy view, drag it onto the Controller to which you assigned the Direct Interactor. Set its local position and rotation to 0, and scale it to .1 in all dimensions (Figure 10). You may wish to assign a non-default Material as well.
13. Build and launch your project on your device, making sure to add this Scene to the build so that it’s loaded at the start. Try grabbing the GameObject created in Step 3 with the Ray Interactor (or the Direct Interactor, if the Interactable is within reach). Try throwing the Interactable in the air with one hand and catching it with the other. If you put more than one Interactable in the Scene, try juggling.
5. Conclusion
Interactors and Interactables give life to your world in a way that merely existing in it can’t. Proper use of interactivity can do wonders for immersion.