Using the PiXYZ Studio Material Editor
Tutorial
Beginner
+0XP
30 mins
Unity Technologies
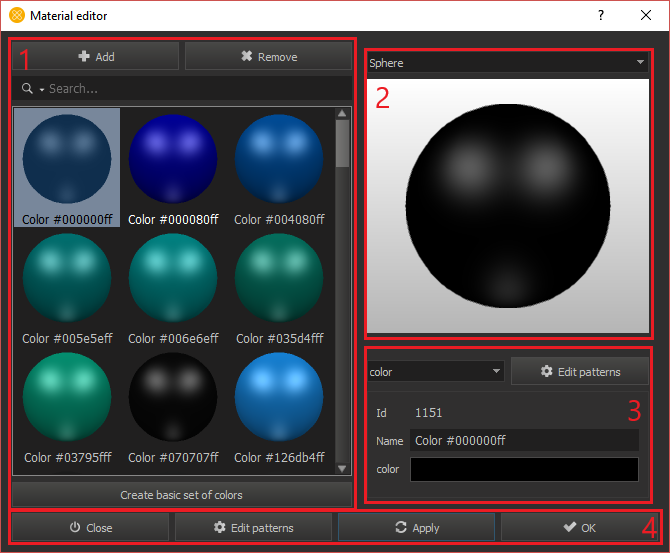
The PiXYZ Studio allows you to manage materials that are used on the models imported into the application. You can create, update, and apply the materials to a mesh they are missing. The Material Editor is a easy to use tool that expedites the workflow in assigning materials to your model. In this tutorial you will learn how to use the material editor and how to apply materials to your models.
Languages available:
1. Using the PiXYZ Studio Material Editor
PiXYZ Studio’s Material Editor is an easy-to-use tool that allows you to design and manage Materials for your model. The Material Editor also allows you to create and modify Shaders that the Materials use.
2. Opening the Material Editor
You can access the Material Editor one of two ways.
- Select the Materials button from the Toolbar. (Figure 01)

- Go to Materials > Material Library from the Menu Bar. (Figure 02)
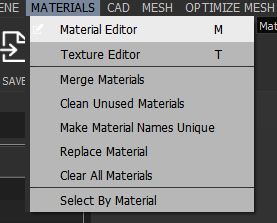
You will notice two additional options in the Material dropdown:
- Clean Unused Materials: This will delete any materials that are not applied to an occurrence.
- Make Material Names Unique: This will ensure that all the material names will be unique and there will not be duplicate naming.
3. About the Material Editor
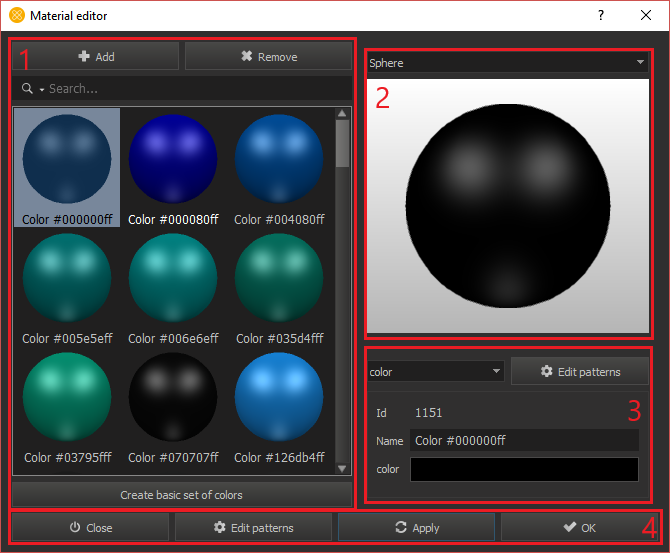
The Material Editor (Figure 03) can be broken down into four sections:
1. Material Library: This is a scrollable window where you can find pre-existing and user-created Materials. You can also Add new materials, Remove existing materials or select Create a basic set of colors.
2. Material Previewer: Here the Material Editor renders out the Material you’ve selected. The dropdown just above the preview window allows you to choose whether to preview the Material on a Sphere or Cube.
3. Material Properties: Just below the preview you can adjust the Material’s properties, from to color to patterns and more.
4. Material Editor Toolbar: At the bottom of the window you have the Material Editor’s general functions. Edit Patterns open’s a new window to modify the Material types. Apply saves all current changes. OK saves all current changes and closes the Material Editor and Close discards all changes and closes the Material Editor.
4. Creating a New Material
Creating a new Material is a straightforward process.
1. Click the Add button at the top of the Material Editor. This opens a new window where you select the Material pattern. (Figure 04)
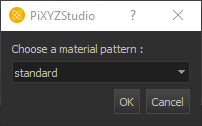
2. Your Material pattern choices are: Standard, Color, PBR, and Unlittexture. Leave the choice at Standard and click OK.
3. This creates a new Material with the default name of “new standard.” All new Materials will be automatically named with the prefix “new” and the chosen pattern. (Figure 05)
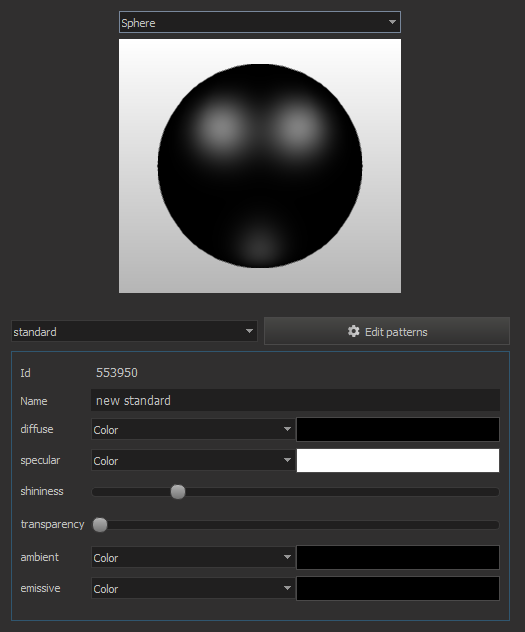
4. The new Material you’ve created will automatically be selected and preview with its properties displayed on the right of the Material Library. Here you can change anything about the Material. Each pattern has a different set of properties thatwhich determine how the Material is rendered.
5. Removing a Material
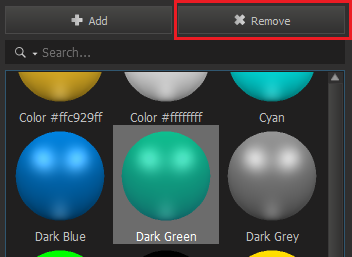
To remove a Material, simply select it within the Material Library and click the Remove button at the top. This will permanently delete the Material. You cannot undo this action. (Figure 06)
6. Creating a basic set of Materials
The Material Editor comes with a basic set of color Materials to get started. Clicking the Create basic set of colors button at the bottom of the Material Library will generate a small set of basic colors you can use. All these Materials use the Color Material pattern.
7. Editing Patterns
One of the most powerful things about the Material Editor is the ability to create new Material types or edit existing ones. To access the Material Pattern Editor, you can either select the Edit Patterns button in the Material Editor toolbar or select Edit Pattern on a selected Material. This will open the Material Pattern Editor window. (Figure 07)
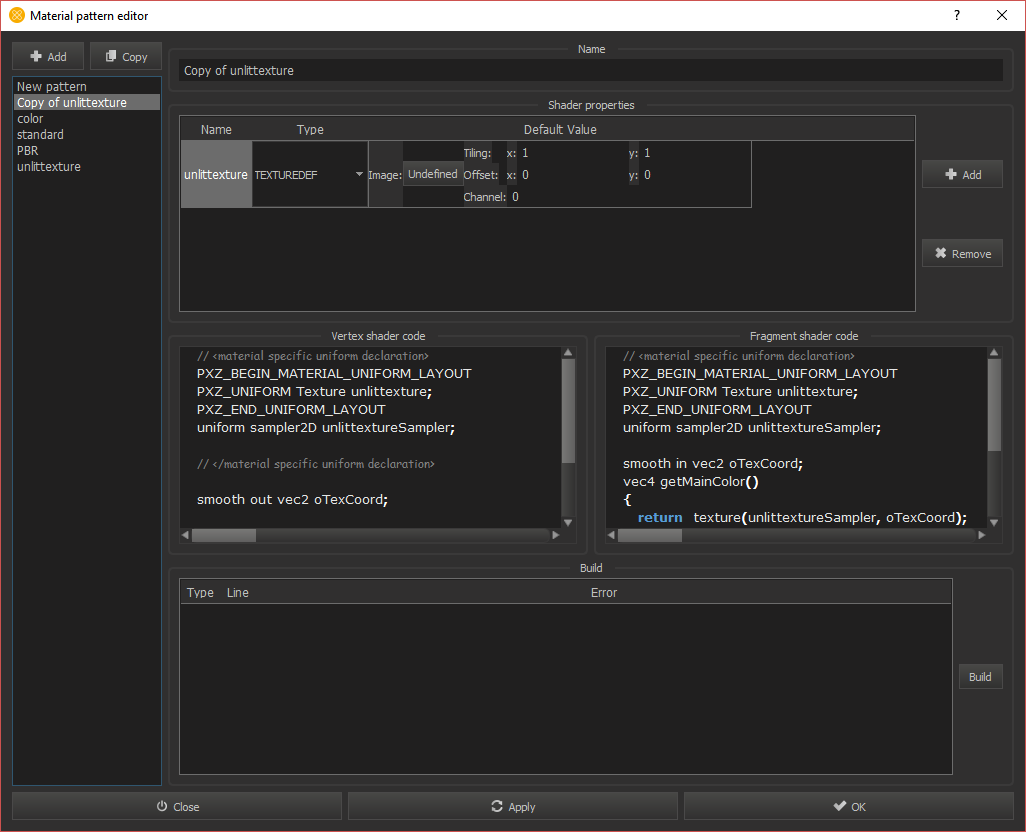
Here you can Add new Material patterns or Copy existing Material patterns to create duplicates. With a Material pattern selected, you can change the pattern’s name, add or remove the Shader properties, and even write the Vertex and Fragment Shader codes. This editor allows you to fully build a custom Shader, compile it, and provide any errors below in the Build Log section. This feature allows you to build unique custom Shaders to apply to your model before exporting it to a real-time application or middleware.
8. Conclusion
The PiXYZ Material Editor is a very powerful and compact tool in PiXYZ Studio. It’s designed to expedite the process of preparing your loaded CAD model for real-time applications by providing the ability to create and assign Materials before the model is exported to its target platform.