
Working with Audio Tracks in Timeline
Tutorial
Beginner
+10XP
15m
(191)
Unity Technologies
Working with audio files is as straightforward as dragging and dropping the files into the Editor and selecting the tools you need to compose a sequence of audio tracks that will bring your scene alive. In this tutorial, you'll add and configure audio using Timeline.
Languages available:
1. Introduction
If you are using Unity 2019.2 or below, click here.
Unity is designed to be smooth and trouble-free when dealing with Audio assets. This extends to the Timeline Editor — working with audio files is as straightforward as dragging and dropping the files into the Editor and selecting the tools you need to compose a sequence of audio tracks that will bring your Scene alive.
2. Open the Timeline Window
To open the Timeline window:
1. Click the Window drop-down on the main Editor window.
2. Click Sequencing > Timeline.
3. The Timeline Editor window will open. (Figure 01).
4. Create or select the GameObject with which you wish to work.
5. If your selected GameObject does not already have a Director component and a Timeline asset, click Create in the Timeline window to create one (Figure 02).
3. Adding an Audio Track
If your selected GameObject does not already have an Audio Source component, attach one now.
1. Click and drag an audio file from the Project window into the Timeline Editor window.
2. Click the button to specify an AudioSource, selecting the Audio Source attached to your GameObject (Figure 03).
4. Properties of Audio Tracks
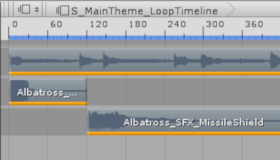
Once an audio track has been added to the Timeline, you will be able to modify it with normal track operations, such as repositioning, duplicating, and looping. In Unity version 2019.1.0b2 and newer, selecting the Audio Track in the left pane of the Timeline window will open additional settings in the Inspector window for all the clips contained in the Track.
(Figure 05)
- Volume: Adjusts the volume of the selected Audio Track. The range is 0 to 1.
- Stereo Pan: Controls if the Audio Track plays from the Left (-1), Stereo (0), or Right (+1) speakers. You can adjust this to be anywhere within the range of -1 to +1.
- Spatial Blend: This determines if the Audio Track is affected by 3D spatialisation calculations (attenuation, doppler, etc). 0 makes the sound full 2D while 1 makes it full 3D.
5. Properties of Audio Clips
Selecting the Audio Clip in the right pane of the Timeline window will bring up properties you can modify and change in the Inspector window. (Figure 06)
The properties are broken into three categories: The Clip Timing category controls the position of the clip in the Timeline and the speed of the clip’s playback. Additionally, this category contains two fields per property: the s field is seconds while the f field is frames. The Blend Curves category controls how the clip blends in and out of other clips. Finally, the Audio Playable Asset category controls the audio asset that’s being played, if the clip is looping, and the volume of the clip.
6. Conclusion
Working with Audio assets within the Timeline Editor is simple and straightforward. Try combining audio assets and adjusting their properties to create sequences for your projects.