Working with Native Plugins - 2019.3
Tutorial
advanced
+10XP
30 mins
142
Unity Technologies

In this tutorial, we’ll explore creating and using native plug-ins in Unity. Native plug-ins are code that is written — typically in a C-based language — compiled outside of Unity, and imported as a prebuilt library. Native plug-ins are precompiled binaries on all build target platforms except iOS, where the original code is imported instead, to be included in the Xcode project. Native plug-ins allow your Unity project to use existing C/Objective-C/C++ code or integrate with middleware libraries and work with hardware where the libraries are available.
Languages available:
1. Working with Native Plug-ins
Verified in 2019.4
In this tutorial, we’ll explore creating and using native plug-ins in Unity. Native plug-ins are code that is written — typically in a C-based language — compiled outside of Unity, and imported as a prebuilt library. Native plug-ins are precompiled binaries on all build target platforms except iOS, where the original code is imported instead, to be included in the Xcode project. Native plug-ins allow your Unity project to use existing C/Objective-C/C++ code or integrate with middleware libraries and work with hardware where the libraries are available.
Code for a native plug-in looks a bit different than a typical C++ program. Since we’re just defining functions, we don’t need a main function. Plug-ins use a C-based call interface, so we must take an extra step (covered below) when using C++ or Objective-C to avoid issues with the names of our functions. We must also let the compiler know which functions are to be made available to outside programs (our Unity project, in this case) by declaring them for export. Where we’d use a string for a return type in Unity, we want to use const char* in C++ and convert the returned data.
2. Creating a Native Plug-in
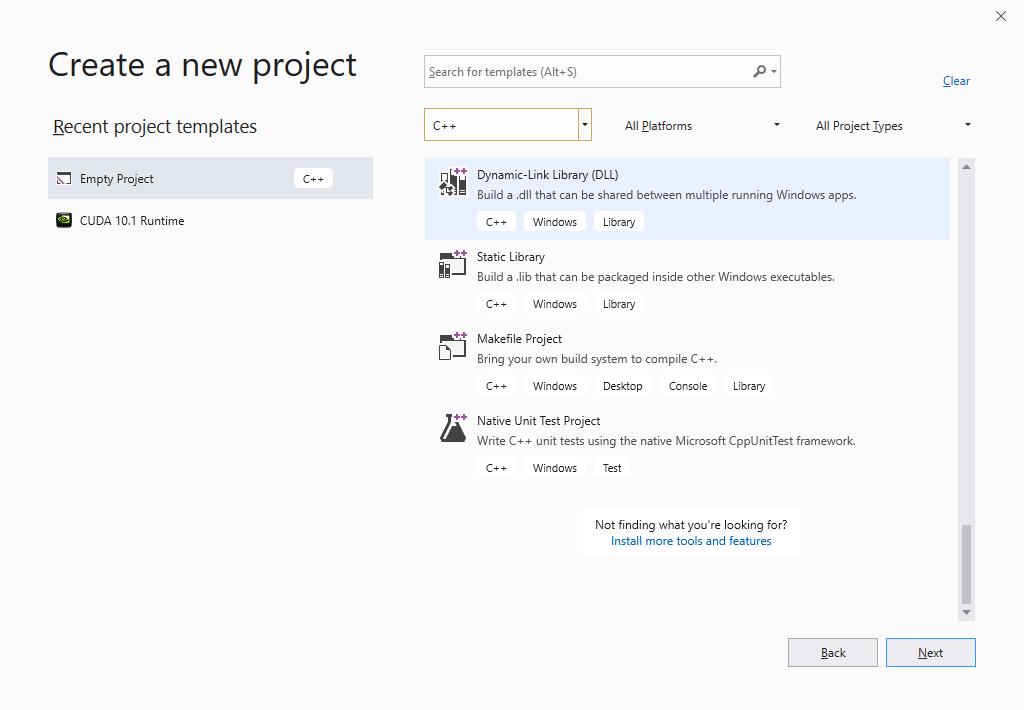
1. In your IDE of choice, create a new project. In Windows, set your project type to Dynamic-Link Library (.dll) (Figure 01). In Xcode on macOS, choose Bundle. Aside from the line used to define how functions are exported (in step 3), the code in this tutorial shouldn’t need any changes to compile on Xcode.
In Xcode, the C++ code belongs in main.cpp.
In Visual Studio, the code belongs in “dllmain.cpp”. The source files “pch.h”, “pch.cpp”, and “framework.h” are not used in this example and can be safely removed from the Visual Studio solution.

2. Include any headers as necessary.
#include <stdint.h>
#include <stdlib.h>
#include <time.h>
3. Next, we’ll create a macro to allow us to quickly mark a function for export.
For Windows, use:
#define DllExport __declspec (dllexport)For macOS, use:
#define DllExport __attribute__(( visibility("default") ))4. Finally, we’re ready to start defining functions. Since we’re not making a class, we don’t need to declare them first. Because of the difference in format between our code and the plug-in call interface, we must wrap our code to prevent name-mangling issues.
extern "C"
{
	// our functions will go here...

}
5. We’ll now define our functions. Our random number generator, Random, will never return 1.0. If you need 1.0 to be a possibility, remove +1 from the denominator.
DllExport void SeedRandomizer()
	{
		srand((unsigned int)time(0));
	}

	DllExport int DieRoll(int sides)
	{
		return (rand() % sides) + 1;
	}

	DllExport float Add(float a, float b)
	{
		return a + b;
	}

	DllExport float Random()
	{
		return (double)(rand()) / ((uint64_t)RAND_MAX + 1);
	}

	DllExport const char* HelloWorld()
	{
		return "Hello, world!";
	}
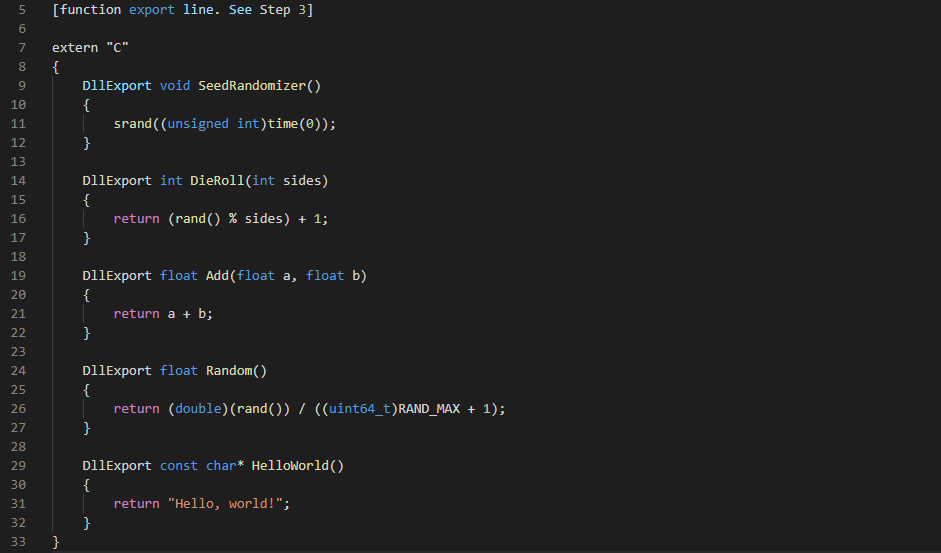
6. The final code:
#include <stdint.h>
#include <stdlib.h>
#include <time.h>

[function export line. See Step 3]

extern "C"
{
	DllExport void SeedRandomizer()
	{
		srand((unsigned int)time(0));
	}

	DllExport int DieRoll(int sides)
	{
		return (rand() % sides) + 1;
	}

	DllExport float Add(float a, float b)
	{
		return a + b;
	}

	DllExport float Random()
	{
		return (double)(rand()) / ((uint64_t)RAND_MAX + 1);
	}

	DllExport const char* HelloWorld()
	{
		return "Hello, world!";
	}
}
7. Save and build your project. Return to Unity.
3. Preparing Your Project
Assuming your project is successfully built, we’re ready to import our plug-in. Once a native plug-in is loaded, it’s never unloaded. If you need to make changes to your code, you’ll need to exit Unity before you can delete or replace the new build.
1. Inside your project’s Assets folder, create a folder called Plug-ins.
2. Copy your compiled .dll or .bundle into the Plug-ins folder.
3. In Unity, create a new C# script and double-click to open it in your script editor.
4. Just as with our C++ code, we must take a few extra steps on the Unity/C# side. To use native plug-ins, and for the data marshalling necessary for HelloWorld, we need to add the System.Runtime.InteropServices namespace. Because we’re using the IntPtr type, we need the System namespace.
using System;
using System.Runtime.InteropServices;
5. Next, we’ll import our DLL. We need to import it for every function, so we’ll do a bit of prep work to make our code cleaner. If we were targeting iOS, we’d create a folder inside Assets\plug-ins called ios and place our code there. In the code below, it’s assumed that our library is named NativeUnityPlugin.dll on Windows or NativeUnityPlugin.bundle on macOS. Change the name to match your plug-in.
#if UNITY_IOS
    const string dll = "__Internal";
#else
    const string dll = "NativeUnityPlugin";
#endif
6. Next, we’ll import our DLL and declare our library functions. Note that where we used the char* data type in C++, we use an IntPtr on the C# side. We marshal the character pointer to an ANSI string so Unity can read and display it. This is necessary to be able to use strings returned by our library function HelloWorld.
 [DllImport(dll)]
    private static extern void SeedRandomizer();

    [DllImport(dll)]
    private static extern int DieRoll(int sides);

    [DllImport(dll)]
    private static extern float Add(float a, float b);

    [DllImport(dll)]
    private static extern float Random();

    [DllImport(dll)]
    private static extern IntPtr HelloWorld();
7. Finally, we’re ready to use our DLL. In Start, type:
 SeedRandomizer();

        Debug.Log(Add(3.2f, 4.5f).ToString());
        Debug.Log(DieRoll(20).ToString());
        Debug.Log(Random().ToString());
        Debug.Log(Marshal.PtrToStringAnsi(HelloWorld()));
The final script should look like this:
using System;
using System.Runtime.InteropServices;
using UnityEngine;

public class PluginTest : MonoBehaviour
{
    //The string dll should match the name of your plugin
#if UNITY_IOS
    const string dll = "__Internal";
#else
    const string dll = "NativeUnityPlugin";
#endif

    [DllImport(dll)]
    private static extern void SeedRandomizer();

    [DllImport(dll)]
    private static extern int DieRoll(int sides);

    [DllImport(dll)]
    private static extern float Add(float a, float b);

    [DllImport(dll)]
    private static extern float Random();

    [DllImport(dll)]
    private static extern IntPtr HelloWorld();

    void Start()
    {
        SeedRandomizer();

        Debug.Log(Add(3.2f, 4.5f).ToString());
        Debug.Log(DieRoll(20).ToString());
        Debug.Log(Random().ToString());
        Debug.Log(Marshal.PtrToStringAnsi(HelloWorld()));
    }
}
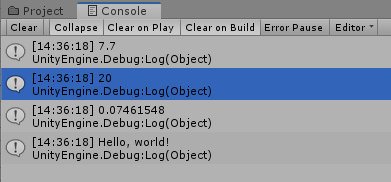
8. Save changes and return to Unity. Add the script to a GameObject in the Scene. Enter Play Mode and check the Console (Figure 02).

9. Exit Play Mode.
4. Conclusion
Native plug-ins extend the library of code and hardware available to Unity. Understanding how to create and use them allows you to take your projects to the next level.