
Working with Poly Shapes in ProBuilder
Tutorial
Beginner
+10XP
10m
(353)
Unity Technologies
ProBuilder is a Unity Package that can be added to Unity projects. It allow users to quickly create 3D models in the Unity Editor. ProBuilder has a suite of tools that will be familiar to 3D artists like extrude, inset, delete faces and so much more. In this tutorial, you will learn to create and edit PolyShapes inside Unity.
Languages available:
1. Introduction to ProBuilder
Verified with Unity 2019.4LTS and ProBuilder v4.2.3
ProBuilder is a Unity Package that can be added to Unity projects. It allows users to quickly create 3D models in the Unity Editor. ProBuilder has a suite of tools that will be familiar to 3D artists like extrude, inset, delete faces and so much more. ProBuilder is primarily used by artists and designers to prototype levels. This can help speed up development because designers no longer have to wait for an artist to create a block out of a Scene.
2. Adding ProBuilder
1. Open the Unity Editor.
2. Go to the Menu Bar and choose Window > Package Manager.
3. Select Unity Registry in the dropdown at the top left of the Package Manager window
4. Select ProBuilder and click Install.
5. Go to the Menu Bar and select Tools > ProBuilder > ProBuilder window.
6. Dock the ProBuilder window next to the Inspector by dragging and dropping it in the area.
3. Creating Poly Shapes
1. Make sure Gizmos are enabled in the Scene view.
2. In the ProBuilder window, choose New Poly Shape.
3. Click and create various points in the Scene view to create the desired shape.
4. End the shape by clicking on the first vertex that was created.
5. Drag up or down to create the desired height of the Poly Shape.
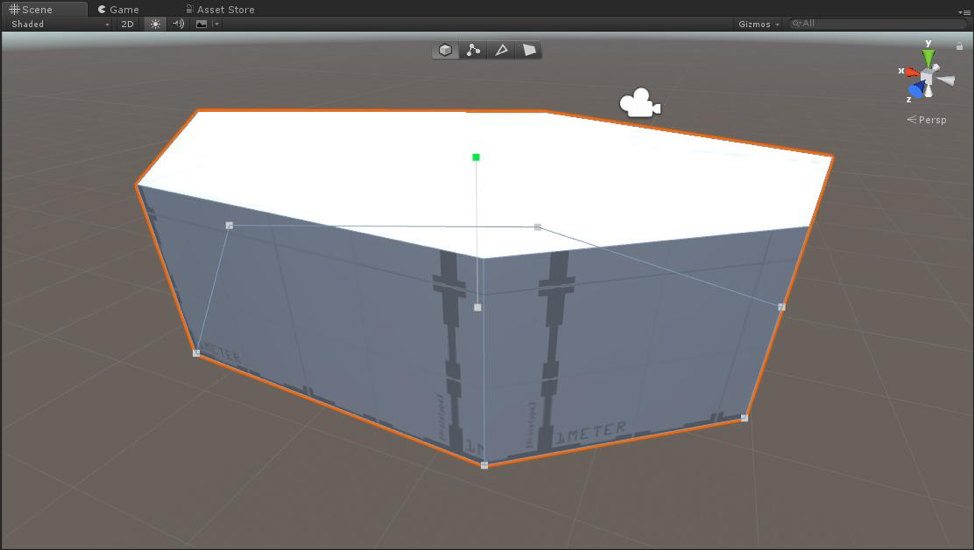
6. Left-click to finalize the Poly Shape (Figure 01).
4. Editing Poly Shapes
1. Immediately after creating the Poly Shape, select the vertices to refine the Poly Shape
2. At the top of the Scene view, select Vertex mode (Figure 02).
3. Left-click and drag around the vertices at the top of the Poly Shape (Figure 02).
4. Use the Move tool to drag them up to increase the height of the Poly Shape (Figure 03).
5. At the top of the Scene view, select Face mode and select the top face
6. Use the Move tool to drag it down to decrease the height of the Poly Shape (Figure 03).
7. At the top of the Scene view, select Edge mode and select an Edge along the side of the Poly Shape.
8. Use the Move tool to drag it in the X and Z direction to modify the overall shape.
(Figure 04)
9. At the top of the Scene View, select Object mode.
10. Use the Move tool to move the entire Poly Shape in the Scene (Figure 05).
5. Conclusion
Poly Shapes are a great way to draw out the shape of a 3D model inside the Unity Editor. Use it to quickly block out areas in your own levels.