
Working with Shapes in ProBuilder
Tutorial
Beginner
+10XP
15m
(1229)
Unity Technologies
ProBuilder is a Unity Package that can be added to Unity projects. It allow users to quickly create 3D models in the Unity Editor. ProBuilder has a suite of tools that will be familiar to 3D artists like extrude, inset, delete faces and so much more. In this tutorial, you will learn to create and edit Shapes inside Unity.
Languages available:
1. Introduction to ProBuilder
Verified with Unity 2019.4 LTS and Probuilder v4.2.3
ProBuilder is a Unity Package that can be added to Unity projects that allow users to quickly create 3D models in the Unity Editor. ProBuilder has a suite of tools that will be familiar to 3D artists like extrude, inset, delete faces and so much more. ProBuilder is primarily used by artists and designers to prototype levels. This can help speed up games because designers no longer have to wait for an artist to create a block out of a Scene.
2. Adding ProBuilder
1. Open the Unity Editor
2. Go to the Menu Bar and choose Window > Package Manager
3. Select Unity Registry in the dropdown at the top left of the Package Manager Window
4. Select ProBuilder and click Install
5. Go to the Menu Bar and choose Tools > ProBuilder > ProBuilder Window
6. Dock the ProBuilder Window next to the Inspector by dragging and dropping it (Figure 01).
3. Creating Shapes
1. In the ProBuilder Window press the ‘+’ button next to New Shape
2. In the Shape Tool Window, choose Cylinder from the Shape Selector dropdown list
3. Change the Radius parameter to 1.0
4. To make the Cylinder smoother, change the Number of Sides to 12
5. Change the Height to 2
6. Set the Height segments to 2
7. The Smooth toggle makes the sides of the Cylinder appear smooth. Leave it enabled (Figure 02).
8. Click on the Build button
9. Close the Shape Tool Window
4. Editing Shapes
1. At the top of the Scene view, select the Faces button
2. Select one of the faces in the center of the cylinder sides (Figure 03).
3. In the ProBuilder Window, choose Select Face Loop
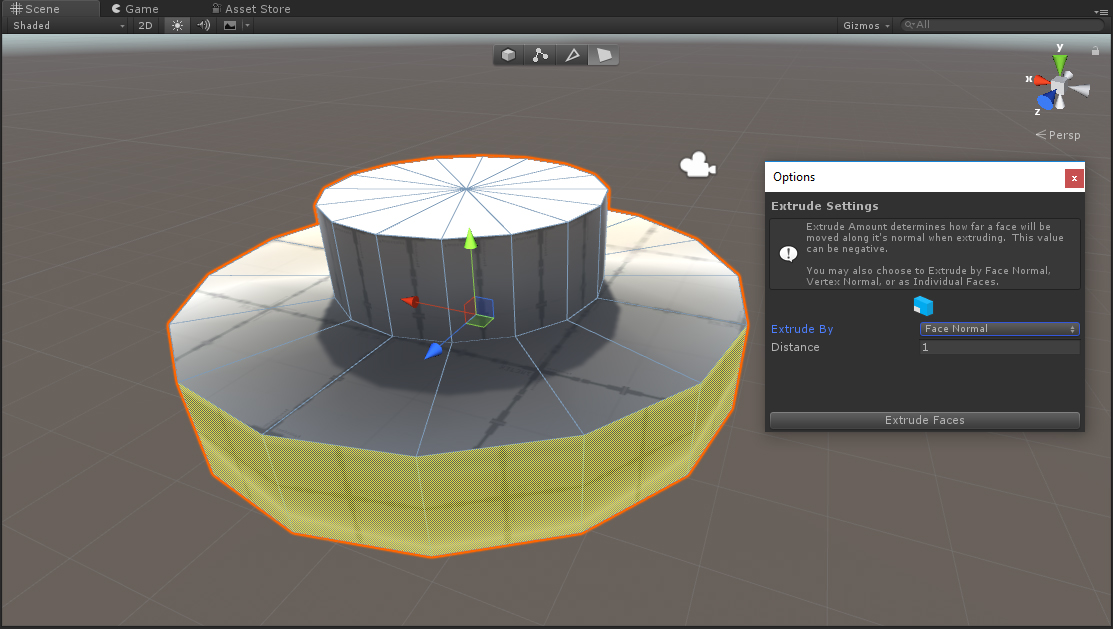
4. In the ProBuilder Window, choose the Options button next to the Extrude Faces button (Figure 04).
5. Change the Extrude By parameter to Face Normal via the dropdown list
6. Change the Distance parameter to 1.0
7. Press the Extrude Faces button (Figure 05).
8. Hold CTRL (Windows) or Command (MacOS) and select the faces on the top of the cylinder
9. With the Move tool active, hold Shift and drag up in the Y direction to interactively extrude the top
ProBuilder can be used to create models right in the Editor and it’s an incredible tool for prototyping levels. We highly suggest using ProBuilder to create the general layout of your next level and use it to create simple props.