Working with Static and Dynamic Canvases
Tutorial
intermediate
+10XP
30 mins
12
Unity Technologies
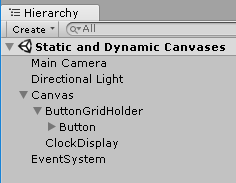
Because of the way Unity handles UI rendering, a canvas element that changes its position, scale, or rotation forces the canvas to rebuild. Changing the contents of a UI object such as text also forces this rebuild. In this tutorial, you will learn to use Static and Dynanic Canvases to control overall lag.
Languages available:
1. Working with Static and Dynamic Canvases
Because of the way Unity handles UI rendering, a canvas element that changes its position, scale, or rotation forces the canvas to rebuild. Changing the contents of a UI object such as text also forces this rebuild. If this happens frequently, especially when the canvas has a large number of UI elements to render, it can cause noticeable lag. One effective solution is to group all of the dynamic objects on their own canvas.
2. Introducing Lag
This first demonstration is a bit of an extreme example, but serves to illustrate the performance penalty from changing UI elements. In it, you’ll simulate a change in conditions by manually editing the contents of a UI Text element while in Play Mode. This workflow assumes you’re familiar with the Profiler. For more information, see Working with the Profiler Window.
- Create a new Scene.
- From the Window dropdown, select Analysis > Profiler.
- Create a UI text object. Name it ChangingText.
- Press Play, and make sure the Profiler is visible.
- Highlight the text object in the Hierarchy view, and change the text in the Inspector (Figure 01). Notice that every update to the contents of the text object causes a dip in performance in the Profiler.
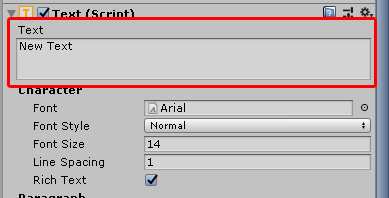
- Try holding down the return key in the text area. Notice the lag penalty in the Profiler.
- Exit Play mode.
3. Moderate Lag
For Exercise 2 and 3, we’ll use the Scene from Exercise 1.
- Rename ChangeText to ClockDisplay.
- Create a new C# script called Clock and attach it to ClockDisplay.
- Double click Clock to open in Visual Studio.
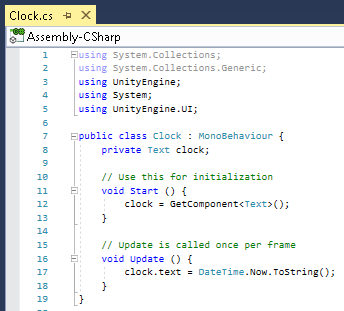
- Beginning on line 4, type:
using System;
using UnityEngine.UI;- On line 8, type:
private Text clock;- In Start, on line 12, type:
clock = GetComponent<Text>();- In Update, on line 17, type:
clock.text = DateTime.Now.ToString();- Clock is now complete (Figure 02). Save changes, and return to the Unity Editor.
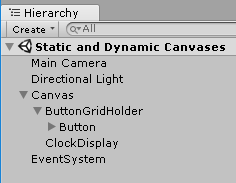
- Select Canvas in the Hierarchy and, from the GameObject dropdown, select Create Empty Child. Name this ButtonGridHolder. Drag it above ClockDisplay in the Hierarchy so that ClockDisplay is rendered over ButtonGridHolder’s child elements. (Figure 03)
- Set ButtonGridHolder’s alignment to stretch, and set all borders to 0. (Figure 04)
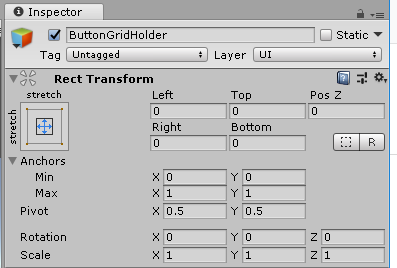
- Add a Grid Layout Group component to ButtonGridHolder.
- From the GameObject dropdown, select UI > Button.
- Drag the Button onto ButtonGridHolder to put it under the control of the Grid Layout Group. (Figure 05)

- Highlight the Button and hold Ctrl-D (or Command-D on a Mac) until Buttons fill the screen.
- From the GameObject dropdown, select UI > Image. Name it MovingImage.
- Create a new C# script called ImageMover and attach it to MovingImage.
- Double click ImageMover to open it in Visual Studio.
- Beginning on line 6, type:
public RectTransform baseRectTransform;

	private float minDistance;
	private float maxDistance;
	private float distance;
	private float spinSpeed = 4;
	private RectTransform rectTransform;
	private Vector3 basePosition;
private Vector3 positionOffset = Vector3.zero;- In Start, beginning on line 18, type:
rectTransform = GetComponent<RectTransform>();
	basePosition = baseRectTransform.position;
	minDistance = Screen.height * .125f;
maxDistance = Screen.height * .375f;- In Update, beginning on line 23, type:
distance = Mathf.Lerp(minDistance, maxDistance,Mathf.Cos(Time.time) * 0.5f + 0.5f);
  	positionOffset.x = distance * Mathf.Cos(Time.time * spinSpeed);
   	positionOffset.y = distance * Mathf.Sin(Time.time * spinSpeed);
rectTransform.position = basePosition + positionOffset;- ImageMover is complete (Figure 06). Save changes and return to the Unity Editor.
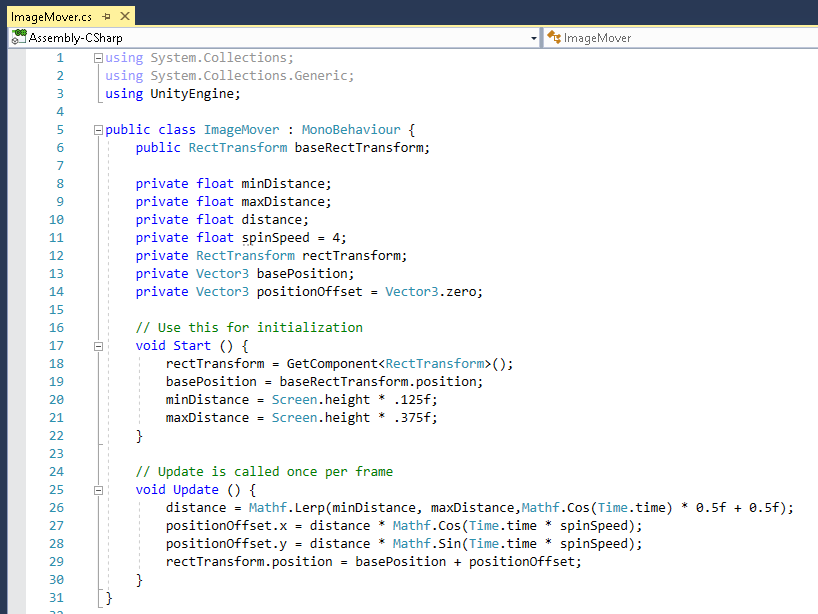
- Click the Image in the Hierarchy to select it, and drop Canvas in the slot marked Base Rect Transform. This will anchor our Image to the center of the canvas.
- Press Play, and monitor the Profiler.
- Exit Play Mode.
4. Separating the Canvases into Static and Dynamic
- When creating a new canvas, it’s important to make sure you duplicate the settings from the original so they appear as one. The easiest way to do this is to highlight the original Canvas in the Hierarchy window and from the Edit dropdown, select Duplicate. Name the duplicate DynamicCanvas.
- In the Inspector for DynamicCanvas, set the Canvas component’s Sort Order to 1 so that it renders over the original Canvas.
- Delete the ButtonGridHolder from DynamicCanvas, and the Image and Text components from the original Canvas.
- Press Play and monitor the Profiler.
- Since the dynamic objects are on their own canvas, their update in content and position does not affect the rendering of the button grid.
- Exit Play Mode.
It’s very possible that, in the demonstration here, you won’t see much difference between the unified canvas and split static and dynamic canvases. The need and benefit will become more obvious in an actual production setting, especially in a project that employs a dynamically generated interface in a busy scene.