
Working with Switch Statements
Tutorial
Beginner
+10XP
20m
(78)
Unity Technologies
In the same family as if and else, switch is a conditional statement. Just as a railroad switch guides a train to one of a number of possible tracks, a switch statement routes the flow of code to one of a number of possible code blocks. In this tutorial, you will learn about Switch Statements and how to use then in Unity.
Languages available:
1. Video Overview
2. Introduction to Switch Statements
This tutorial has been verified using Unity 2019.4.11f1 LTS
In the same family as if and else, switch is a conditional statement. Just as a railroad switch guides a train to one of a number of possible tracks, a switch statement routes the flow of code to one of a number of possible code blocks. Where if statements are useful for true/false testing, switch statements are more efficient when testing the value held by a variable, or returned by an expression evaluation, against a set of expected cases. Similar to the optional else block that follows an if statement, a switch may execute a default block of code when no specified condition has been met.
It is important to note that switch statements are only able to test integers (not floating point numbers), characters, strings, Booleans, enumerations, and nullable data types.
Following are examples of three of the many uses of switch.
3. Example 1
In this example, we will use a switch statement to check whether a chosen option is a primary color, according to conventional color theory (Figure 01).
Technical Steps:
1. In the Project window, right-click and select Create > C# Script.
2. For this example, name the script “ColorChecker”.
3. Double-click the script to open it in Visual Studio.
4. Delete the Start() section, as we won't be using that method for this exercise.
5. In this step, we define a new enum, a data type that lets us define members of a set, called “ColorChoice”. An enum must be defined before it can be declared as a data member type. For more information on enum, see Enumerations.
Beginning on line 7, type:
public enum ColorChoice
{
	Red,
	Orange,
	Yellow,
	Green,
	Blue,
	Purple
}
6. Now that we have defined ColorChoice, we can use it as a data type as we would int or bool.
Beginning on line 16, type:
public ColorChoice theColor;
public bool isPrimary;
7. In Update, beginning on line 21, type:
switch (theColor)
{
	case ColorChoice.Red:
		isPrimary = true;
		break;
	case ColorChoice.Yellow:
		isPrimary = true;
		break;
	case ColorChoice.Blue:
		isPrimary = true;
		break;
	default:
		isPrimary = false;
		break;
}
8. Save your script. It is now complete, and ready to be attached to a GameObject (Figure 02).
9. Back in the Unity Editor, from the GameObject dropdown, select Create Empty GameObject. A new GameObject will appear in the hierarchy window. It’s good to name your objects so that their role in the Scene is clear. In the hierarchy window, right-click the newly created GameObject, select Rename, and type “ColorCheck”.
10. With ColorCheck selected, select the Add Component button below the Transform section in the Inspector.
11. Type Color Checker into the search bar. As you type, your options will narrow to those components whose name contains your search term(s). Select Color Checker in the list.
12. With ColorCheck still highlighted in the hierarchy, select the lock in the upper right-hand corner of the Unity Editor window, above the Inspector, to keep focus on our object.
13. In the upper center of the Unity Editor, select the Play button.
14. Direct your attention to the section of the Inspector named Color Checker (Script) (Figure 03).
15. Selecting the dropdown labeled The Color, select the various colors and note the behavior of the checkbox. Even though we only specified code for three cases, all others can be handled by the default case.
16. Select Play again to end the demonstration.
4. Example 2
In this example, we will use switch to modify settings and behaviors of the game controller based on the current game mode. The sequence of an enum’s elements — the order in which you test for cases in a switch — is entirely up to you. You’re not required to match these sequences, but it will make your code easier to read and debug if you do. For this example, we’ll match both to the illustration (Figure 04).
Technical Steps:
1. In the project window, right-click and select Create > C# Script.
2. For this example, name the script “GameController”.
3. Double-click the script to open it in Visual Studio.
4. Delete the Start() section, as we won't be using that method for this exercise.
5. Beginning on line 7, type:
public enum GameMode
{
	Paused,
	Active,
	GameOver
}
6. Beginning on line 13, type:
public GameMode gameMode;
public bool playerCanMove;
public bool enemiesCanMove;
public bool spawnNewEnemies;
public float timeScale;
7. In Update(), beginning on line 22, type:
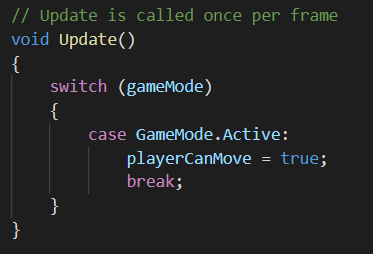
switch (gameMode)
{
	case GameMode.Paused:
		playerCanMove = false;
		enemiesCanMove = false;
		spawnNewEnemies = false;
		timeScale = 0;
		break;
	case GameMode.Active:
		playerCanMove = true;
		enemiesCanMove = true;
		spawnNewEnemies = true;
		timeScale = 1;
		break;
	case GameMode.GameOver:
		playerCanMove = false;
		enemiesCanMove = true;
		spawnNewEnemies = false;
		timeScale = 1;
		break;
}
8. Save your script. It is now complete, and ready to be attached to a GameObject (Figure 05).
9. Back in the Unity Editor, from the GameObject dropdown, select Create Empty GameObject. A new GameObject will appear in the hierarchy window. It’s good to name your objects so that their role in the scene is clear. In the hierarchy window, right-click the newly created GameObject, select Rename, and type “GameControl”.
10. With GameControl selected, select the Add Component button below the Transform section in the Inspector.
11. Type “Game Controller” into the search bar. As you type, your options will narrow to those components whose name contains your search term(s). Select Game Controller in the list.
12. With GameControl still highlighted in the hierarchy, enable the lock in the upper right-hand corner of the Unity Editor, above the Inspector, to keep focus on our object.
13. In the upper center of the Unity Editor, select the Play button.
14. Note that Game Controller (Script), Paused is currently selected and its settings applied (Figure 06).
15. Selecting the dropdown labeled Game Mode, select the various modes and note the changes in the game’s settings.
16. Select Play again to end the demonstration.
5. Example 3
In this example we will use both if and switch, among other commands, to create a simple game where you must guess a number chosen by the computer (Figure 07).
Technical Steps:
1. In the project window, right-click and select Create > C# Script.
2. For this example, name the script “GuessingGame”.
3. Double-click the script to open it in Visual Studio.
4. While you’re not required to separate your private and public data members, doing so aids readability and provides a clear place for any necessary additional data members.
Beginning on line 7, type:
public int maxNumber = 20;
public int yourGuess;
public string result;

private int secretNumber;
5. Because the maximum is exclusive in the integer version of Random.Range, we add 1 to make our chosen maximum (20 by default) possible.
In Start(), on line 16, type:
secretNumber = Random.Range(1, maxNumber + 1);6. Before we invoke switch, we use if to check if the secret number has been guessed.
In Update(), beginning on line 22, type:
if (yourGuess == secretNumber)
{
	result = “Just right!”;
}
7. If we get to the switch, we know that the player has guessed incorrectly. Finding the sign of the difference between the guessed and secret numbers will tell us whether the guess was too high or low. Because Sign returns a float, and switch cannot evaluate those, we typecast to an int. For more information, see Mathf.Sign and Casting and Type Conversions.
Beginning on line 26, type:
else
{
	switch ((int)Mathf.Sign(yourGuess - secretNumber))
	{
		case 1:
			result = “Too high.”;
			break;
		case -1:
			result = “Too low.”;
			break;
	}
}
8. Save your script. It is now complete and ready to be attached to a GameObject (Figure 08).
9. Back in the Unity Editor, from the GameObject drop-down, select Create Empty GameObject. A new GameObject will appear in the hierarchy window. It’s good to name your objects so that their role in the Scene is clear. In the hierarchy window, right-click the newly created GameObject, select Rename, and type “NumberGuess”.
10. With NumberGuess selected, select the Add Component button below the Transform section in the Inspector.
11. Type “Guessing Game” into the search bar. As you type, your options will narrow to those components whose name contains your search term(s). Select Guessing Game in the list.
12. With NumberGuess still highlighted in the hierarchy, enable the lock in the upper right-hand corner of the Unity Editor, above the Inspector, to keep focus on our object.
13. In the upper center of the Unity Editor, select the Play button.
14. Direct your attention to the section of the Inspector named Guessing Game (Script) (Figure 09).
15. Guess a whole number between 1 and the max number (inclusive) and type it into the input field labeled Your Guess. The field labeled Result will tell you if your guess was correct, too high, or too low. Keep guessing until you get it. A helpful strategy is to always guess nearest the center between the known possible minimum and maximum values.
16. Select Play again to end the demonstration. Try changing the max number, while not in Play mode, and selecting Play again. A new secret number is chosen each time Play mode is activated.
6. Conclusion
This has been just a sampling of what switch is capable of. It is a versatile, simple command that can be used as a cleaner alternative to an if-else if-else if-...-else sequence, all the way to implementing finite state machines.