
QuickStart to TextMesh Pro
Tutorial
Beginner
+10XP
10 mins
893
Unity Technologies

TextMesh Pro is an easy-to-use system for high-quality text. It has many text appearance and formatting options, and is an easy way to add a professional touch to any project’s user interface. In this tutorial, you will learn to prepare fonts for use in TextMesh Pro, create new TextMesh Pro objects, and alter those objects.
Languages available:
1. Working with TextMesh Pro
This tutorial has been verified using Unity 2019 LTS
TextMesh Pro is an easy-to-use system for high-quality text. It has many text appearance and formatting options and is an easy way to add a professional touch to any project’s user interface.
2. Creating a TextMesh Pro Text Object
1. Using either the GameObject dropdown or right-clicking in the Hierarchy window, select UI > TextMesh Pro - Text.
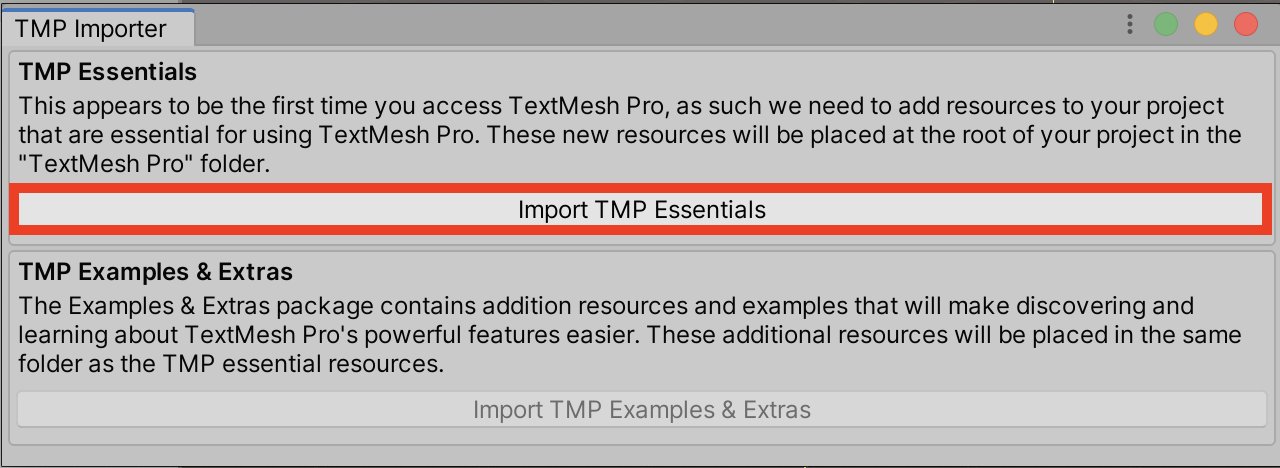
2. The first time you use TextMesh Pro (TMP) in a project, Unity will offer to import the TMP Essentials and Examples & Extras packages (if you haven’t already imported the TextMesh Pro asset package). Click Import TMP Essentials and close the window (Figure 01).
3. If the text isn’t visible in the Scene tab, click to highlight it in the Hierarchy, then press the ‘F’ key on the keyboard while the mouse cursor is in the Scene view.
4. In the upper right corner of the Inspector, click the lock to keep focus on the TextMesh Pro Text object.
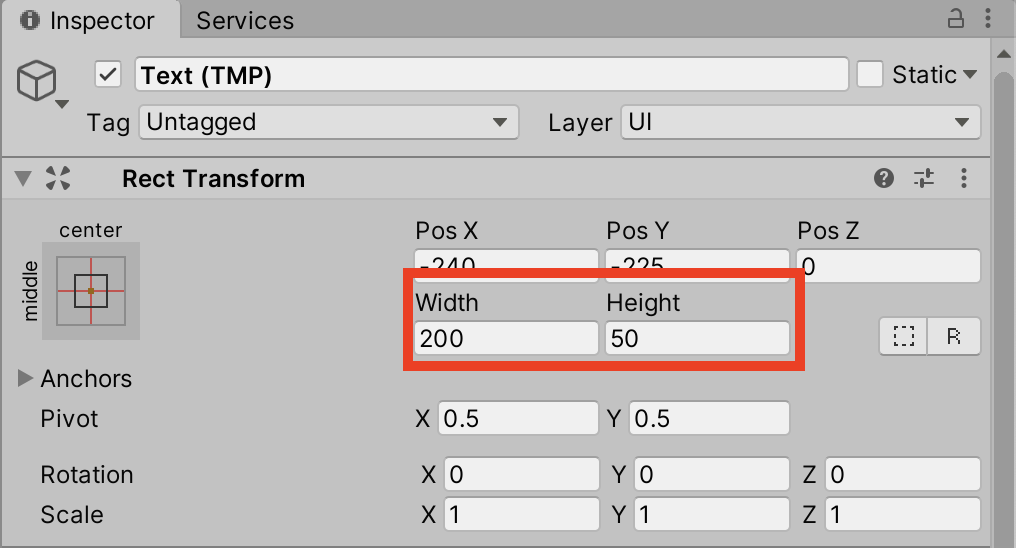
5. In the Rect Transform settings, set the size of the text area to 300 x 100 (Figure 02).
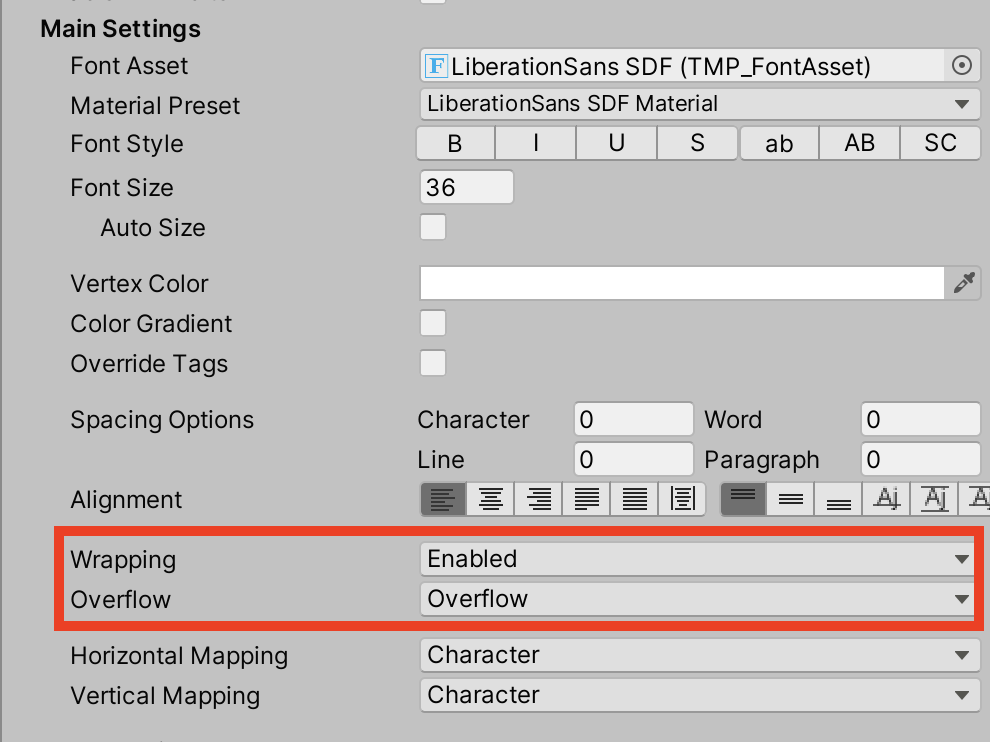
6. In the Font Settings section of the Text Mesh Pro UGUI Inspector, enable text wrapping and overflow (Figure 03).
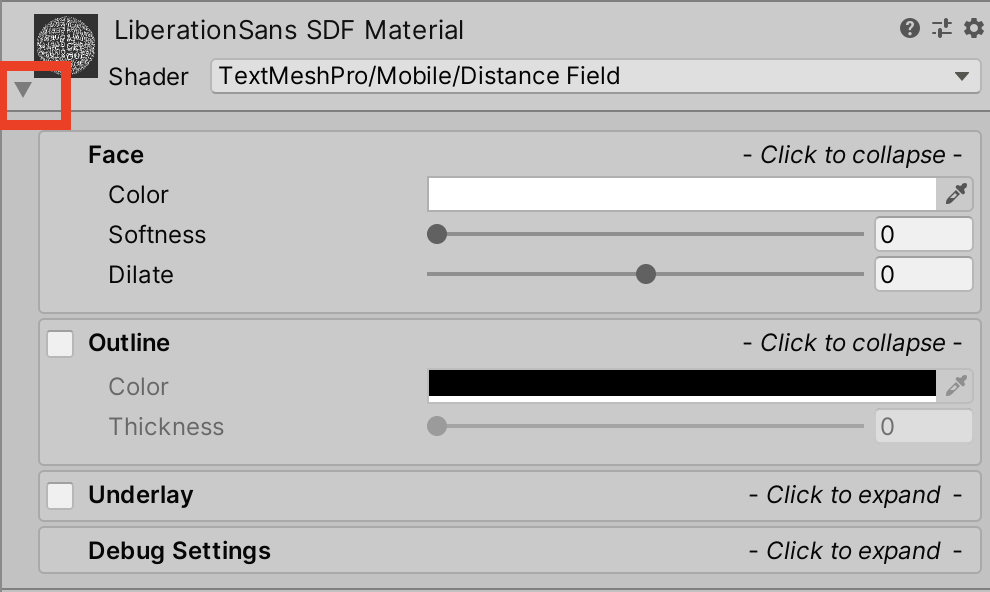
7. Try changing the Material Preset, and various font settings. You can set the color of the font either by changing the vertex color, as in Figure 03, or in the Material settings. Click the triangle on the Material at the bottom of the Inspector to expose the settings for the font face, outline, and underlay (drop shadow) (Figure 04).
8. Click the checkbox in the right half of the Outline section and click anywhere else in the section to open its settings.
9. Adjust the text’s color and thickness (Figure 05).

10. Try changing the underlay and face settings. Click the gear in the upper right corner and select Reset to revert to the default settings (Figure 06).
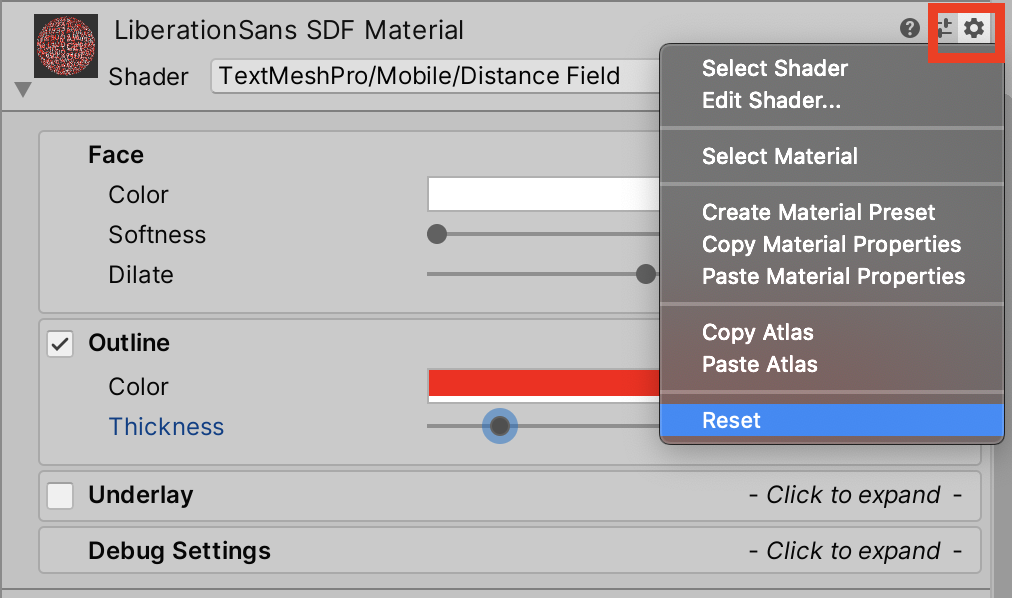
11. Experiment with font Material presets, and adjust the font settings as desired
(Figure 07).

3. Accessing TextMeshPro objects in code
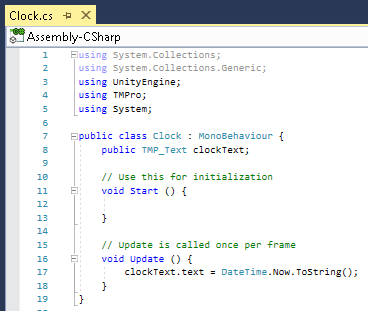
Here, we are using System namespace in our script to access date and time functionality. Only the TMPro namespace is necessary for TextMesh Pro.
1. From the GameObject dropdown, select Create Empty, naming it “ClockDisplay”.
2. Create a new script called “Clock” and attach it to ClockDisplay. Double-click Clock in the Project window to open Visual Studio or MonoDevelop. Delete the Start() method, as we won’t be using it for this exercise.
3. Beginning on line 4, type:
using TMPro;
using System;
4. On line 8, type:
public TMP_Text clockText;5. In Update, on line 12, type:
clockText.text = DateTime.Now.ToString();6. The Clock script is now complete. Save changes and return to Unity (Figure 08).
7. Drag the TextMesh Pro object you created in Exercise 1 to the slot marked Clock Text in the Clock inspector.
8. Press Play to start the demonstration. The current date and time are shown with the Material settings specified in the TextMesh Pro Text Inspector.
9. When ready, exit Play mode.
4. Preparing a font for use with TextMesh Pro
1. If you don’t already have a Resources folder in Assets, create one, and within that create a folder called “Fonts”. This is where you’ll store your created Font Asset.
2. Drag a font file (OpenType or TrueType) into the Resources folder.
3. From the Window dropdown, select TextMesh Pro > Font Asset Creator.
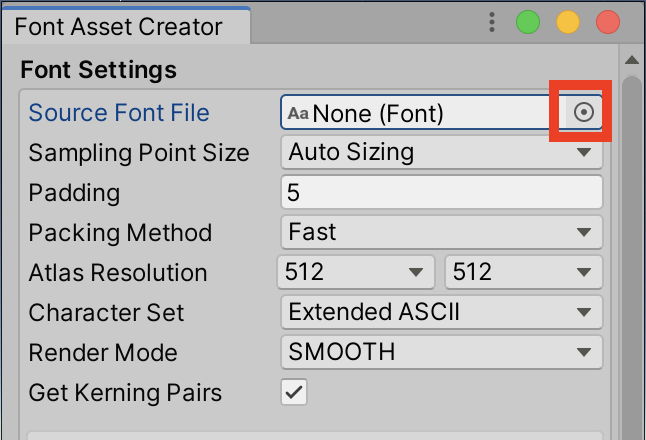
4. Click the circle next to the Font Source slot and select your font (Figure 09). You can also just drag a font directly from Project view into the slot.
5. Click Generate Font Atlas.
6. Click Save.
7. Navigate to Assets > Resources > Fonts, name your font, and click Save.
8. If it’s still not appearing in the Inspector, click the TextMesh Pro Text object in the Hierarchy window to highlight it.
9. Click the circle next to Font Asset and select the Font Asset you just created.
10. Enter Play mode to see your new Font Asset in action.
11. Exit Play mode.
TextMesh Pro is highly versatile. It can be used for any situation calling for text, including games, graphic applications, video, and more.