
Working with the Event System
Tutorial
Beginner
+0XP
15 mins
(254)
Unity Technologies
This tutorial has been verified using Unity 2019.4.12f1 LTS
An aesthetically pleasing User Interface (UI) is a fantastic addition to any project. To make it even better, Unity’s EventSystem allows your UI to respond to events.
Languages available:
1. Working with the Event System
This tutorial has been verified using Unity 2019.4.12f1 LTS
An aesthetically pleasing User Interface (UI) is a fantastic addition to any project. To make it even better, Unity’s EventSystem allows your UI to respond to events.
An EventSystem component is automatically created alongside your UI and contains several Input Modules. These modules are responsible for deciding how GameObjects in your UI respond to input — if a corresponding GameObject within your UI contains the same Input Module as the one in your EventSystem, it can be interacted with.
2. Raycasting
The Graphic Raycaster allows UI components within a Canvas to communicate with each other by forming a connection (called a “hit”) between a pointer position (such as a mouse or touch on a screen) and an object within your Scene.
When a UI is created, a Graphic Raycaster is automatically included within the Canvas (Figure 01).
When this Raycaster “hits” another object, an Event can be triggered by the UI’s EventSystem.
In this tutorial, we’ll use raycasting to detect UI elements and use them to change the color of another object’s Material.
1. Right-click in the Hierarchy and go to UI > Panel. This will create a Canvas object with an Image component. This Image component will be used as a background to contain our color swatches (Figure 02).
You can toggle the Raycast Target checkbox to enable it. As we don’t want our backdrop to trigger any events, uncheck this box before proceeding (Figure 03).
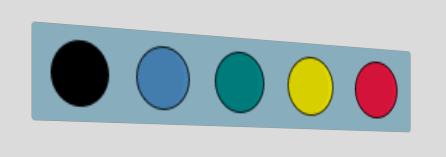
2. Next, create several Image GameObjects and parent them to the backdrop. Modify their position and color to your liking. These images will act as our color swatches (Figure 04).
3. Since they will be used to trigger an event (changing the color of an object in our Scene), leave the Raycast Target checkbox checked.
Now we want to create a new script that describes the Event that will occur when our cursor “hits” any of these swatches. This is the script we will use:
using System.Collections;
using System.Collections.Generic;
using UnityEngine;
using UnityEngine.UI;
using UnityEngine.EventSystems;

public class UI_ColorPicker : MonoBehaviour
{
    public GameObject target;
    private Material targetMaterial;
    private GraphicRaycaster rc;
    private PointerEventData pt;
    private EventSystem eventSystem;

    void Start()
    {
        //Obtain the target object's material
        if(target != null)
        {
            targetMaterial = target.GetComponent<Renderer>().material;
        }
        //Obtain the Canvas' Raycaster and EventSystem Components
        rc = GetComponent<GraphicRaycaster>();
        eventSystem = GetComponent<EventSystem>();
    }
The “target” object in our script is the GameObject whose Material we want to change. We gather its Material in the Start()function. Notice how we must also obtain our Graphic Raycaster and EventSystem — these two components allow the UI components to communicate with each other.
 void Update()
    {
        pt = new PointerEventData(eventSystem);
        pt.position = Input.mousePosition;

        List<RaycastResult> results = new List<RaycastResult>();
        rc.Raycast(pt, results);

        foreach(RaycastResult swatch in results)
        {
            if(swatch.gameObject.GetComponent<Image>().color != null)
            {
                changeColor(swatch.gameObject.GetComponent<Image>().color);
            }
        }
    }
Our Update() function is responsible for registering a “hit” and keeping track of all the objects hit by the Graphic Raycaster in our Canvas. These objects are the swatches we created earlier. For every swatch our Raycaster hits, we only want to pay attention to the color of its Image component. We pass this color into a custom function that changes the target Material’s color to the color of one of our swatches.
void changeColor(Color c)
    {
        targetMaterial.color = c;
    }
After you’ve created the script, you need to add it onto the GameObject that will change color. In this instance, we will just use a basic cube.
1. Go to the Hierarchy, right-click and go to 3D Object > Cube.
2. Attach the script to the Canvas by dragging it onto the canvas object.
3. Add the cube to the script as the target GameObject by pressing the radial button next to the Target and selecting the cube, or by dragging the cube GameObject from the Hierarchy (Figure 05).
Now when your mouse hovers over one of your swatches, the object should turn the same color.
3. Next Steps
You have now learned how to use the Event System to hookup great UI for your project. You also learned about the Graphics Raycaster, what raycasting is, and how it can be beneficial to making the UI work. Finally, since you learned how to script some interactions with the Event System and raycasting, you now have the tools to create engaging UI in your own projects.