Working with the Streaming Assets Folder - 2019.3
Tutorial
intermediate
+10XP
25 mins
30
Unity Technologies
In this tutorial, you’ll learn how to use the StreamingAssets folder to allow users to load their own images, songs, and even game levels into a project.
Languages available:
1. Introduction
If you are using Unity 2019.2, click here.
The process for loading Assets from the StreamingAssets folder is the same as for loading a web-based resource, as we’ll see in the following exercise.
2. Loading Images for Display
For this first exercise, we’ll use a button loaded from StreamingAssets to replace an image.
1. Inside the Assets folder, create two new folders and name them: Images and StreamingAssets.
2. Inside the Images folder, place an image file, making note of the file name. This will be the image first loaded during runtime. (Example: ‘Image1.png)
3. Inside the StreamingAssets folder, place another image file, again making note of the file name. (Example: ‘Image2.png’.)
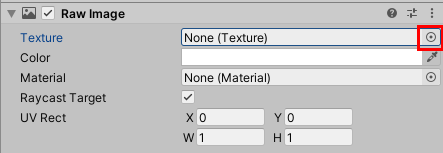
4. From the GameObject drop-down menu, select UI > Raw Image. Name this image ImageDisplay. You can assign the first image to load ‘Image1.png’ to the ImageDisplay by clicking on the circle button, next to the Texture field in the Inspector window (Figure 01).
Note that any images in your project are visible for selection, except for any saved images inside the StreamingAssets folder. Images saved to the StreamingAssets folder remain hidden.
5. From the GameObject drop-down menu, select UI > Button. Name this button ChangeImage. We will use a script in an upcoming step to set the second image to ‘Image2.png’.
6. With the ImageDisplay object selected in the Hierarchy Window, Create a new C# script by selecting the button: Add Component > New script. Rename it to ImageLoader.
7. Double-click the script to open in your script editor.
8. On line 4, type:
using UnityEngine.UI;
using System.IO;
using UnityEngine.Networking;
9. We use a helper function to return the path to the file we want to load because the StreamingAssets folder location varies by platform. We’ll use this in all of our examples. Inside the class definition, beginning on line 9, type In the following code, replacing “Image2.png” with the name of your image file saved to the StreamingAssets folder.
public string customTextureFilename = "Image2.png";

private UnityWebRequest uwr;

public static string GetFileLocation(string relativePath)
{
    return "file://" +
Path.Combine(Application.streamingAssetsPath, relativePath);
}

public void ChangeImage()
{
    StartCoroutine(ChangeImageCo());
}

System.Collections.IEnumerator ChangeImageCo()
{
    using (uwr = UnityWebRequestTexture.GetTexture(GetFileLocation(customTextureFilename)))
    {
        yield return uwr.SendWebRequest();
        if (uwr.isNetworkError || uwr.isHttpError)
        {
            Debug.Log(uwr.error);
        }
        else
        {
            gameObject.GetComponent<RawImage>().texture = DownloadHandlerTexture.GetContent(uwr);
        }
    }
}
10. You can also load images from any StreamingAssets subfolder. Let’s say your image file is named “logo.png” and is in a subfolder called “LogoImages.” In this case, you’d specify “LogoImages\\logo.png” for customTextureFilename if referencing this file in the script. We will use the double-slash \\ to reference the folder location and image name. (A single slash \ is used as an escape sequence for including special characters in the code, and wouldn’t work in this case) You don’t need to use \\ if you’re just typing the file name in the Unity Inspector. In that case, you’d just enter LogoImages\logo.png (Figure 02).

11. Save changes and return to the Unity Editor.
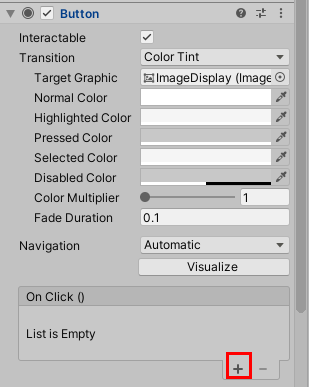
12. With the ImageDisplay button selected in the Hierarchy window, click In the Inspector window, and on the Button properties, click + to add an action to its OnClick event listener (Figure 03).
13. Drag ImageDisplay into the slot labeled None (Object).
14. Click the drop-down currently labeled No Function and select ImageLoader > ChangeImage() (Figure 04).

15. Enter Play Mode. When you click on the UI Button, the Raw Image changes from ‘Image1.png’ from the Images folder to ‘Image2.png’ loaded from the StreamingAssets folder.
16. Exit Play Mode.
3. Custom Soundtracks
For our next example, we’ll load a song from the StreamingAssets folder at the start of the Scene, set it to loop, and start it playing. This could serve as the basis for allowing a user to load their own background music in a game editor.
1. Inside StreamingAssets, create a folder called Music and place your song in there. The song needs to be in a Unity-supported format.
2. Select Create Empty from the GameObject drop-down and name it BGMPlayer.
3. Attach a new C# script to BGMPlayer called BGMLoader.
4. Double-click BGMLoader to open your script editor.
5. On line 4, type:
using System.IO;
using UnityEngine.Networking;
6. Inside the class definition, type:
private string musicFile = "Music\\BGM.wav"; // replace with the filename of your song
private AudioSource audioSource;

private void Start()
{
    StartCoroutine(MusicPlayer());
}

public static string GetFileLocation(string relativePath)
{
    return "file://" + Path.Combine(Application.streamingAssetsPath, relativePath);
}
7. Now we’ll load our song. If the GameObject to which this script is attached already has an AudioClip, we need to clear that out. If there’s no AudioSource, a new one will be created. Volume and looping settings are applied to the Audio Source, and the song is loaded and assigned. Once ready to play, the song starts and the Coroutine exits.
After the code from Step 6, type:
IEnumerator MusicPlayer()
{
    //Ensure the AudioType matches your file extension type
    using (UnityWebRequest uwr = UnityWebRequestMultimedia.GetAudioClip(GetFileLocation(musicFile), AudioType.WAV))
    {
        yield return uwr.SendWebRequest();

        if (uwr.isNetworkError || uwr.isHttpError)
        {
            Debug.Log(uwr.error);
        }
        else
        {
            audioSource = gameObject.GetComponent<AudioSource>();
            if (audioSource == null)
                audioSource = gameObject.AddComponent<AudioSource>();
            else if (audioSource.clip != null)
            {
                //Unload the existing clip
                audioSource.Stop();
                AudioClip currentClip = audioSource.clip;
                audioSource.clip = null;
                currentClip.UnloadAudioData();
                DestroyImmediate(currentClip, false);
            }

            audioSource.loop = true;
            audioSource.volume = .2f;
            audioSource.clip = DownloadHandlerAudioClip.GetContent(uwr);
            audioSource.Play();
            yield return null;

        }
    }
}
8. Save changes and return to Unity.
9. Enter Play Mode. Your song should load and begin playing.
10. Exit Play Mode.
4. Custom Game Levels
For our final example, we’ll revisit loading a Texture from StreamingAssets. This time, we’ll use it as the legend for building a level, with each pixel representing a cell in the Unity world, and each unique color representing some Prefab. This exercise can be done in the same Scene as our previous example to load not just custom music, but also a custom level for it to accompany.
1. Inside StreamingAssets, create a folder called Levels.
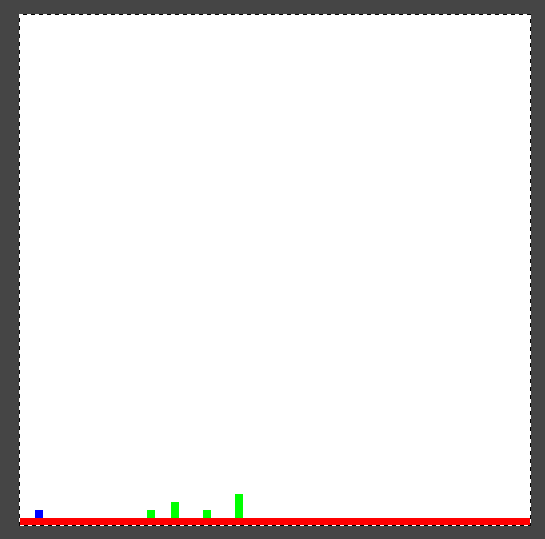
2. Outside of Unity, create a 64x64 bitmap. Fill it with white and, using the hard pixel brush/pencil tool, draw some assortment of dots, lines, and shapes in two or three colors, making note of each color. Be sure that you’re not using anti-aliasing, but rather hard pixels (Figure 05).
3. Save the image, and drop it into the Levels folder. Make note of the file name.
4. If you don’t already have a subfolder named Prefabs in your Assets folder, create one.
5. From the GameObject drop-down, select 3D Object > Cube. Drag this cube into Prefabs.
6. Repeat this with as many colored shapes as you used in your image, or create whatever Prefab you like. Ideally, your Prefabs should be exactly 1 Unity unit in each dimension. The reason why will become clear once we load our level.
7. Select Create Empty from the GameObject drop-down and name it LevelLoaderObject.
8. Attach a new C# script to LevelLoaderObject called LevelLoader.
9. Double-click LevelLoader to open in your script editor.
10. Before we define our class, we’ll create a data structure for our level editor. This structure will hold a color and an assigned Prefab. We’ll make it Serializable so that we can edit it in the Inspector. Outside the class definition, type:
using System;
using System.IO;
using UnityEngine.Networking;

[Serializable]
public struct LevelPiece
{
    public Color color;
    public GameObject prefab;
}
11. We’ll now declare our custom level file name, our list of possible level pieces, and our helper function to find our files in StreamingAssets before defining our method to actually load the level in the next step. Inside the class definition, type:
public string levelmap = "Levels\\1.png";
public LevelPiece[] pieces;

public static string GetFileLocation(string relativePath)
{
    return “File://” + Path.Combine(Application.streamingAssetsPath, relativePath);
}
12. Our level loader loads the map from StreamingAssets and iterates through each pixel. If the pixel’s color matches that of any of the defined level pieces, that piece is instantiated in the matching location of the game world.
Type:
public IEnumerator LoadLevel()
{
    using (UnityWebRequest uwr = UnityWebRequestTexture.GetTexture(GetFileLocation(levelmap)))
    {

        yield return uwr.SendWebRequest();
        if (uwr.isNetworkError || uwr.isHttpError)
        {
            Debug.Log(uwr.error);
        }
        else
        {
            var loadedTexture = DownloadHandlerTexture.GetContent(uwr);
            Vector2 mapsize = new Vector2(loadedTexture.width, loadedTexture.height);
            Texture2D maptex = loadedTexture;
            for (int x = 0; x < mapsize.x; x++)
            {
                for (int y = 0; y < mapsize.y; y++)
                {
                    Color col = maptex.GetPixel(x, y);
                    foreach (LevelPiece piece in pieces)
                    {
                        if (col == piece.color)
                        {
                            Instantiate(piece.prefab, transform.position + Vector3.right * x + Vector3.up * y, Quaternion.identity);
                        }
                    }
                }
            }
        }
    }
}
13. We’ll invoke LoadLevel as soon as the Scene starts. In Start, type:
StartCoroutine(LoadLevel());14. Save changes and return to Unity.
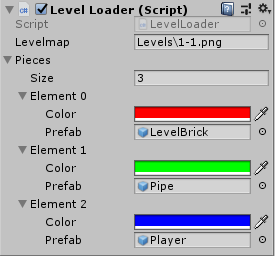
15. Click to select LevelLoaderObject. Click the triangle next to Pieces in its Inspector. Set Size to the number of colors you used (aside from the background color).
16. For each piece, assign the color you used to represent it in the bitmap, making sure to set alpha to 255. This is necessary because Unity considers the alpha value as well as rgb when looking for a match.
17. After each color, assign the matching Prefab (Figure 06).
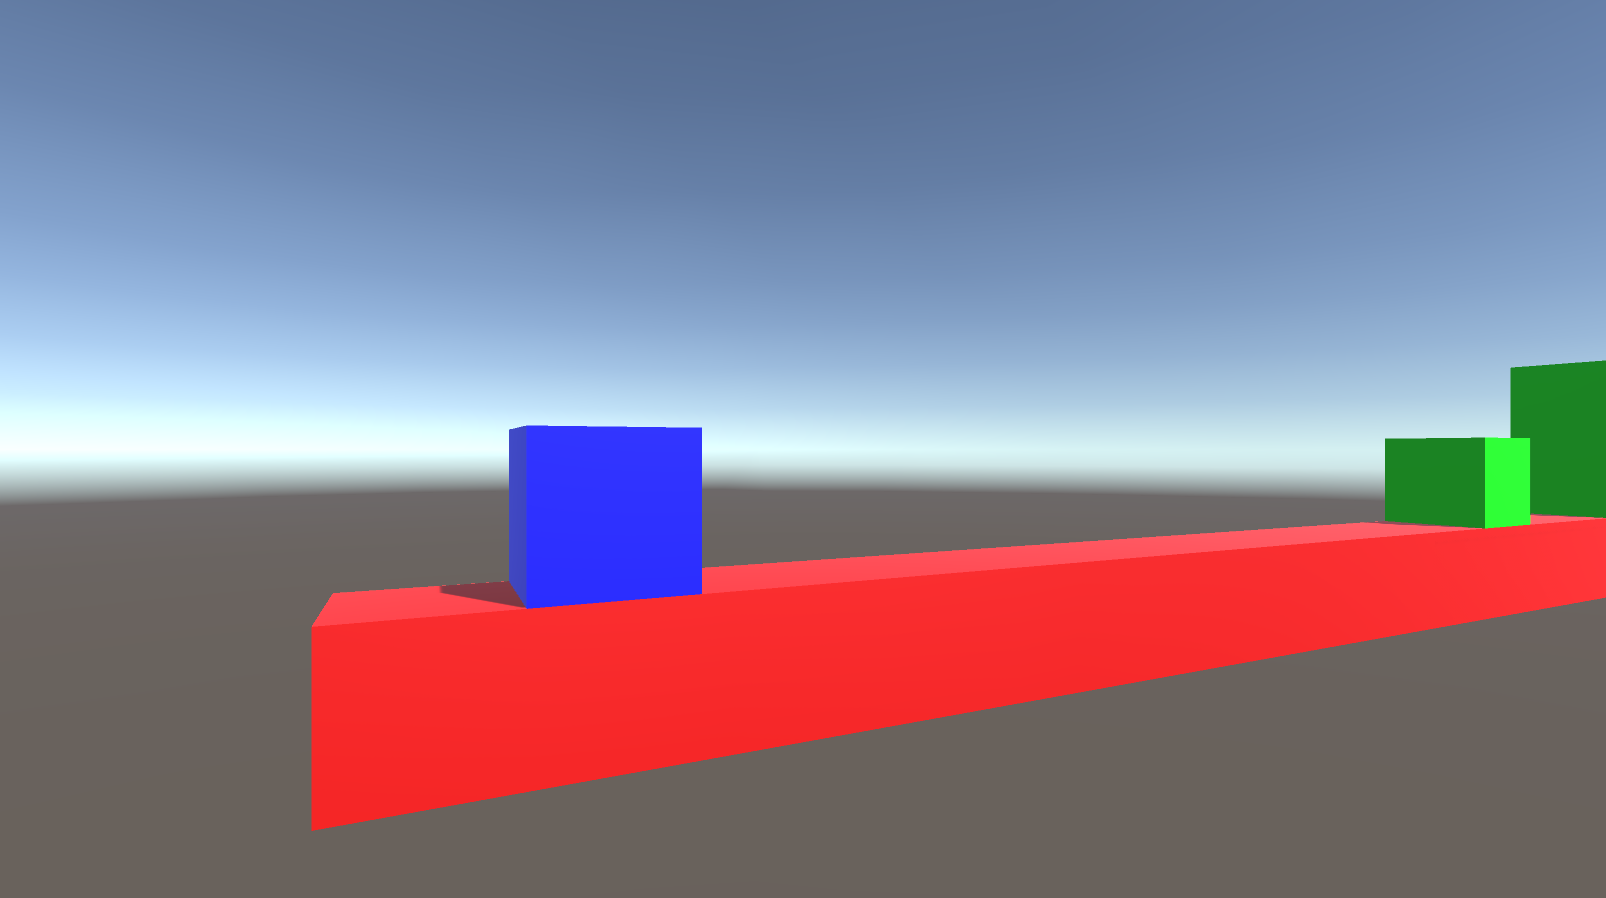
18. Enter Play Mode. The level should load instantly (Figure 07).

19. Exit Play Mode. This script can be used for 2D as well, by replacing Prefabs with Sprites and instantiating a 1x1 unit (not pixel) Sprite Prefab at each cell location.
5. Conclusion
The StreamingAssets folder is an easy way to allow users to save, load, and work with their own files in your Unity Project.