Working with the Terrain Editor - 2019.3
Tutorial
Beginner
+10XP
15 mins
314
Unity Technologies
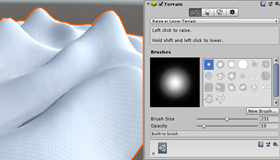
Unity’s Terrain Editor provides tools to create realistic, vast terrains — designed to be highly optimized for efficiency — quickly and easily.
In this tutorial, you’ll learn how to create a terrain using tools such as a landscape brush, trees brush, and details brushes. You’ll see how powerful and versatile the Terrain Editor can be and how easy it is to create terrains for your projects.
Languages available:
1. What is the Terrain Editor?
Unity’s Terrain Editor provides tools to create realistic, vast terrains — designed to be highly optimized for efficiency — quickly and easily.
In this workflow, you’ll learn how to create a terrain using tools from the landscape brush to the trees and details brushes. By the end of the workflow, you’ll have a solid understanding of how powerful and versatile the Terrain Editor can be and how easy it is to create terrains for your projects.
2. Creating a Terrain
To begin using the Terrain Editor in Unity, we need to first create a Terrain Tile.
- Click GameObject > 3D Object > Terrain.
- This will create a Terrain Tile in your Scene. (Figure 01)
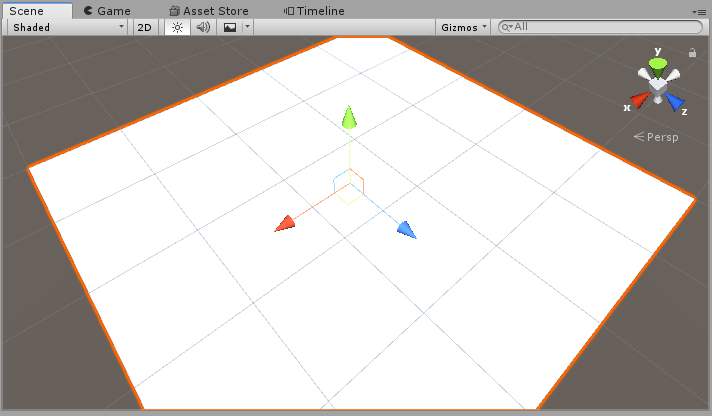
Creating the Terrain Tile also adds a corresponding Terrain Asset to the Project window. (Figure 02)

Your Terrain tile will be a large, flat plane. The terrain will be auto-selected in the Hierarchy and the terrain tools will appear. (Figure 03)
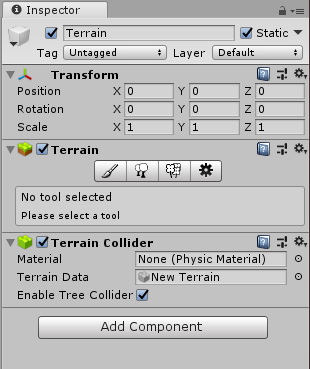
The four-icon toolbar in the Terrain component in the Inspector provides options to sculpt and paint your terrain. You can also add trees and details such as grass, flowers, and rocks and change general settings for the selected terrain.
3. Painting with the Paintbrush
Select the paintbrush icon to access the painting tools. (Figure 04)
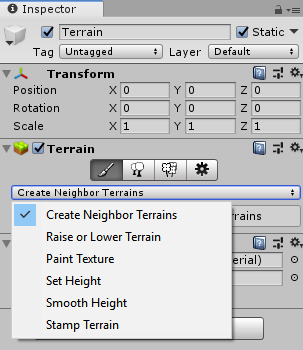
- Create Neighbor Terrains: This tool creates additional Terrain Tiles adjacent to the Terrain Tile you’ve created. This helps build larger environments and allows the terrain tools to continually affect the terrain in a seamless way.
- Raise or Lower Terrain: This allows you to raise or lower the terrain by using the mouse cursor.
- Paint Texture: This allows you to paint textures onto the terrain by creating Terrain Layers, a collection of textures that will be blended together as you paint to quickly add detail to your terrain.
- Set Height: This allows you to set the height of your terrain. It’s useful for making plateaus, flattening the terrain, or creating valleys and riverbeds. You can set the height of the entire landscape by selecting a value with the slider and then clicking the Flatten button.
- Smooth Height: This smooths out the terrain to a set height, creating a gradual incline/decline.
- Stamp Terrain: This allows you to stamp the terrain at a specified height.
Selecting any of these tools will provide a set of brushes and additional properties for Brush Size, Opacity and, in the case of the Stamp and Height brushes, a Height slider. (Figure 05)
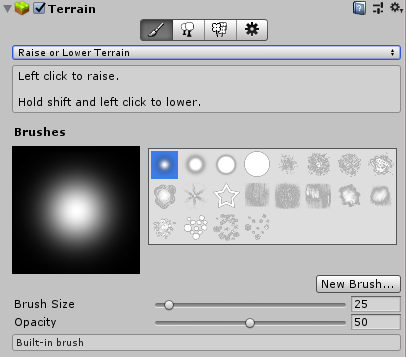
You’ll be able to select the brushes’ shape, size, pattern, and even create your own brushes.
4. Using the Trees and Details Brushes
The Tree tool recognizes SpeedTree, a third-party product by IDV Inc., which provides prebuilt tree Assets and modeling software. These brushes allow you to paint trees, foliage, grass, and rocks directly on your terrain, cutting the work of having to place each asset by hand. This tool works like the Paintbrush, but with one caveat: you must define a tree for the brush to place, as the trees themselves are meshes. (Figure 06)
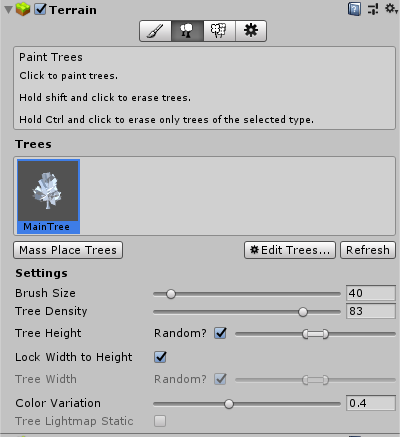
When a tree is defined, additional settings become available.
- Mass Place Trees: This creates an overall covering of trees without painting over the whole landscape. After placement, you can still add or remove trees with the brush.
- Brush Size: This controls the size of the area the tree brush will cover.
- Tree Density: This controls the average number of trees that will be painted in the area defined by the brush.
- Tree Height: This controls the trees’ minimum and maximum height via a slider.
- Lock Width to Height: This locks the width of the tree to its height so trees are always scaled uniformly.
- Tree Width: If the tree width is not locked to its height, this will determine the minimum and maximum width.
- Color Variation: This controls the amount of random shading applied to the trees. It only works if the Shader applied to the tree reads the _TreeInstanceColor property.
- Tree Lightmap Static: This indicates to Unity that the GameObject’s location is fixed and will participate in the global illumination computations.
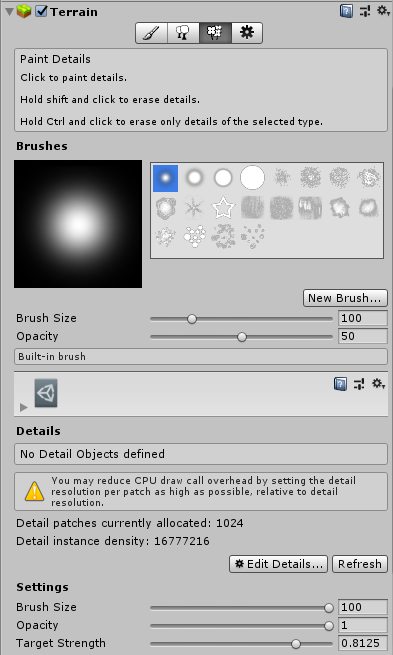
Once a tree is defined by clicking the Edit Trees button, you’ll be able to “paint” it much like the Paintbrush tool, where you can select a brush and adjust its settings. (Figure 07)
5. Creating the Hills and Valleys
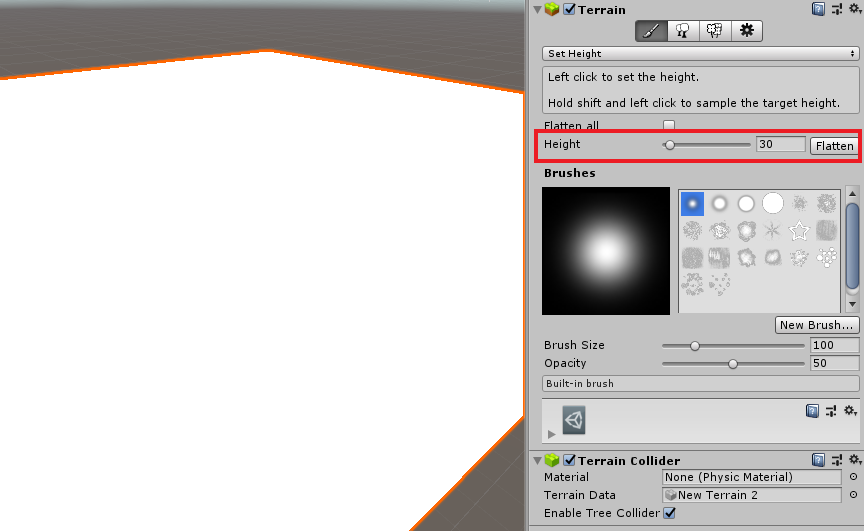
You’ll now create a simple terrain with some hills and valleys. To begin, set the entire terrain height to a larger value to allow for valleys.
- With the terrain selected in the Hierarchy, go to the Inspector and select the brush tool.
- Click the drop-down beneath the tool and select Set Height.
- Set the Height to 30 and click Flatten. (Figure 08)
- Now go back to the drop-down and select Raise or Lower Terrain.
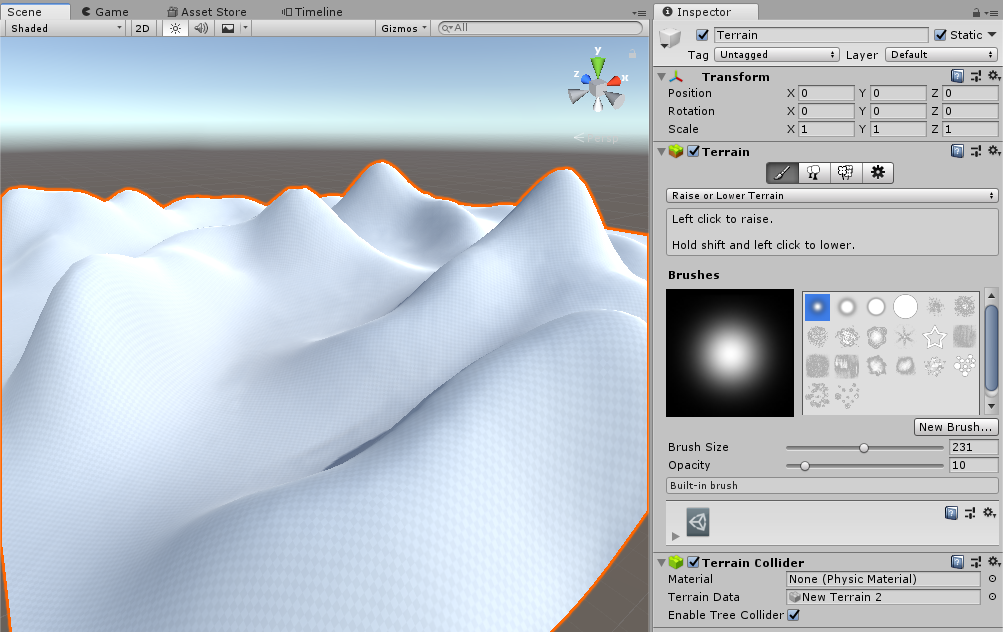
- Begin creating hills by clicking and dragging the brush across the Terrain tile. (Figure 09)
- To create valleys, you’ll use the same brush. Hold Shift while clicking and dragging to lower the terrain. Lower it to the maximum depth to create a small bottom to the valley. (Figure 10)
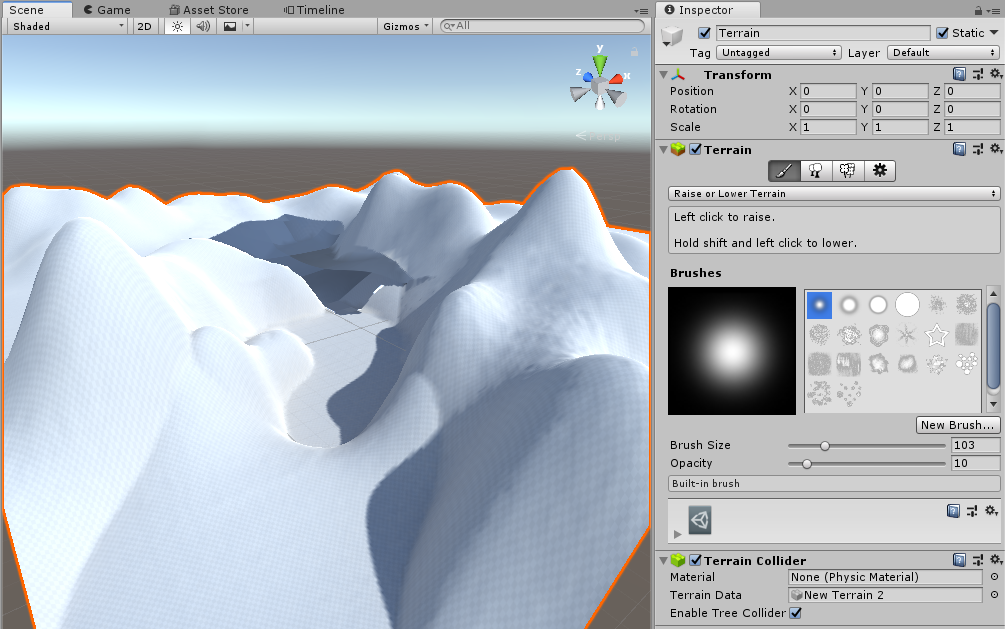
Now you have a basic terrain with a few hills and a valley. You’ll notice that as you edited the terrain, Unity automatically re-rendered the lighting, creating a baked normal map. Unity will also automatically adjust any details or trees you’ve already placed on the terrain.
The Terrain Editor is a powerful tool that allows you to quickly create hills, mountains, plateaus, valleys, and more. Play around with the brushes and settings to see how they affect the terrain. A large part of creating realistic terrain is to explore the tools you have at your disposal.