Working with the Terrain Editor
Tutorial
Beginner
+10XP
60 mins
1045
Unity Technologies

The Unity Terrain Editor enables you to create detailed and realistic terrains. Using the provided sets of Terrain tools, you are able to efficiently design optimized landscapes with ease. In this tutorial, you will learn how to create and customize a terrain using specific tools and techniques, ranging from shaping the landscape, adding trees, and using brushes to enhance your terrain with additional details. By the end of the tutorial, you will have a solid understanding of how powerful and versatile the Terrain Editor can be, and how easy it is to create customized terrains for your projects.
Languages available:
1. Getting Set Up With Your Project
To begin, create an empty scene in a newly created Universal Render Pipeline (URP) Project. You are able to work with the Terrain Editor, however, in either of the 3D, HDRP, or URP Project templates. Note that the Terrain Editor is unavailable in the 2D Project template. It is encouraged that you practice within your own saved Project, otherwise go ahead and create a new URP project from the Unity Hub and follow along with this tutorial. You shall begin by creating a new Terrain GameObject.
2. Creating a Terrain
To begin using the Terrain Editor in Unity, you need to first create a Terrain GameObject.
1. From the top menu dropdown, select: GameObject > 3D Object > Terrain. This will add a new Terrain GameObject into your Scene.

Creating the Terrain also adds a corresponding Terrain Asset to the Project window.

Your Terrain will be a large, flat plane. When the Terrain GameObject is selected in the Hierarchy window, the Terrain tools appear in the Inspector.

The five-icon toolbar in the Terrain component in the Inspector provides options to create neighbor Terrains, sculpt features into the landscape, and paint texture maps onto your Terrain. You can add trees as well as additional details such as grass, flowers, and rocks. You are also able to change general settings for the selected Terrain.
3. Creating Neighbor Terrains
Your Terrain’s default size has a square mesh resolution, where the length and width = 1000 meters. Supposing you want to expand your terrain using a tiled grid system, you can do so using the Create Neighbor Terrains button.
1. First select the Create Neighbor Terrains button, which is the first button in the Terrain toolbar in the Inspector. Next, hover your mouse in the Scene window, and you will see a new grid appear, showing 4 quadrants, outlining to the North, South, East, and West of the Terrain.

2. In the Scene window, select any adjacent quadrant outlines to add a neighboring Terrain. With each newly created Terrain, an accompanying GameObject is incrementally created in the Hierarchy.

With this technique, you can create a vast range of Terrain tiles, spanning across an area as wide or as narrow as your project requires. For this tutorial, the neighboring Terrains is set to an even grid of 2 x 2, or 2000 x 2000 meters.

4. Sculpting Terrain Features
The Paint Terrain tool offers a wide variety of features, ranging from sculpting to smoothing, to applying additional effects. Let’s explore the Paint Terrain tool in further detail.
1. Select the Paint Terrain tool, which is the second button in the Terrain toolbar. Select the dropdown menu titled: “Raise or Lower Terrain” to see the list of available options. This dropdown menu accesses the different painting and sculpting tools. Let’s first explore the Raise or Lower Terrain tool option.

In the Scene window, you will see a cylindrical object hover wherever the mouse cursor is positioned. This is the default brush that will enable Terrain sculpting.
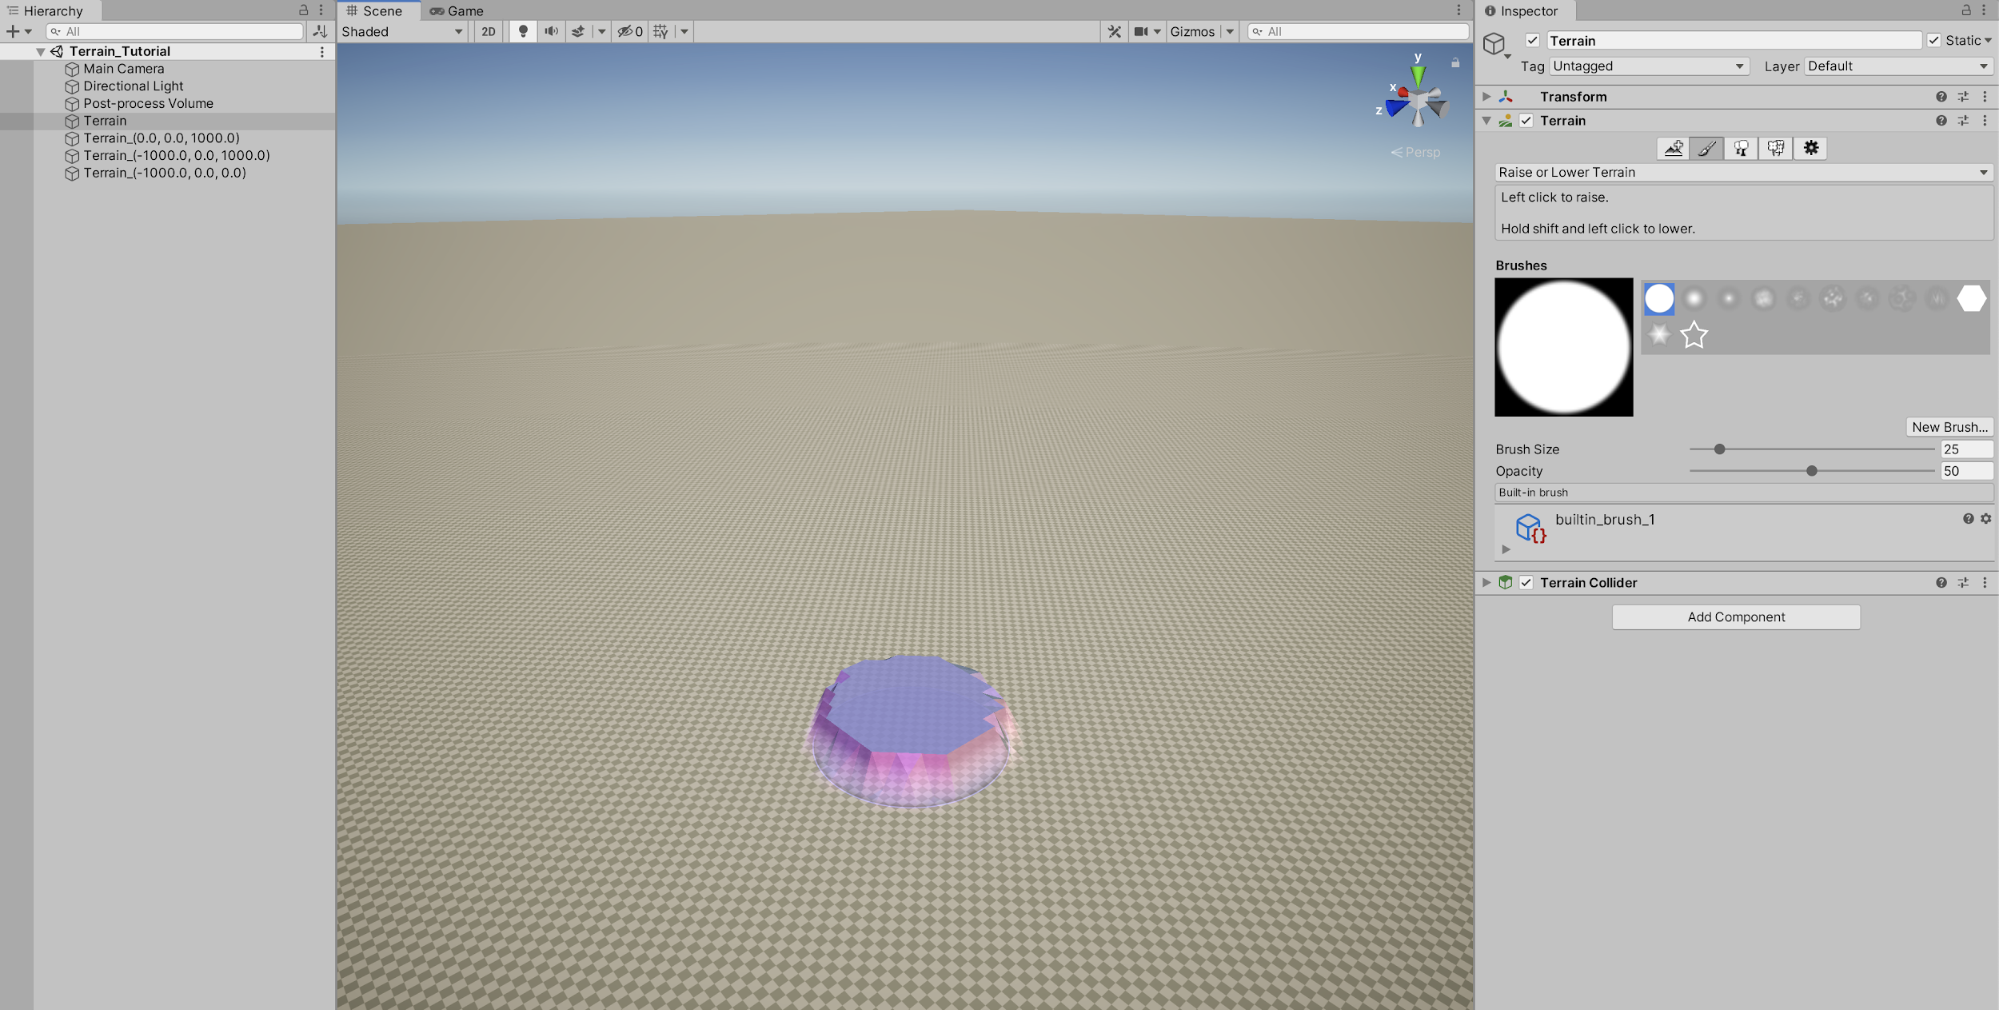
2. With the cylindrical brush enabled in the Scene window, select by left-clicking and dragging with your mouse to raise the Terrain. You will immediately notice that the brush is extremely sensitive, and that the Terrain height raises very quickly. You will fine-tune your brush in the next step, but for now, hold down the Shift key while left-clicking with the mouse, and the Terrain will lower back down to ground level.
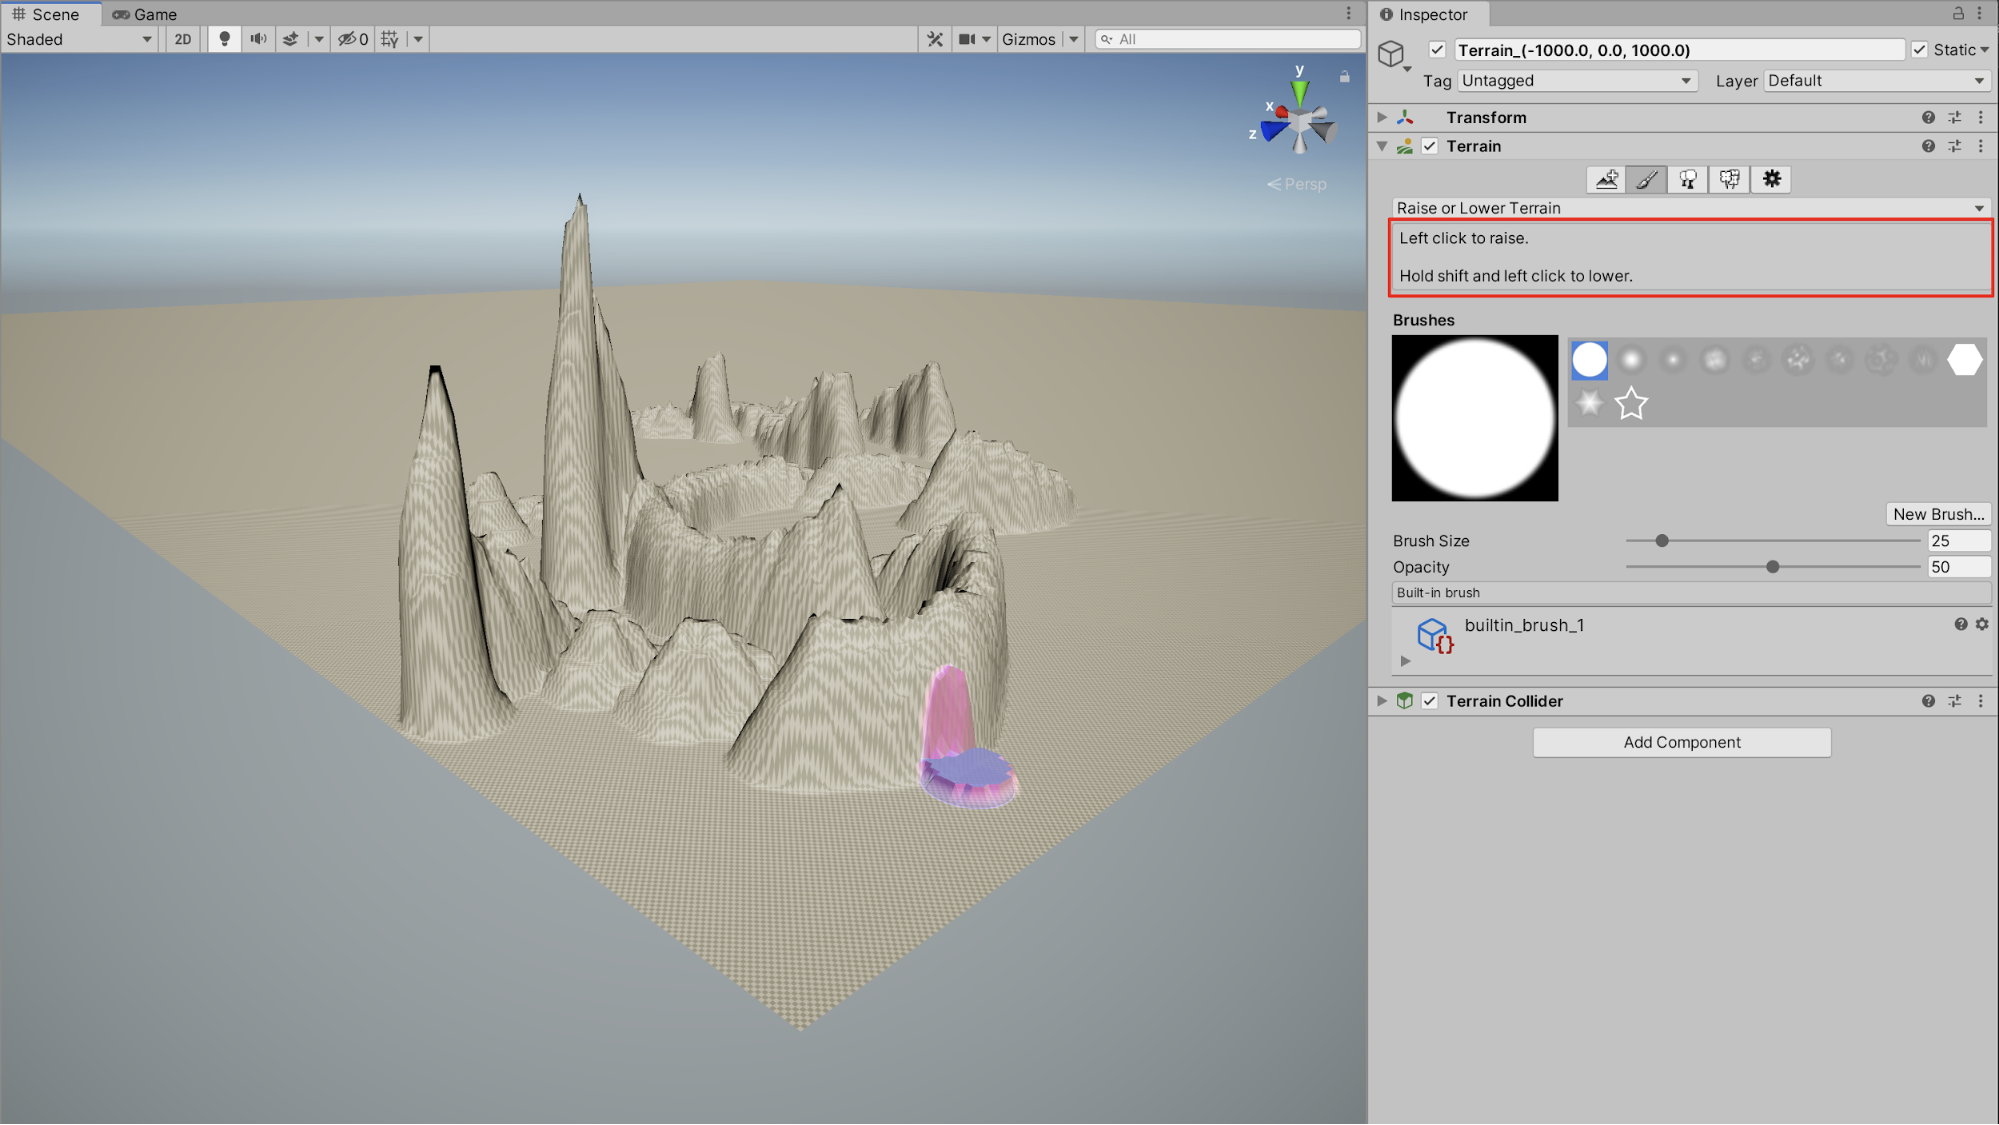
3. Let’s fine-tune our brush settings, and turn down the strength of the brush. In the Inspector, reduce the Opacity to 15. This will affect the strength of the brush, reducing how fast it raises the Terrain when sculpting with the mouse. Additionally, let’s increase the Brush Size to 50. The brush cursor has now changed in appearance in the Scene window, resembling a wider and flatter circle. Continue to sculpt the Terrain by mouse-clicking with the Paint Terrain tool, and dragging along the Terrain. You can effectively sculpt and raise the Terrain with more precision and control.
4. Next, let’s change the shape of our brush. Select from the palette of built in brushes in the Inspector, to choose a different brush, and practice sculpting with different brush shapes. Be sure to practice making adjustments to the Opacity and Brush Sizes as well

5. Experiment with the possibilities of combining various brush shapes, with differences in Brush Size and Opacity to sculpt a uniquely-shaped mountain range. As a helpful hint, practice using the open and closed brackets keys on the keyboard ( [ ] ) to increase and decrease the Brush size while sculpting.

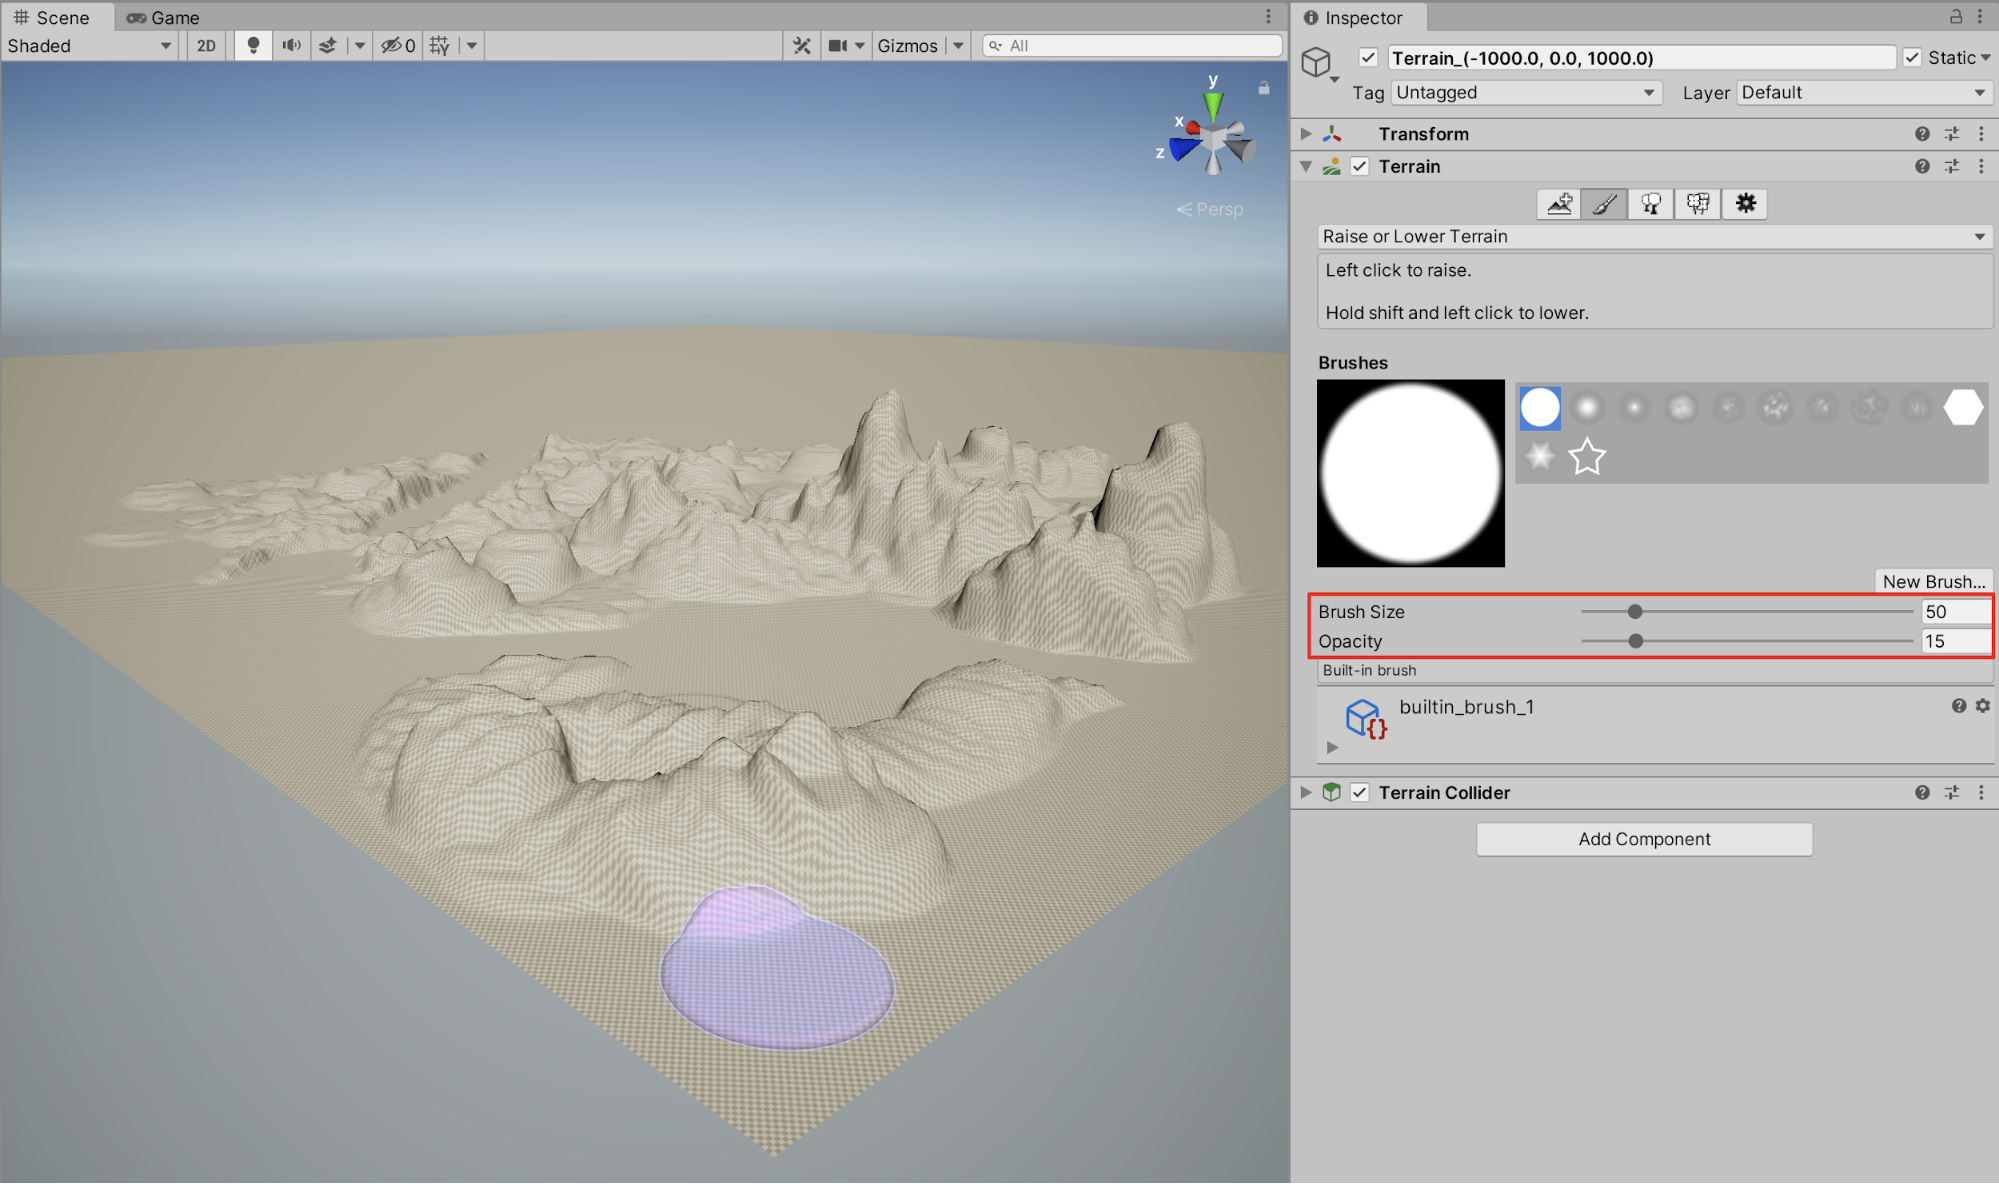
6. To sculpt the Terrain to a specific height, select the Terrain Brush menu dropdown, and select Set Height. Next, set the Height value to 55, (or a similar height value). Select a brush shape, size, and opacity, and position your cursor in the Scene. Next, click and drag over the Terrain to sculpt its features. The topography of the Terrain will plateau, limiting the elevation to the specific Set Height value. This is especially useful when creating canyons, riverbeds, or rock formations.
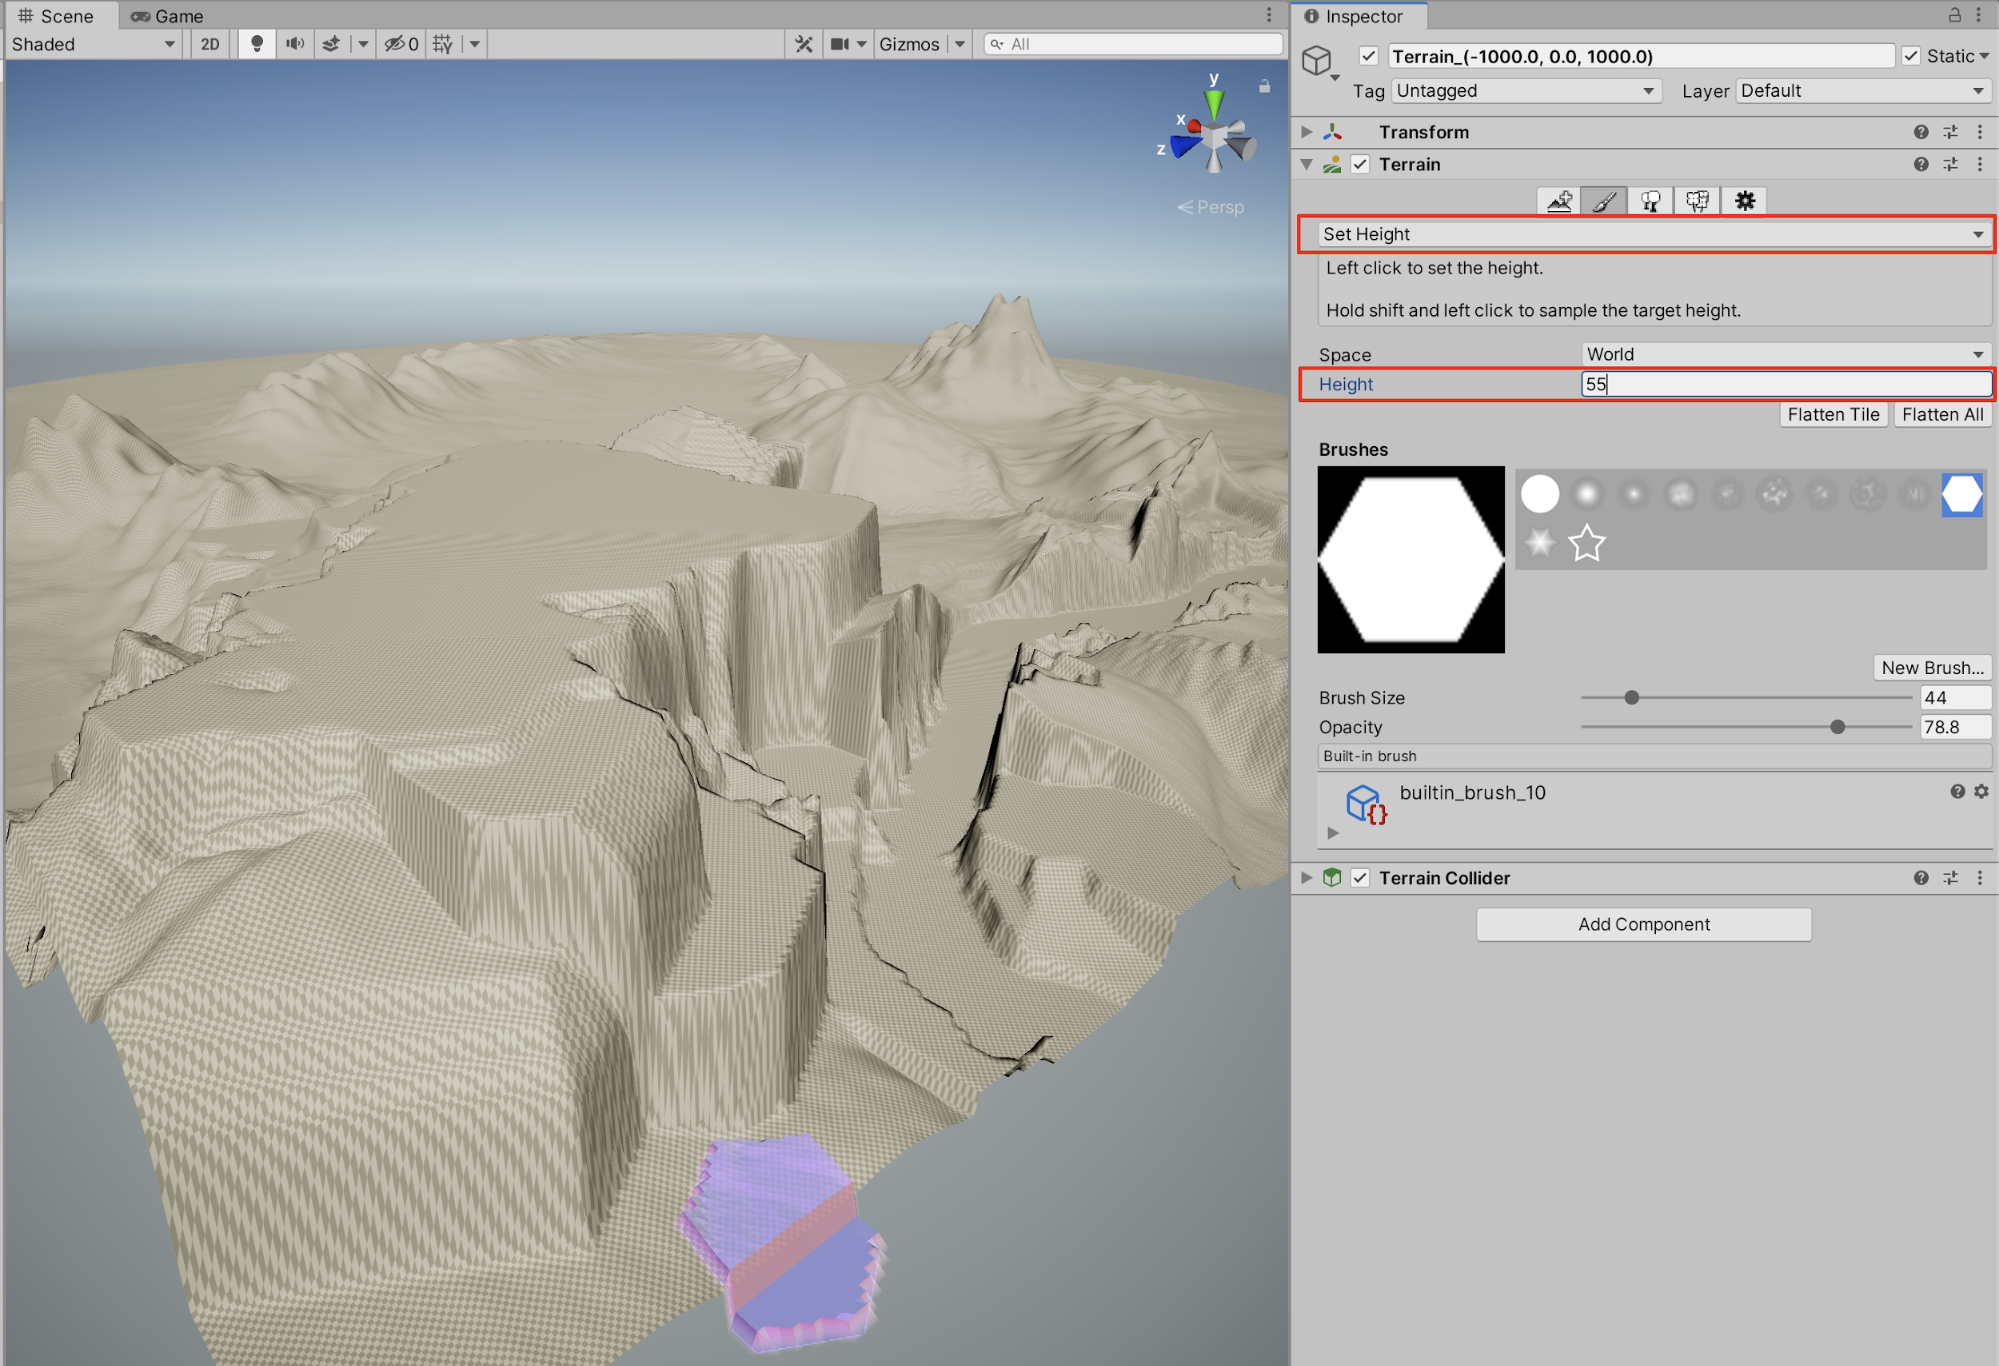
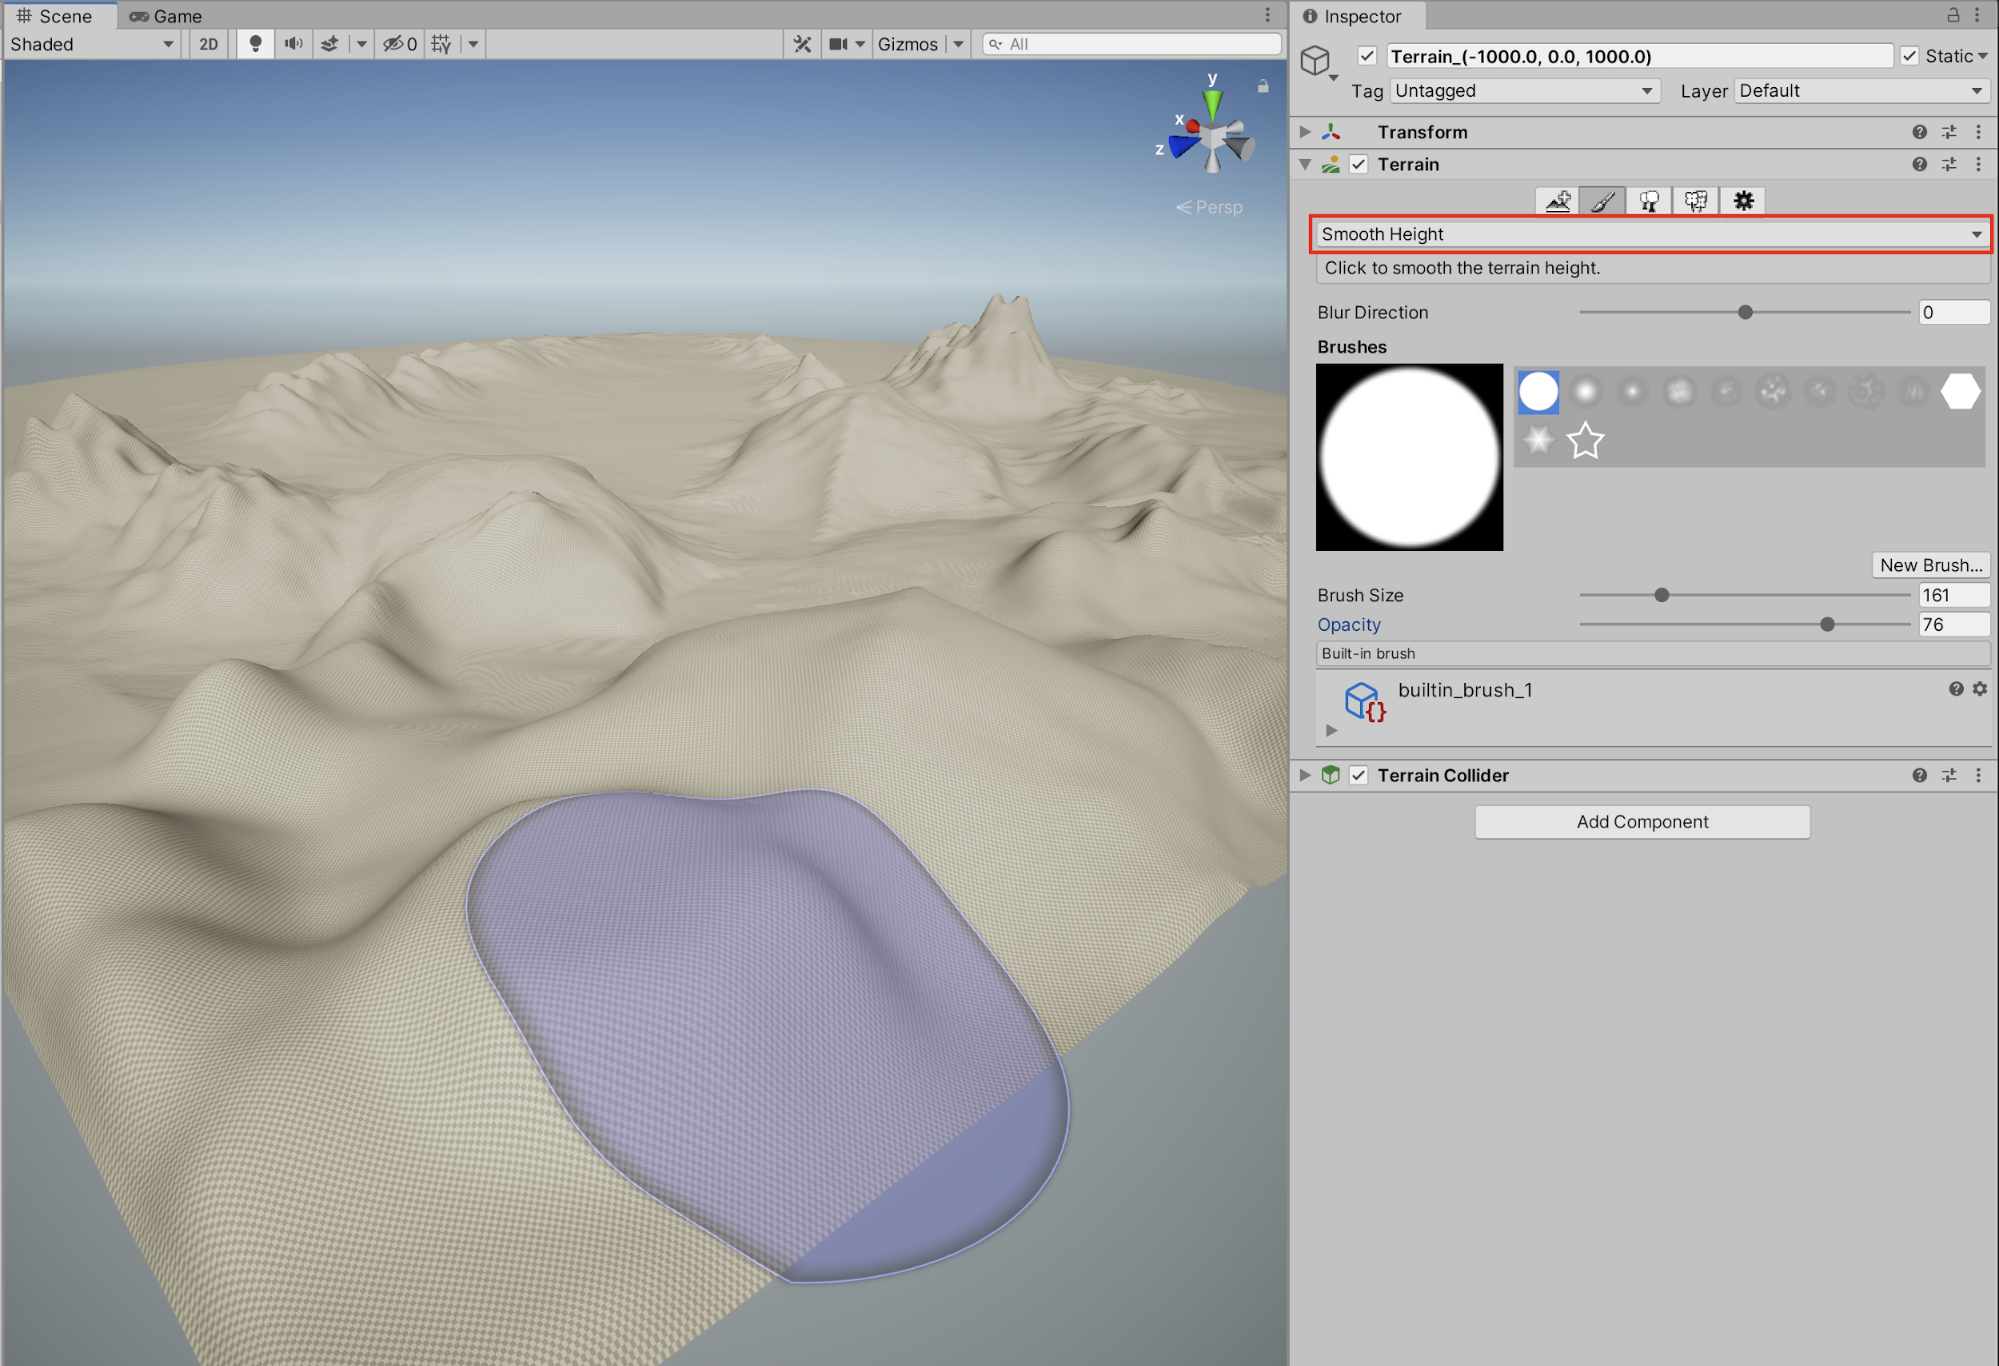
7. To smooth the Terrain’s rough edges, or to soften the Terrain, select the Terrain Brush menu dropdown, and select Smooth Height. When sculpting with any of the brushes, the Terrain’s jagged edges will become more gradually smooth. Increase the Opacity to increase smoothness while sculpting.
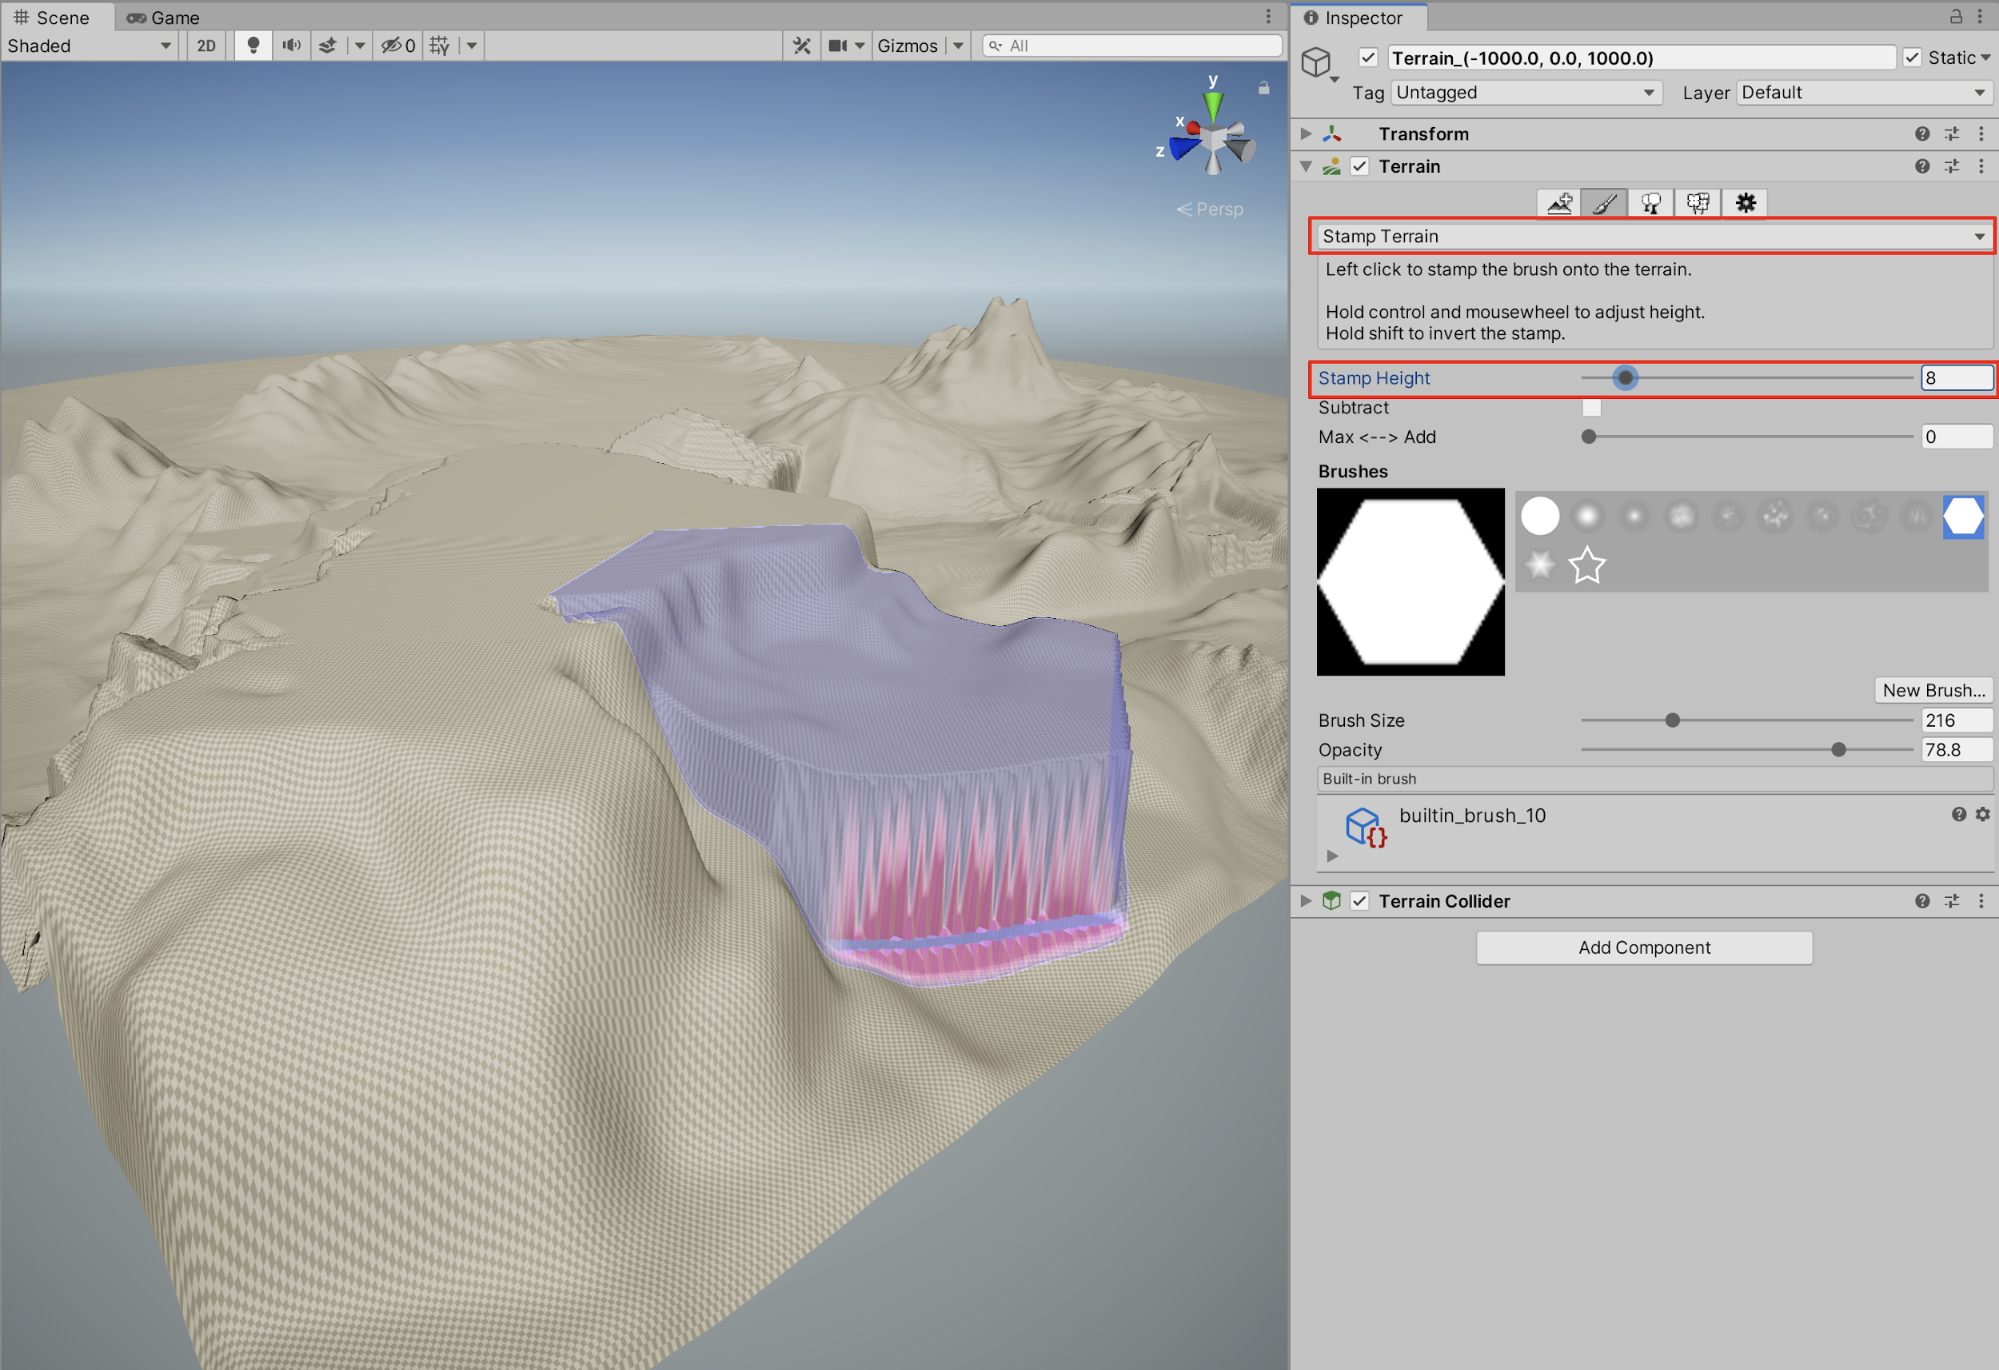
8. To make adjustments to the Terrain using the Stamp Terrain tool, select the Terrain Brush menu dropdown, and select Stamp Terrain. When sculpting with any of the brushes using Stamp Terrain, the Terrain conforms to a set height, specified in the Stamp Height property, yet retains some of the existing Terrain’s higher elevation topography, creating a combined blend of both heights. Increase the Stamp Height to a raised value, position the cursor in your Scene, and apply the stamp with a single mouse click.
5. Terrain Textures Overview
You are able to paint detailed and realistic textures onto your Terrain using the Paint Texture tool. The Paint Texture tool enables you to paint textures directly onto the surface of your Terrain using material layers. You are able to combine and build up multiple material layers to achieve very detailed textures. Because Terrains can be quite large, material textures are typically prepared as a tile with seamless edges, where you can paint its repeating pattern across the landscape, without using unnecessarily large image materials. In order to get set up with some sample texture materials for your Terrain, you will need to either prepare your own image textures or download sample materials into your Project’s Assets folder. You will be using some sample textures, available for download from the Asset Store.
6. Getting Set up with Sample Textures
There are many different options available for bringing in material texture Assets into your Project. For this Tutorial, sample textures have been downloaded from the Asset Store, using a familiar favorite called “Standard Assets.” Although a few Standard Assets folders will be useful for our project, there are extra additional items which won’t be relevant for our needs. Therefore, you will only import the selected folders pertaining to your Terrain.
1. Open up the Asset Store window by selecting from the top menu dropdown: Window > Asset Store.
2. Search for and select “Standard Assets”, and then select Import.

3. The Import Unity Package popup window will appear. Collapse all of the triangles, and deselect all of the checkboxes by selecting None. Next, only select the Environment folder’s SpeedTree and TerrainAssets folders, and then select Import.

Now you are ready to take advantage of the sample Environment Assets, including Terrain textures.
7. Painting Terrain Textures
You shall begin painting textures onto our Terrain using Terrain Layers.
1. With the Terrain selected in the Hierarchy window, select the Paint Terrain paintbrush tool in the Inspector, and set the dropdown menu option to Paint Texture. Select the Edit Terrain Layers button, and then select Create Layer.

2. The Select Texture2D popup window will appear, containing the full collection of 2D Assets saved in your Project. Type in the search field to search for “albedo”, and you will see the 2D sample surface textures for your Terrain sorted into arrangement. Select the texture labelled “GrassRockyAlbedo”.

3. The GrassRockyAlbedo texture has now been uniformly added to the selected Terrain as a Terrain Layer.
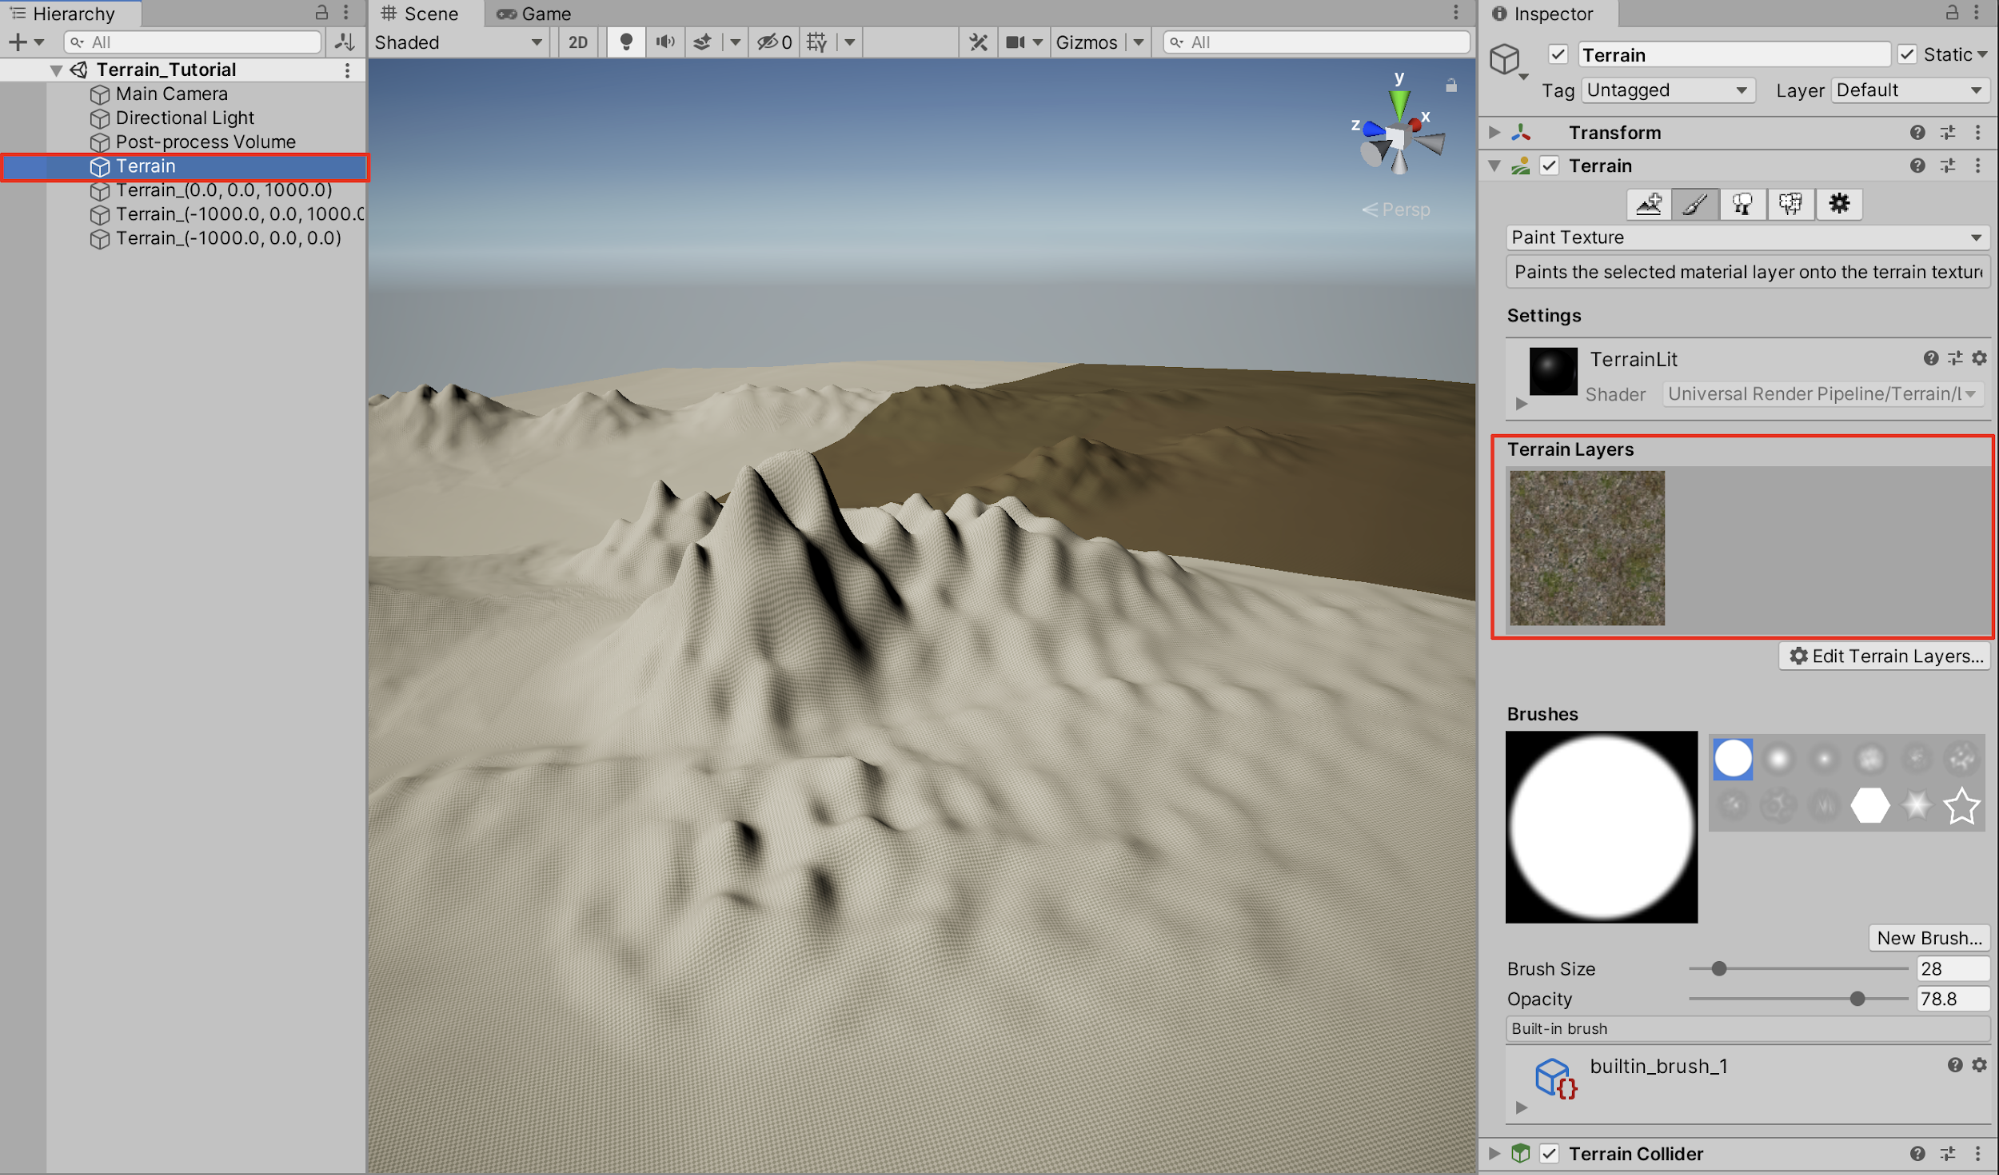
4. In order to apply the same Terrain Layer to the other neighboring Terrain quadrants, first select the Terrain tile GameObject in the Hierarchy window, select the Edit Terrain Layers button in the Inspector, and then select Add Layer.

5. The Select TerrainLayer popup window will appear. When you select through the layers, determine which layer already has the surface texture associated with it, and select the corresponding layer. Note that our layer only has one surface texture assigned to it, however you will add additional textures to our layers in an upcoming step later in this tutorial.

6. Continue adding the Terrain Layer to each of the remaining Terrains.

7. Zoom in to your Terrain to view the texture detail more clearly. Note that you can now distinguish its repeating tiled pattern.

8. Let’s apply additional surface textures, and use them to paint more detail onto the Terrain. Repeating the earlier steps by first selecting the Edit Terrain Layers button, and then next selecting the Add Layer menu selection, and then finally adding surface additional surface textures, you will add the GrassHillAlbedo, CliffAlbedo, and SandAlbedo textures.

9. Selecting the different Terrain Layers, practice painting combinations of surface textures onto the Terrain. Be sure to make adjustments to the Brush Size and Opacity to achieve detailed and unique blends.

8. Using the Trees and Details Brushes
The Tree tool recognizes SpeedTree, a third-party product by IDV Inc., which provides prebuilt tree Assets and modeling software. These brushes allow you to paint trees, foliage, grass, and rocks directly on your terrain, reducing the work of having to place each object model individually. The SpeedTree Asset is included in the Standard Assets, previously imported into your Project. Alternatively, it can also be found on the Asset Store, including additional commercially available tree and vegetation packages for sale.
9. Getting Set Up with SpeedTree
To give SpeedTree models a test run in your Project without any cost, you can download and install the Free SpeedTrees Package from the Asset Store, and then directly import the Assets into your Project using the Package Manager.
1. From a web browser, search for Free SpeedTrees Package in the Unity Asset Store, and then select the Add to My Assets button.

2. From the Package Manager, first select the Download button, and after it has finished downloading, select the Import button. Lastly, select the Import button again from the Import Unity Packages popup window to save the SpeedTrees Package into your Project.

Before painting the SpeedTrees onto your Terrain, you may first need to regenerate the SpeedTree materials, so that they work with the Universal Render Pipeline (URP) Project. This is easily accomplished with a quick adjustment.
3. Navigate to the Free_SpeedTrees folder inside your Assets folder in the Project window. Next, select the first tree Asset named “Broadleaf_desktop.spm”. In the Inspector, select the Apply & Generate Materials button.

4. Repeat the previous step to regenerate the materials for the remaining Trees named: Broadleaf_Mobile, Conifer_Desktop, and Palm_Desktop. Now you are ready to start applying trees to your Terrain.
10. Using the Paint Trees Tool
The Paint Trees brush tool works much like the Paint Terrain brush tool, however you must first define a tree mesh for the brush to work.
1. With the Terrain selected in the Hierarchy window, select the Paint Trees tool, which is the third button in the Terrain toolbar. Select the Edit Trees button, and then select Add Tree from the dropdown menu.

2. The Add Tree popup window appears. Select the Object Loader circle button to the Right of the Tree Prefab field to select a tree model.

3. The Select GameObject popup window appears. Select the tree mesh labelled “Broadleaf_Desktop”, and then select the Add button in the Add Tree window to load the tree model into the Paint Trees brush tool.

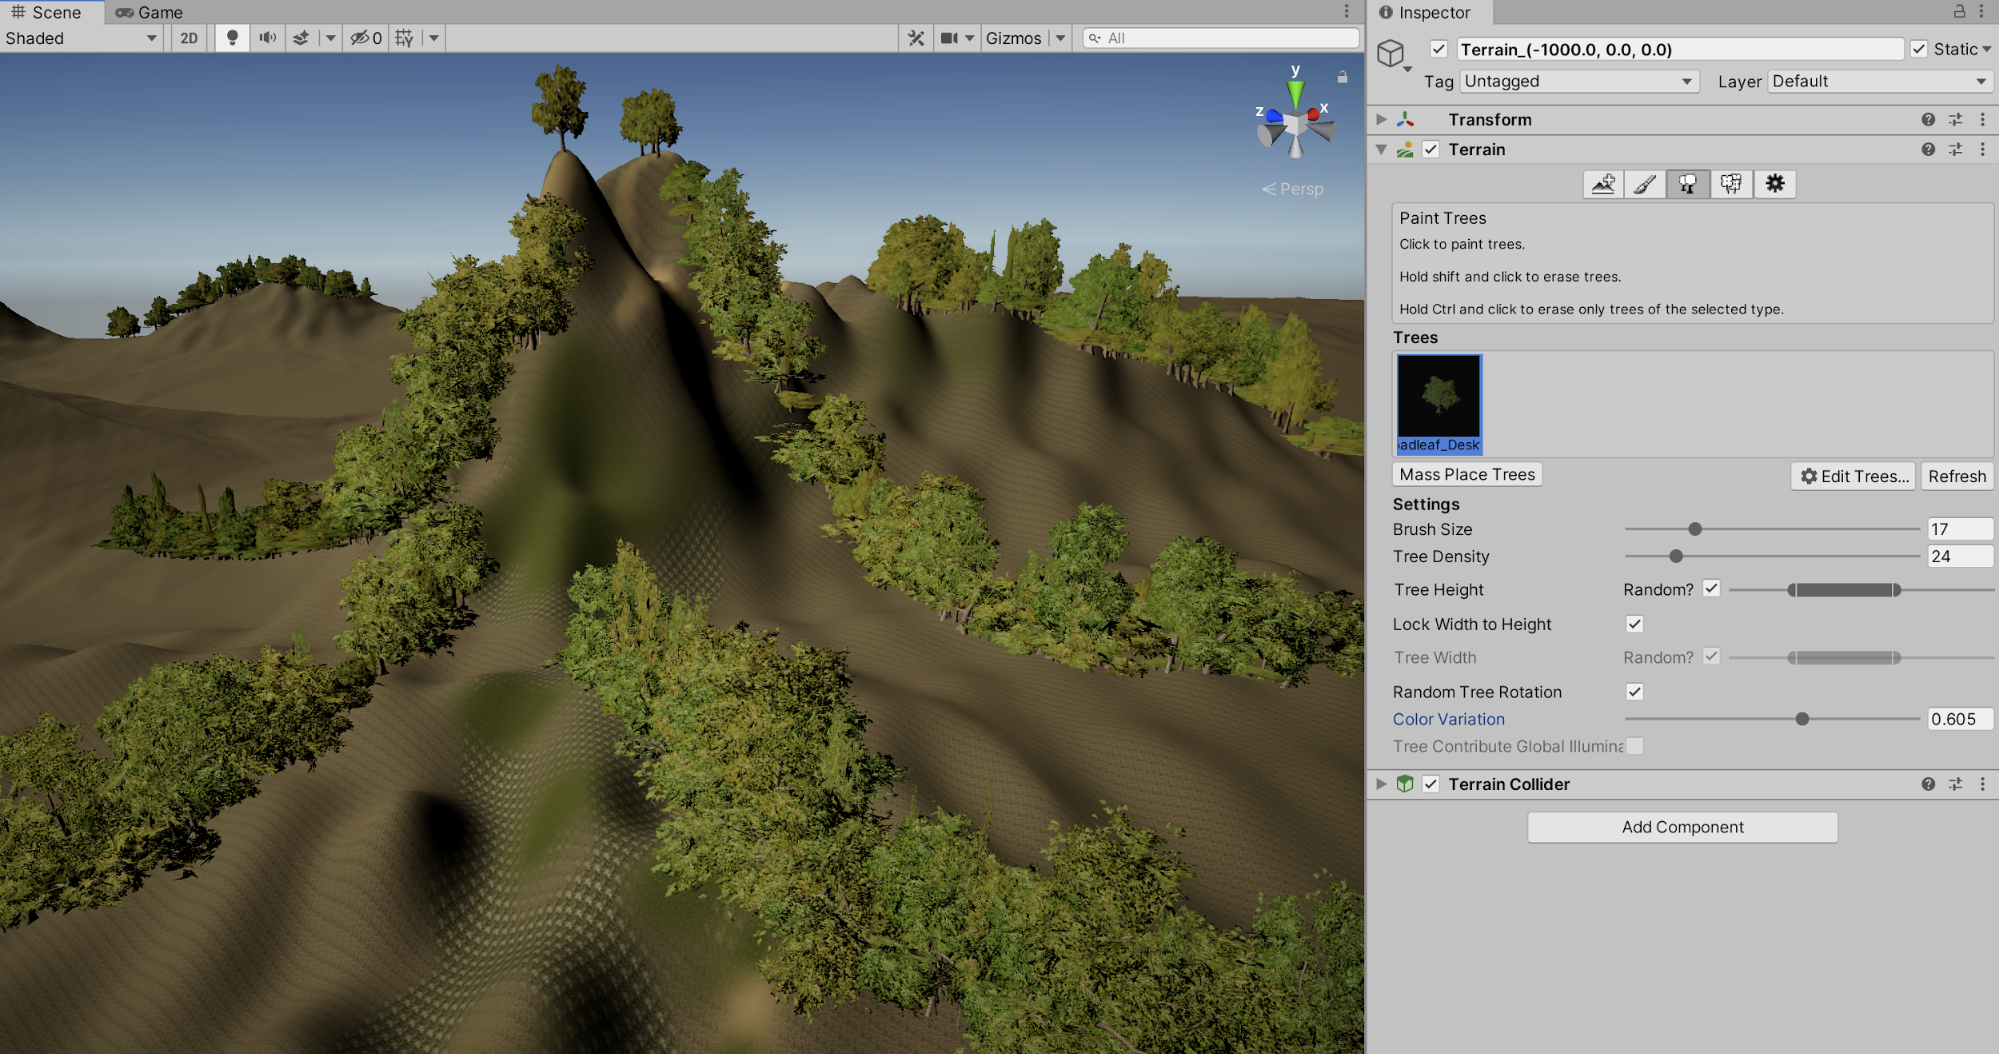
4. You are now ready to paint the trees onto the Terrain. Adjust settings for the Brush Size and Tree Density to determine how dense or sparsely your trees will be placed. Additionally, select the checkbox to enable Random Tree Height, and then adjust the slider range to encompass a wider or narrower range of randomness. Keep the checkbox enabled for Random Tree Rotation, to ensure that each tree is placed with a random rotation, and lastly, adjust the slider to increase or decrease the tree’s Color Variation. With the cursor visibly placed on your Terrain in the Scene window, click and drag the mouse to selectively paint trees onto your Terrain. Hold down the Shift key while painting, to remove trees.

5. Practice painting groves of trees in a forest or in a row by making adjustments to the Brush Size, and Tree Density values.
11. Painting Details
The Paint Details brush tool works much like the Paint Trees and Terrain brush tools, however you must similarly first define a detail mesh for the brush to work. For this example, you will paint in grass detail.
1. With the Terrain selected in the Hierarchy window, select the Paint Details tool, which is the fourth button in the Terrain toolbar. Select the Edit Details button, and then select Add Grass Texture from the dropdown menu.

2. The Add Grass Texture popup window appears. Select the Object Loader circle button to the Right of the Detail Texture field to select a grass texture.

3. The Select Texture2D popup window appears. Type in “grass” in the search field, and then select the grass mesh labelled “GrassFrond01AlbedoAlpha”. Next, select the Add button in the Add Grass Texture window to load the grass texture into the Paint Details brush tool.

4. You are now ready to paint the grass texture onto the Terrain. Adjust settings for the Brush Size and Target Strength to set the size and density of the grass texture. With the cursor visibly placed on your Terrain in the Scene window, click and drag the mouse to selectively paint the grass texture onto your Terrain. Hold down the Shift key while painting, to remove details.

12. The Terrain Settings Tool
You are able to inspect features of, and make adjustments to the Terrain by going into the Terrain Settings.
1. With the Terrain selected in the Hierarchy window, select the Terrain Settings tool, which is the fifth and last button in the Terrain toolbar.

Although this tutorial won’t be going into specific detail in this section, you are able to see that there are additional settings that can be adjusted and modified for your Terrain, including categories for Basic Terrain, Tree & Detail Objects, Wind Settings, Mesh Resolution, Holes Settings, Texture Resolutions, and Lighting.
13. Next Steps
The Terrain Editor is a powerful tool that allows you to quickly create vast, detailed, complex, and configurable Terrain landscapes. With practice, you will be able to creatively sculpt hills, mountains, plateaus, valleys, and much more with ease. Challenge yourself with creating unique and diverse Terrain topographies, sculpted and painted with additional texture detail. With only a short amount of effort, your landscapes will come to life with their realism and creativity.