Working with the Terrain Toolbox
Tutorial
·
Beginner
·
+10XP
·
20 mins
·
(394)
Unity Technologies
In this tutorial, you will learn how to add and use the Terrain Tools package.
Languages available:
1. Setting up the Project
The Terrain Tools Package offers an extended range of sculpting and brush tools optimized for adjusting Terrain features, and works within the Unity Terrain Editor. To take advantage of these additional sets of tools, you will need to install the Terrain Tools Package from the Package Manager window.
1. From the Top Menu dropdown, select Window > Package Manager.
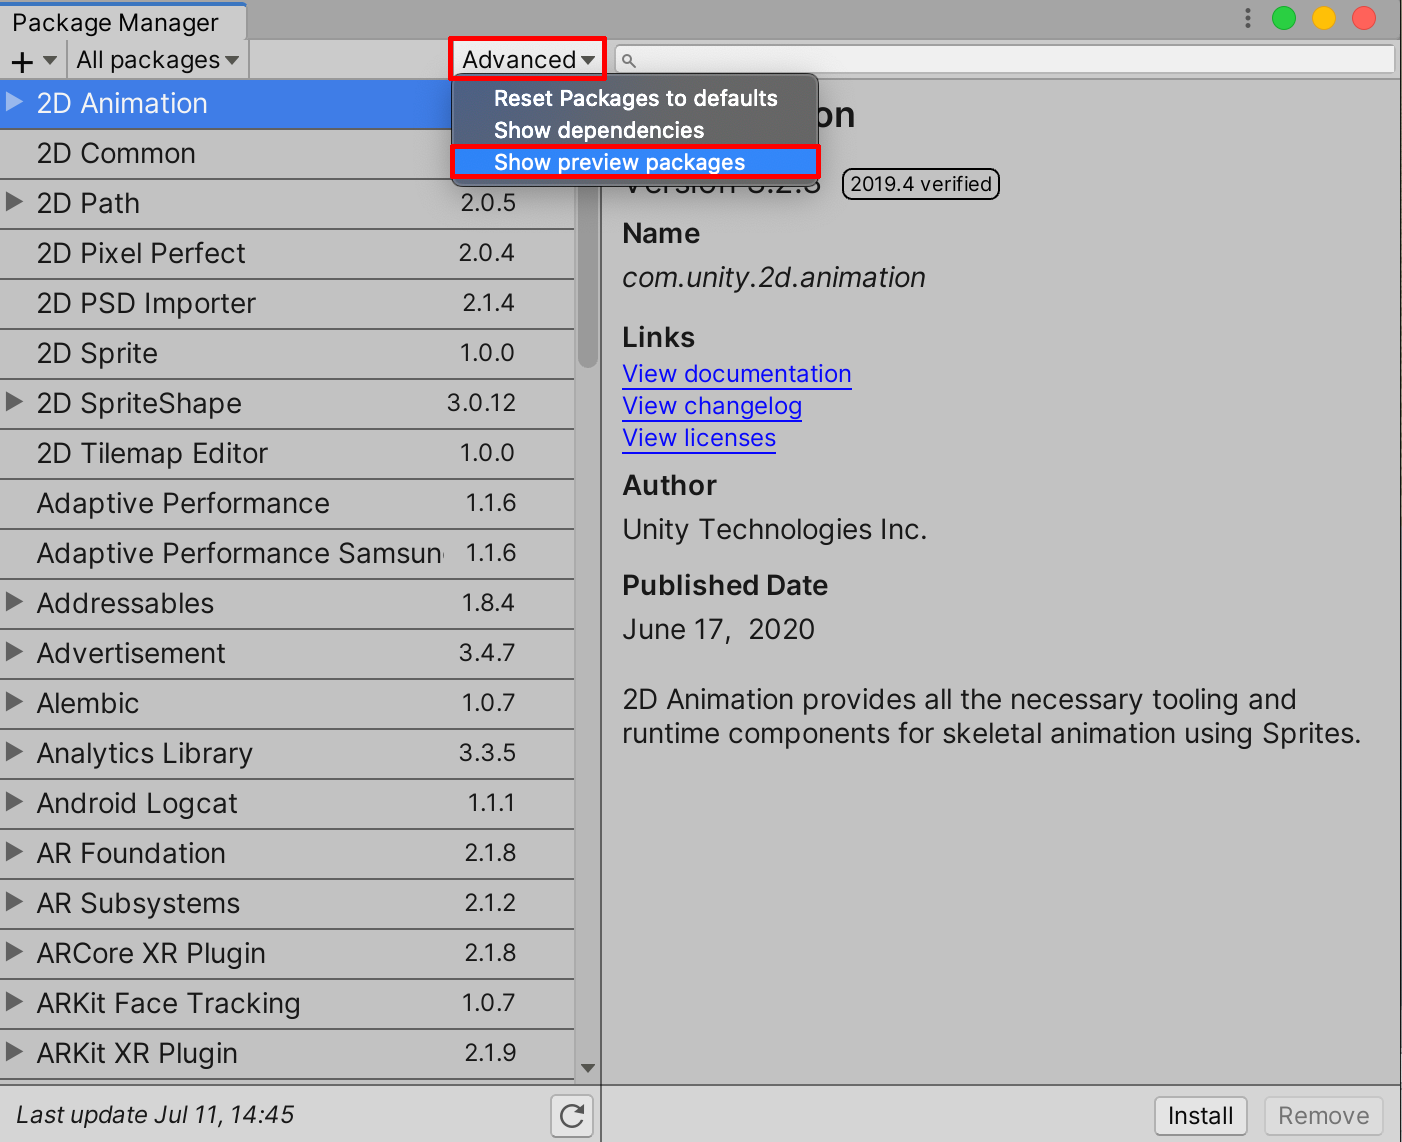
2. In the top of the Package Manager window, select Advanced, and then select Show Preview Packages from the dropdown menu.
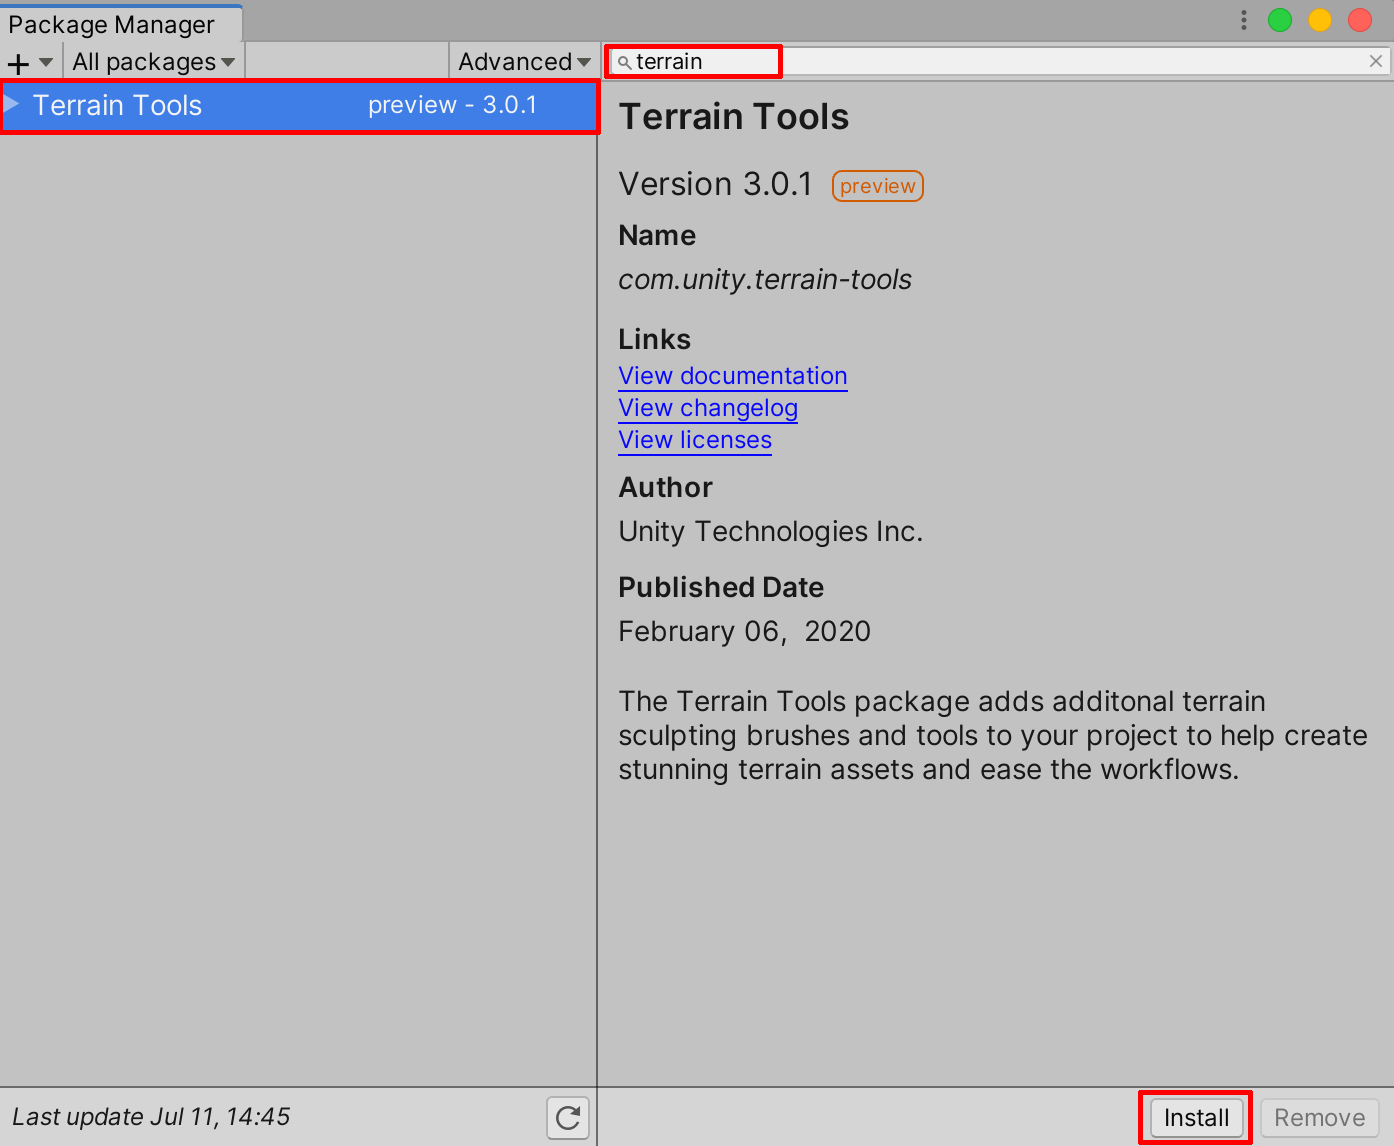
3. In the search field, type in “terrain” to search for the Terrain Tools, and with the Terrain Tools preview package selected, select the Install button.
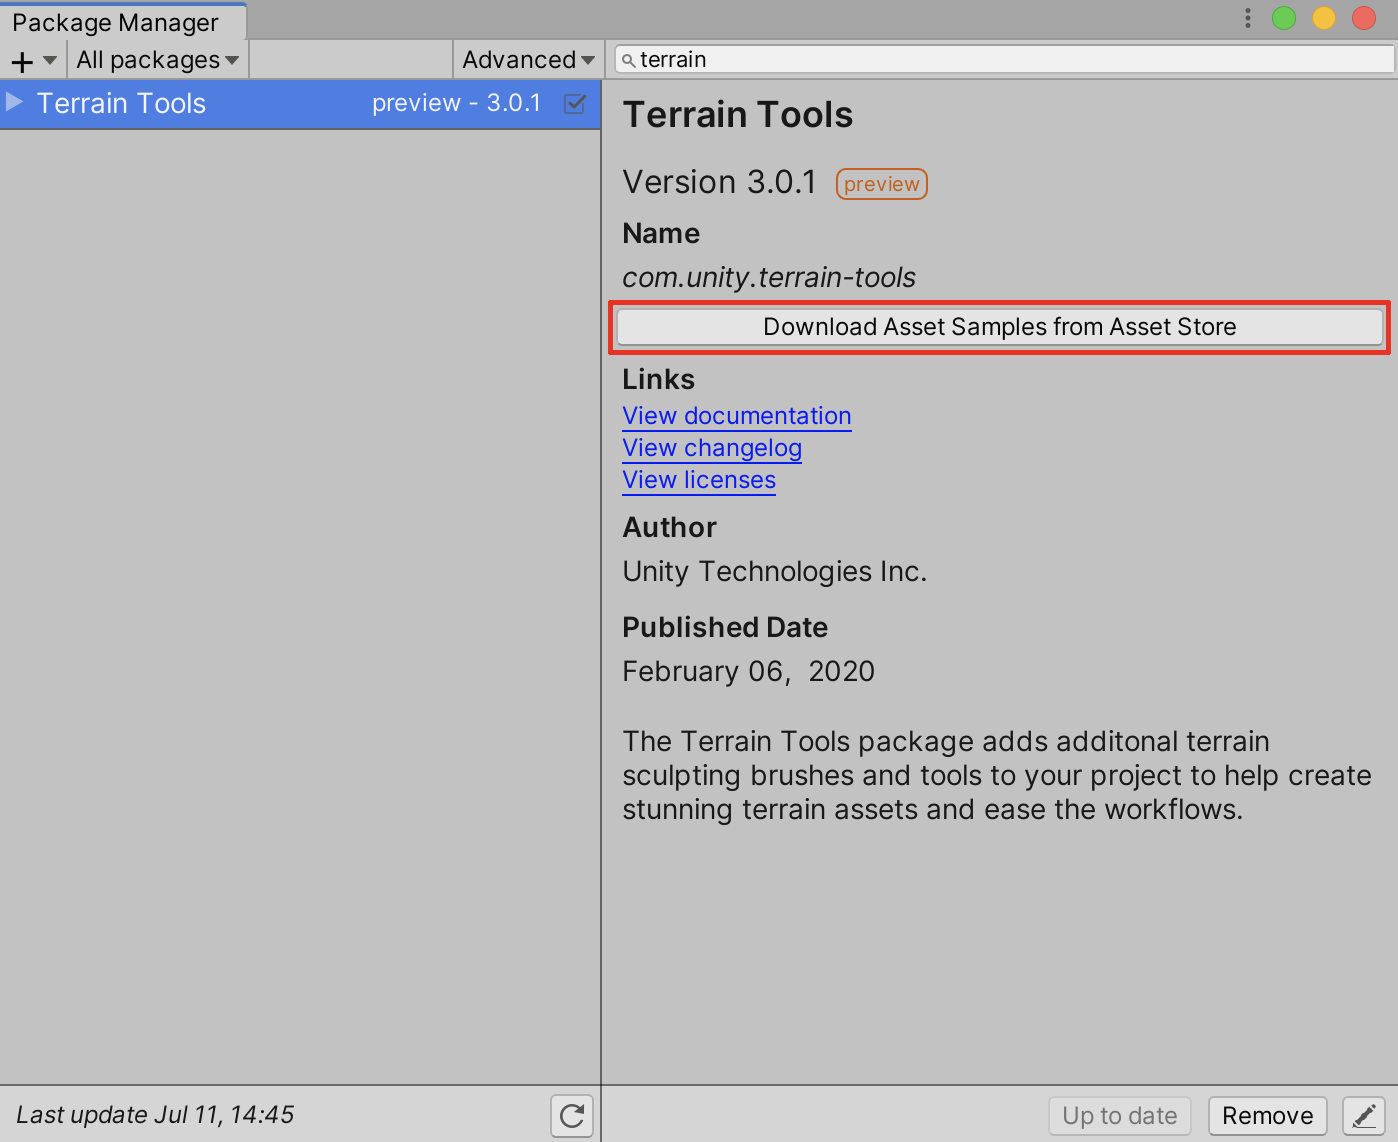
4. To practice with freely available Terrain samples such as tree and texture assets, select the Download Asset Samples from Asset Store button in the Package Manager window.
5. The Unity Asset Store site will automatically open in your default web browser. Select the Add to My Assets button.
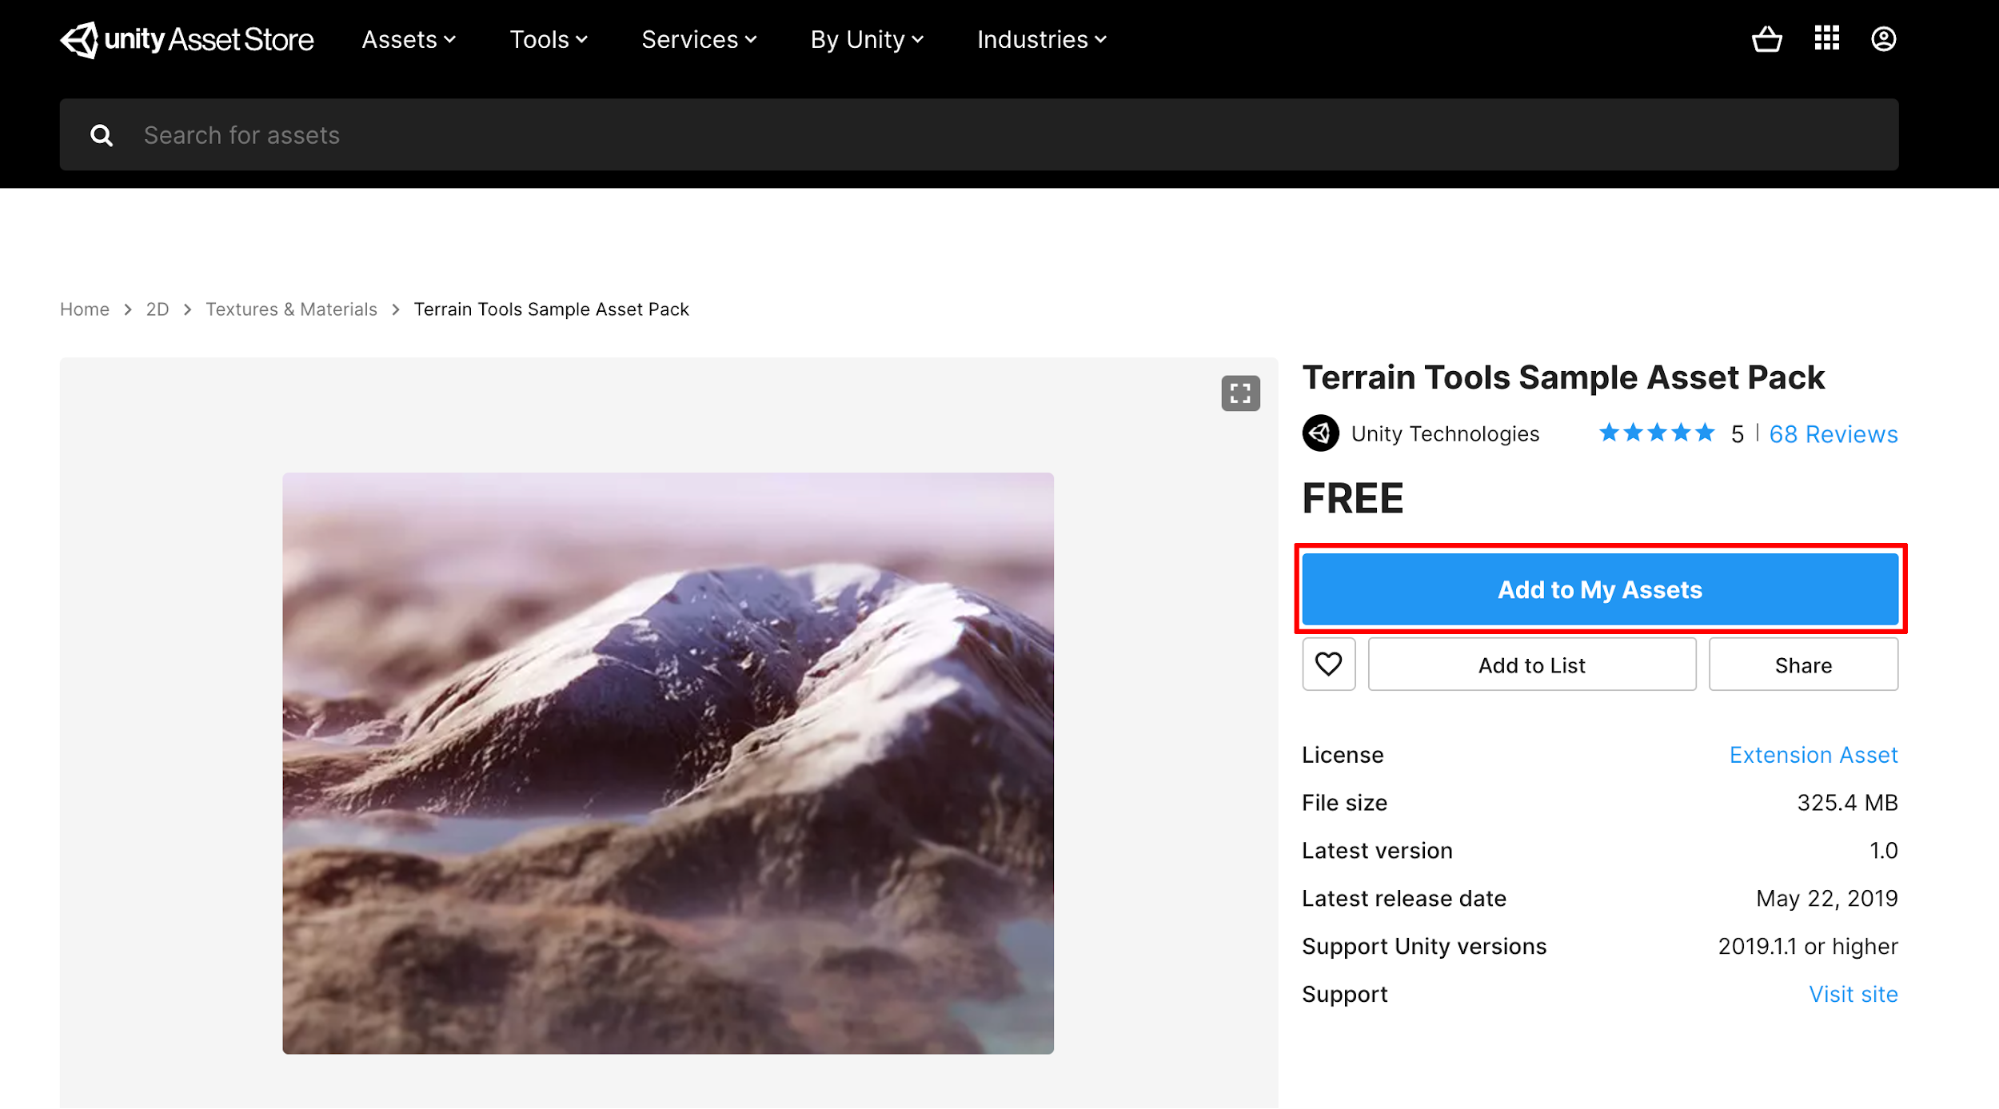
6. A pop up window will appear at the top of your page, showing the Terrain Tools Sample Asset Pack added to your assets. Select the Open in Unity button.

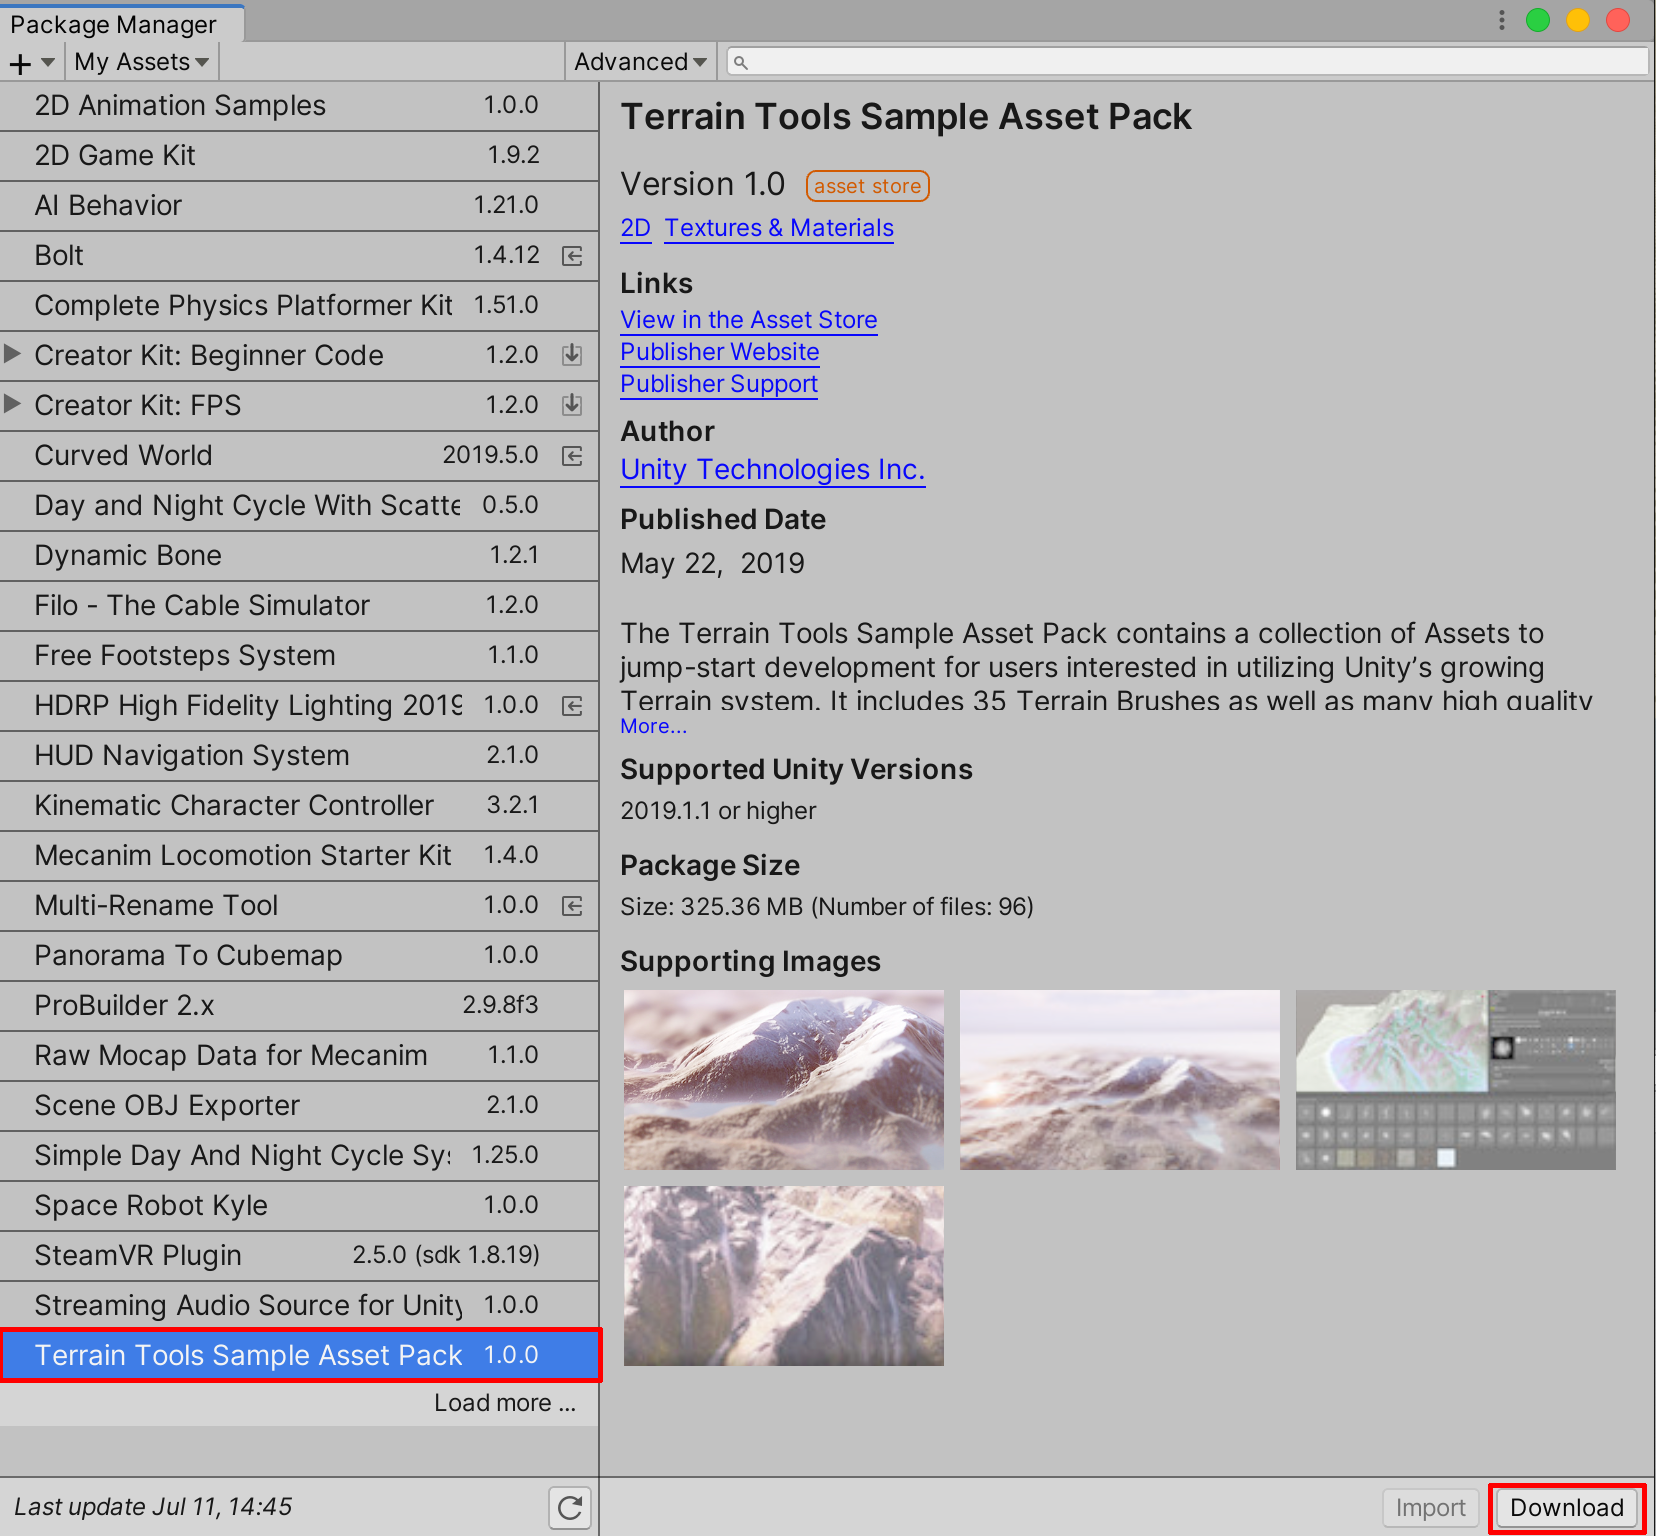
7. The Unity Package Manager window will automatically refresh, showing the Terrain Tools Sample Asset Pack. Select the Download button to start the download.
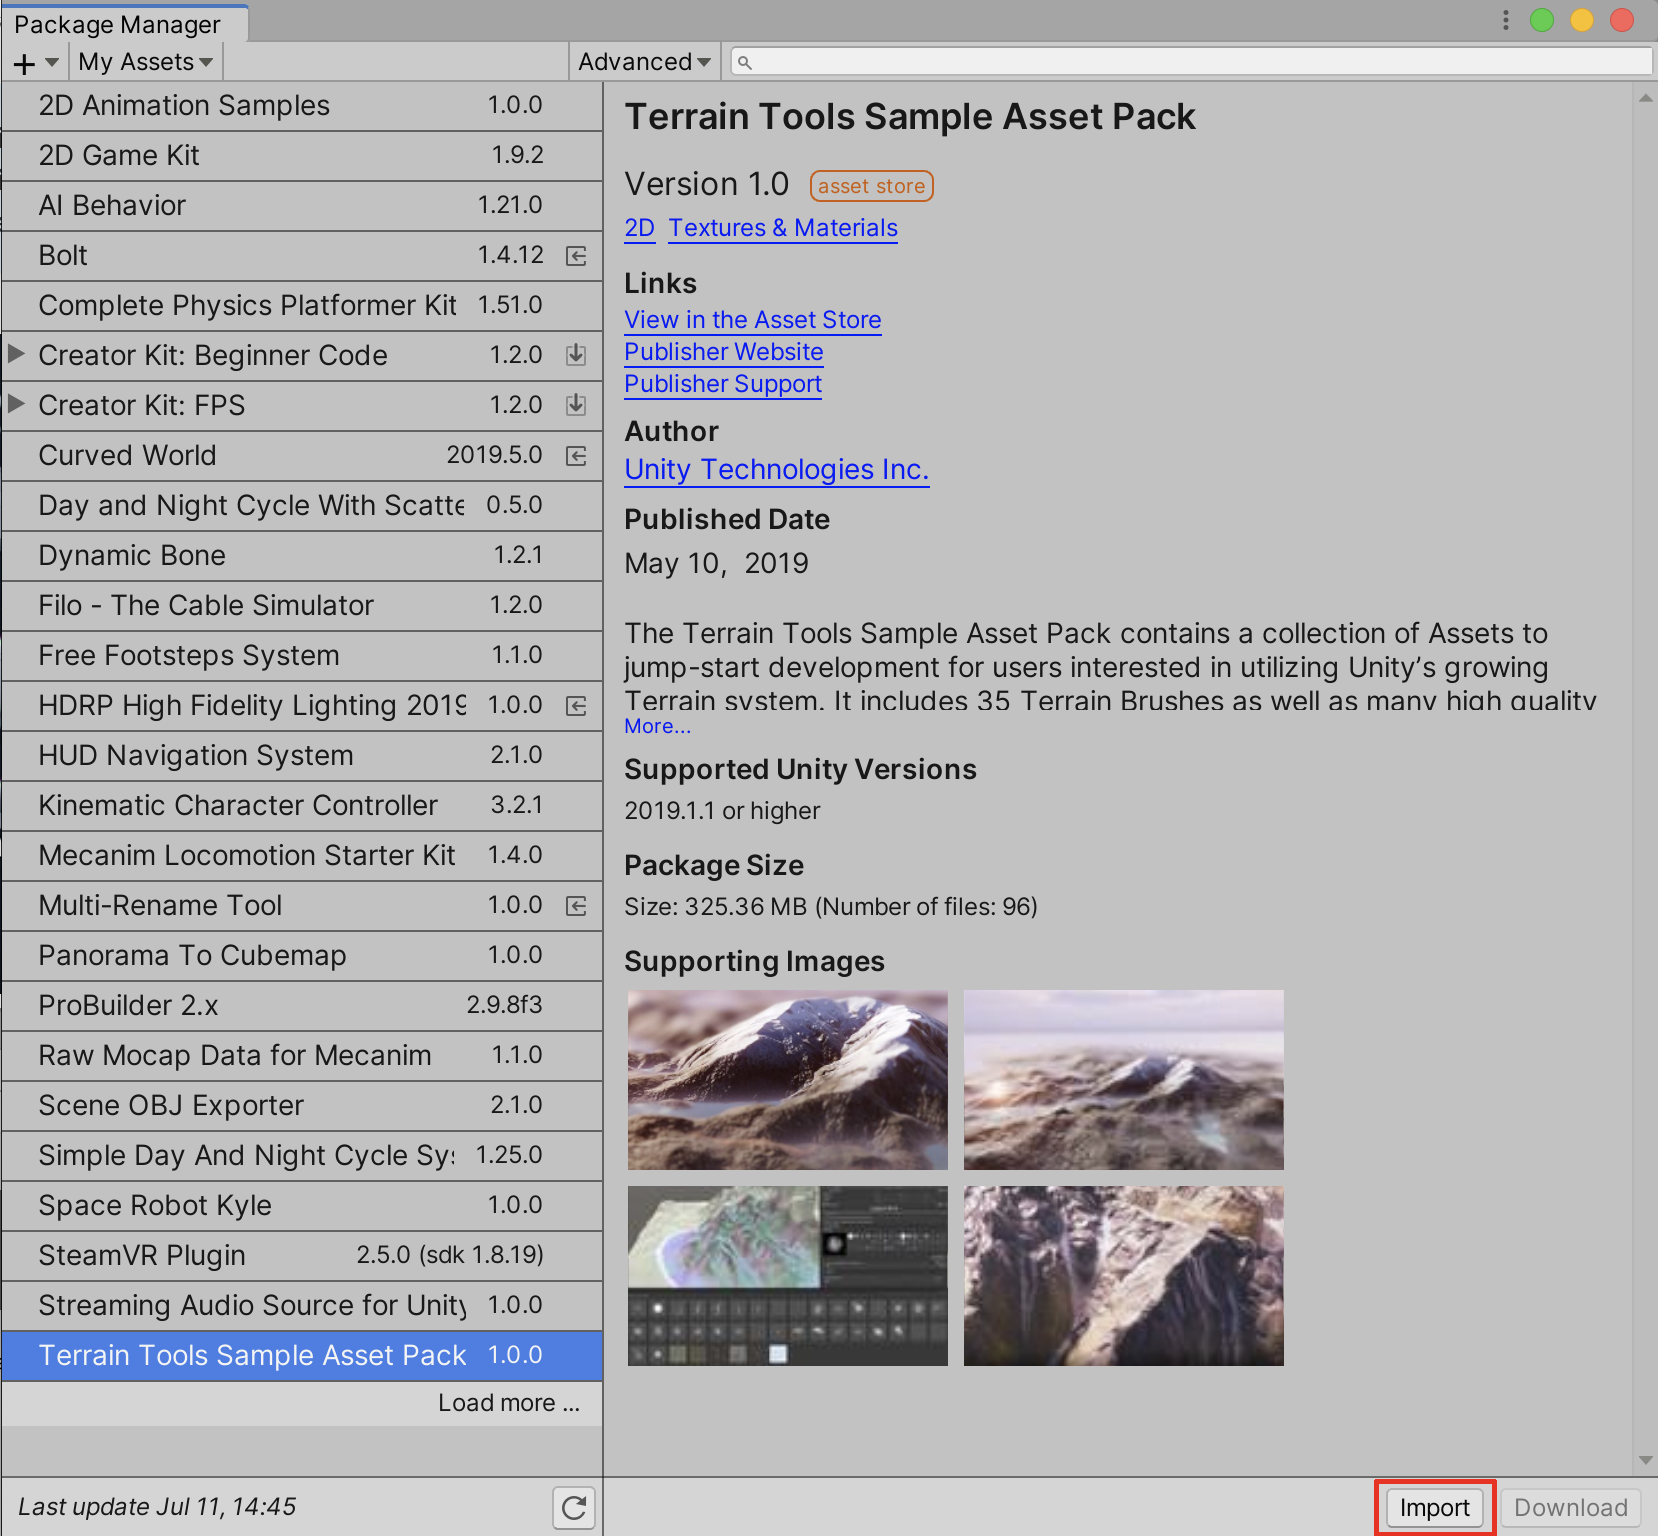
8. After the Sample Asset Pack has finished downloading, select the Import button to import the Sample Assets into your Project.
9. Finally, The Import Unity Package pop up window will appear. Select the Import button to save the Terrain Tools Sample Asset Pack into your Project
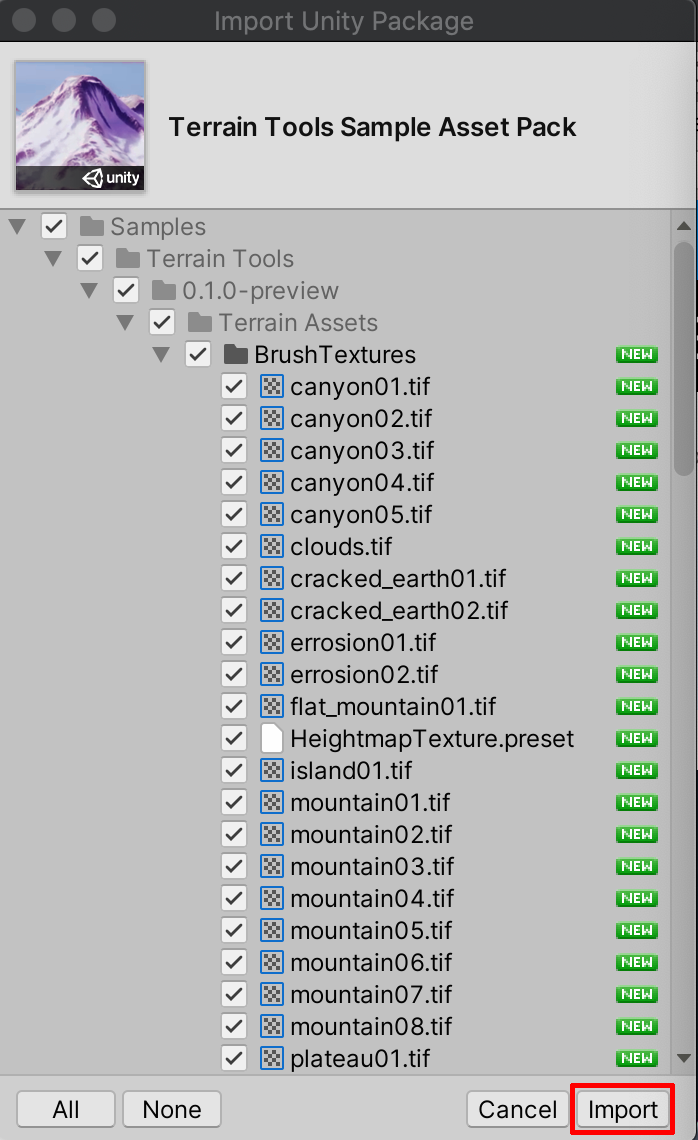
You are now ready to take full advantage of Unity’s Terrain System, and practice with the additional sets of tools and Sample Assets. You can now close out the Package Manager window, and further explore some of the additional features.
2. Exploring the Additional Terrain Tools
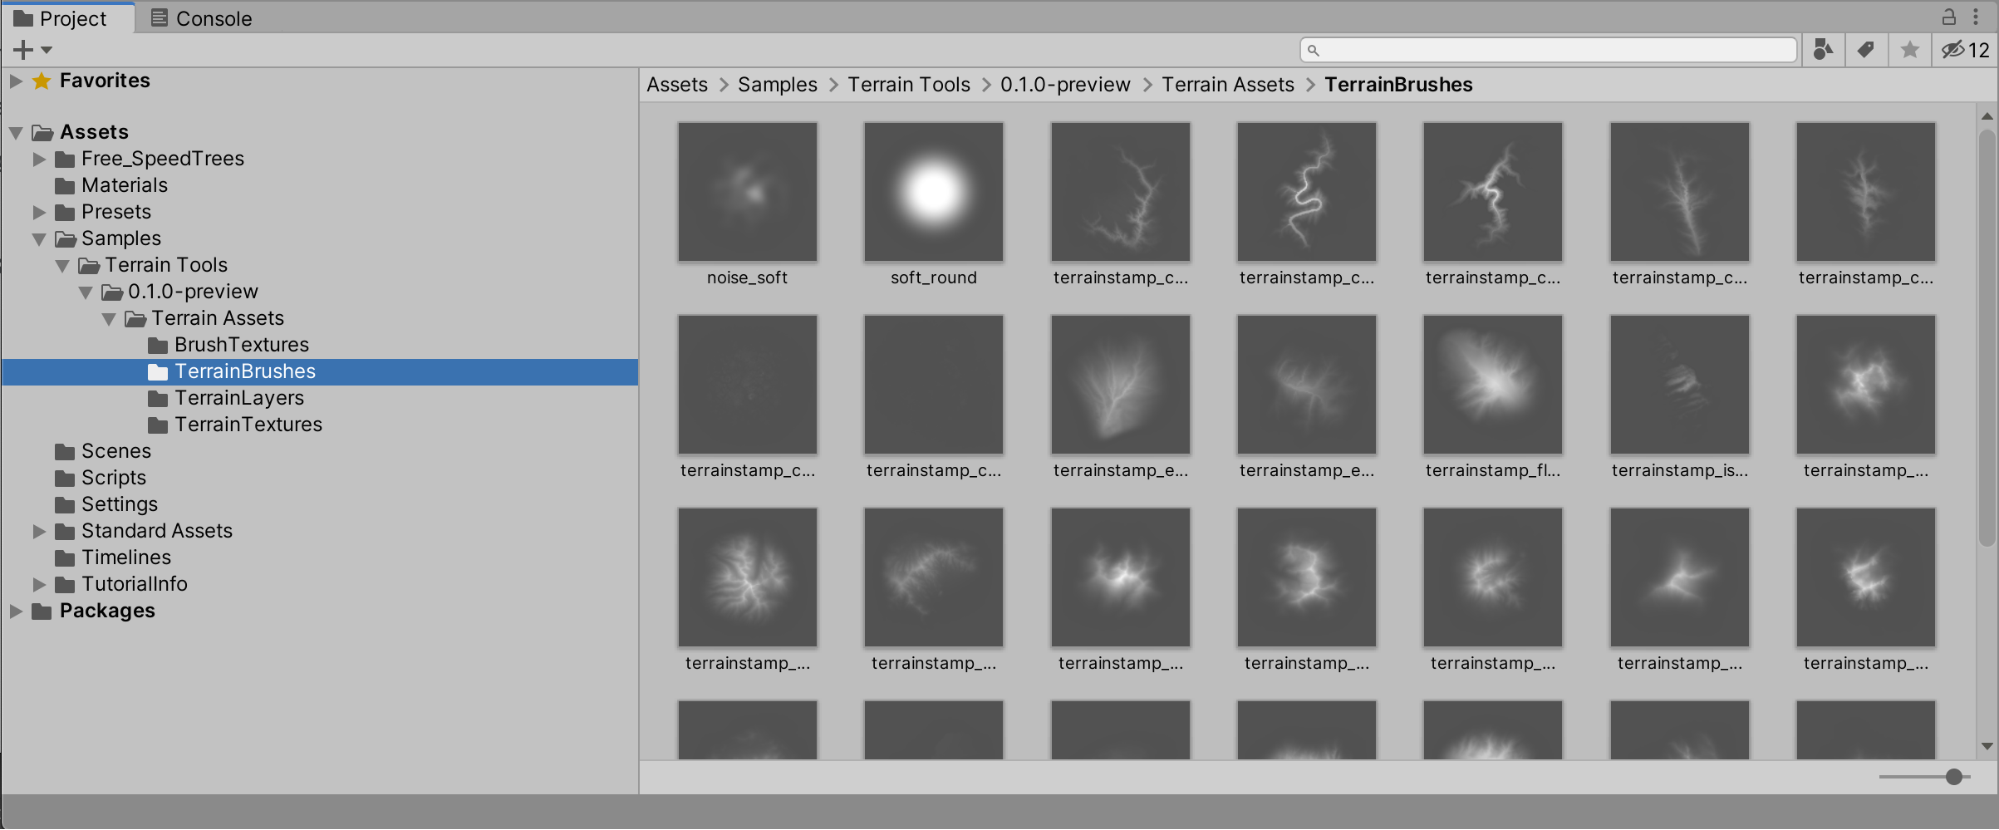
There are now newly-added folders in the Project window, containing additional samples for use. You'll explore the additional Terrain Brushes now available.
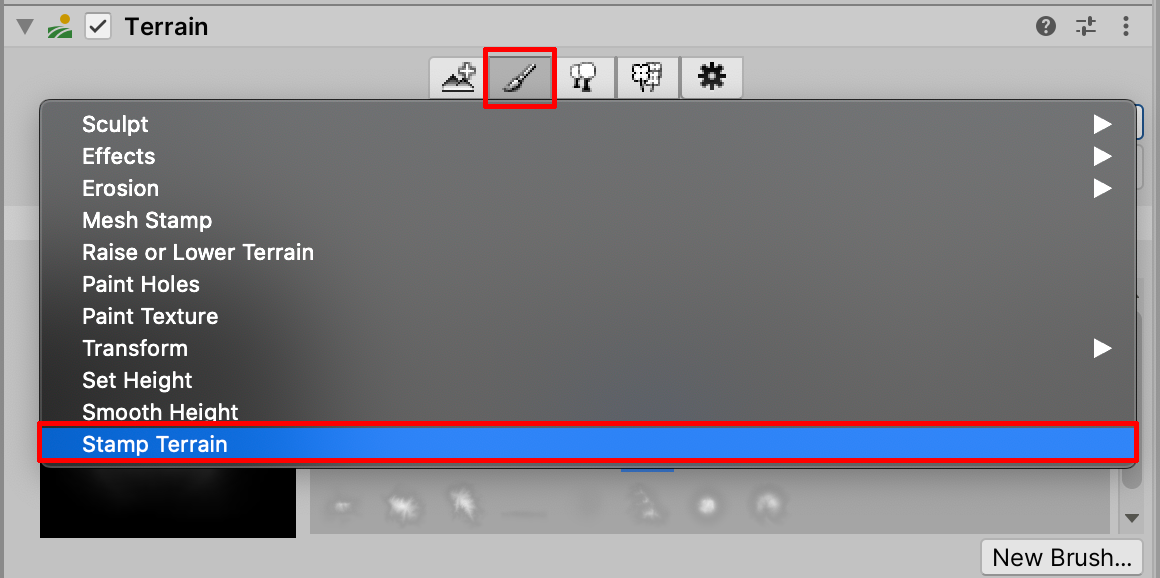
1. With the Terrain selected in the Hierarchy window, select the Paint Terrain tool in the Inspector. You will notice that there are now some new changes shown in the Inspector. Select the menu dropdown, and then select the Stamp Terrain tool option. Note that at first glance, there are additional features available in the dropdown menu which weren’t there before, including additional options for Sculpting, Effects, Erosion, and Set Height.
Let’s explore the Stamp Terrain tool in further detail.
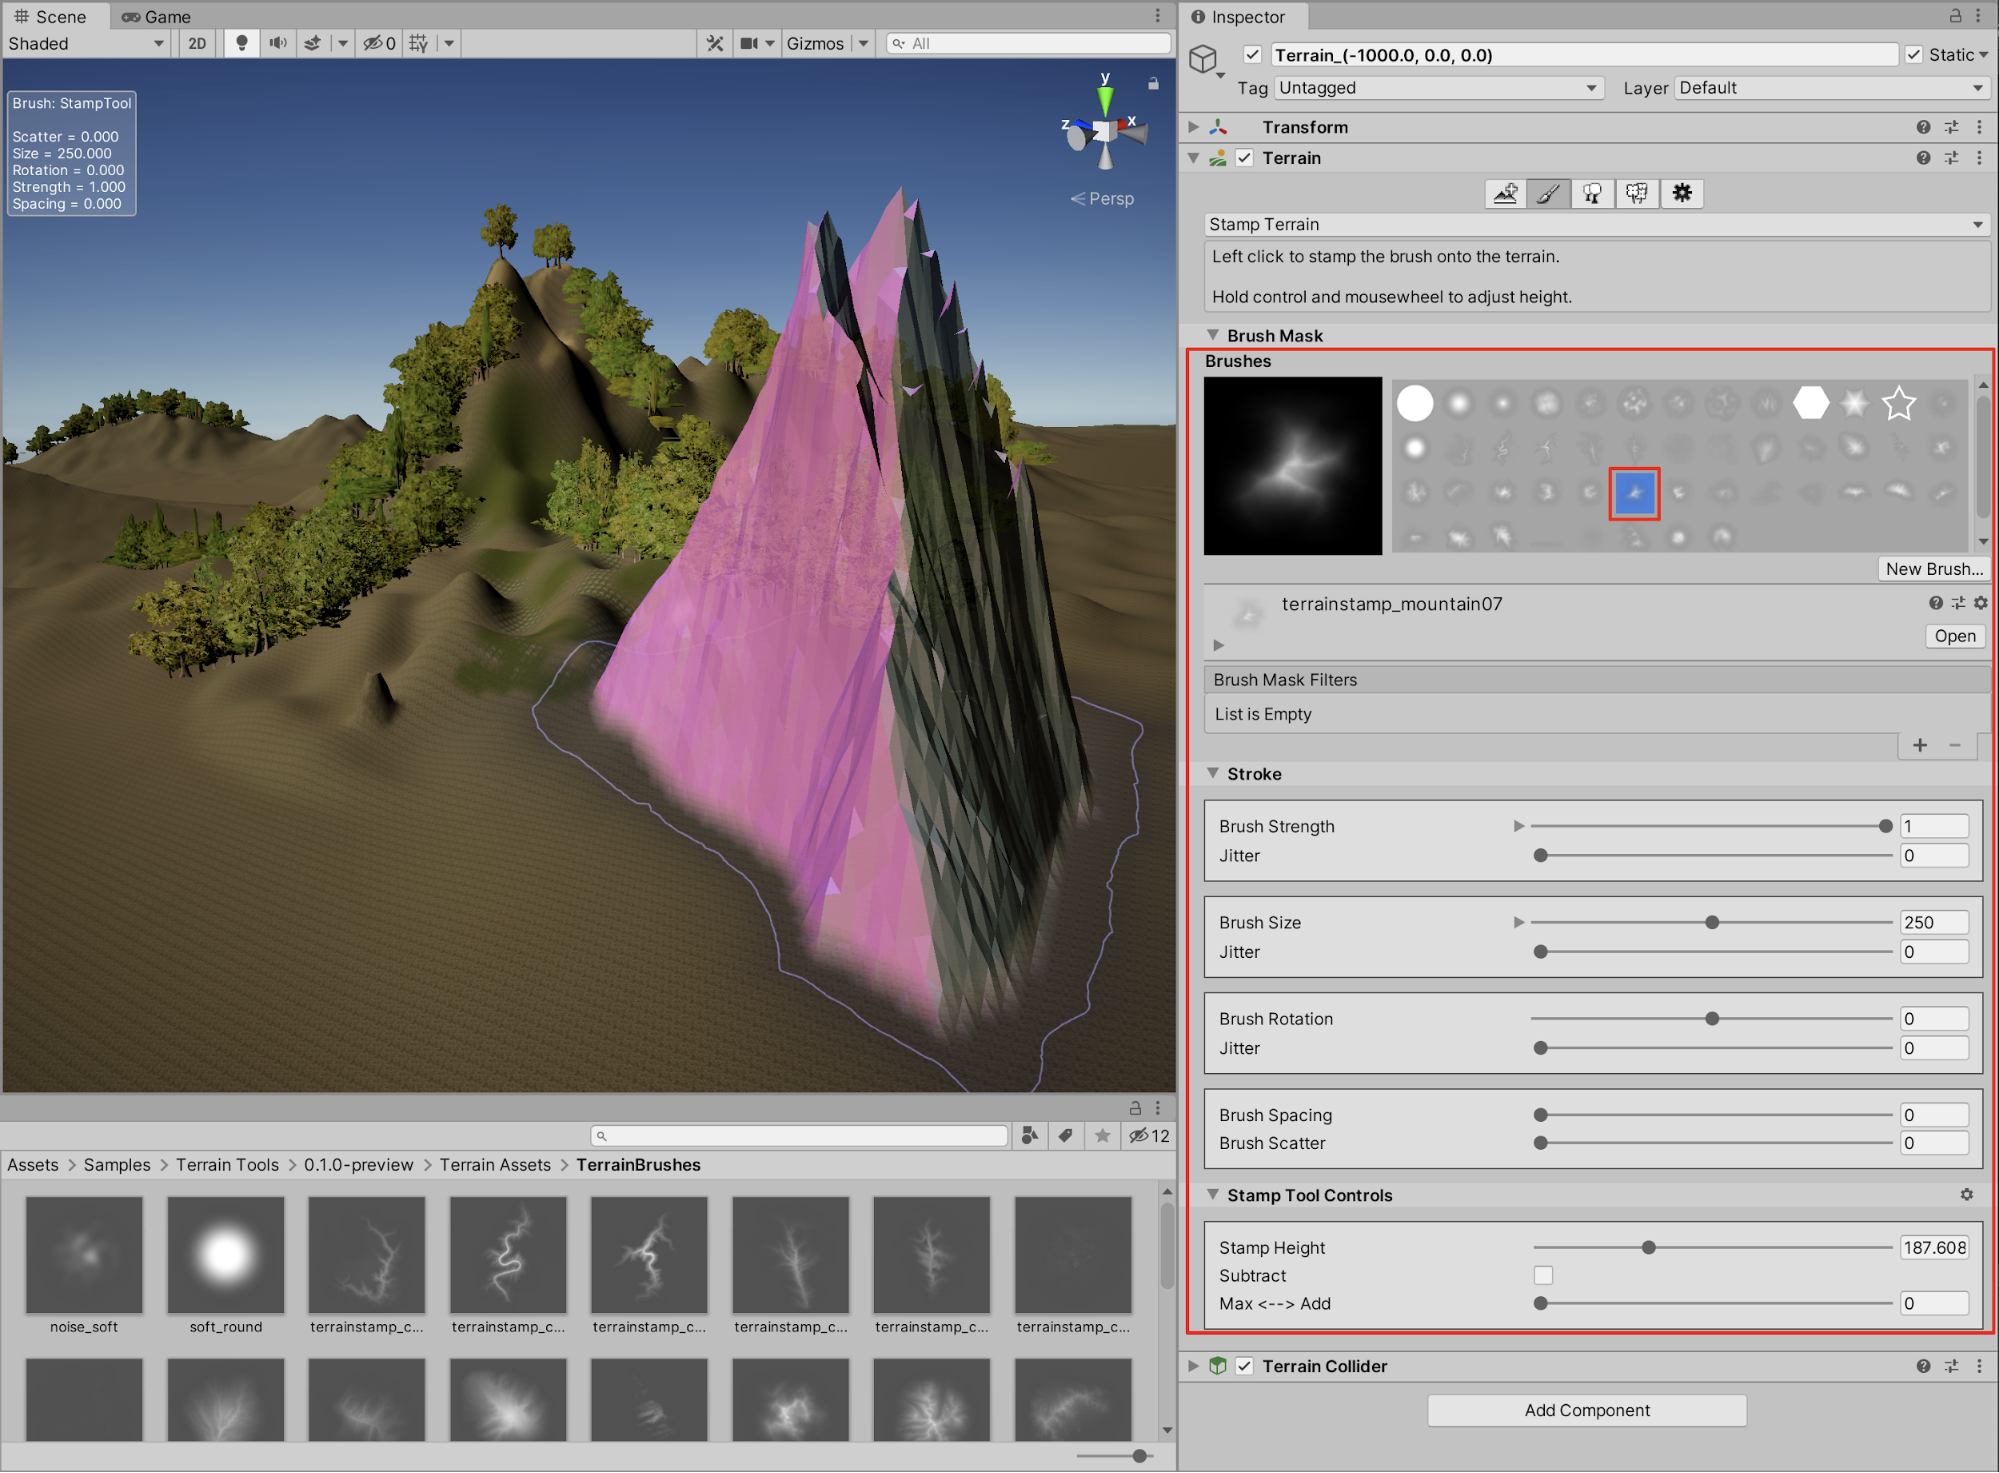
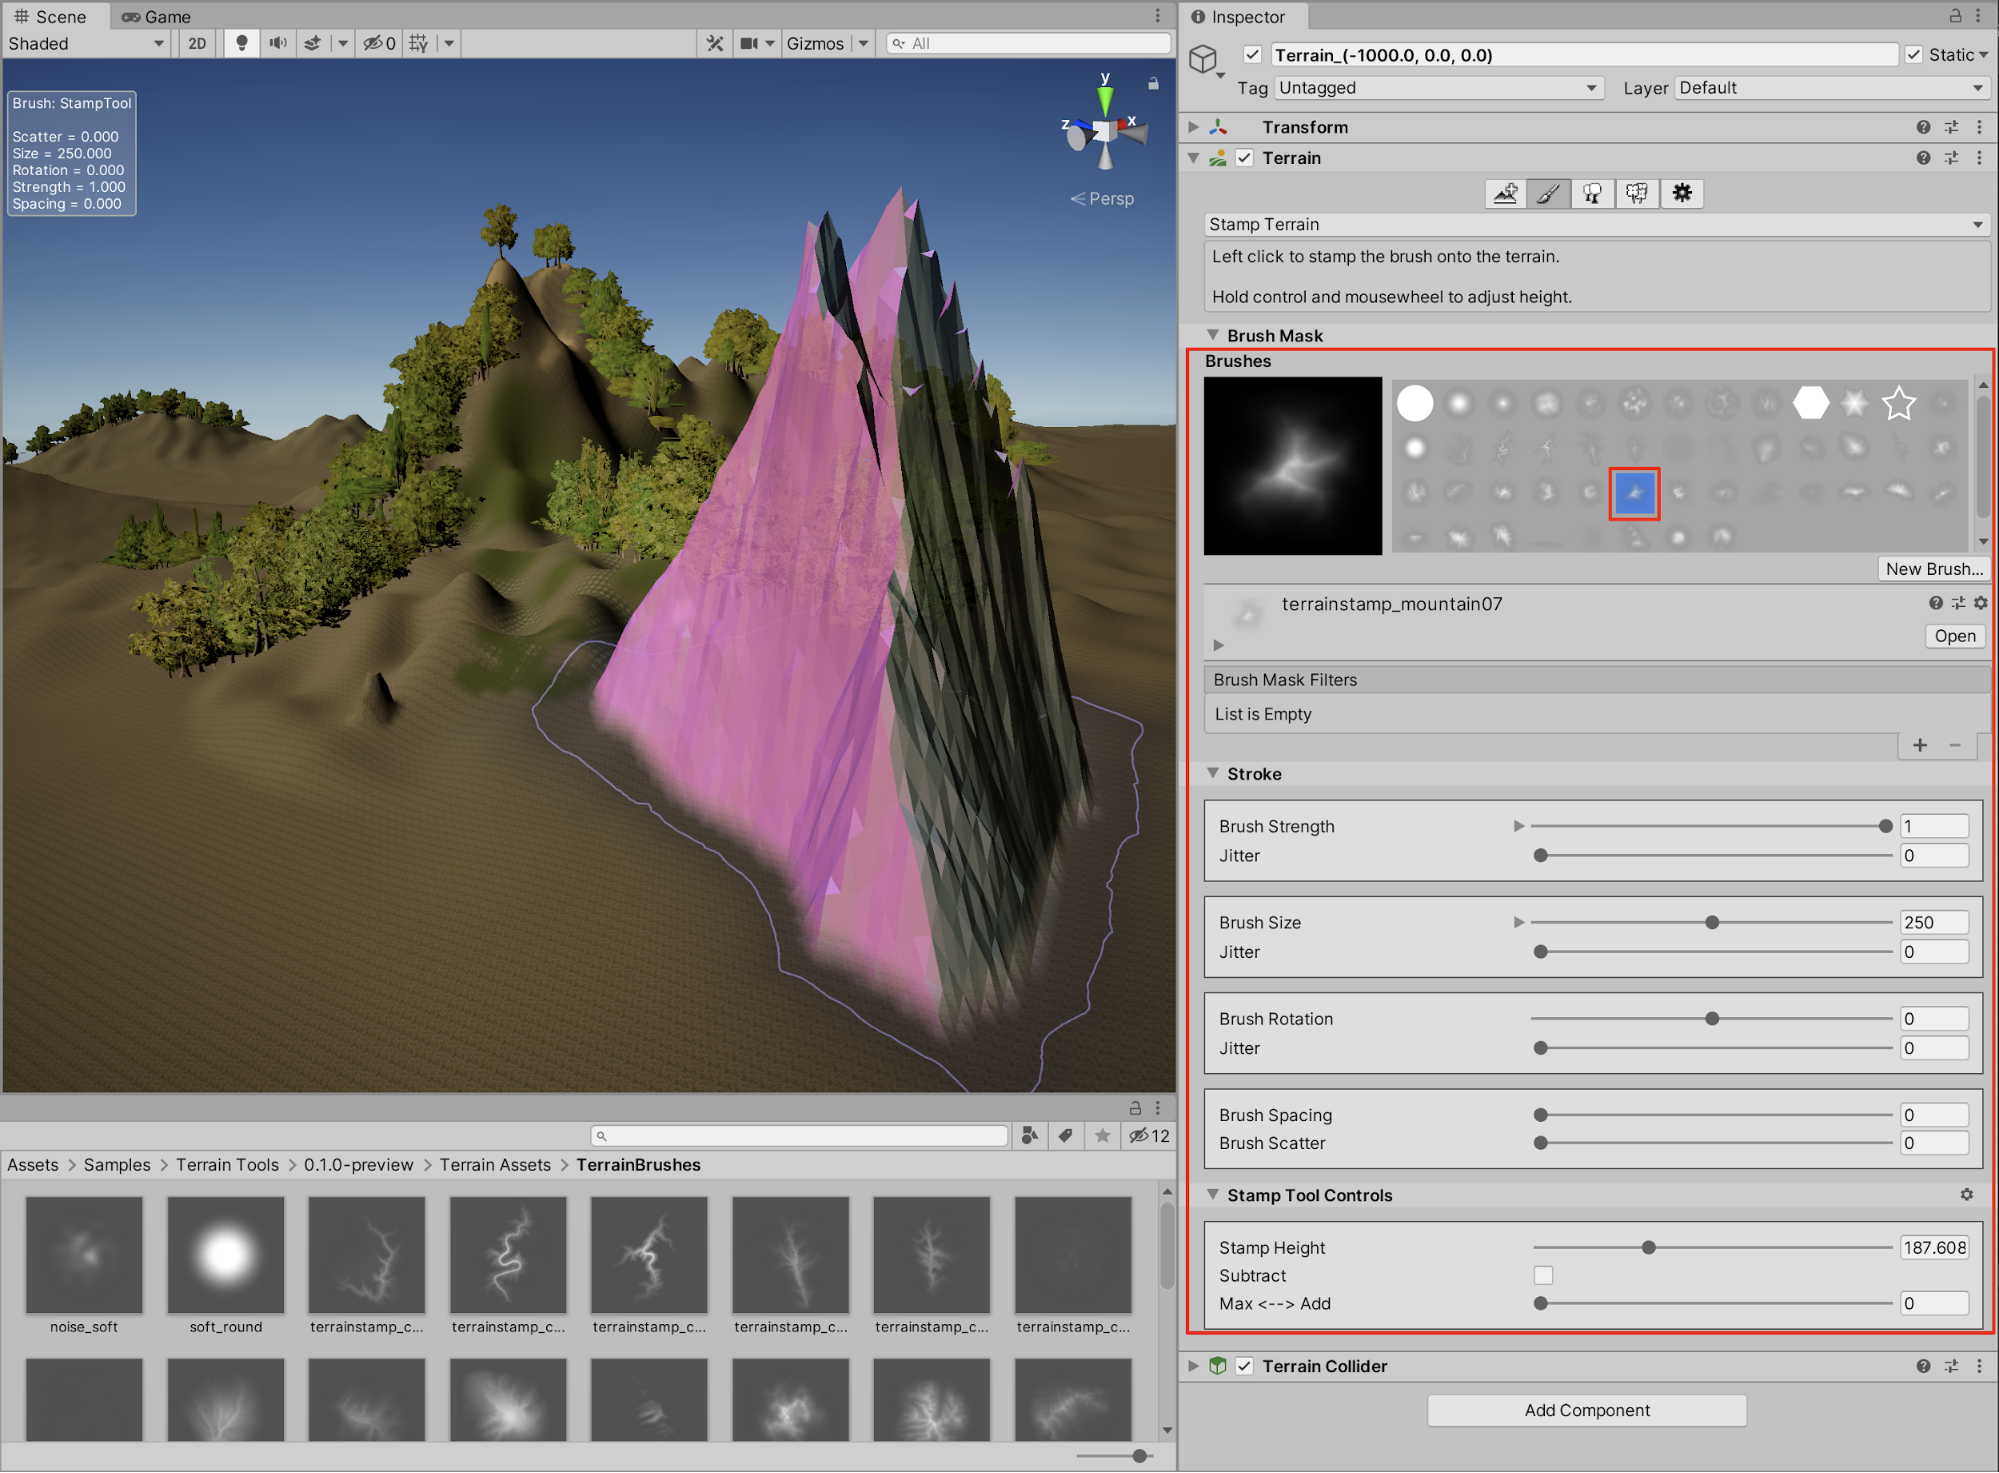
2. Select a brush from the expanded palette of available brushes. Set the Brush Size, and Stamp Height values in the Inspector, to arrange the size and shape of the Terrain Stamp. Position the brush cursor in the Scene view and click to stamp the Terrain. Additionally hold down the Control key while scrolling the mouse wheel to adjust the stamp height.
3. The Terrain Toolbox
The Terrain Toolbox is a feature of the Terrain Tools Package which offers additional useful tools to help speed up your workflow. It enables you to productively work with new or existing terrains such as batch editing, making tailored adjustments, or creating new Terrains from preset settings.
1. From the Top Menu Dropdown, select: Window > Terrain > Terrain Toolbox to open the Terrain toolbox window.
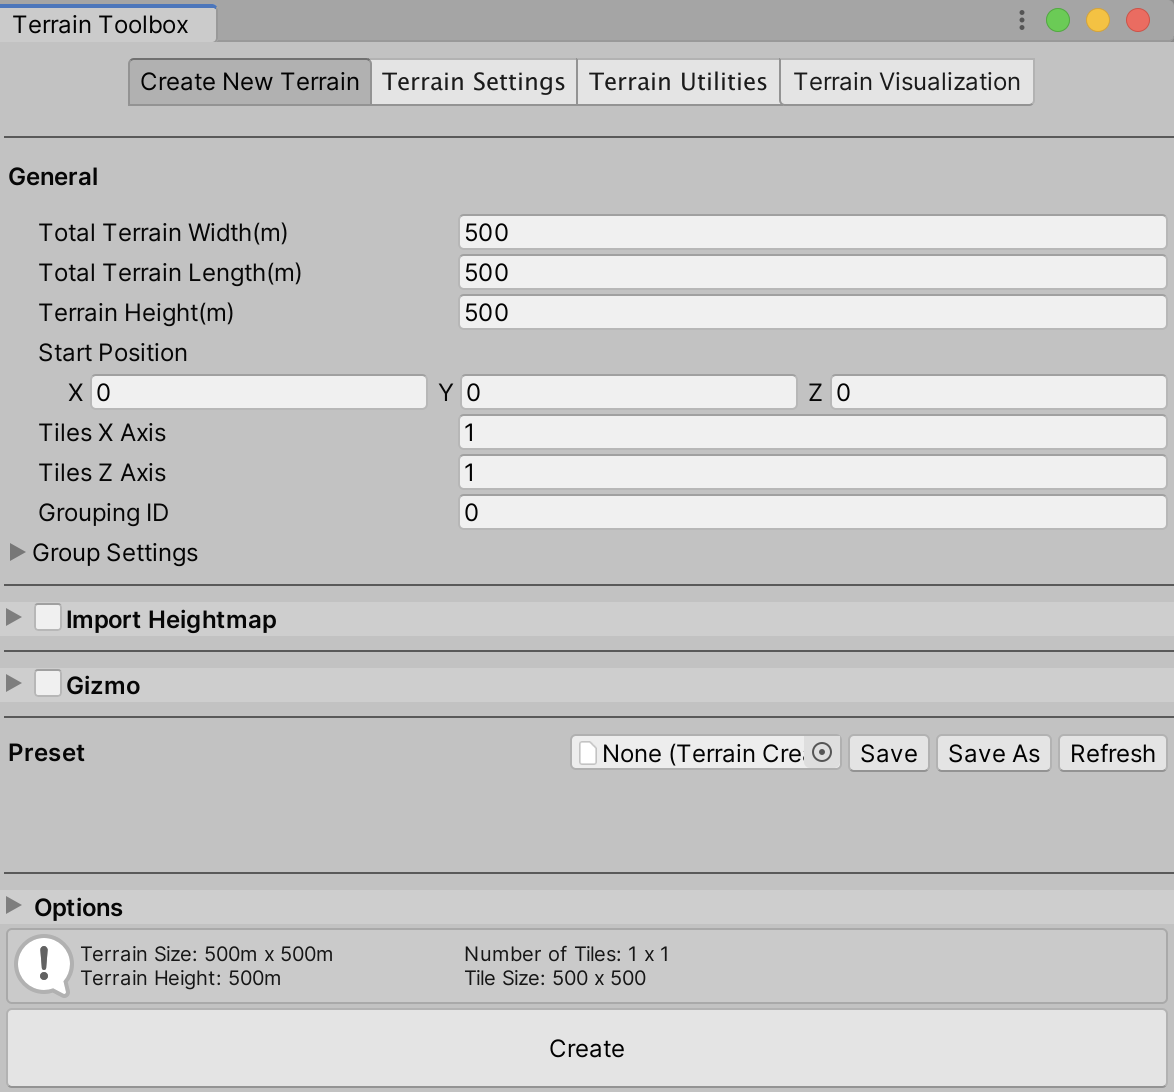
You are able to see at a glance that there are additional settings to explore and modify for your Terrain, including categories for Creating New Terrains, adjusting Terrain Settings, Terrain Utilities, and settings for Terrain Visualization. Now create new Terrains using the Terrain Toolbox window.
2. Save the current Scene with your existing Terrains, as you will delete them in the next step in order to demonstrate the Create New Terrain feature in the Terrain Toolbox window
3. With the Terrains selected in the Hierarchy window, right-click, and select Delete to delete them from your Scene.
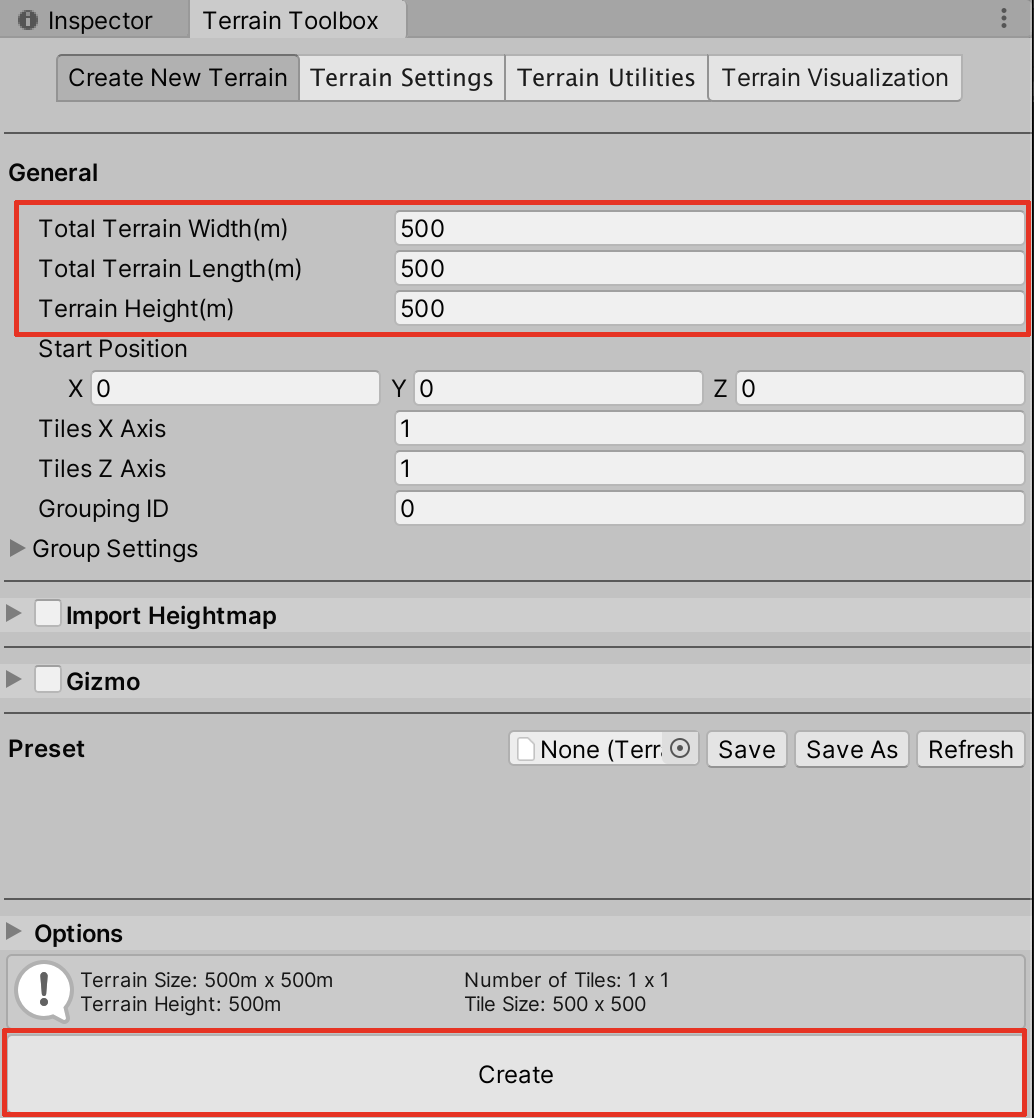
4. With the Terrain Toolbox Window open, Ensure that the first tab labelled Create New Terrain is selected. Note that the default Total Terrain Width, and Total Terrain Length is set to 500 x 500 meters. (As you may recall, the original setting for the Terrain Editor at the beginning of this tutorial is set to a default of 1000 x 1000 meters.) You are able to specify a custom length and width, however, using the Terrain Toolbox. We will leave the length and width values at 500 meters for now. We can also additionally set the Terrain Height value to a specific height limit, however let’s keep this setting to 500.
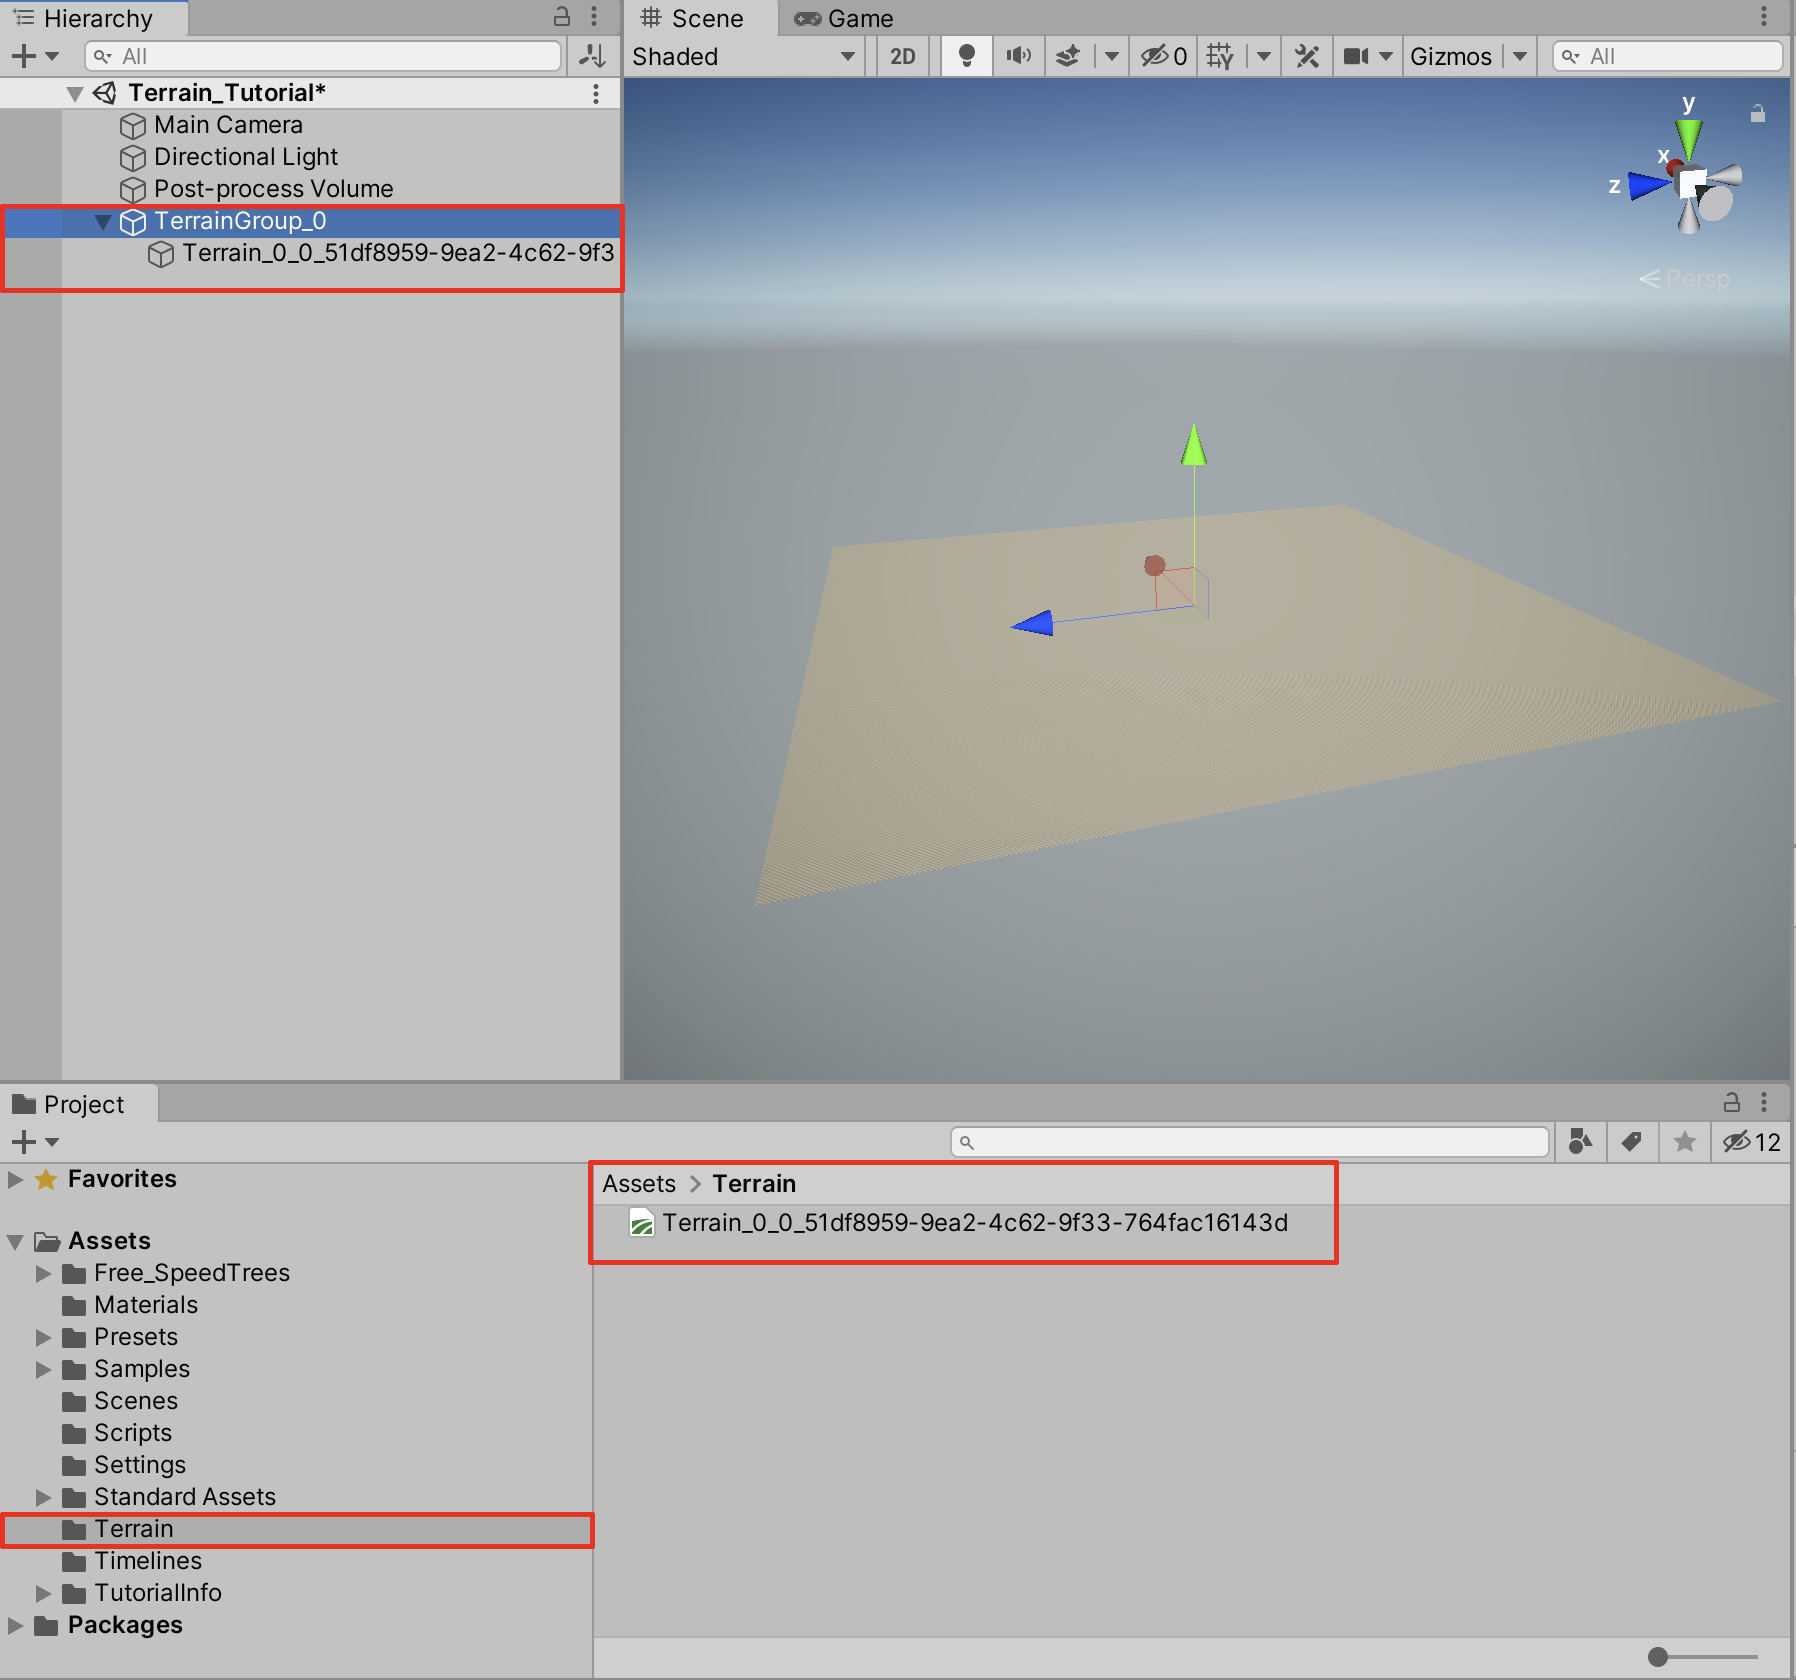
The resulting Terrain appears in the Scene as expected. The Terrain GameObject is automatically saved inside a parent object titled TerrainGroup_0 in the Hierarchy window. Additionally, the Terrain Asset itself is saved in a newly created folder named Terrain, in the Project window.
With the Terrain Toolbox, you are further able to create highly customized Terrain sizes, as well as with any reasonable number of Terrain neighbors. Undo your first Terrain of 500 x 500 x 500, and create a more expansive tiled Terrain region, containing a grid of 4 x 4 Terrain tiles.
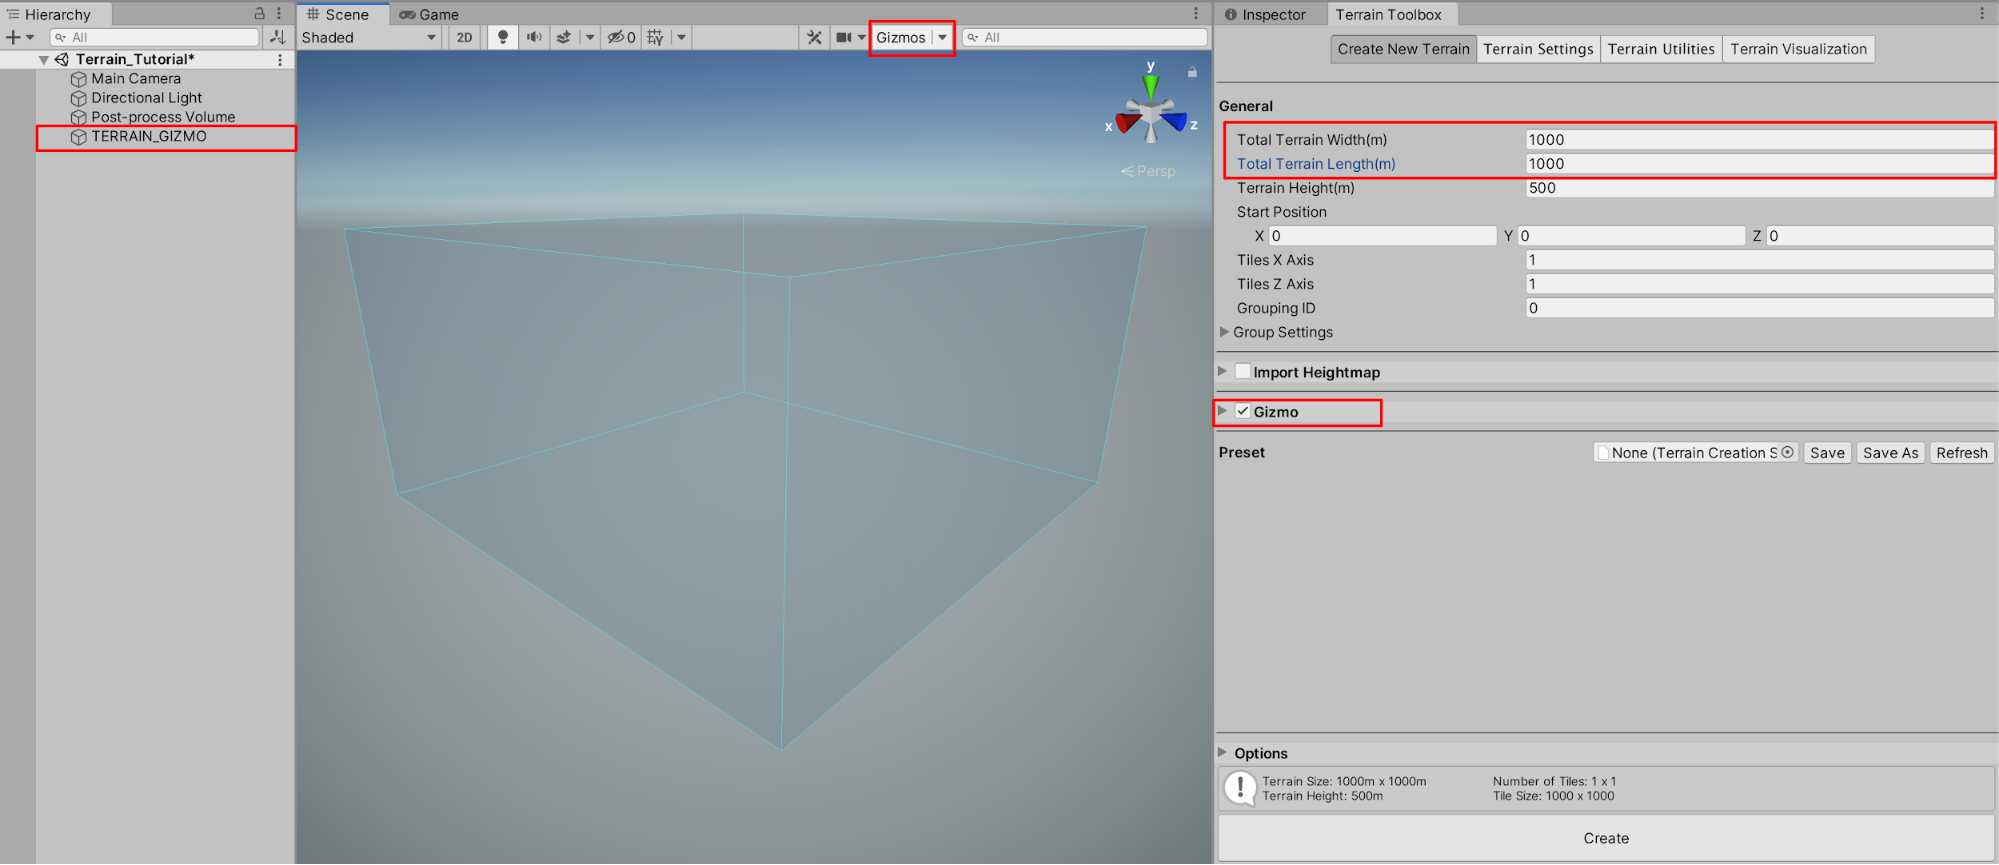
5. In the Terrain Toolbox Window, set the Total Terrain Width to 1000, and the Total Terrain Length also to 1000. Select the Gizmo checkbox, to visualize your Terrain before selecting the Create button. A GameObject will appear in the Hierarchy window, named TERRAIN_GIZMO. Zoom out in your Scene window to preview the full Gizmo. If you cannot yet see the Gizmo cube shown in blue, make sure the Gizmos Toggle Visibility button is selected at the top of the Scene Window.
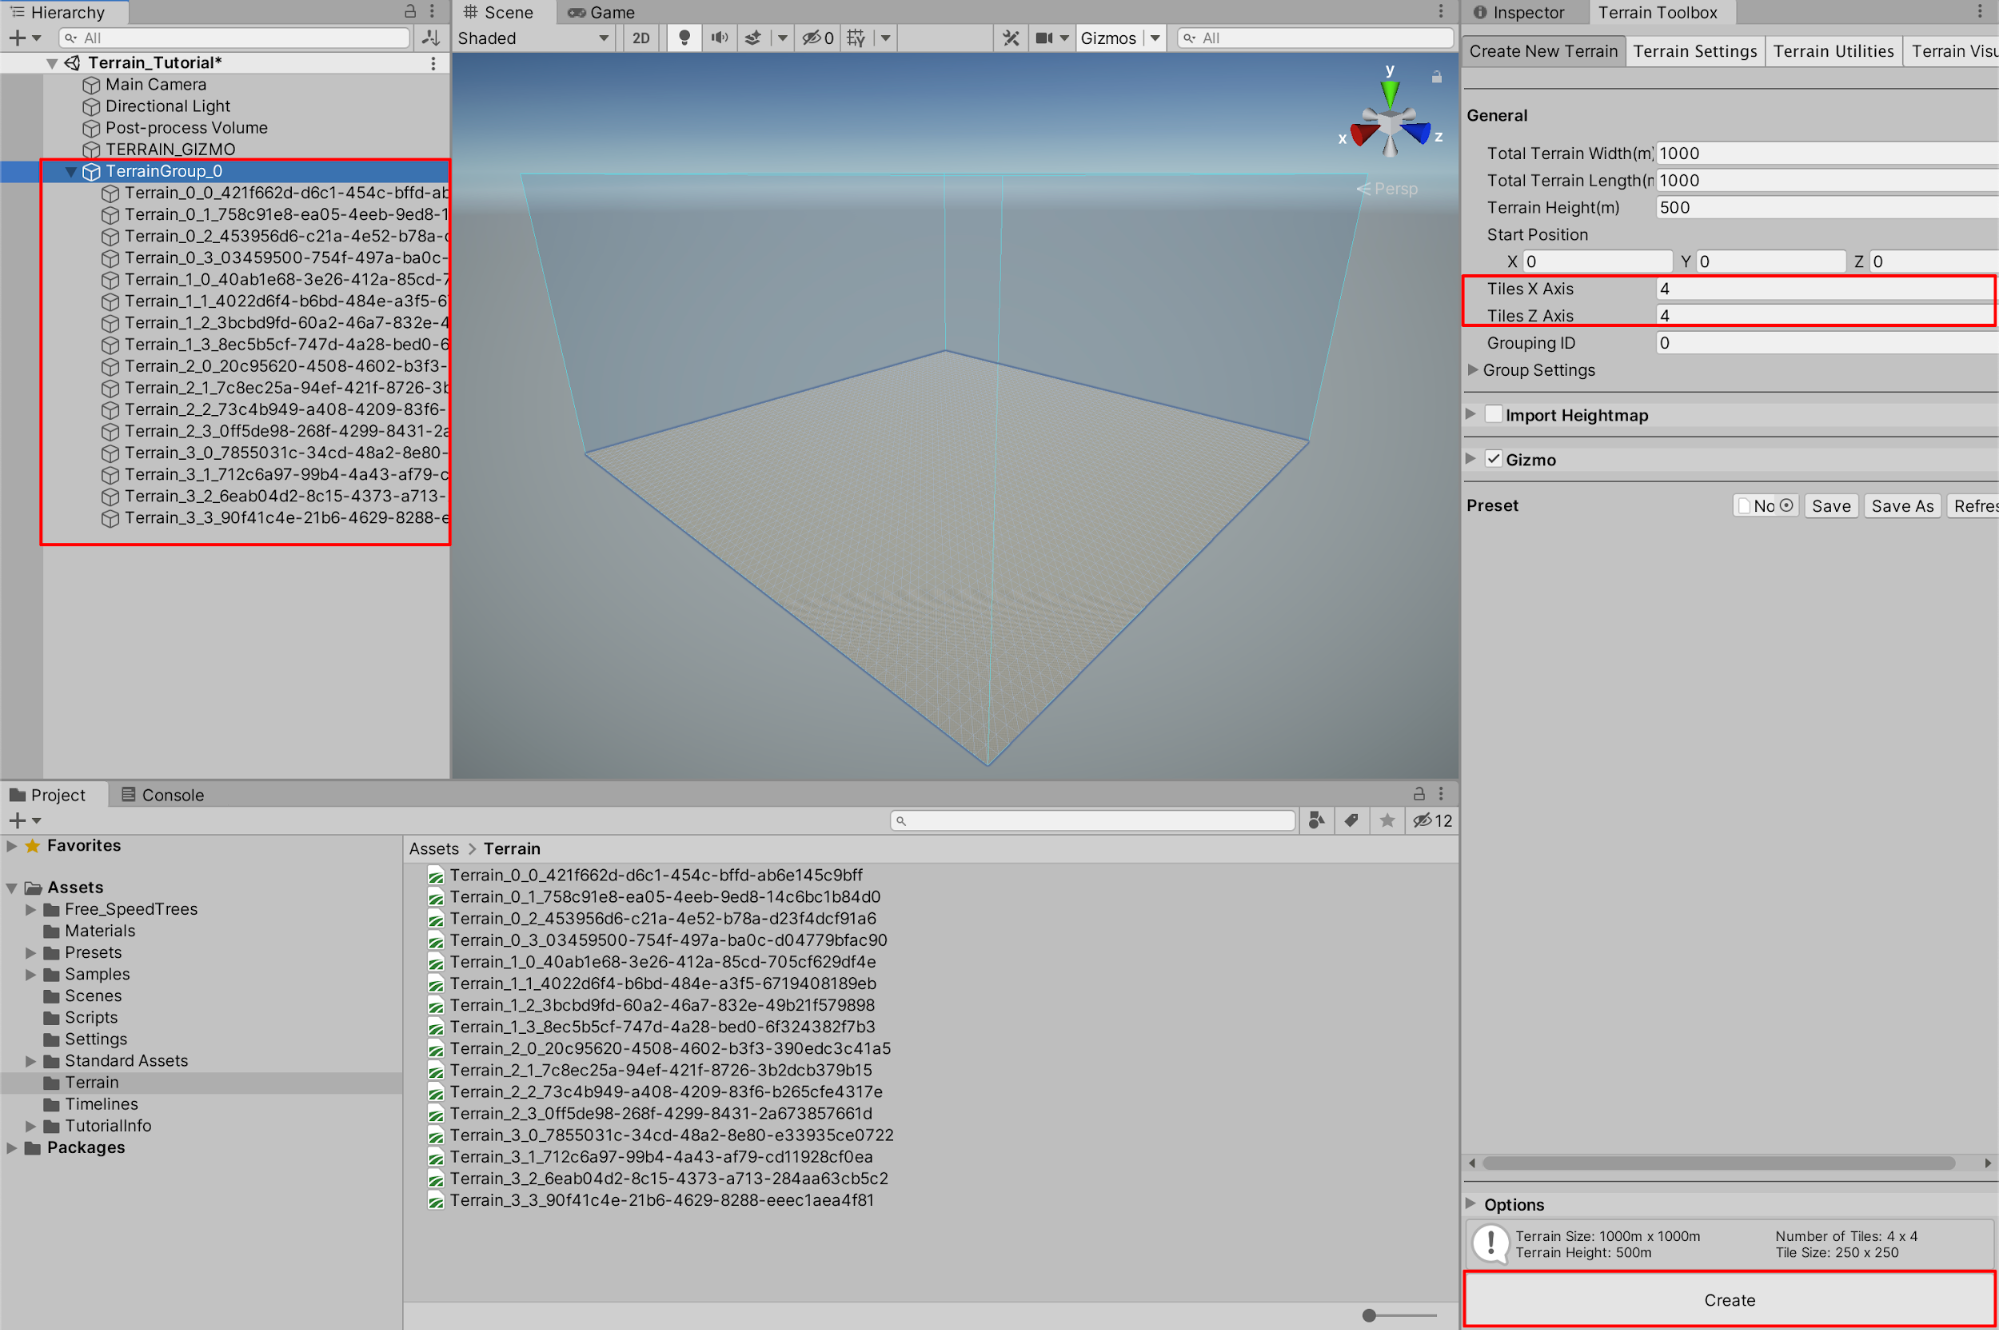
6. In the Terrain Toolbox Window, set the Tiles X Axis and the Tiles Z Axis to 4, and then Select the Create button.
The resulting Terrains are now created as a tiled group of 4 x 4 tiles, for a total of 16 Terrains. Since each Terrain has a length and width of 1000 meters, the total area is now 16,000 square meters.
4. Next Steps
The Terrain Editor, combined with the Terrain Tools Package, is a powerful tool that allows you to quickly create vast, detailed, complex, and configurable Terrain landscapes. With practice, you will be able to creatively sculpt hills, mountains, plateaus, valleys, and much more with ease. You will be able to quickly add textures, trees, and other fine details to your Scene. Experiment with and practice using the tools, brushes, and settings to see how they affect your Terrain. Challenge yourself with creating unique and diverse Terrain topographies, sculpted and painted with additional texture detail. With only a short amount of effort, your landscapes will come to life with their realism and creativity.