
Demo: Baked Lighting
Tutorial
intermediate
+0XP
1h
(56)
Unity Technologies
When possible, it is a best practice to identify the static objects in your 3D mobile application in order to light them correctly and efficiently. In this demo, we will compare the performance between baked and non-baked lighting.
1. Overview
In a previous tutorial, you learned about the benefits of implementing baked lighting in your 3D Scenes. In this demo, you will profile two sample Scenes and compare the difference in performance between baked and unbaked lighting.
2. Before You Begin
If you haven’t done so, download the course project that contains the sample demos here. When prompted by the pop-up, click on either the Lighting Demo - Non-baked or Lighting Demo - Baked.
You can also open the sample Scene in the Project view (Assets > 4 Lighting > Scene > Lighting_Baked or Assets > 4 Lighting > Scene > Lighting_Unbaked). Once downloaded and open, you can either enter Play Mode in the Editor or build this Scene to your mobile device to profile in the Profiler.
3. What to Watch For
As discussed in a previous tutorial, the Unity engine offers three options for generating lightmaps - Enlighten, the Progressive CPU lightmapper, and the Progressive GPU lightmapper. For this project, we chose the Progressive CPU lightmapper as Enlighten is being deprecated and the Progressive GPU lightmapper is in preview.
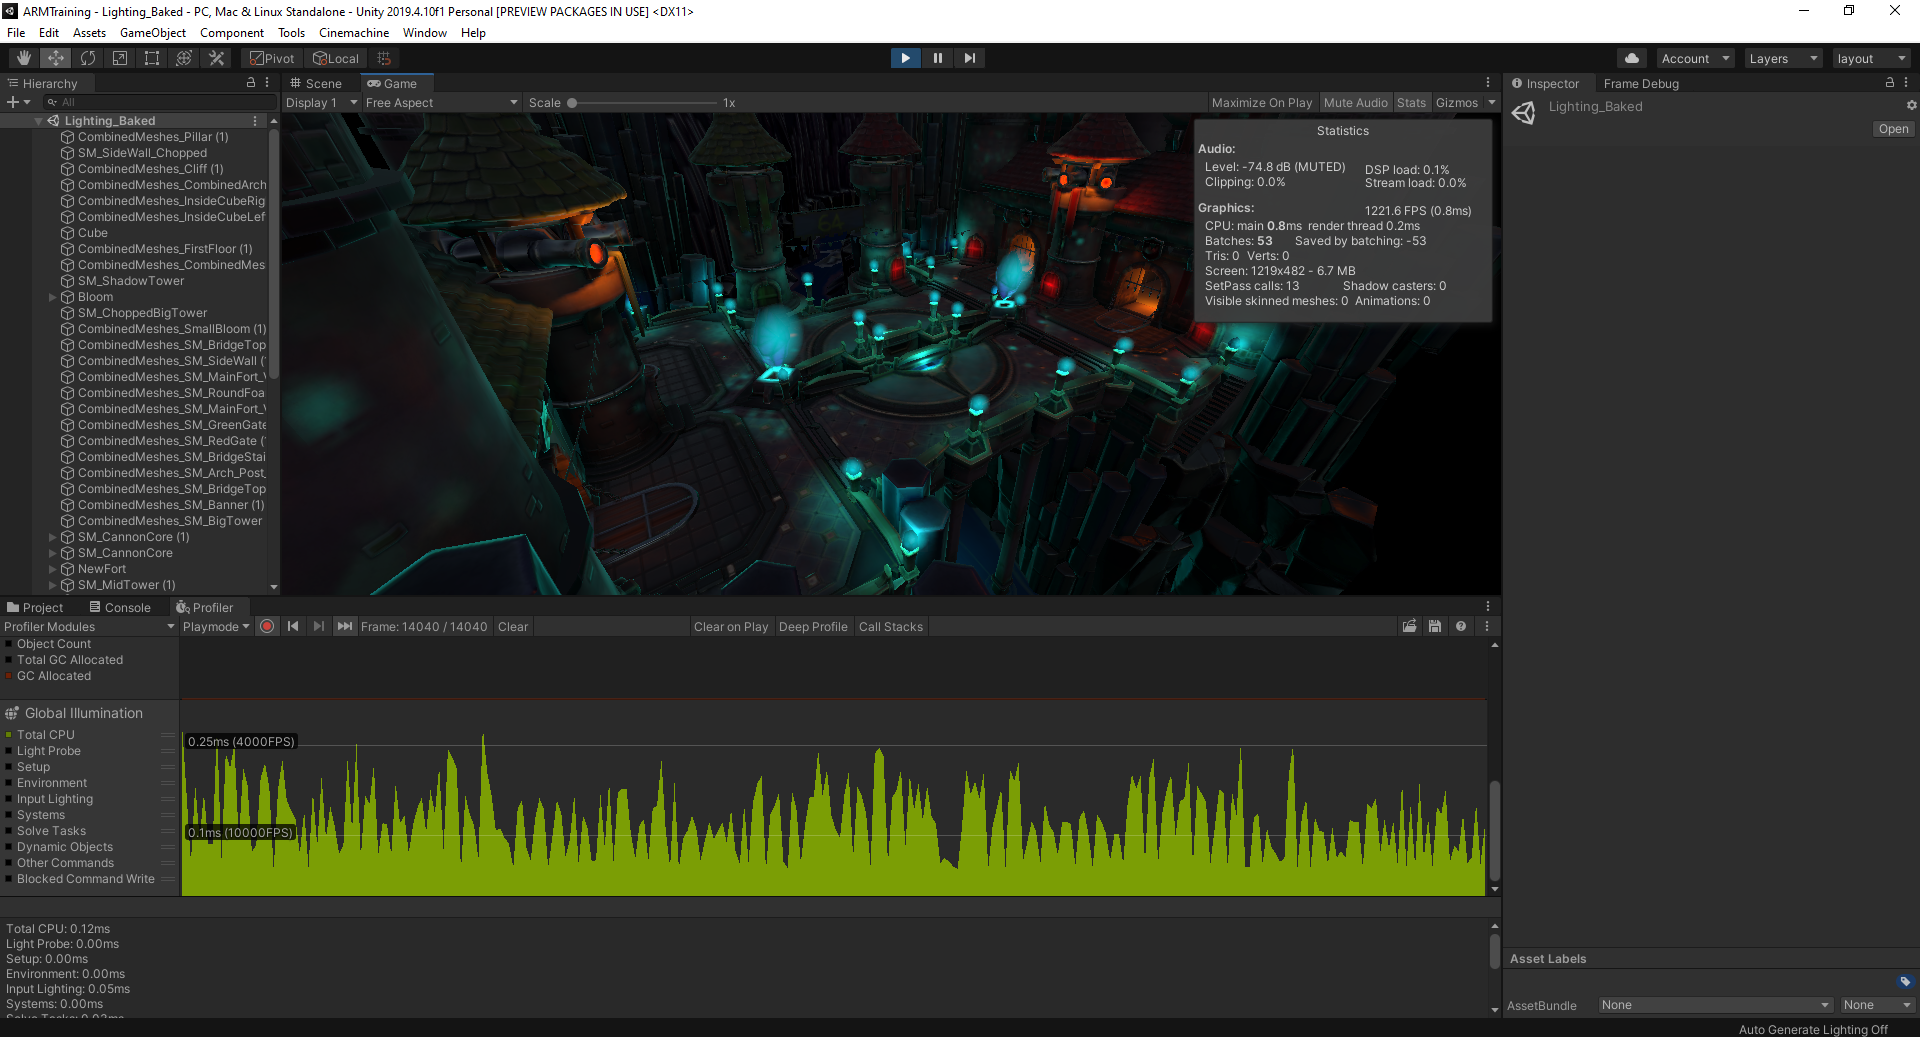
When implementing baked lighting using the Progressive CPU lightmapper, you will save CPU cycles when processing lighting information. As a result, you may see a large increase in frames per second (FPS) while seeing a decrease in CPU usage. You should see a significant difference in the Statistics Window when measuring FPS between the two Scenes.
Where the differences will really show is on your mobile device. Build the sample Scene to your phone of choice and profile the two Scenes while watching the Total CPU graph in the Profiler’s Global Illumination section. Depending on your phone’s specs, you should see a large difference in CPU usage.
(Note: While we opted for the Progressive CPU lightmapper, we encourage you to experiment and profile with the Progressive GPU lightmapper. Depending on your system's GPU, performance may vary.)
4. Conclusion
Lights accentuate features in your mobile application that, alone, could be overlooked or underappreciated. When making lighting decisions, choose wisely between static and non-static lights, as this choice will determine if your application lives up to expectations and performs efficiently on your target device.
---
Congratulations! You have completed this course on 3D Art Optimization for Mobile Applications! Continue on to the last project, where we’ll briefly discuss next steps and additional resources that will help you in your game-development journey.