
Indicating Progress to a Player
Tutorial
Beginner
+10XP
20m
(272)
Unity Technologies
It’s good practice in game design to indicate progress to a Player, either through a user interface or through indicators in the game.
We’ll be adapting our Game Command and Counter to show Crystals lighting up near the door when Ellen activates each Switch.
1. Activating the Crystals
We’ll be adapting our Game Command and Counter to show Crystals lighting up near the door when Ellen activates each Switch. This shows the player that there are 3 Switches in the world for that door, and indicates how many they have activated.
- In the Project window, go to Assets > 3DGamekitLite > Prefabs > Interactables.
- Find the Crystal Prefab.
- Drag it into the Scene.
- Place the Crystal somewhere near DoorSmall.
- With the Crystal selected in the Hierarchy window, press Ctrl + D (Cmd + D on macOS) twice to duplicate it twice.
- Select Crystal (1) and Crystal (2) in the Hierarchy window (Ctrl + left-click on Windows, or Cmd + left-click on macOS) and drag to reorder them near Crystal in the list.
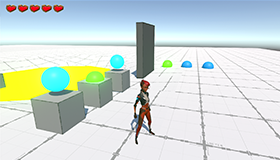
- In the Scene view, position the Crystals alongside each other.
In this example we’ve placed them just next to DoorSmall to make it obvious to the player. Let’s make them change colour when a Switch activates:
- In the Hierarchy window, select the Switch.
- In the Inspector window, scroll down to the bottom and select Add Component.
- In the search box, type Send on Trigger Enter.
- Select the Send on Trigger Enter component to add it to the Switch GameObject.
This adds another Send On Trigger Enter component to the Switch. Let’s use this to send a command to the Crystal, for it to change colour when the Switch is activated.
Set the values in the Send On Trigger Enter component you just added to the following:
- Interaction Type: Activate
- Interactive Object: Crystal (drag the Crystal GameObject from the Hierarchy window into the the slot)
- One Shot: Enabled (tick the box)
- Layers: Player
A quick note on Layers:
Layers are a way to group GameObjects together so that we can apply specific actions to that layer only. For example, if we want to test collisions in our level, we could place all objects in an "environment" layer. This way we can focus on collision testing only and not be distracted by characters or gameplay objects.
This sends a command to the Crystal to activate when the Switch activates.
To test the mechanic, press Play and run up to the first Switch. It should also activate the first Crystal.
Repeat these steps for each remaining Switch and Crystal combination. Make sure you match Switch (1) with Crystal (1) and Switch (2) with Crystal (2). Each Switch should now send a command to its assigned Crystal, and to the Counter.