This content will be retired soon
This learning content is being retired and may no longer be available in the future. Consider completing it soon or checking out newer learning resources.

Placing an Object on a Plane in AR
Tutorial
Beginner
+10XP
35m
(316)
Unity Technologies
In this tutorial, you will learn how to utilize plane detection in AR foundation and tap gestures to place an object on a horizontal surface.
1. Overview
This tutorial will help you understand how to use plane detection in AR foundation to place an object on a plane. In addition, you will learn how to instantiate an object using a tap gesture. You will create an AR app that has the functionality to place an object on a detected plane with a tap.
2. Enable Plane Detection
Learn how to enable plane detection with AR foundation
1. Go to the Hierarchy and double click on the AR Session Origin object
2. Add the plane manager component (Figure 1)
3. Select Horizontal in the drop-down menu for Detection Mode (Figure 2). You might have to click Nothing first, before setting it to Horizontal.
4. The manager is now tracking horizontal planes.
3. Visualize Planes
After enabling plane detection, learn how to visualize the planes with a Prefab object.
1. Create an AR Default Plane object in the Scene view by selecting GameObject > XR > AR Default Plane from the context menu that appears (Figure 3)
2. Save the AR Default Plane as a Prefab
3. Drag and drop the AR Default Plane Prefab into the AR Plane Manager Plane Prefab field (Figure 4)
4. Delete the AR Default Plane GameObject in the Scene
5. Result: plane detection for horizontal planes (Figure 5)
4. Place cube on plane
Use AR Raycast Manager and AR Reference Point Manager to place a cube on a plane when a user taps the screen. The use of reference points improves tracking accuracy of the application and is normally used as a best practice when creating AR content.
1. Add an AR Raycast Manager to your AR Session Origin
2. Add an AR Reference Point Manager to your AR Session Origin
3. Create a new C# Script and call it TapToPlace
4. Add the TapToPlace C# script to your AR session origin
a. This script uses raycasting and touch detection to place the cube on the plane depending on where the user tapped on the phone screen.
using System.Collections.Generic;
using UnityEngine;
using UnityEngine.XR.ARFoundation;
using UnityEngine.XR.ARSubsystems;

public class TapToPlace : MonoBehaviour
{
    //Remove all reference points created
    public void RemoveAllReferencePoints()
    {
        foreach (var referencePoint in m_ReferencePoint)
        {
            m_ReferencePointManager.RemoveReferencePoint(referencePoint);
        }
        m_ReferencePoint.Clear();
    }


    void Awake()
    {
        m_RaycastManager = GetComponent<ARRaycastManager>();
        m_ReferencePointManager = GetComponent<ARReferencePointManager>();
        m_PlaneManager = GetComponent<ARPlaneManager>();
        m_ReferencePoint = new List<ARReferencePoint>();
    }


    bool TryGetTouchPosition(out Vector2 touchPosition)
    {
        if (Input.touchCount > 0)
        {
            touchPosition = Input.GetTouch(0).position;
            return true;
        }

        touchPosition = default;
        return false;
    }

    void Update()
    {
        if (!TryGetTouchPosition(out Vector2 touchPosition))
            return;

        if (m_RaycastManager.Raycast(touchPosition, s_Hits, TrackableType.PlaneWithinPolygon))
        {
            // Raycast hits are sorted by distance, so the first one
            // will be the closest hit.
            var hitPose = s_Hits[0].pose;
            TrackableId planeId = s_Hits[0].trackableId; //get the ID of the plane hit by the raycast
            var referencePoint = m_ReferencePointManager.AttachReferencePoint(m_PlaneManager.GetPlane(planeId), hitPose);
            if (referencePoint != null)
            {
                RemoveAllReferencePoints();
                m_ReferencePoint.Add(referencePoint);
            }
        }
    }

    static List<ARRaycastHit> s_Hits = new List<ARRaycastHit>();

    ARRaycastManager m_RaycastManager;
    ARReferencePointManager m_ReferencePointManager;
    List<ARReferencePoint> m_ReferencePoint;
    ARPlaneManager m_PlaneManager;

}
4. Create an empty GameObject (Figure 6)
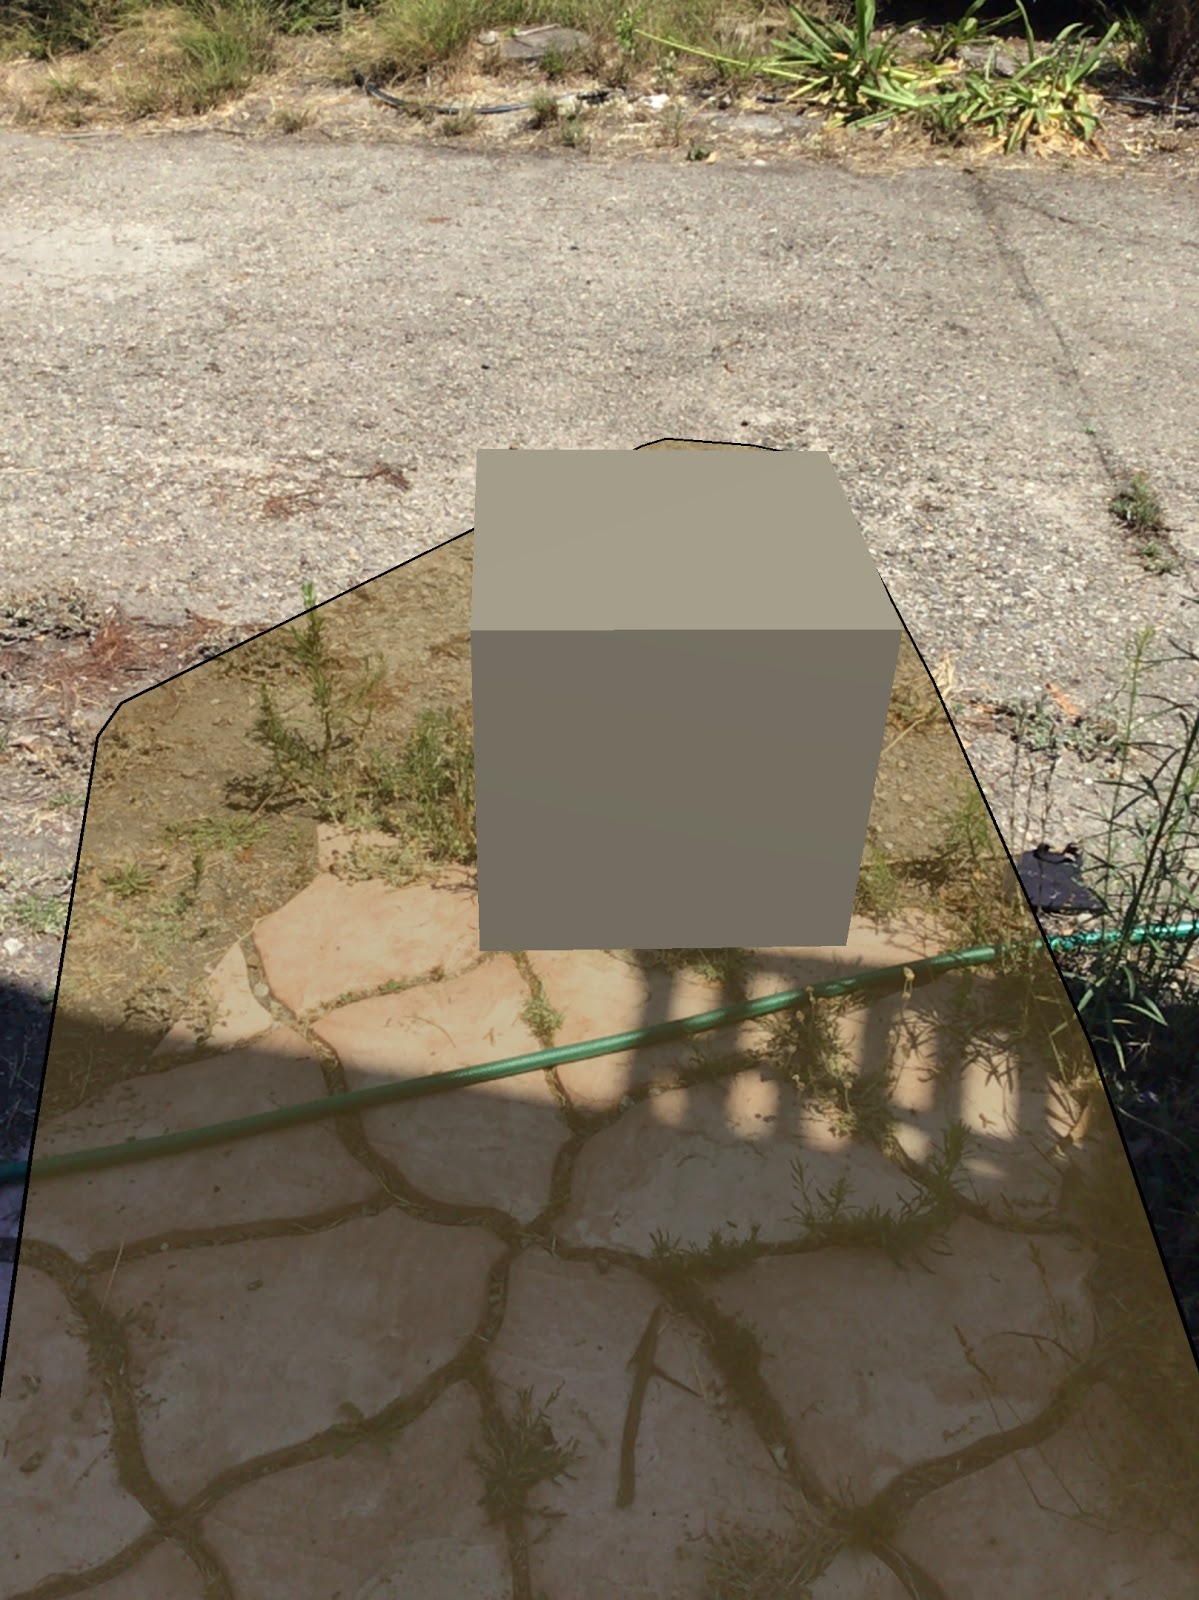
5. Create a cube. We want to alter the scale and position to make it sit realistically on the plane (Figure 7)
6. Set the scale of the cube to 0.5 in all dimensions in the Inspector
7. Set the position of the cube to be 0.5 in the y dimension
8. Drag the cube under the empty GameObject to parent it to the empty GameObject (Figure 8)
9. Create a cube Prefab and drag the parent GameObject into the field for the script component (Figure 9)
11. Build and run your project. Make sure to tap your screen to instantiate a cube!
12. Result (Figure 10):
5. Conclusion
In this tutorial, the user has added plane detection, reference points, and touch gesture functionality to their AR Foundation project. This project serves as a stepping stone for the user to customize the project for different use cases.