
Add toggles and sliders
Tutorial
Beginner
+10XP
30 mins
157
Unity Technologies

As a UI becomes complex, you will inevitably need to implement toggles and sliders, which each allow the user a unique way to interact with an application. In this tutorial, you will add a toggle that allows the user to turn music on and off and a slider that allows them to control the volume.
By the end of this tutorial, you'll be able to:
- Identify use cases for Sliders and Toggles in UI design.
- Implement simple toggle functionality by using the Event System.
- Implement simple slider functionality by using the Event System.
1. Overview
You currently have an empty settings menu. The obvious next step is to fill it with settings.
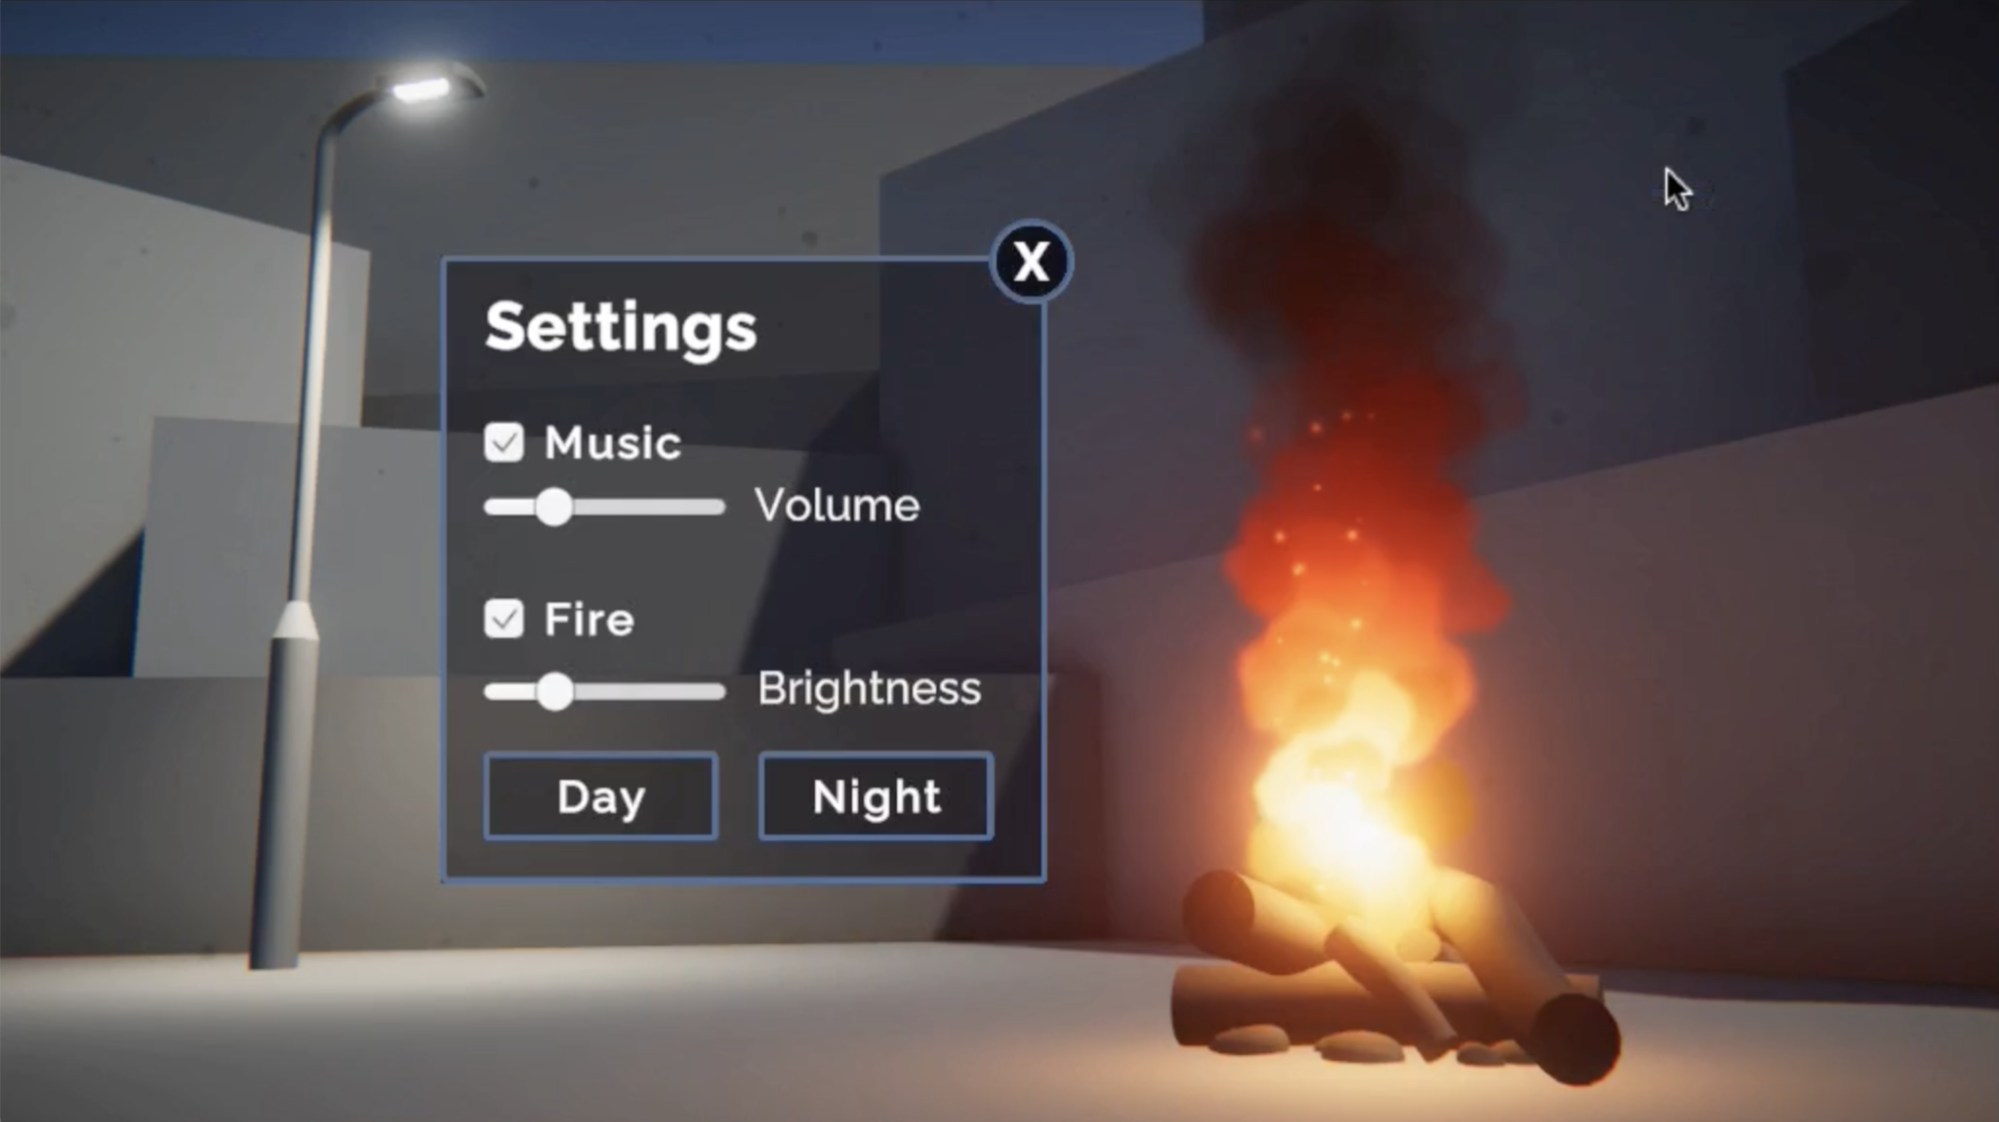
In this tutorial, you will add a toggle to turn music on and off and a slider to control volume. If you want, you can add additional settings too.
By the end of this tutorial, your project might look like this:
2. Add a music toggle setting
In the previous tutorial, you added functionality to buttons. Buttons are incredibly versatile UI elements.
Another very useful UI element is the toggle, which allows users to turn things on or off.
Let’s add a toggle to allow users to turn music on or off in the scene.
First, let’s bring up the settings menu and hide the title for easier editing.
1. Activate the Settings Menu object and hide all other UI elements, then make sure you’re in a good 2D perspective to edit the Canvas in the Scene view.
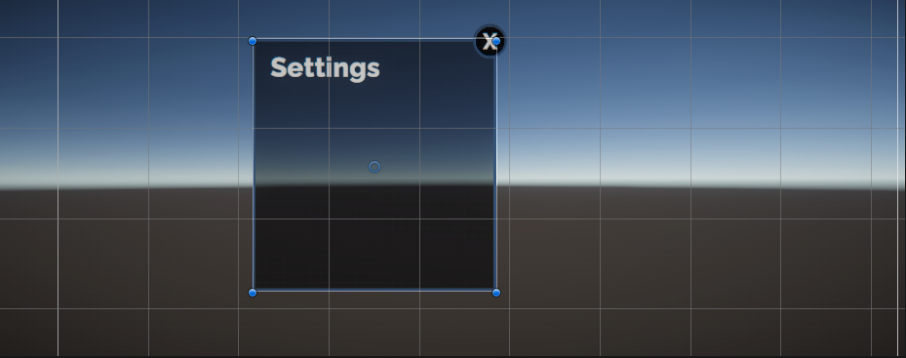
2. Right-click on the Settings Menu object and select UI > Toggle, then rename it “Music Toggle” in the Hierarchy. This will add a checkbox with the word Toggle next to it, anchored in the center of your menu.
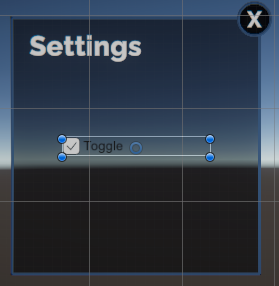
By default, the Toggle label uses Unity’s old text system rather than the more robust and optimized TextMeshPro. Let’s replace that simple text with TextMeshPro.
3. In the Hierarchy expand the Music Toggle GameObject and delete the Label object, then right-click on Music Toggle and select UI > Text - TextMeshPro. This will create a default New Text object, which is far too large and out of position.
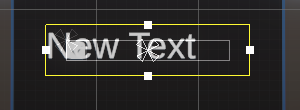
4. Edit the text label to match the rest of your app and reposition it appropriately for the checkbox, then reposition the parent Music Toggle object where you’d like in the menu.
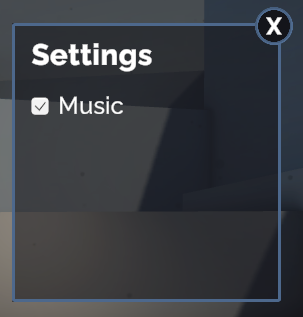
The toggle now looks great, but still doesn’t do anything if you select it. Let’s make it functional.
3. Add music to the scene
Before you can toggle the music on and off, you need to add some music into the scene!
1. In the Hierarchy, right-click > Audio > Audio Source. This is basically like adding a speaker into the scene.
2. In the Audio Source component, for the Audio Resource property, use the object picker to select music for your project.
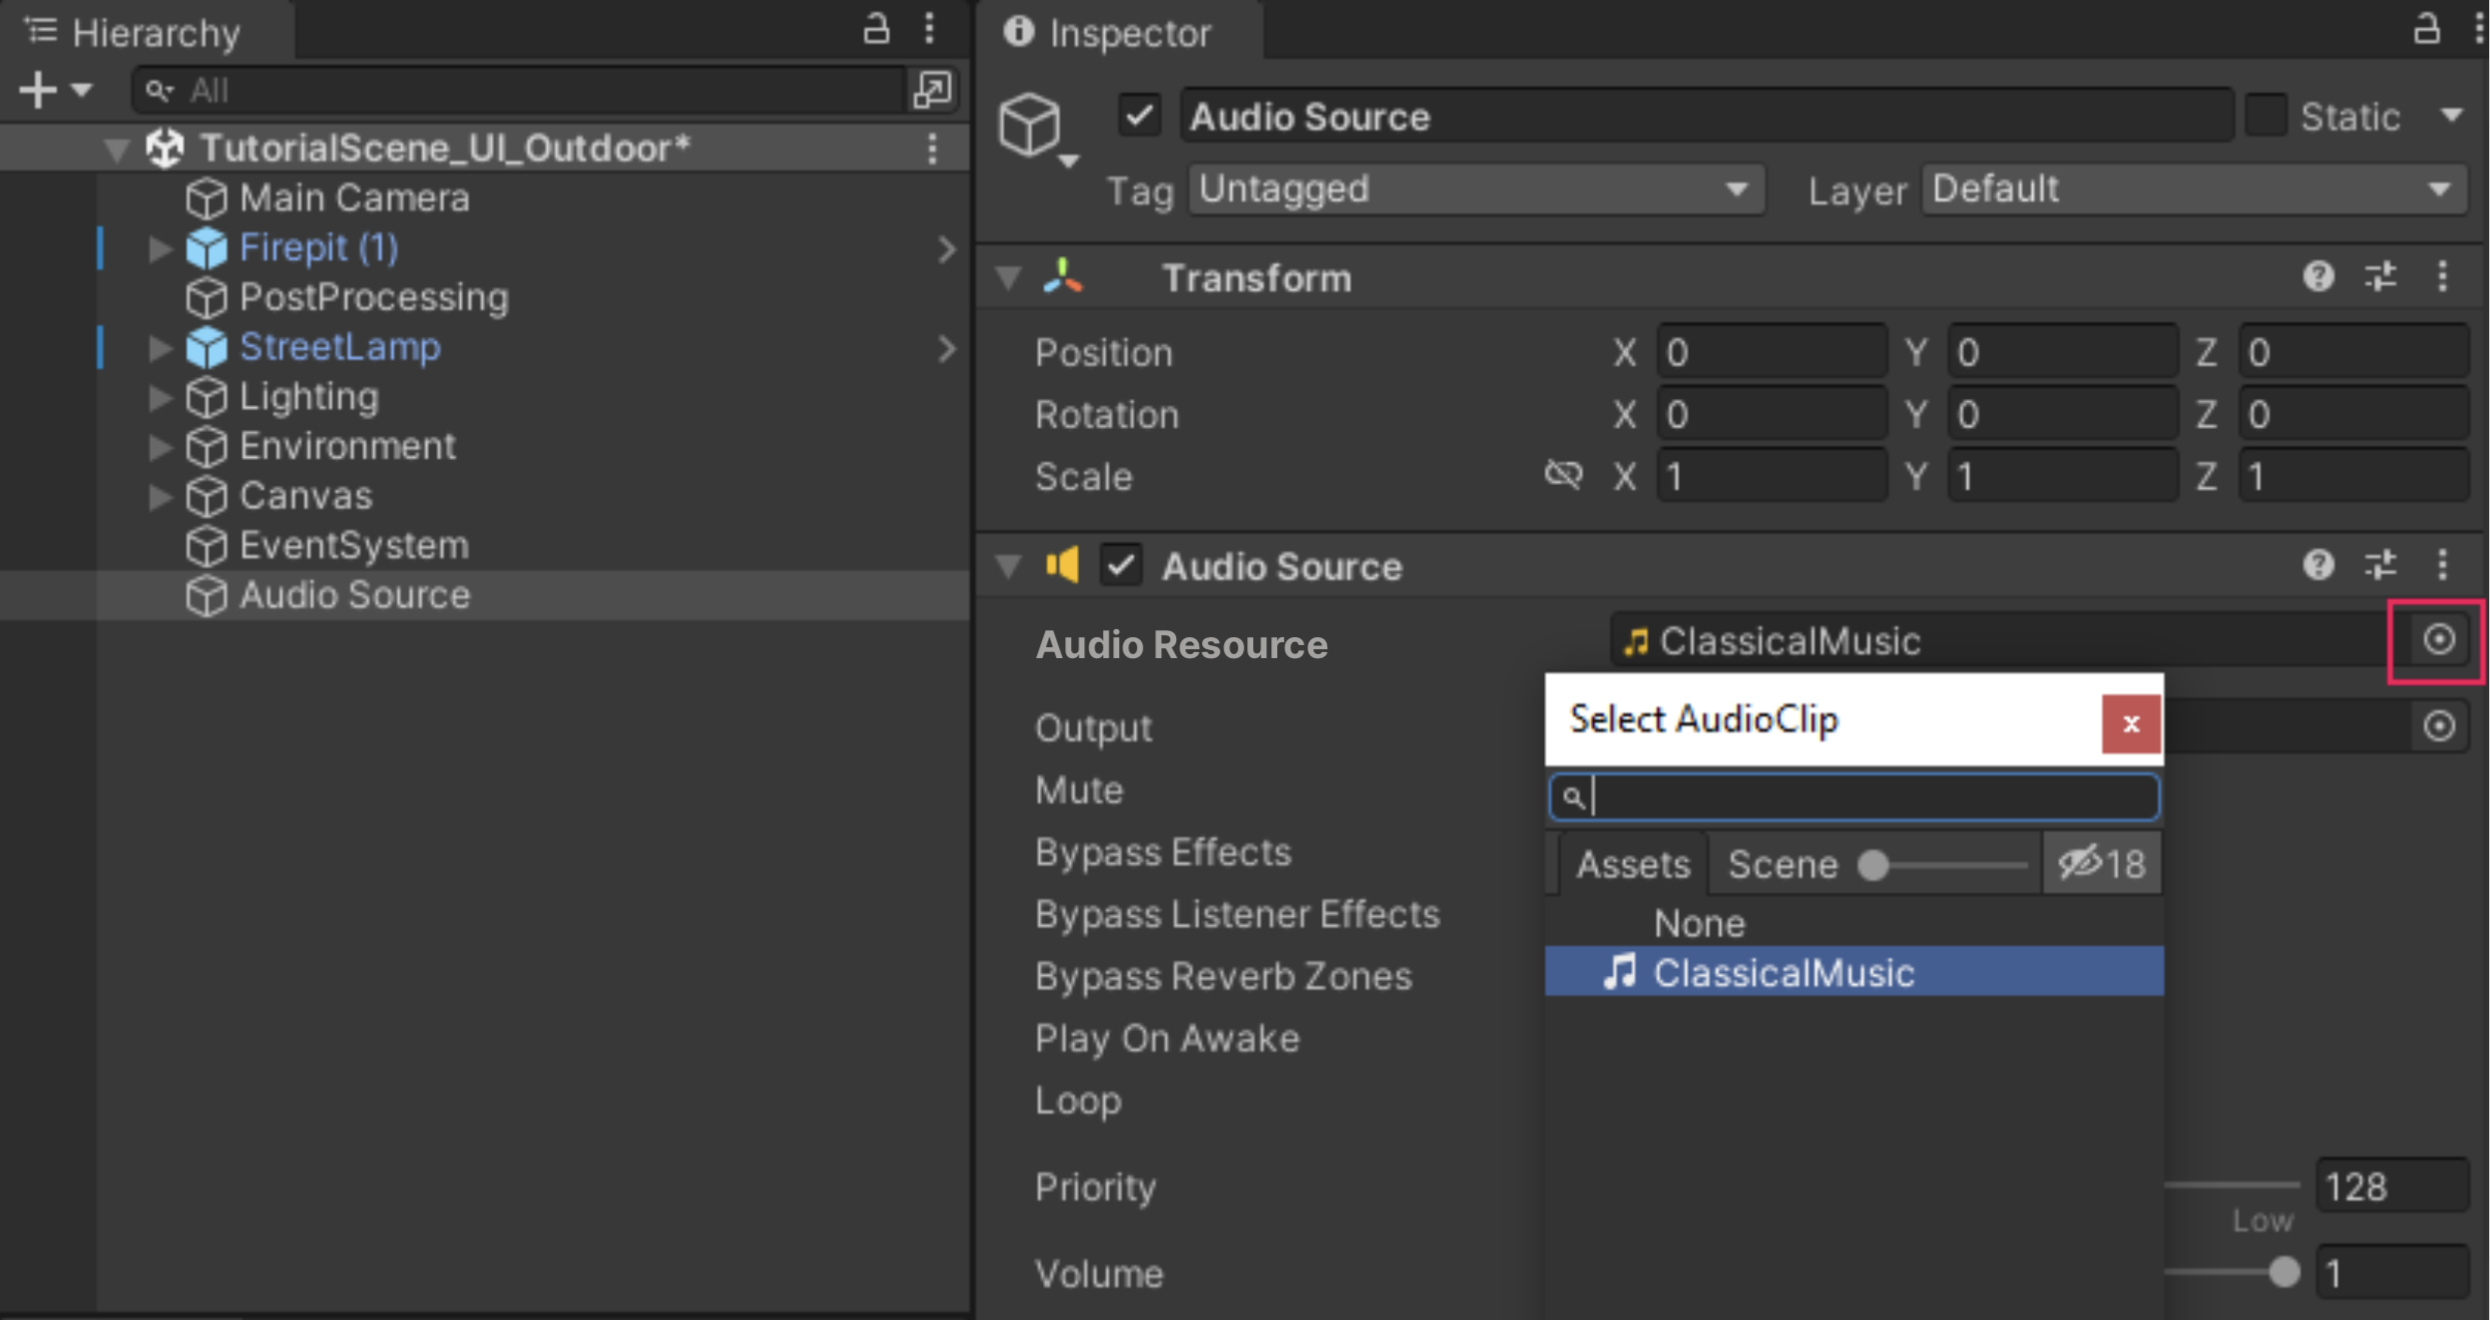
You can preview the music by playing your project. We have provided you with a few music options, but you could also download and import other songs too!
3. In the Audio Source component, set the Volume property to a value between 0.25-0.50. We don’t want the music to be too loud or startling for people.
4. Make the music toggle functional
Now that you have music playing, let’s add the ability to toggle it on and off.
Just like with the Button component, there is a special Unity Event that is called whenever the toggle is turned on or off by the user.
1. Select the Music Toggle object and locate the On Value Changed (Boolean) event at the bottom of the Toggle component.
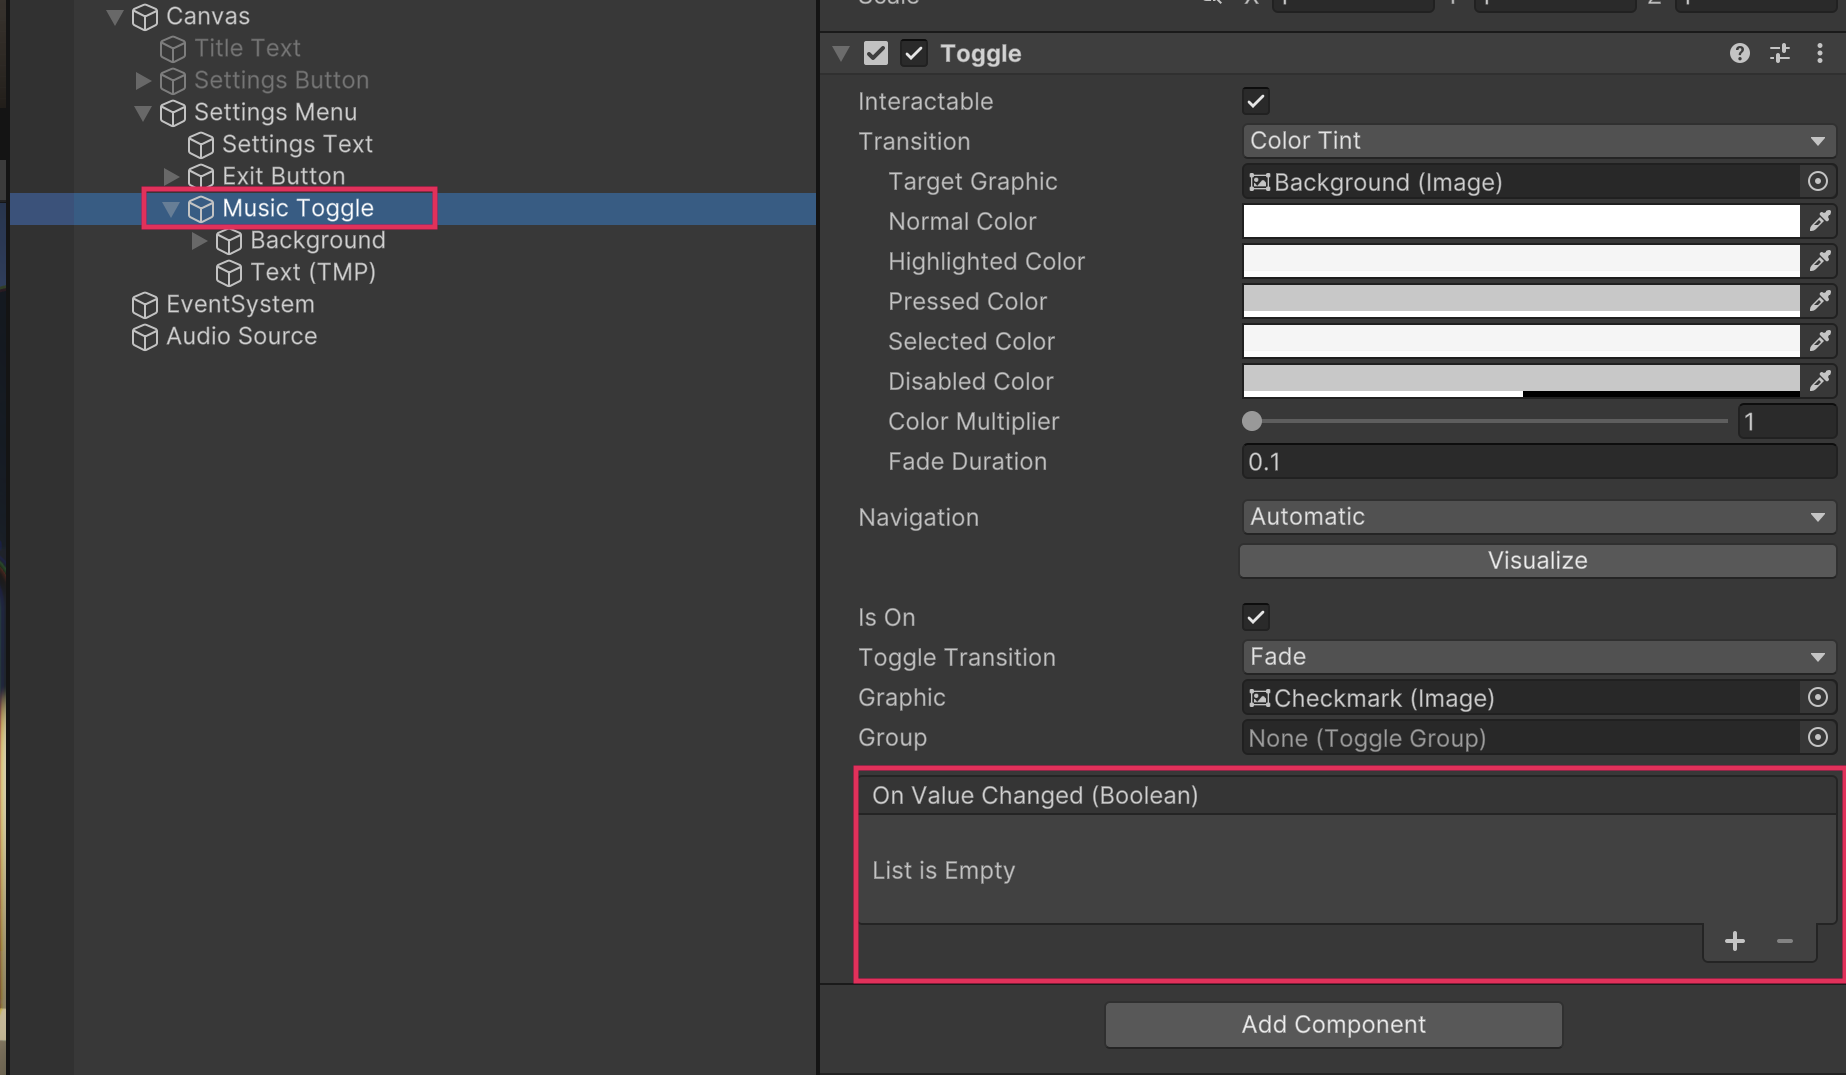
In the On Value Changed (Boolean) Event, “Boolean” is the parameter. This Boolean parameter means that you can make different things happen if that Boolean is true or false. In this case, we want the music to play when it’s true (toggle selected) and stop when it’s false (toggle deselected):
- Toggle on → OnValueChanged(true) → play music
- Toggle off → OnValueChanged(false) → stop music
2. Select the + button within the On Value Changed Event to add a new action to the list, then assign the Audio Source GameObject. This will allow you to call a function from the Audio Source GameObject.
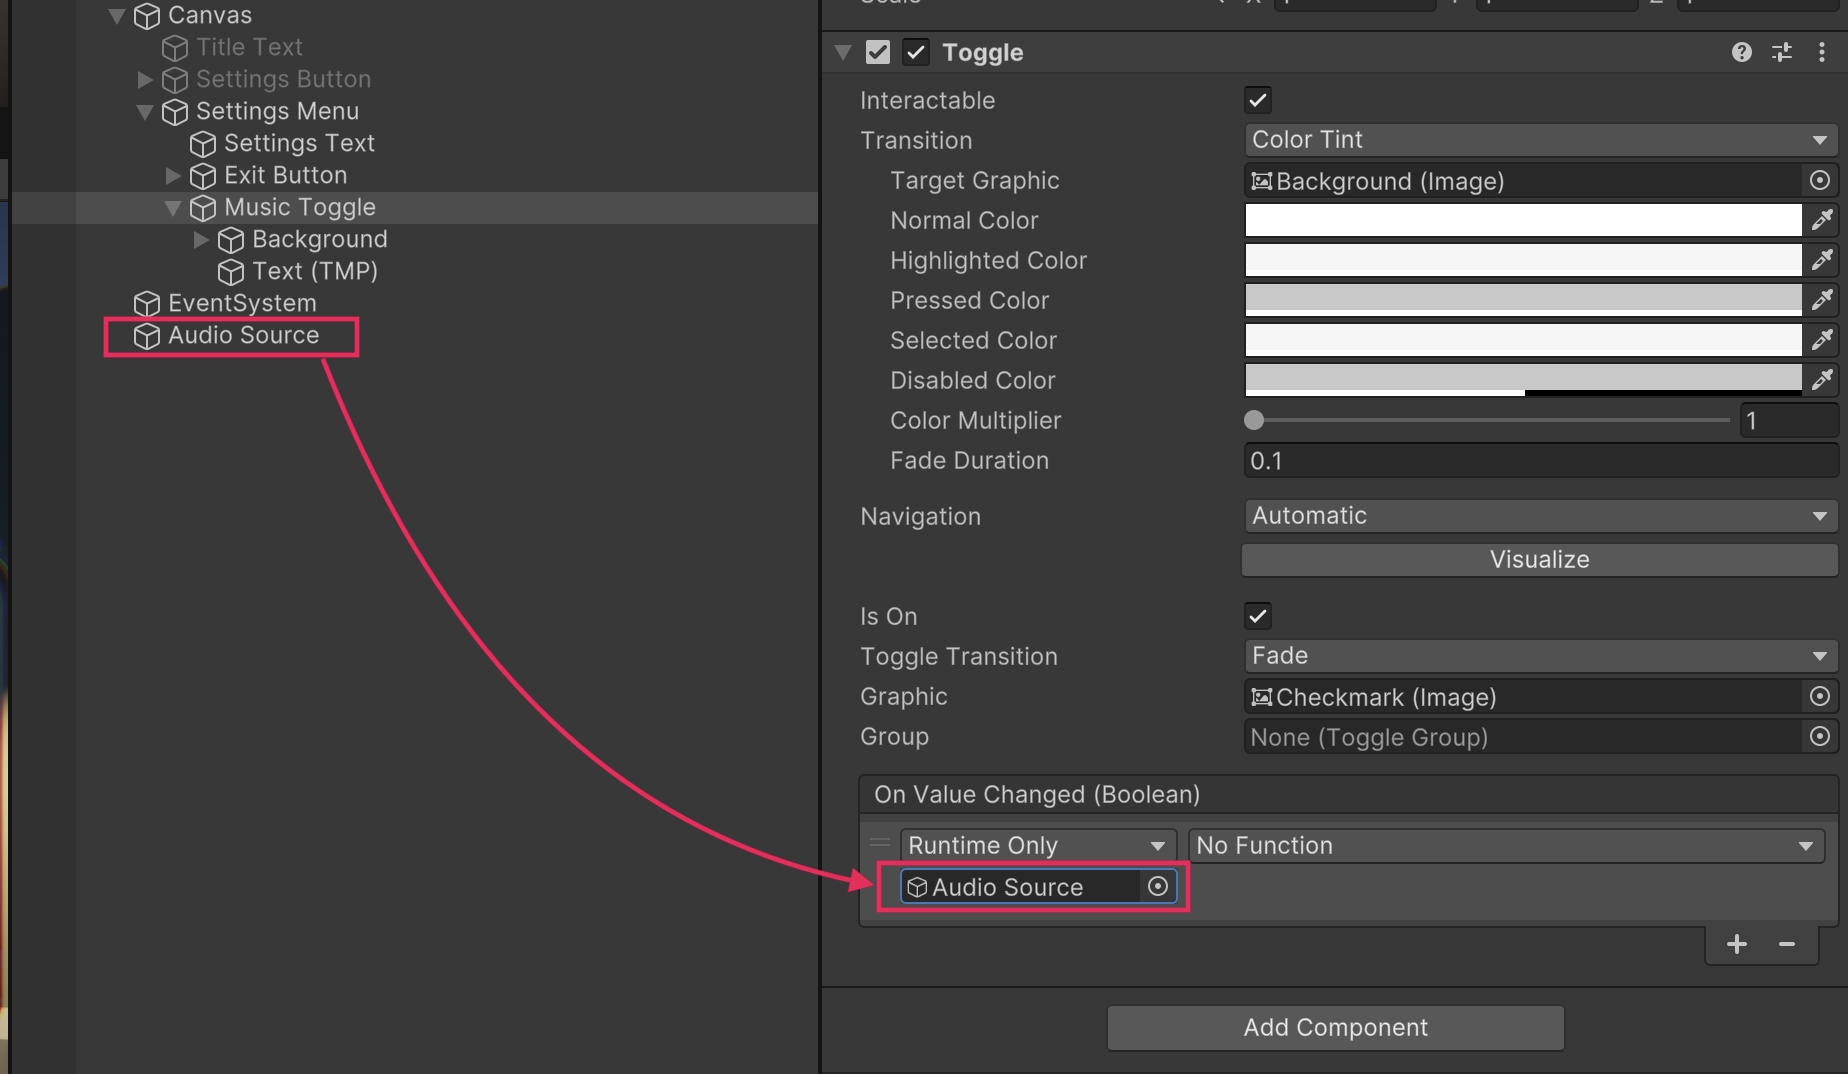
3. Using the action dropdown, which is currently set to No Function, select AudioSource > enabled from the upper section of the list.
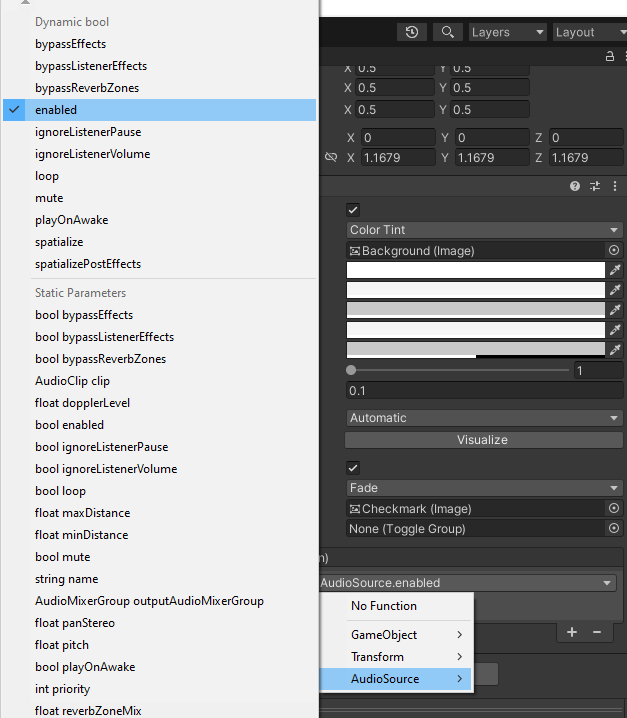
As the toggle is set to true or false, so is the enabled property of the Audio Source. Now, when the user enables and disables the toggle, it will also enable and disable the Audio Source component, turning the music on and off.
Try testing your app. Using the toggle should now stop and play your music.
Some people might also want to adjust the volume of the music – let’s add that functionality next.
5. Add a volume slider
To control the volume, we’ll use a new UI element: the slider. Sliders are very useful and allow more precise control over settings like volume, brightness, text size, price ranges, and more.
1. Right-click on the Settings Menu object and select UI > Slider, then rename it “Volume Slider” in the Hierarchy.
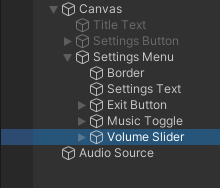
2. Use the Rect Transform component or Rect tool in the Scene view to resize and reposition the slider appropriately on the menu.
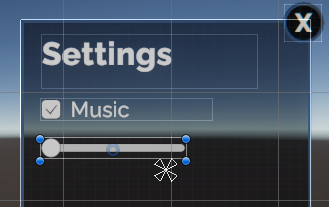
3. Right-click on the Volume Slider GameObject and create a child Text - TextMeshPro GameObject. Then edit the style and position of the text so that it says Volume next to the slider.
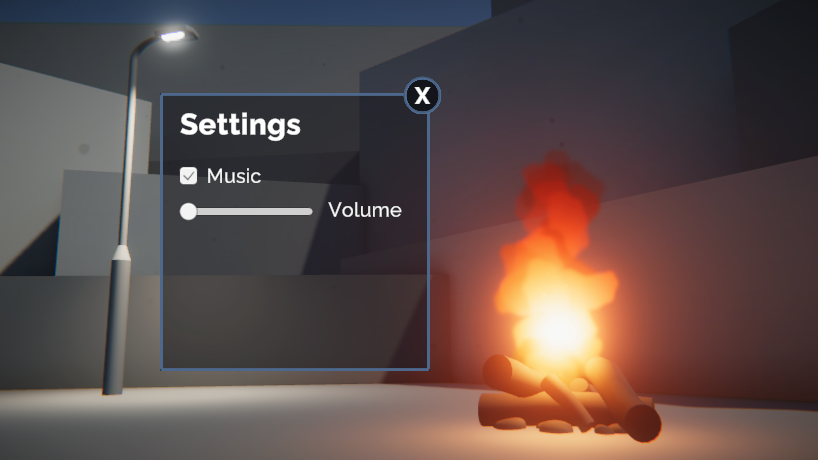
6. Make the volume slider functional
With the slider now looking good, we just need to make it functional. When the slider is adjusted by the user, the volume of the Audio Source should change dynamically along with it.
1. Select the Volume Slider object and locate the On Value Changed (Single) Event within the Slider component.
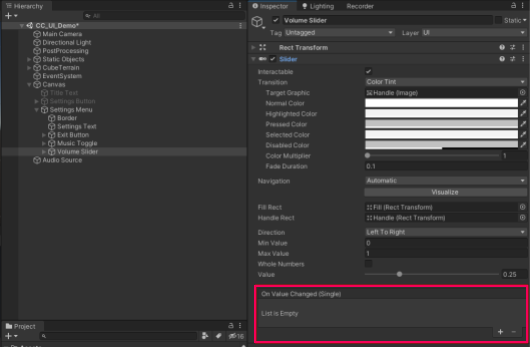
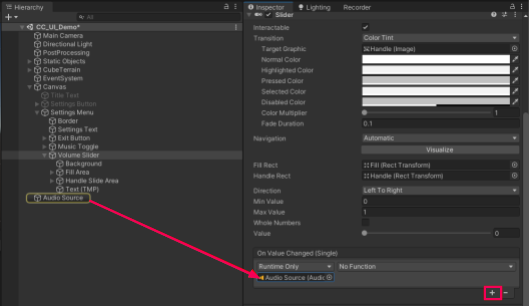
2. Add a new action to the list, then assign the Audio Source object to it.
3. From the action dropdown, select AudioSource > volume from the upper section of the list.
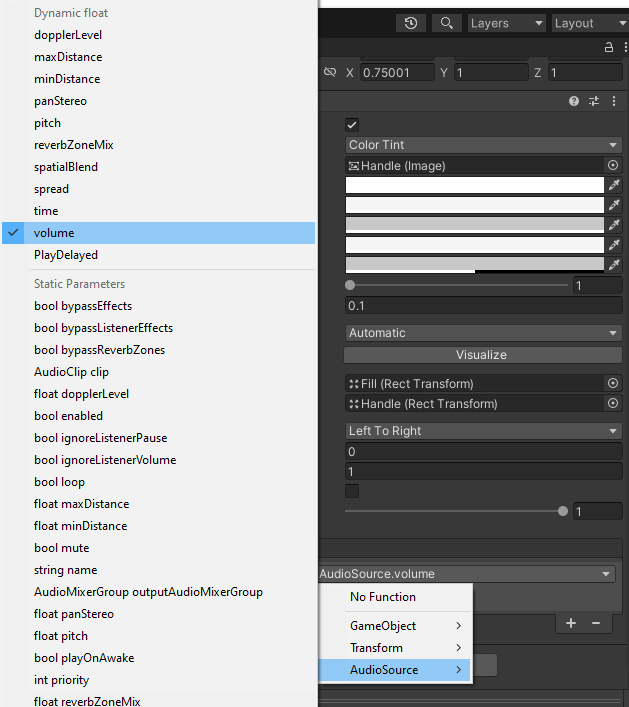
In this case, the property is a float instead of the Boolean you used with the toggle. A float is a number with decimal values. The slider will set the volume to a decimal value between 0 and 1, depending on where the slider handle sits.
If you test your app now, you’ll notice something strange. The music will be playing at regular volume, but the slider will still be set all the way to the left, since that is its default position. At the start of the scene, the slider position should match the current volume.
4. In the Slider component, set the default Value property to match the starting volume of your Audio Source. This will move the slider handle in your scene as well.
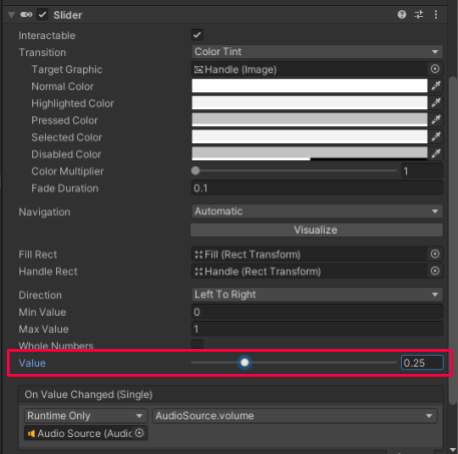
Now your slider should function as expected!
7. Explore: Add new UI elements
You now understand how to create new UI elements and link them up with simple functionality.
Try adding some new settings to your menu to give the user more control over their experience!
You could add toggles to view or hide certain objects, sliders to control the brightness of lights, buttons to switch between night and day, or any other fun feature you can think of!
Experiment by assigning objects to a UnityEvent and browsing through the functions. This will give you some ideas for what’s possible.
8. Next steps
Your settings menu is complete! Don’t forget to reactivate the title screen elements and hide the settings menu by default.
In the next challenge tutorial, you’ll learn about an entirely different Canvas mode, where your UI can appear to be part of the physical world of your scene. This opens all kinds of interesting opportunities with UI design in 3D worlds!