
Part 3.1: Implementation fundamentals
Tutorial
advanced
+5XP
20 mins
(213)
Unity Technologies
In this section of the DOTS Best Practices guide, you will:
- Learn how to check for causes of poor performance or errors in your DOTS code
- Learn how to declare your data with appropriate read/write permissions and memory allocators
- Learn where and how to store your data
1. Always profile, always read the console window
However you like to lay out your windows in the Unity Editor, if you’re developing using ECS-based code it’s useful to keep the Unity CPU Profiler (preferably in Timeline view) and the Console window open and visible at all times. The console window quickly gives you an indication of whether you’ve written code that violates the job safety system or leaked temporary native-allocated memory. The Profiler lets you know if you’ve written a system that might cause performance problems.
When you write and debug code, you should turn the safety systems on to allow Unity to report potential problems in the Console window. Here’s where to find them:
- Jobs > Burst > Safety Checks > On: This warns you about out-of-bounds errors with Native Containers and issues with data dependencies
- Preferences > Jobs > Leak Detection Level > Enabled: This warns you about potential memory leaks that relate to the allocation of Native Containers. Alternatively, enable Preferences > Jobs > Leak Detection Level > Enabled With Full Stack Trace: to track down the causes of specific leaks.
- Preferences > Jobs > Enable Jobs Debugger > (Ticked) : This warns you about issues that relate to job scheduling and conflicts.
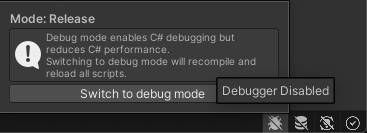
- Unity Editor Status Bar > Debug Mode: This setting allows you to attach a debugger to the Editor while it’s running. This option is in the icons at the bottom right of the Unity Editor window.
Note: These options all impact performance, and you should turn them off when you’re finished debugging and you want your code to be performant in the Editor.
2. Debugging Entities
The Entities package contains a number of debugging tools. These can help diagnose a number of the issues discussed in this guide. You should familiarize yourself with the various windows and the information they display, and understand how to interpret that information to check how your project is performing.
The GDC 2022 talk “DOTS authoring and debugging workflows in the Unity Editor” is a great introduction to these windows and how to use them.
For more detail on the windows and inspectors that are available when working with entities, see the documentation on Working in the Editor.
Favor ISystem
Early experimental versions of the Entities package only implemented class-based systems that inherited from SystemBase. Since the pre-release, the package now allows for the creation of struct-based systems that implement the ISystem interface. The ISystem approach is the recommended one. When you write new systems, implement ISystem rather than inheriting from SystemBase. If you are updating an existing ECS-based project to current versions of the Entities package, SystemBase is provided to make the updating process easier, but we recommend that you consider converting your system to ISystem. Consult the Entities upgrade guide for more information on how to update your project.
The Systems Comparison page of the Entities documentation discusses the differences between ISystem and SystemBase. The most important differences are that:
- Because ISystem is a struct that contains no system state of its own, the entire system and its methods can be Burst-compiled, greatly improving main thread performance
- ISystem does not support Entities.ForEach(), instead favoring iterating over entities in a query using idiomatic foreach, or for multi-threaded operations, IJobEntity or IJobChunk
- ISystem does not support inheritance
Entities.ForEach() relies on a large amount of automatic code generation which significantly slows down iteration speeds on a project. This automatic code-gen also introduces a number of unintuitive edge-cases in which unexpected behavior might occur. Idiomatic foreach is a cleaner, more intuitive interface for iterating over components on the main thread, and IJobEntity / IJobChunk are more explicit ways to express your desired behavior when multithreading is required.
ISystems can process managed data or call managed API methods if required, although if they do they cannot be Burst-compiled. Inheritance hierarchies in systems can generally be refactored into a more efficient form that makes use of interface composition. All of these things contribute towards clean, explicitly, easily optimizable code. For those reasons, the discussions and code examples in this guide will assume the use of ISystem rather than SystemBase.
3. Separate data from systems
Combining data with methods that operate on that data encapsulated into a single structure (or class) is an OOP concept. DOD is based around having structures of data and systems to operate on that data. This means that as a general rule, there should be no methods in components and no data in systems.
Beware methods on components
Methods on components aren’t necessarily harmful, but they indicate a DOD anti-pattern: the “do things one by one” anti-pattern. A method on a component is designed to operate on the data within that component, but a big part of the performance benefits of DOD come from writing methods that transform an entire buffer (or EntityQuery) of components in one go. Make the component data public, write the loops to iterate over multiple components and perform the operations directly on the data.
If you put methods in components, you get one of two outcomes. Either:
- The method is not inlined and you take the performance impact of the additional method call for every component in your loop, or:
- The method is inlined, and the generated code is the same as if you’d written the data transformations directly into the system in the first place. You gain nothing from having written the method.
Beware data in systems
“No data in systems” is a slightly more nuanced rule in practice. From a coding style point of view, systems should ultimately be nothing more than data transformations. They should store as little state data as possible - ideally none at all. However, from a practical point of view, in some situations, you can store certain types of data inside member variables in systems. As such, the key rule to consider is that component data should be the one source of truth.
This means that it’s okay for a system to cache data in structures that are efficient for processing, as long as the system recreates that cached data (either every frame, or when it detects that component data may have been changed since the last time the system ran) based on the current state of the ECS world. This is because entities and components can be created or destroyed from outside the systems that are interested in them (for example, when subscenes are streamed in or unloaded). This means that systems can’t make any assumptions about the lifespan of entities, and shouldn’t keep cached data that might outlive the components that were used to build that cached data.
However, each system instance has an associated “System Entity” that can be accessed through the system’s SystemHandle. Rather than store data as fields of a system, it’s generally better to store it in a component that forms part of the system’s entity. You can read more about this technique in the package documentation page on defining and managing system data.
Caching values in a reactive system can be useful in some situations. For example, Unity Physics reacts to the presence of RigidBody components and builds a spatial hash structure for efficient collision detection. However, it’s important to note that by design, the Unity Physics engine has no frame coherency, so the data in the spatial hash is transient and gets rebuilt every frame. The Entities Graphics package reacts to RenderMesh components being created or destroyed to maintain a list of rendering batches. This list persists from frame to frame, but because the Entities Graphics systems update it as a reaction to RenderMesh components being created or destroyed, the systems can guarantee that they always keep the batch list in sync with the World state.
For more information on how to detect when components are destroyed, see the Entities package documentation page for Cleanup components.
It’s also quite common for systems to cache things related to their internal functioning: for example, caching EntityQueries or references to systems such as EndSimulationEntityCommandBufferSystem in OnCreate() for faster access later.
Avoid static mutable data for faster iteration times
One of the most common causes of slow iteration times during development is domain reloading when entering or exiting Play Mode. This is the process in which the Unity Editor unloads and reloads the entire scripting context in order to reset the values of any static variables to provide a fresh, deterministic state when Play Mode starts. You can disable domain reloading, but this can result in unexpected behaviors if your project makes use of static variables, as is often the case in GameObject-based OOP projects (see Unity blog post Enter Play Mode faster in Unity 2019.3). However, as discussed in a forum post from Unity CTO Joachim Ante (#Protip: Super fast enter playmode times when working in DOTS), everything in DOTS is designed to avoid static variables. If your project avoids static data too, you can disable domain reloading and save significant amounts of iteration time during development.
4. Declare read-only data as often as possible
The data design should tell you which data is read-only to which systems. When implementing the systems, you should make sure that you explicitly and correctly express those read-only relationships. Doing so enables the job system to schedule jobs more efficiently, making the best possible use of the available worker threads.
Use blob assets for read-only config data
Data which is 100% read-only (such as config data) should be read from whatever the source data is and packed into a blob asset using BlobBuilder. Better yet, use BlobAssetSerializeExtensions to serialize directly to a binary file at build time and then just load and deserialize it directly at runtime. This saves on time-consuming loading and parsing operations from other file formats.
Declare write access correctly in queries
Whether a system iterates over components on the main thread using foreach or on worker threads via a scheduled job, a query is the way to specify exactly which entities and components should be accessed. Queries take a number of different forms, and it’s important to understand how to declare read-only components for all of them.
When using foreach to iterate over components, the iteration is controlled by a QueryEnumerable built by a call to SystemAPI.Query(). This query API allows you to specify up to 7 type parameters to read, and in the case of component parameters you should specify whether the components are to be treated as read-only or read/write. The read-only type parameters are RefRO<T> and EnableableRefRO<T>, and the read/write ones are RefRW<T> and EnableableRefRW<T>. For more information and examples of building queries for foreach, see the documentation page “Iterate over component data with SystemAPI.Query”.
Scheduling an IJobEntity or an IJobChunk to iterate over component data also requires an EntityQuery. However, IJobEntity provides a choice in how to specify the query. Queries can be explicitly built and passed into the Schedule() method, or they can be generated automatically based on the parameters supplied to the Execute() method and attributes applied to the job struct itself. An example of both ways to specify queries can be found in the “Specify a Query” section of the IJobEntity documentation. When declaring parameters for an IJobEntity’s Execute() method, ensure you declare component parameters as read-only with the in keyword where appropriate. If you need to modify component data inside the lambda, declare those parameters as ref. For an in-depth exploration of how Burst handles in parameters, see the Unity blog post In parameters in Burst.
Explicit EntityQueries can be created either by creating an EntityQueryBuilder or with a SystemAPIQueryBuilder which can be obtained by calling SystemAPI.QueryBuilder(). The APIs for both types of builder work in the same way. For example, specifying a component with a WithAll<T1>() method in either type of builder indicates that the component should be treated as read-only by any job that uses the query. To specify a component with read/write access, use WithAllRW<T1>().
Use attributes to mark [ReadOnly] fields in jobs
When declaring data in a job struct, make sure fields that are not written to in the job’s Execute() method are marked with the [ReadOnly] attribute.
Use read-only versions of ComponentLookup or BufferLookup where possible
Sometimes it’s necessary to iterate over a set of entity components but maintain the ability to randomly access components or dynamic buffers via a job-friendly structure that behaves like a Dictionary. The SystemAPI.GetComponentLookup<>() and SystemAPI.GetBufferLookup<>() methods provide support for this. Note that both of these methods take an optional boolean value which you should pass as true if you only intend to read the component/buffer data. The job scheduler uses this information to calculate dependencies and execution order of scheduled jobs. However, Entities.ForEach() doesn’t use this flag to decide whether the ComponentLookup or BufferLookup is safe to use without race conditions in parallelized code. For that you need to add WithReadOnly() to the definition.
Alternatively, some code generation happens if you call SystemBase.GetComponent() / SystemAPI.SetComponent() from inside an idiomatic foreach, or a scheduled IJobEntity / Entities.ForEach(). The code generation process turns these calls into a ComponentLookup which is flagged as read-only if you only call GetComponent(), or read/write if you also call SetComponent().
Putting it all together
Imagine you’re writing a system that moves certain entities along spline paths. The data that’s accessed by such a system might look like this:
- The system operates on all entities with a FollowingSplineTag component. This is included in the EntityQuery, but the system doesn’t need to actually read or write this component.
- The system needs read-only access to a SplinePath component, which contains an Entity to identify the spline to be followed, and a float indicating a distance along that spline.
- Spline entities contain a DynamicBuffer of SplinePoints called SplinePointsBuffer. Given an arbitrary Entity handle representing a spline, the system needs read-only random-access to these buffers.
- Spline entities also contain a SplineLength component which the system requires read-only random-access to in order to perform spline position calculations.
- Finally, the system needs read-write access to the spline-following entities’ LocalTranform components in order to update the positions and rotations.
In code terms, the required components might look like this. Let’s also declare a stub for a helper method that will perform the actual spline calculation:
public struct FollowingSplineTag : IComponentData { }

public struct SplinePath : IComponentData
{
   public Entity Spline;
   public float Distance;
}

public struct SplinePointsBuffer : IBufferElementData
{
   public float3 SplinePoint;
}

public struct SplineLength : IComponentData
{
   public float Value;
}

public struct SplineHelper
{
   public static LocalTransform FollowSpline(DynamicBuffer<SplinePointsBuffer> pointsBuf, float length, float distance)
   {
       // Perform spline calculation and return a new LocalTransform here
   }
}
Here’s how you’d put it all together in a simple foreach in an ISystem:
var lengthLookup = SystemAPI.GetComponentLookup<SplineLength>(true);
var pointsBufferLookup = SystemAPI.GetBufferLookup<SplinePointsBuffer>(true);

// Version with writeable buffer lookup
foreach (var (transform, path) in
        SystemAPI.Query<RefRW<LocalTransform>, RefRO<SplinePath>>()
        .WithAll<FollowingSplineTag>())
{
   var splineLength = lengthLookup[path.ValueRO.Spline].Value;
   var pointsBuf = pointsBufferLookup[path.ValueRO.Spline];
   transform.ValueRW = SplineHelper.FollowSpline(pointsBuf, splineLength, path.ValueRO.Distance);
}
Here’s the same thing written as multithreaded code using an IJobEntity with an automatically-generated query:
// Job declaration
[BurstCompile]
[WithAll(typeof(FollowingSplineTag))]
public partial struct FollowSplineJob : IJobEntity
{
   [ReadOnly] public ComponentLookup<SplineLength> LengthLookup;
   [ReadOnly] public BufferLookup<SplinePointsBuffer> PointsBufferLookup;

   public void Execute(ref LocalTransform transform, in SplinePath path)
   {
       var splineLength = LengthLookup[path.Spline].Value;
       var pointsBuf = PointsBufferLookup[path.Spline];
       transform = SplineHelper.FollowSpline(pointsBuf, splineLength, path.Distance);
   }
}

// in OnUpdate()...
new FollowSplineJob
{
   LengthLookup =  lengthLookup,
   PointsBufferLookup =  pointsBufferLookup
}.ScheduleParallel();
For the sake of completeness, here is how the same code would look using an Entities.ForEach in a SystemBase.
Entities
    .WithAll<FollowingSplineTag>()
    .WithReadOnly(lengthLookup)
    .WithReadOnly(pointsBufferLookup)
    .ForEach((ref LocalTransform transform, in SplinePath path) =>
    {
        var splineLength = lengthLookup[path.Spline].Value;
        var pointsBuf = pointsBufferLookup[path.Spline];
        transform = SplineHelper.FollowSpline(pointsBuf, splineLength, path.Distance);
}).ScheduleParallel();5. Know your memory allocators
Choosing an allocator
When allocating native containers, Unity presents you with a choice of Allocators. These are described in more detail in the NativeContainer Allocators section of the NativeContainer manual page. Generally speaking, the longer the allocation is intended to last, the longer it takes to allocate and deallocate the memory. So if you only need a quick scratch buffer for the current frame, use Allocator.Temp. If you want to use the container in a job, use Allocator.TempJob. For allocations you want to last longer than 4 frames, use Allocator.Persistent.
For a more detailed exploration of the performance characteristics of Allocators, see Jackson Dunstan’s 2019 blog post Native Memory Allocators: More Than Just a Lifetime.
Disposing allocated memory
Once you have allocated your native container with the correct allocator, the next question is how to deallocate. Native memory is not automatically scoped and garbage collected in the way that you might be used to with managed memory in C#.
In systems which inherit from SystemBase, you can add WithDisposeOnCompletion() to Entitites.ForEach() or Job.WithCode() definitions to dispose of captured variables once the job has completed.
When you’re creating and scheduling job structs directly (for example, if you’re using an IJob), you can pass Native containers to the job and ensure they’re deallocated afterwards by calling Dispose() on the container, passing the JobHandle to ensure that the disposal happens after the job has completed.
public partial struct DisposeExample : ISystem
{
   private struct MyJob : IJob
   {
       public NativeList<int> SomeList;

       public void Execute()
       {
           // ... Process SomeList...
       }
   }

   [BurstCompile] public void OnUpdate(ref SystemState state)
   {
       var someList = new NativeList<int>( 10, Allocator.TempJob );
       var job = new MyJob { SomeList = someList };
       state.Dependency = job.Schedule(state.Dependency);
       someList.Dispose(state.Dependency);
   }
}
In the current version of DOTS, it’s possible to tag a NativeArray in a job with the [DeallocateOnJobCompletion] attribute to perform the deallocation. We don’t recommend this. The attribute doesn’t work for all Native Containers - only NativeArrays - and we plan to deprecate this attribute in future versions.