
Creating Ragdolls
Tutorial
Beginner
+10XP
40 mins
(106)
Unity Technologies
Ragdolls are variants of animated objects whose bones are completely taken over by the force of physics. They’re most often used when a character is defeated, like in an action game when a player’s health depletes, or when you want a character’s movement to appear to be driven by physical forces.
In this tutorial, we’ll create a Ragdoll using Unity’s built-in Ragdoll Wizard. We’ll be using the Eva character, but feel free to use any character you desire.
Resources
1. Creating Ragdolls
This tutorial has been verified using Unity 2019.4.14f1 LTS
Ragdolls are variants of animated objects whose bones are completely taken over by the force of physics. They’re most often used when a character is defeated, like in an action game when a player’s health depletes, or when you want a character’s movement to appear to be driven by physical forces.
In this tutorial, we’ll create a Ragdoll using Unity’s built-in Ragdoll Wizard. We’ll be using the Eva character, but feel free to use any character you desire.
1.) To begin, create a new Scene
2.) Click and drag your character Prefab to the Hierarchy, and move it to an empty area in your Scene (Figure 01).
3.) Select your character in the Hierarchy and go to GameObject > 3D Object > Ragdoll to open the Ragdoll Wizard (Figure 02).
The Ragdoll Wizard contains a list of slots for the bones in your rig.
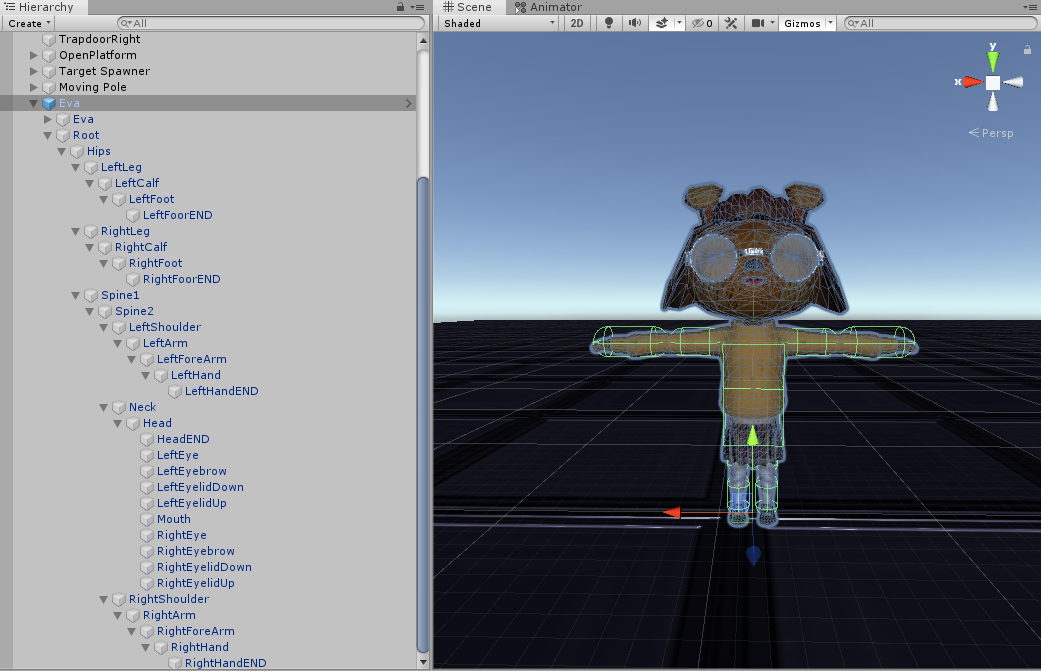
4.) Click the drop-down next to your character in the Hierarchy, then hold ALT and click the drop-down next to Root GameObject to open your character’s entire bone hierarchy (Figure 03).
5.) From this list, drag the bones to the Create Ragdoll pop-up window as follows:
Pelvis → Hips
Left Hips → LeftLeg
Left Knee → LeftCalf
Left Foot → LeftFoot
Right Hips → RightLeg
Right Knee → RightCalf
Right Foot → RightFoot
Left Arm → LeftArm
Left Elbow → LeftForeArm
Right Arm → RightArm
Right Elbow → RightForeArm
MiddleSpine → Spine2
Head → Head
When you’re done, the Wizard should be populated in the manner below (Figure 04).
6.) If all seems correct, click Create to complete the initial setup of the Wizard.
7.) Select your character in the Hierarchy and you’ll see the new group of Capsule Colliders that comprise the Ragdoll (Figure 05).
Notice there are no Colliders on the feet. We’ll address this now:
8.) In the Hierarchy, select RightFoot and add a Rigidbody, Capsule Collider, and a Character Joint. In our previous step, each of these components were added to the bones we specified in the Wizard (Figure 06).
9.) Set the Material variable of the Capsule Collider to the Limb_PhysMat under the Project tab’s Materials folder. This Material will help our Ragdoll move more quickly and stop more slowly when it collides with itself or other objects (Figure 07).
10.) Click Edit Collider and conform the Collider to your character’s foot. Alternatively, you can use the Radius, Height, and Center settings (Figure 08).
11.) If you click Edit Joint Angular Limits in the Character Joint component, you’ll see a new Gizmo in the Scene view. If you cannot see it, check to make sure you have only one Inspector window open (Figure 09).
With this Gizmo, you can grab the handles to set limits on the Ragdoll’s joint rotation. It’s important to keep the handles within reasonable limits to prevent excessive squashing or stretching of your character’s joints when the Ragdoll is activated.
This particular joint will control the angular rotation of the ankle, so try to adjust the handles accordingly. The settings below provide a good approximation (Figure 10).
If the ankle motions don’t look correct, you may need to change the axis in the Character Joint so the twist axis (y-axis) is pointing up.
12.) Try setting the axis to X=0, Y=1, Z=0 to see how the ankles realign themselves.
13.) Finally, in the Character Joint component, set Connected Body to the previous bone above it in the hierarchy. In this instance that would be RightCalf (Figure 11).
Now we must repeat the last six steps for LeftFoot, LeftHand, and RightHand bones. Using this method, you can add any bone to the Ragdoll system.
2. Debugging your Ragdolls
Often, you will want to see the other bones while you are adjusting each one individually to make sure your Colliders don’t overlap. By default, Unity pushes overlapping Colliders away from each other. This can inadvertently deform bones. The Physics Debugger can help you identify overlapping Colliders (Figure 12).
14.) Go to Window > Analysis > Physics Debugger.
15.) Turn on Collision Geometry to see all the Ragdoll Colliders. Turn on Mouse Select to be able to click and select the bones in the Scene view (Figure 13).
16.) Make sure none of the Capsule Colliders are overlapping. You can also check the Angular Limits on the bones to make sure they will move in a more realistic way.
17.) If you do not need to see the Collision Geometry, you can uncheck the Collision Geometry checkbox in the Physics Debug.
Before we test our Ragdoll, select your character in the Hierarchy and uncheck its Animator in the Inspector. This will ensure we’re not trying to animate the character while the Ragdoll is trying to run its simulation (Figure 14).
Now enter Play Mode and check out how your Ragdoll works. If you see any strange rotations, try adjusting the Capsule Colliders or the Joint Angular Limits.
If there is stretching or “spaghettification” of the limbs, try turning off the Enable Preprocessing checkbox in the Character Joint component. Preprocessing predicts all the possible ways the Ragdoll can deform upon impact, then selects one at random. For more accurate deformation, it’s best to leave this option unchecked unless you’re running on a mobile device. (Figure 15).
You can also turn on the Enable Collision checkbox if you want the Collider to collide with another connected joint (for example, hand, forearm, foot, lower leg). This option is best used on the last bone of a chain, like the hands or feet.
3. Toggling between Ragdoll and Kinematic Characters
18.) Rename your character something along the lines of “[Character]_Ragdoll” and drag it from the Hierarchy to the Prefabs folder in the Project window. You can position your Ragdoll in the Scene as you see fit (Figure 16).
19.) Now, drag another instance of your Ragdoll Prefab from the Prefabs folder into the Hierarchy and rename it along the lines of [Character]_Ragdoll_Animated (Figure 17).
20.) Add a Box Collider component and position it so that it encapsulates your character (Figure 18).
Now that we have both a player controlled version of our character and a Ragdoll variant, we must create a script to toggle when to switch between the two. The following script is a good place to start in implementing this feature:
using System.Collections;
using System.Collections.Generic;
using UnityEngine;

public class AnimationToRagdoll : MonoBehaviour
{
    [SerializeField] Collider myCollider;
    [SerializeField] float respawnTime = 30f;
    Rigidbody[] rigidbodies;
    bool bIsRagdoll = false;
When this script is activated, we assume the character is in an animated state, so its Ragdoll is not activated
void Start()
    {
        rigidbodies = GetComponentsInChildren<Rigidbody>();
        ToggleRagdoll(true);
    }
If our character is not in a Ragdoll state, enable its Ragdoll and reset the character back to its animated state after a set number of seconds (respawnTime) has passed. We can change this if statement to the condition that activates the Ragdoll, such as pressing the space bar (currently it will activate when it collides with a GameObject tagged as Projectile).
 private void OnCollisionEnter(Collision collision)
    {

        if (!bIsRagdoll && collision.gameObject.tag == "Projectile")
        {
            ToggleRagdoll(false);
            StartCoroutine(GetBackUp());
        }
    }
What actually makes our character a Ragdoll? By disabling the character’s outer Collider and setting all its bones to non-kinematic (disabling isKinematic), we surrender control of our character’s rig to the physics engine—another way of saying, “Your character is a Ragdoll.”
    private void ToggleRagdoll(bool bisAnimating)
    {
       bIsRagdoll = !bisAnimating;

        myCollider.enabled = bisAnimating;
        foreach (Rigidbody ragdollBone in rigidbodies)
        {
            ragdollBone.isKinematic = bisAnimating;
        }
Consequently the character’s Animator component is only enabled when the character is not in a Ragdoll state. The character will play an animation at random when in an animated state.
GetComponent<Animator>().enabled = bisAnimating;
        if (bisAnimating)
        {
                     RandomAnimation();
        }
    }

 private IEnumerator GetBackUp()
    {
        yield return new WaitForSeconds(respawnTime);
        ToggleRagdoll(true);
    }

    void RandomAnimation()
    {
        int randomNum = Random.Range(0, 2);
        Debug.Log(randomNum);
        Animator animator = GetComponent<Animator>();
        if (randomNum == 0)
        {
            animator.SetTrigger("Walk");
        }
        else
        {
            animator.SetTrigger("Idle");
        }
    }
}
21.) Uncheck the Box Collider in the Inspector and add an AnimationToRagdoll component. Drag the Box Collider component to the My Collider variable in the AnimationToRagdoll component. This script toggles the activation of the Ragdoll Prefab we created earlier (Figure 19).
22.) You can set the Respawn Time variable to whatever you want. This is the number of seconds the character will remain in a Ragdoll state when activated.
23.) Set the Controller variable in the Animator component to the [Character]_AnimationController from the Animation folder in the Project window (Figure 20)
This script cycles through the Ragdoll bones and sets them to IsKinematic. It then enables the Animator component and chooses a random (either idle or walk) animation to play. In our current script, when our Ragdoll is toggled, it disables the animation and sets those bones back to not being kinematic (subsequently enabling the Ragdoll). Then after the wait time it will reset back to another random animation.
Now you can enter Play Mode and test out your new Ragdoll.
4. Conclusion
There are many uses for Ragdolls in your projects. Beyond acting as a procedural “death” animation for characters, Ragdolls allow you to create rather interesting movement patterns for characters, since they’re controlled by physically based forces. To add even more functionality, you can also easily toggle whether your character is in a kinematic or Ragdoll state with a simple C# script.