Ideation and Pre-production
Tutorial
·
Beginner
·
+10XP
·
15 mins
·
(30)
Unity Technologies

Learn about the ideation and pre-production phases of game development.
1. Introduction
The first two phases of the game development process, ideation and pre-production are the phases where you ideate and test your . As a reminder they are:
- Ideation - The time taken to identity your audience and stakeholders, do research, and create personas. Ideation is done when you think your idea will work!
- Pre-production - The work done before full-scale production begins, such as planning, prototyping, pipeline setup, and initial designs.
2. Phase 1: Ideation
How you come up with specific ideas for your game tends to be unique to the project, and therefore is the least well-defined of the processes we’ll discuss here. However, there are a couple of things to consider when first designing your game for impact:
- Audience: A method from the world of UX design is to document a “persona”; that is, a fictional member or members of your audience, and then use that persona in thought experiments that examine how an audience might react to your idea. Once a persona has been created, sometimes teams will create a “mood board” of pictures or ideas in a tool like Miro, or we have even seen a team create a faux “apartment” of their archetype user by transforming a conference room! Getting inside the user’s head might also involve interviews or other research to really understand the potential audience, all of which can inform the game’s ultimate design.
- Stakeholders: In many games for impact, one or more stakeholders external to the core game project might be involved. This could include a funder, or maybe the game is being made for a contest, festival, or grant (like Unity for Humanity!), or could include outside experts. Involving stakeholders and doing your best to understand their needs and opportunities as early as you can helps the ideation process. In many cases, an individual external stakeholder will be somewhat naive as to how games work and how they are built. This creates an obligation for the game design team to help educate collaborators. When this is viewed as an opportunity rather than a burden, stakeholders might insert unexpected ideas into the ideation process, ultimately leading to a better outcome for your game.
- Research: Doing research and documenting your findings is an important part of this process. Even if you are an expert on the subject matter, writing down and organizing your knowledge is crucial. The right time to do research is during the ideation stage, rather than trying to insert new external knowledge later on in the process.
Ideation can take a long time or be very quick, depending on the resources and urgency of the project. As a general guide, take no longer than is necessary in this phase; while research and persona-building is extremely important, the reality is that until you start building prototypes, you’re not learning whether or not your idea will work. As a guideline, if you’re not sure whether to continue to ideate or to move into pre-production, move into pre-production!
3. Phase 2: Pre-production
Small, focused prototypes allow for efficient progress toward creating the actual game. Somewhat counter-intuitively, delaying the start of the actual game project in favor of creating prototypes will usually lead to a faster (and better) net result.
Collectively, we refer to the process of designing, creating, and analyzing prototypes as pre-production.
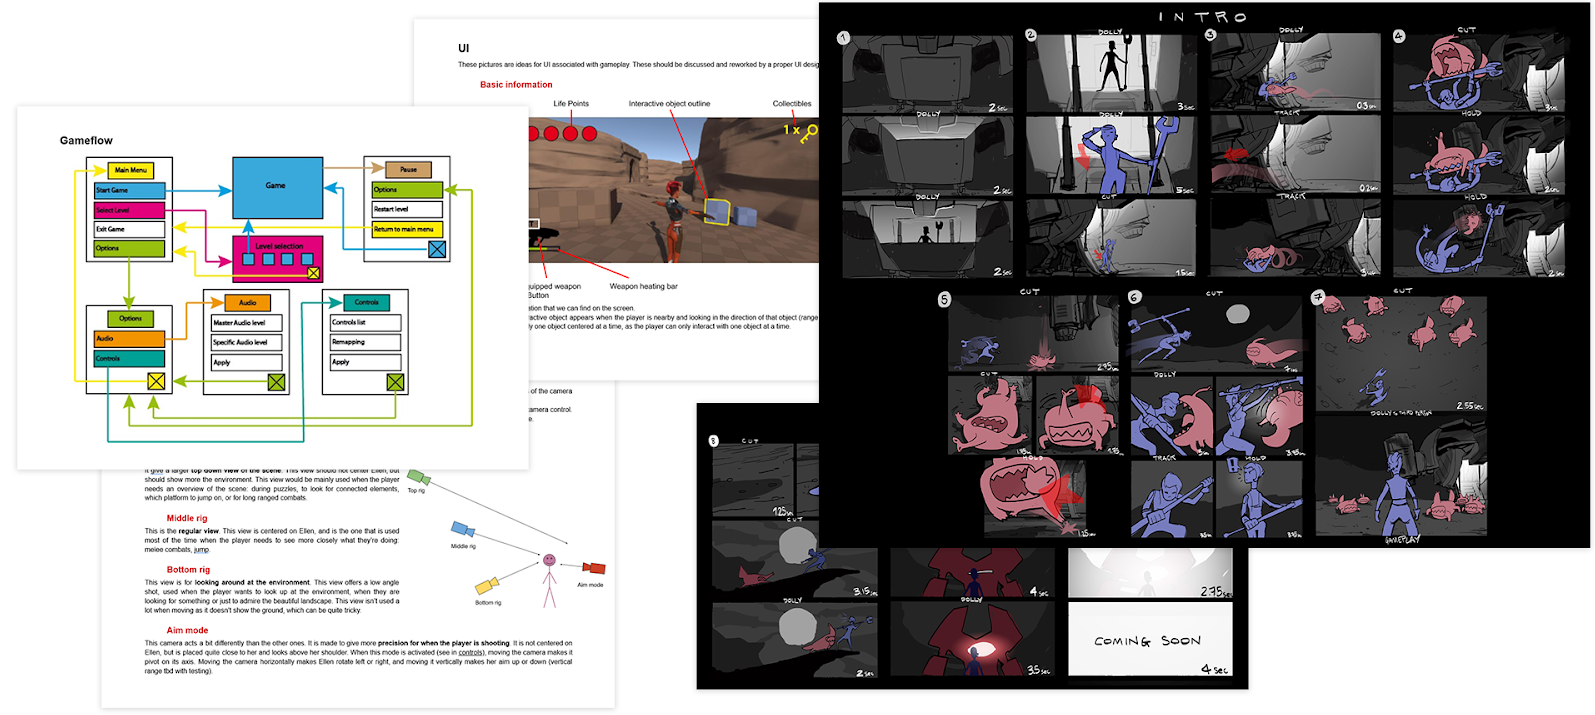
To streamline the pre-production phase, studios produce a design document for their product: a single source of truth for its creative direction. For a film or animation, this may take the form of a script and storyboards, depicting the contents, look, and feel of each scene. For a game, a game design document includes information about the story, gameplay, art direction, intended target audience, and accessibility.

4. Prototyping in pre-production
Prototypes are a little bit like science experiments: they exist to answer a question. Designing a prototype starts with generating a question. Examples might include:
- How fast should the player move through the game?
- What information will the player need to be shown?
- Will people find this action amusing?
However, generating a question doesn’t quite finish the job. The second thing you should do before beginning work on a prototype is to analyze its value to the project. We think of value as a mathematical formula:

In this formula, “progress” refers to the level of impact the progress will have on the development of the game. If you’re making an RPG game, establishing the level of detail needed in storytelling has a very high impact and will have a very high progress value. However, if you’re making an action game, story details might have a low progress value, while controls and camera systems would have high progress values.
“Resources” primarily refers to time, but might also reference the technical difficulty of the prototype or art/audio resources needed. As you can see from the "value = progress / resources" formal, keeping the resources denominator as low as possible maximizes the value of a prototype.
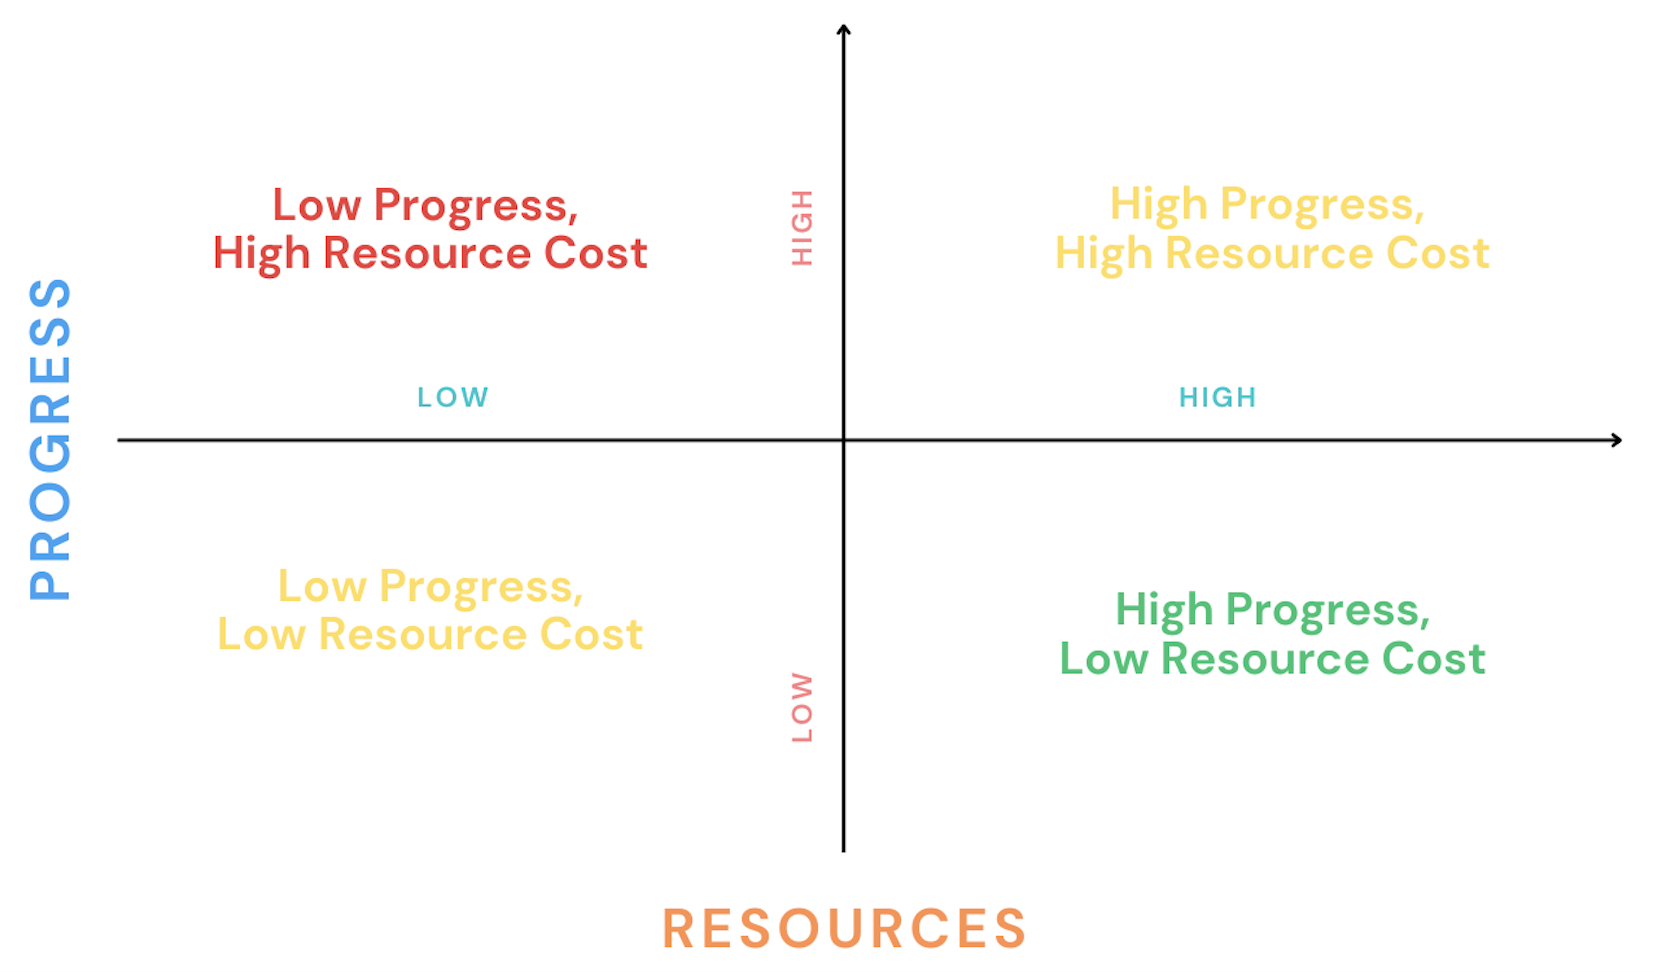
It may also be helpful to visualize possible prototypes on a 2x2 grid:

Using this grid, the prototype ideas that fall into the lower-right corner are the most attractive. Sometimes prototypes in the upper-right or lower-left can be justified, and those in the upper-left should be avoided entirely.
Prototyping can be very fun: prototypes ideally are made quickly and without concern for things like robust software and clear tutorials. However, making sure they are as high value as possible makes them not only fun, but also productive.
5. Prototypes are not games
In order to maximize the value of a prototype, we recommend you avoid thinking of the prototype as “getting started on the game.” Instead, build the smallest, simplest prototypes that will answer questions quickly and efficiently, without worrying too much about portability into the final project.
This concept of not having to make a prototype that will port into the final project, opens the door to prototyping that is not even in the same medium as your intended game. For example, paper prototypes or spreadsheets can be used to assess possible economy designs for your game. A prototype of a game system that operates only in text might be helpful to see if that system is interesting to observe.
This principle applies particularly to technical work. Software engineering best practices suggest building frameworks and code structures early to save time and make a higher quality codebase later. Unfortunately, this kind of work often goes to waste during pre-production: while the game changes and evolves over the course of creating prototypes, well-constructed systems can become obsolete, and the technical time might have been better invested in making more and more high-value prototypes.
Making work visible
An aspect of pre-production that goes against a pure prototyping strategy is that, often during this period, you’ll need to show your work to various people in order to get resources or generate interest or excitement. You may need to make demos or videos that are more complete and usable than a typical prototype would be.
Look ahead as best you can and identify points where making more robust, complete game builds or trailers might be wise. This is external to the prototyping process, but can be crucial during pre-production. For example, the Unity for Humanity application expects a game that is already functional, and ideally one in a pre-production phase of work.
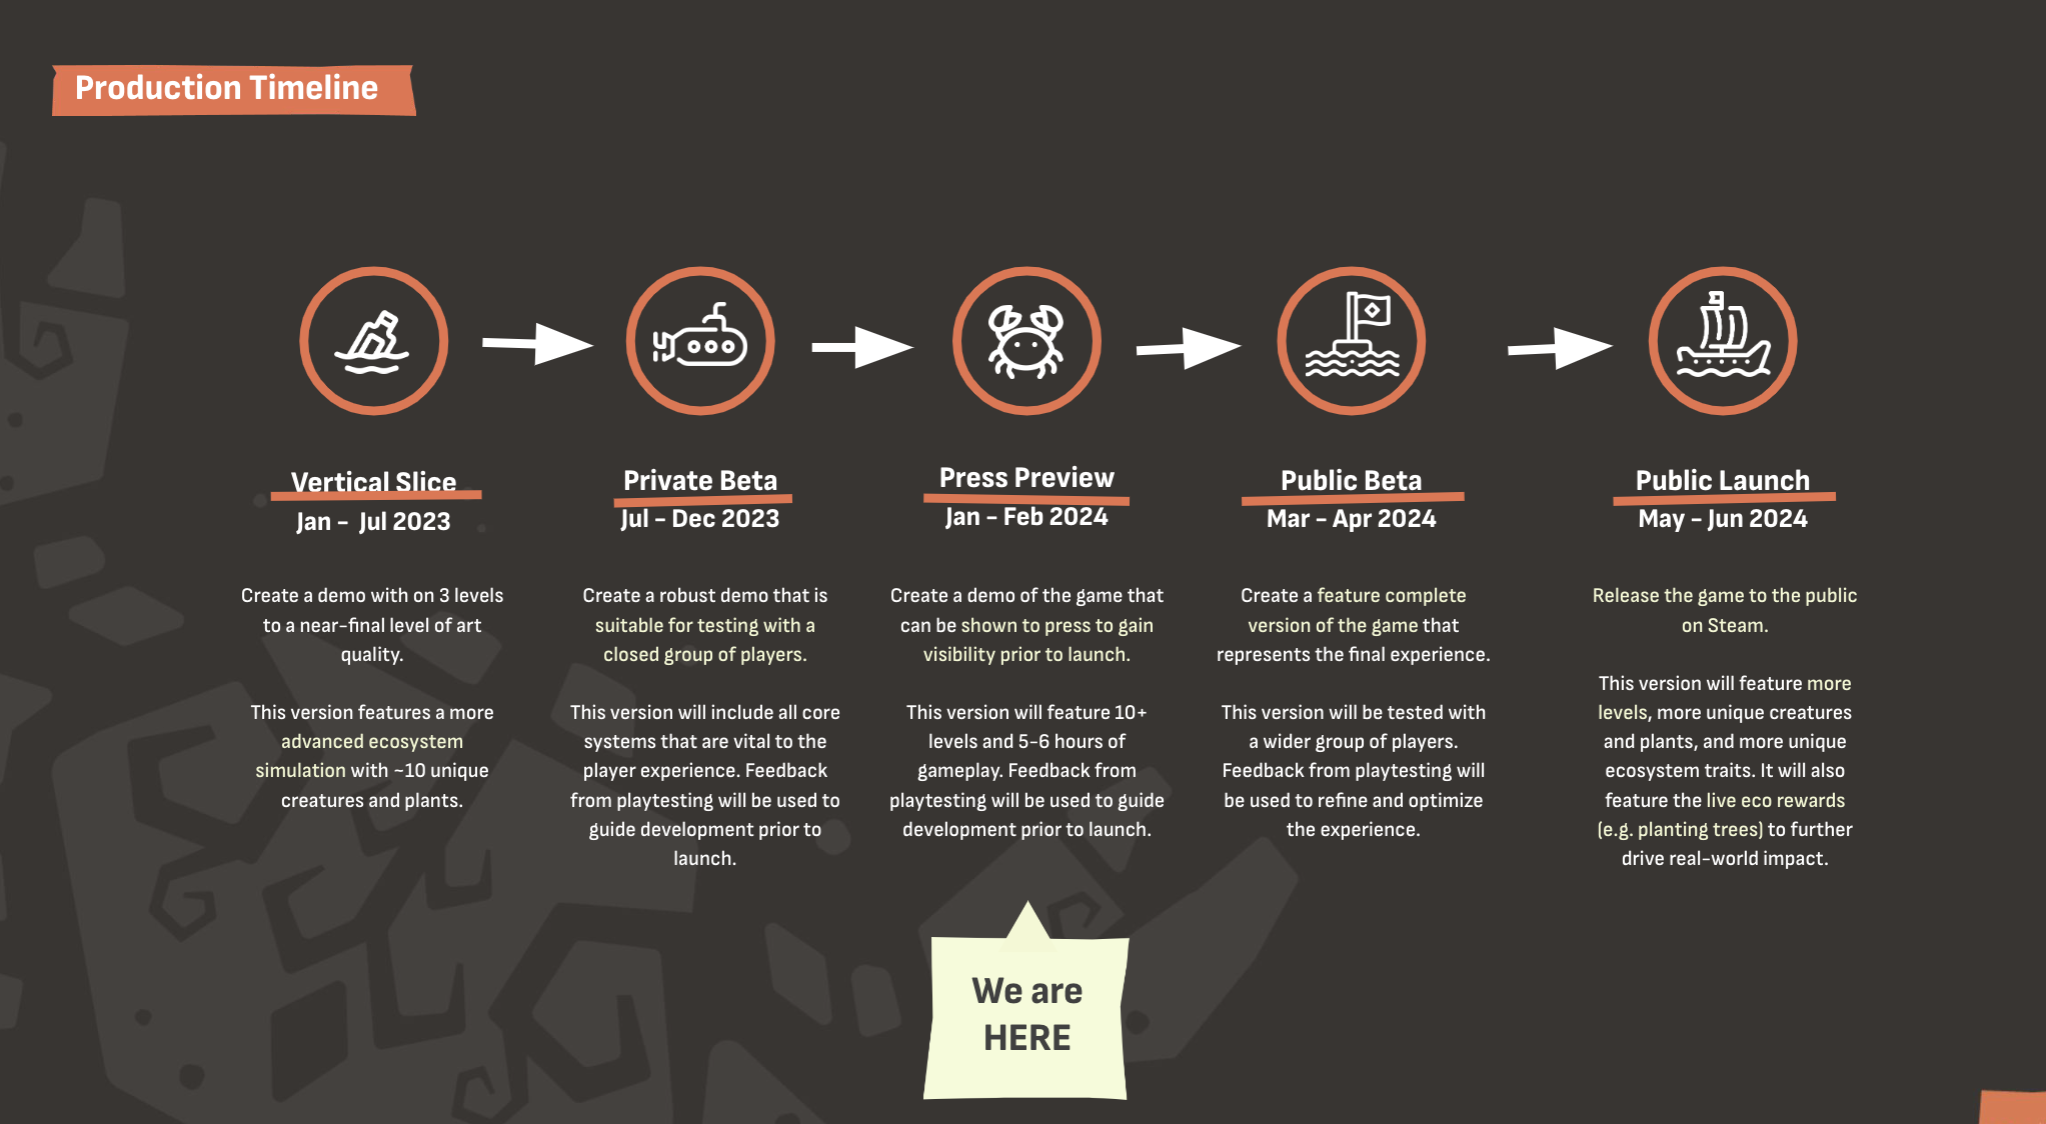
For example, in grantee Crab God, by Chaos Theory Games, the team shared in their pitch their production timeline.

Next let's learn about the production and post release phases of production