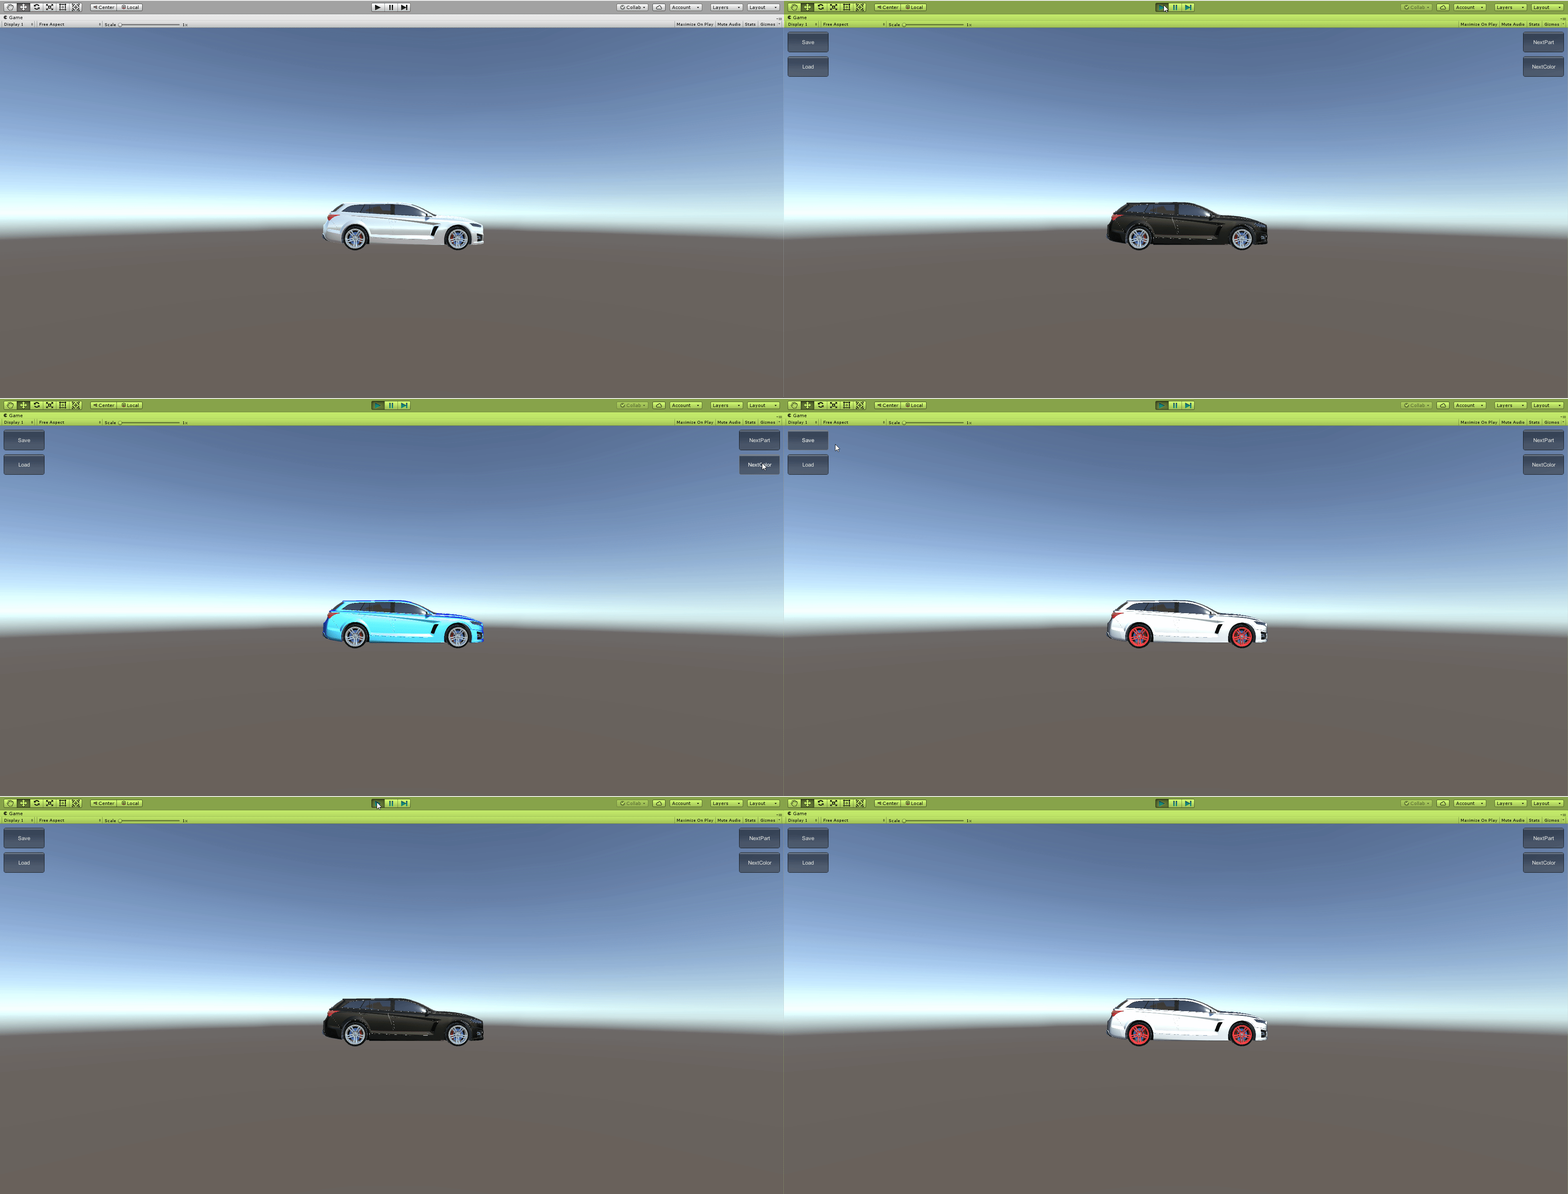
Save and Load Runtime Scene Changes
Tutorial
Beginner
+10XP
30 mins
6
Unity Technologies
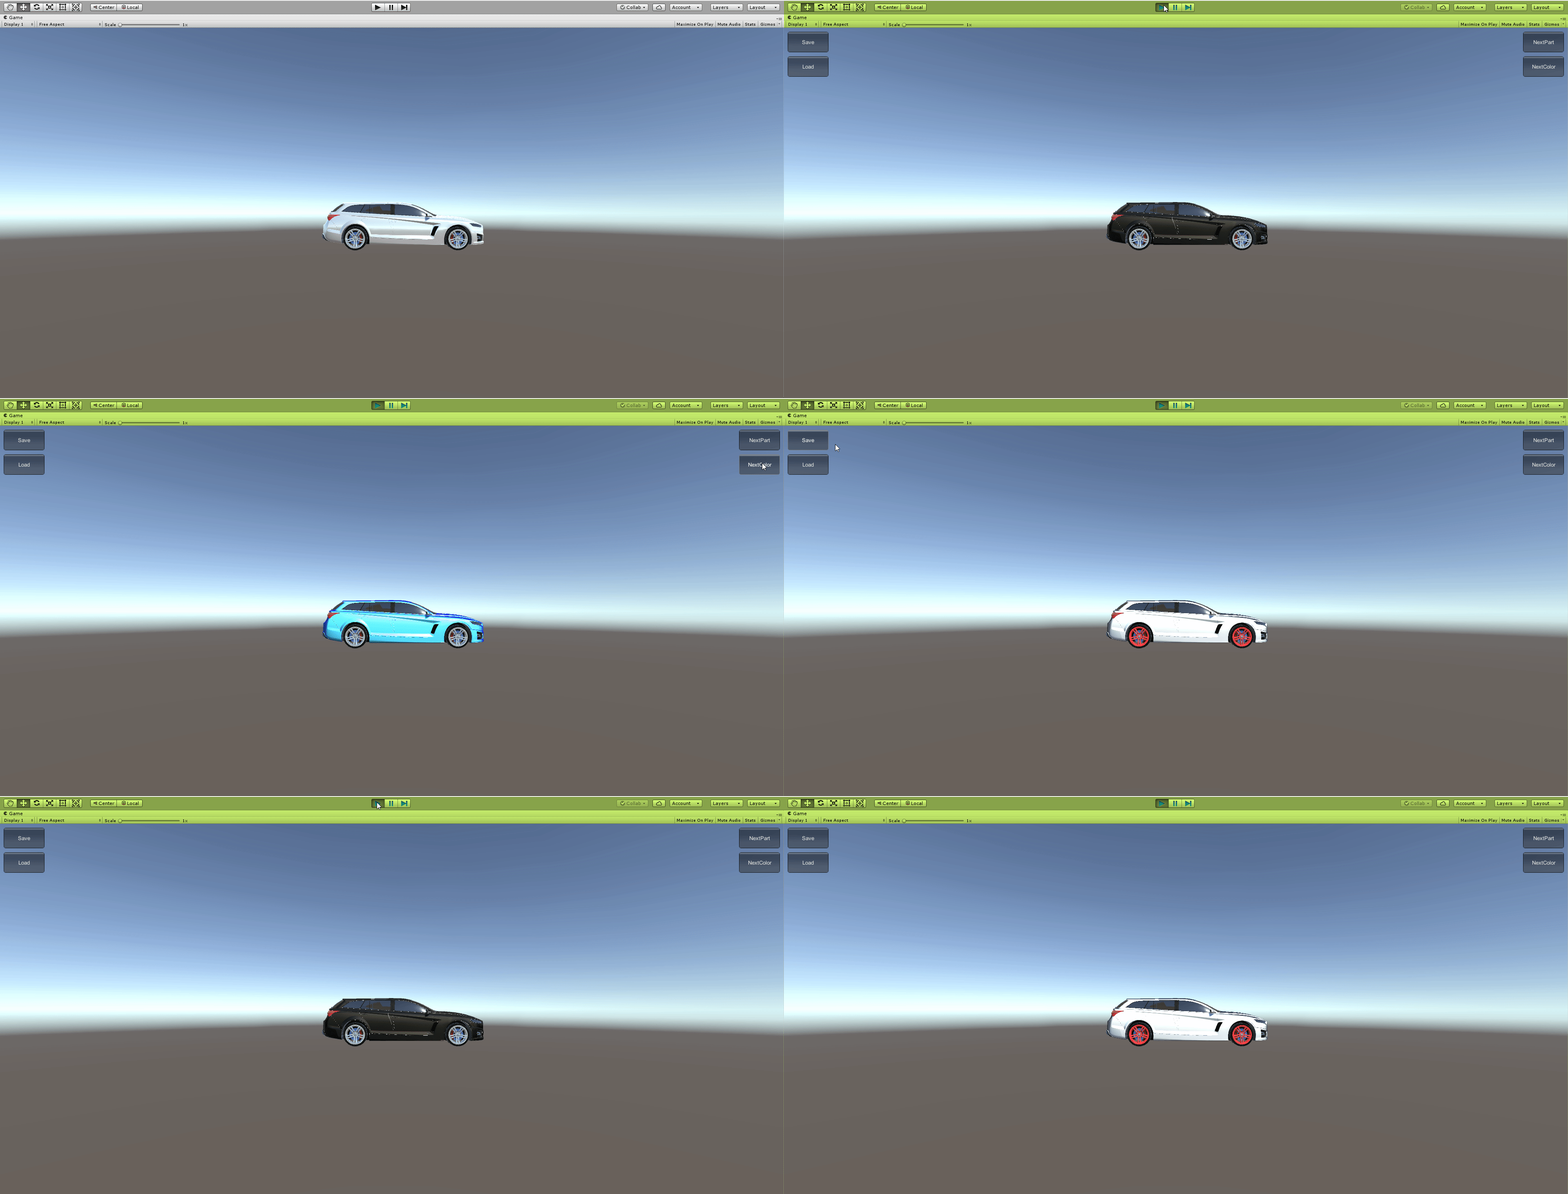
By completing this tutorial, you will understand how to incorporate the Save and Load component into any iterative design project.
Materials
1. Overview
Why Save and Load?
Save and Load features use a concept known as “data persistence.” Data persistence refers to saving information between Unity sessions and is essentially the ability to save and load Material, object, and Transform changes made in Play mode.
You may be wondering, “Doesn’t File > Save or Ctrl + S save my changes?”
Yes, File > Save saves your Scene changes but there is an important distinction to make here. While File > Save saves edits made in the Editor, it does not save changes made at runtime.
For iterative design, it is important to save and load different design prototypes and offer a user the ability to save any progress made while in Play mode. Without this feature, the application is a great visualization tool, but cannot be used for the real-time iteration and updates that are crucial for team workflow.
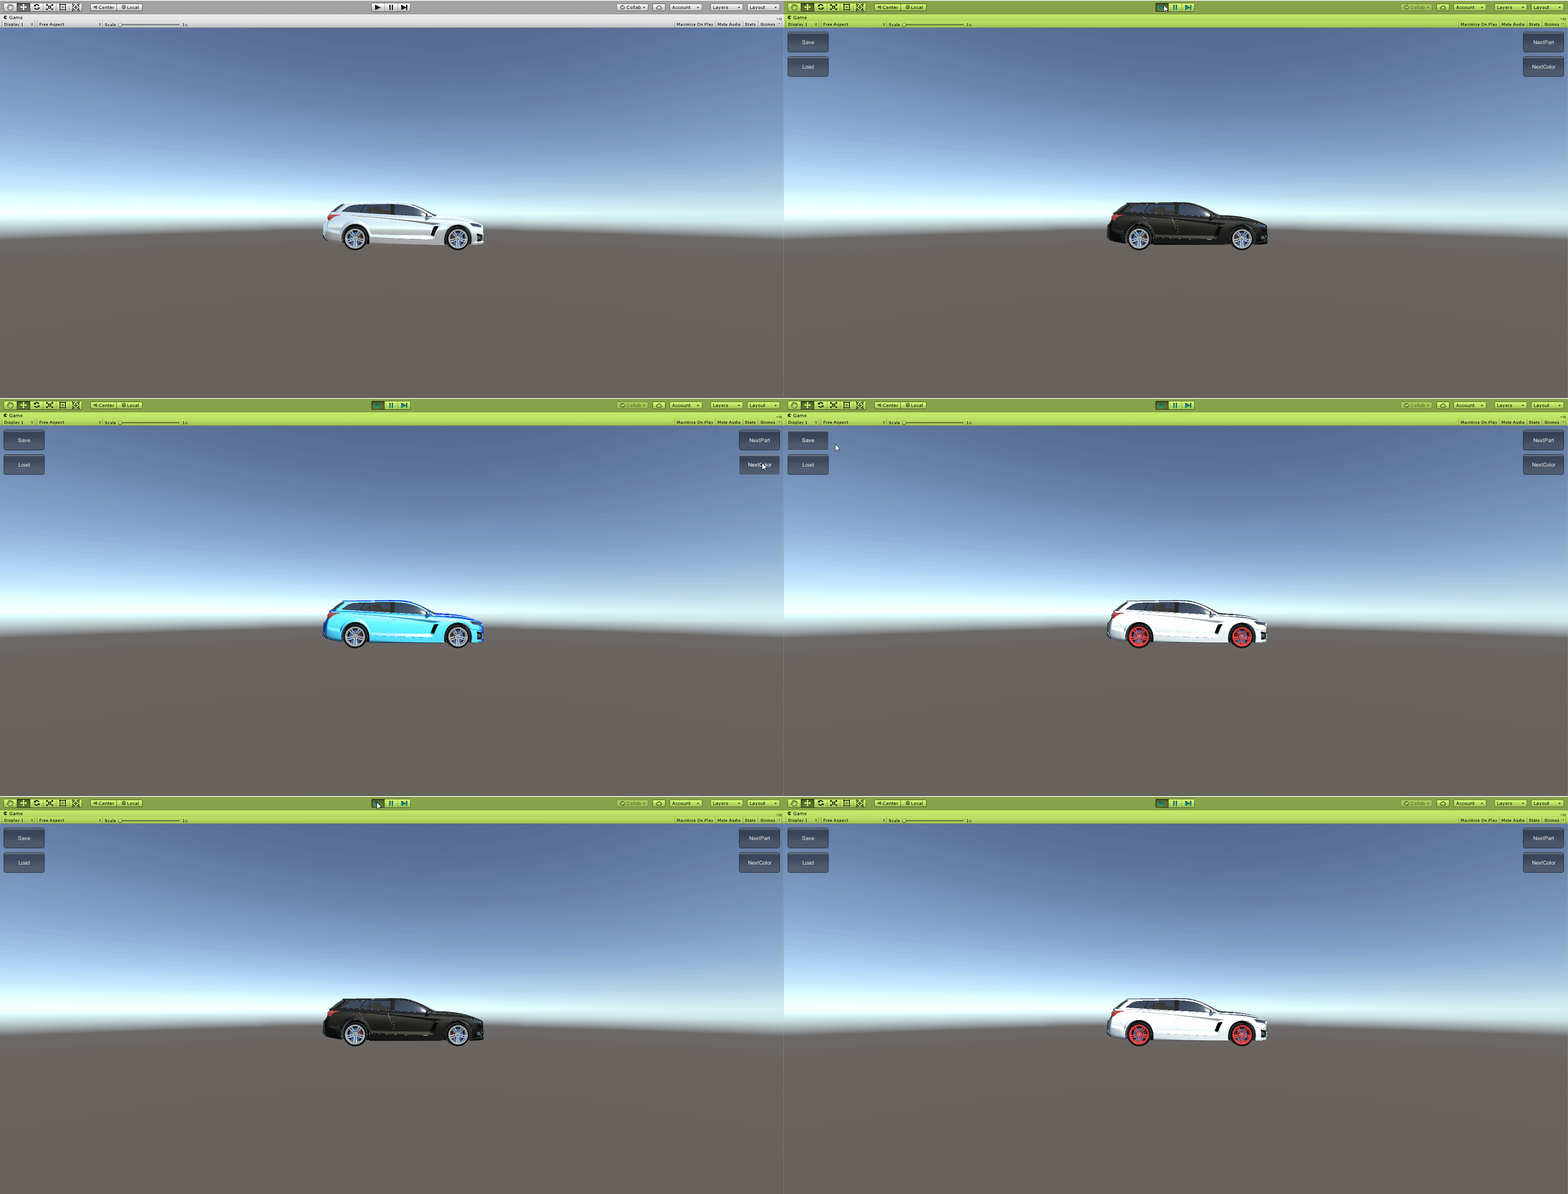
This tutorial will walk you through the configuration of the Save and Load feature, and, as such, does not include a challenge. By configuring this Scene, you will understand how the SaveLoad component can be used to save changes made in Play mode in Unity or an executable file.
To do this, you will need to complete the following steps:
- Understand the layout of the Hierarchy
- Create the Material, Object, and SaveLoad Manager GameObjects
- Configure the Material Manager
- Configure the Object Manager
- Configure the SaveLoad Manager
2. Understand the Layout of the Hierarchy
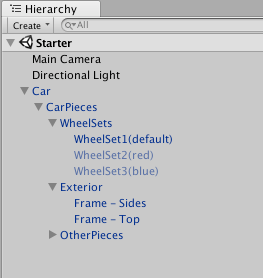
There are three objects in the Scene: the Main Camera, a Directional Light, and a Car. Look at the Car’s child GameObjects and note the three different WheelSets.
3. Create the Material, Object, and SaveLoad Manager GameObjects
Create three empty GameObjects and name them SaveLoadManger, MaterialManager, and ObjectManager, respectively. These objects will house the Save and Load functionality.
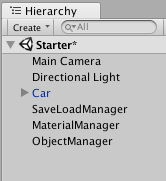
- Create three empty GameObjects (Create > Empty GameObject).
- Rename them to SaveLoadManager, MaterialManager, and ObjectManager, respectively.
--------------------
Tip — Naming Managers and Controllers
Using “Manager” and “Controller” as names is a common practice in Unity. These names correspond to different functions in a Unity project. To fully understand the reasoning behind these names, a basic understanding of scripting is required. At a high level, Managers control the state of multiple GameObjects, whereas Controllers control a single object’s functionality. Note that in this example, Controllers are not used.
4. Give the MaterialManager the Appropriate References
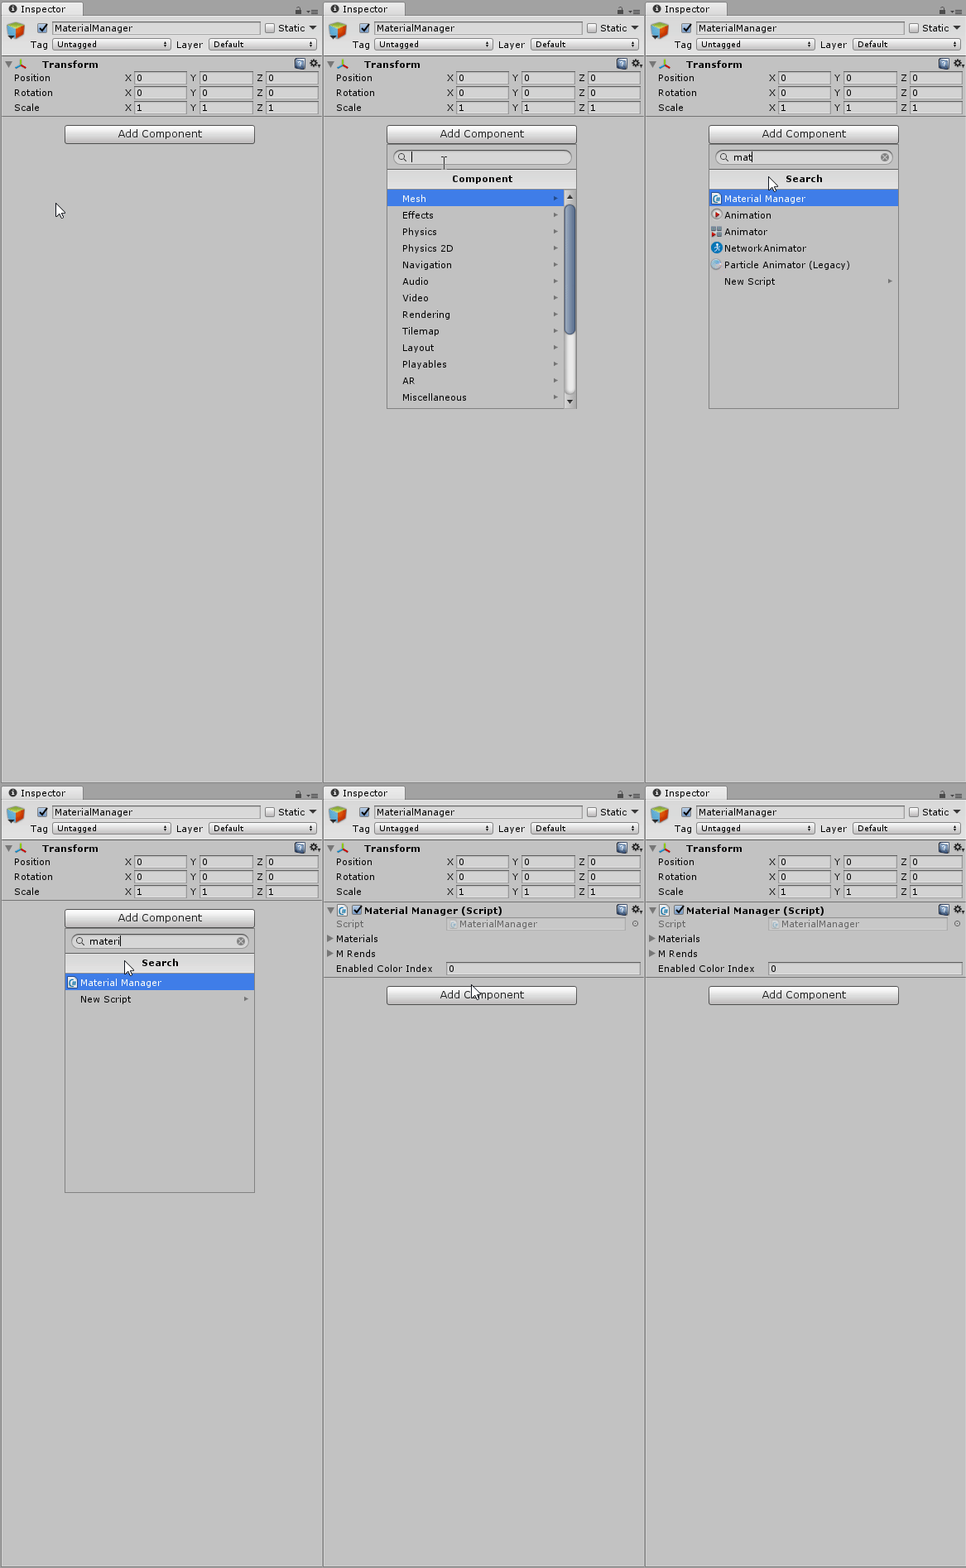
Add the MaterialManager component to the MaterialManager GameObject so we can change the Materials on objects in the Scene.
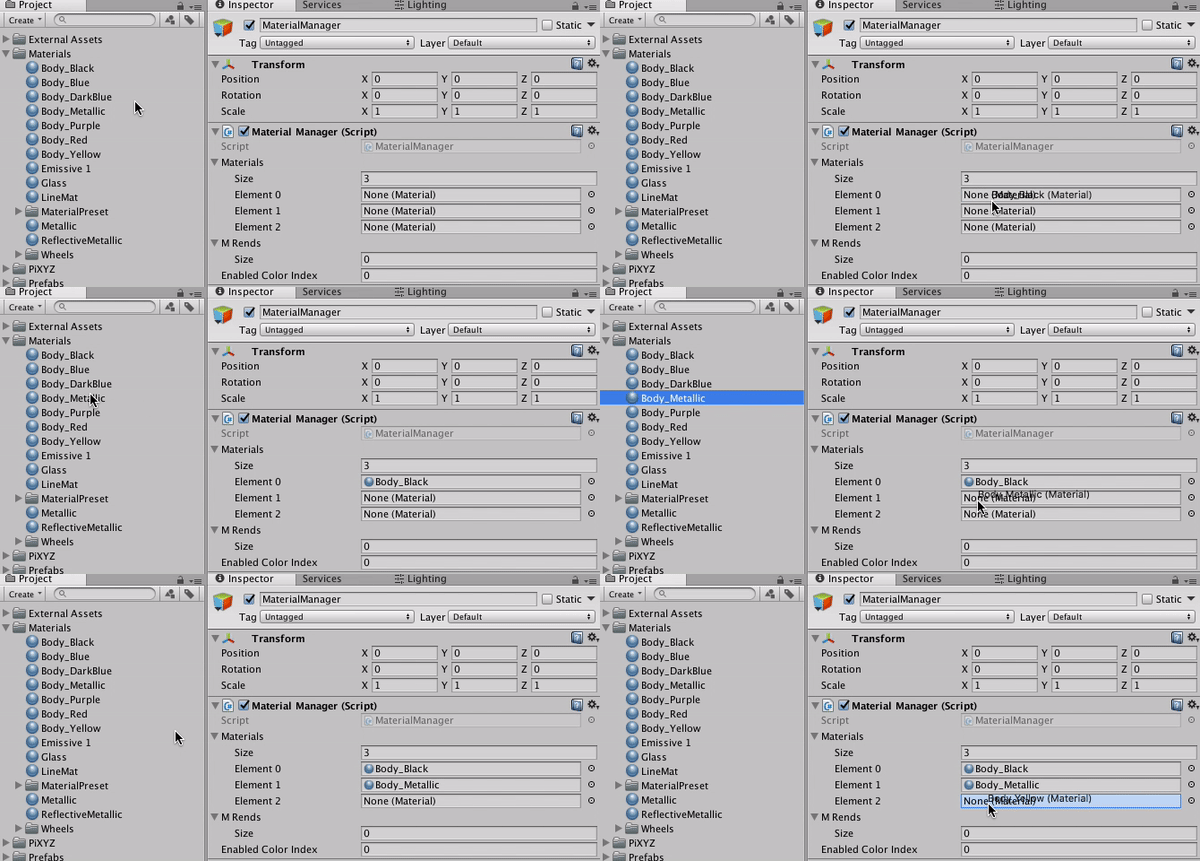
Add some Materials to the Material List so we can change the car’s Materials to these Materials.
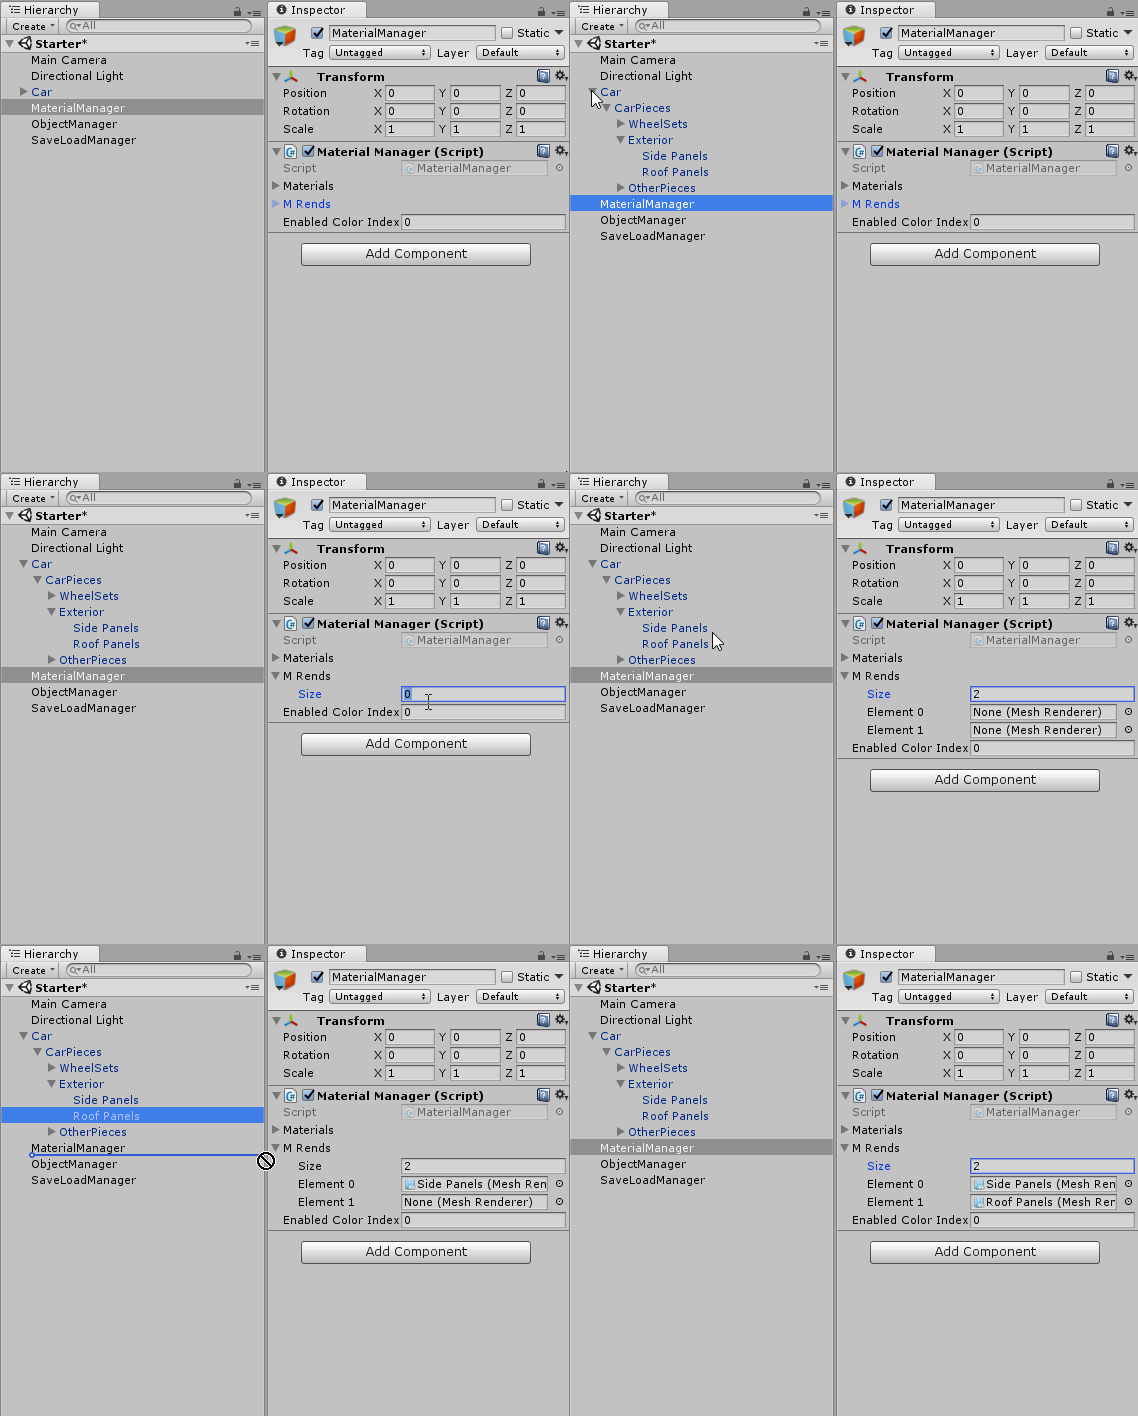
Add the Car’s frame to the Mesh Renderers list so we can change the Material to the Materials above.
What is the MaterialManager?
The MaterialManager is responsible for saving and swapping the Materials on the car Asset during runtime. The Materials drop-down is a list of the Material options you’d like for the object. The M Rends is a list of Mesh Renderers that correspond to the object that will have its Material updated. In this example, the M Rends will be the car body. The Enabled Color Index indicates which Material is currently active in the Materials list; however, you will not need to adjust this value manually.

--------------------
- With the MaterialManager selected, add a MaterialManager component using the Add Component button in the Inspector.
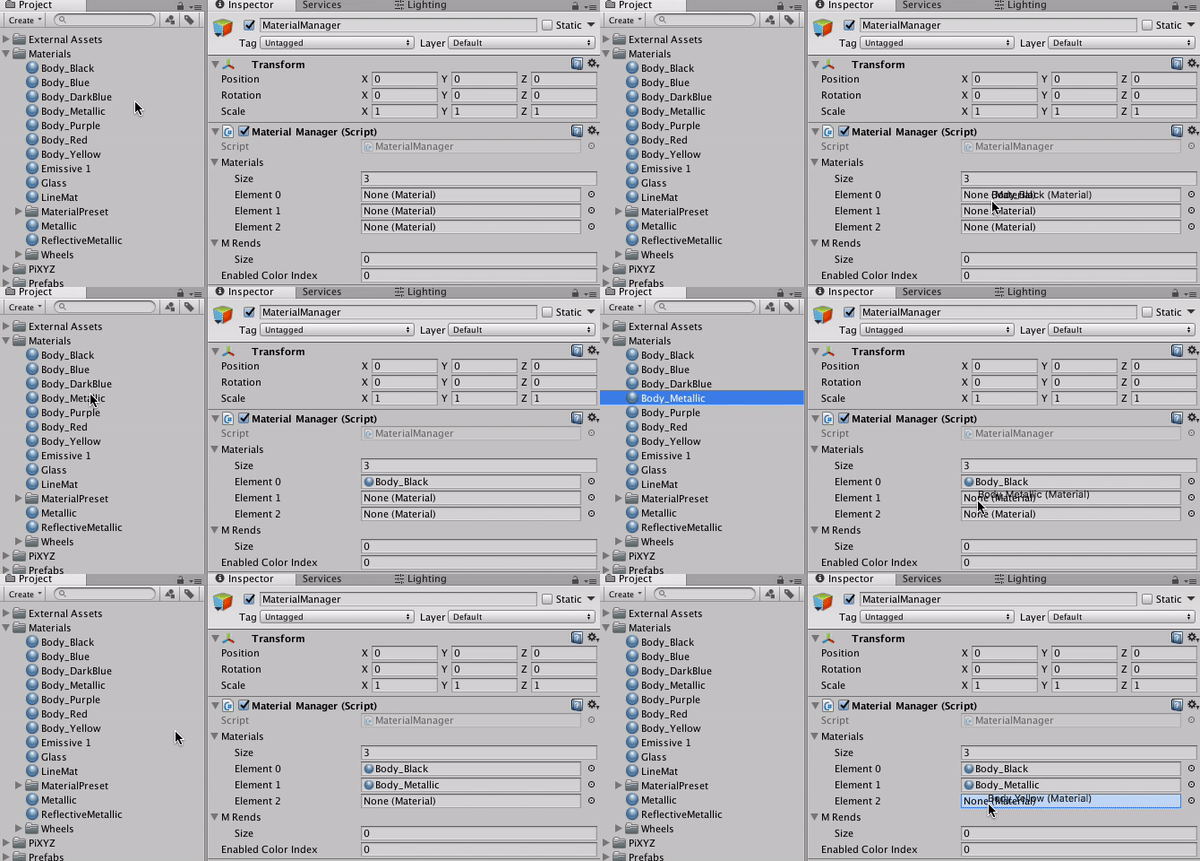
- To add Materials to the list, change the size of the list from 0 to 3.
- Drag the Materials from the Project window into the fields to add them as references.
- Change the size of the M Rends list from 0 to 2 so that you can add the Car Panel GameObjects to the list.
- Add the Side Panels (Car > CarPieces > Exterior > Side Panels) and Roof Panels (Car > CarPieces > Exterior > Roof Panels) to the M Rends list.
--------------------
Tip — Add Multiple Objects to the List
You can add multiple objects to a list at the same time. To do so, lock the Inspector, select multiple items using click + shift, and drag them onto the list.
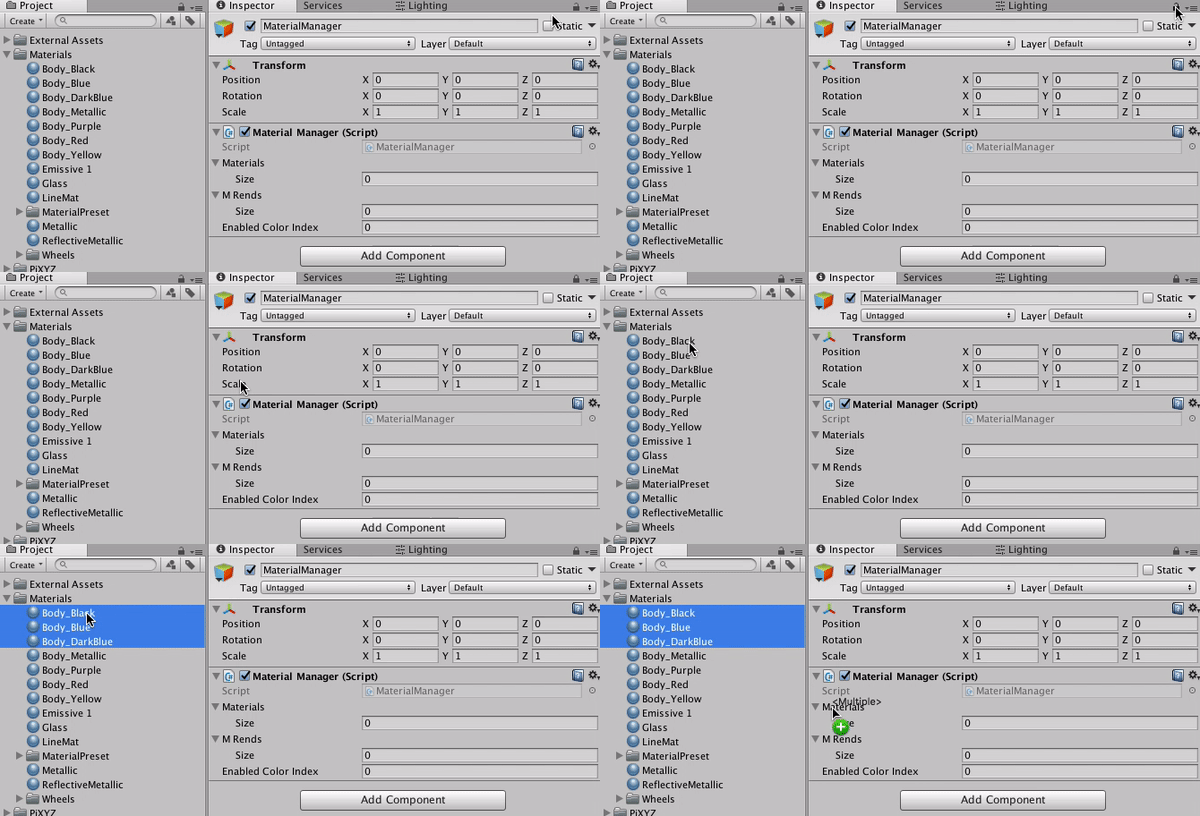
Don’t forget to unlock the Inspector when you’re done.

5. Configure the ObjectManager
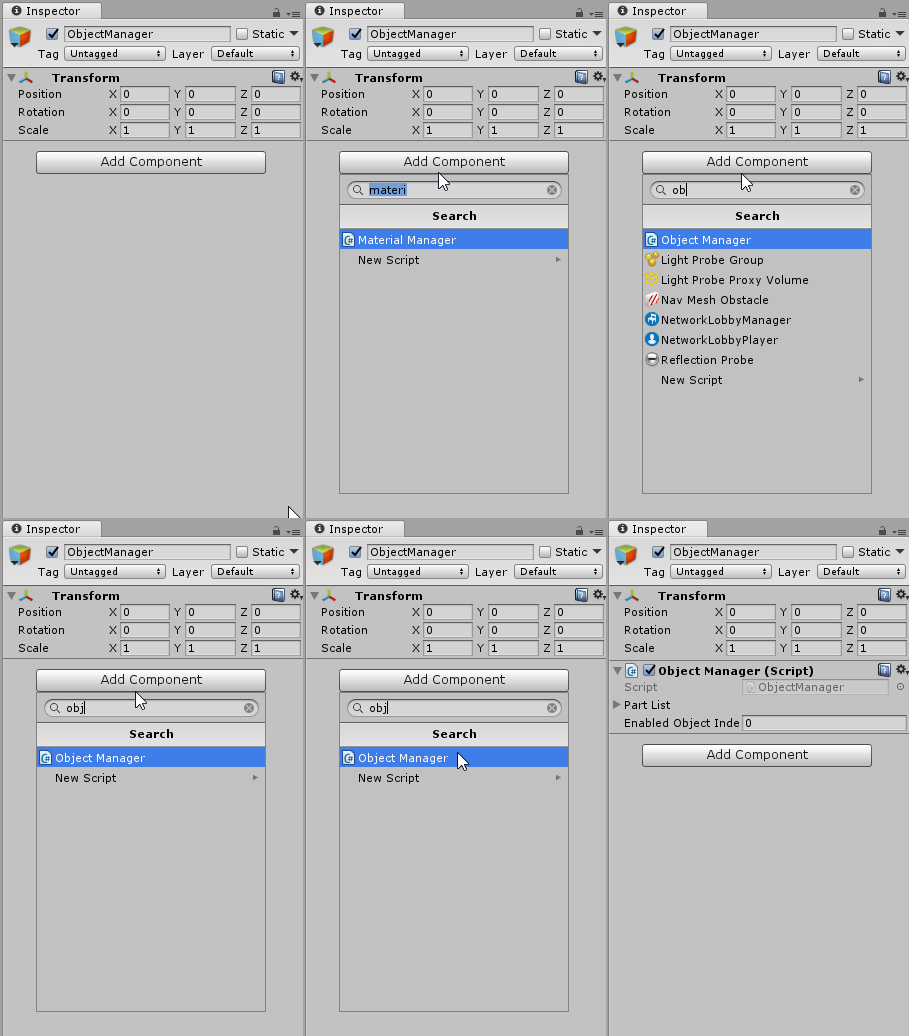
Add the ObjectManager component to the Object Manager GameObject so we can toggle on/off different objects in the Scene.
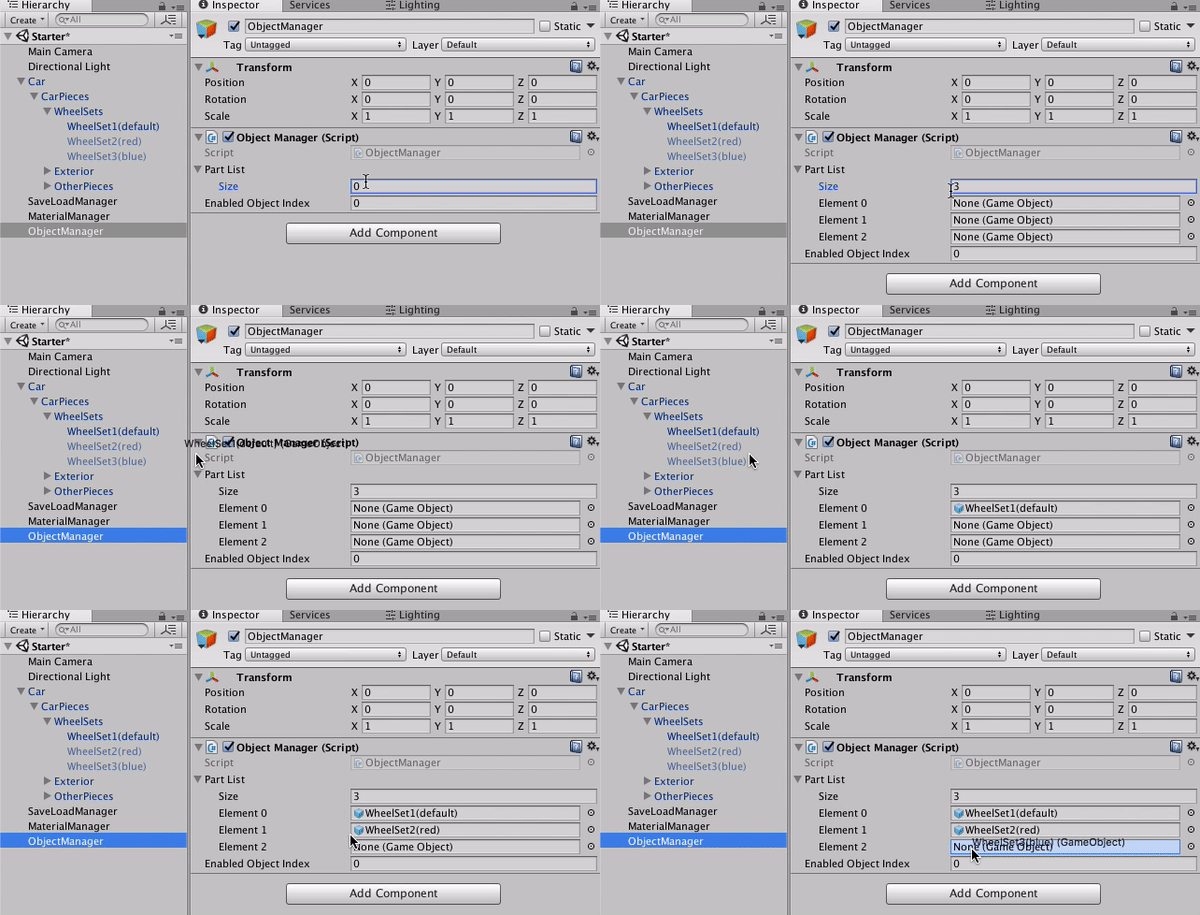
Add the WheelSets to the Part List so we can change out different wheel sets.
What is the ObjectManager?
The ObjectManager is used to enable and disable GameObjects in the Scene. In this situation, the objects that will be toggled on and off are the different WheelSets.
--------------------
- With the ObjectManager selected, click Add Component in the Inspector window and add the ObjectManager component.
- Change the size to 3 and add the following objects: WheelSet1, WheelSet2, WheelSet3 (Car > CarPieces > WheelSets > WheelSet) to the Part List.
6. Configure the Save and Load Manager
Add the Save Load component to the SaveLoadManager GameObject so we can save Scene data.
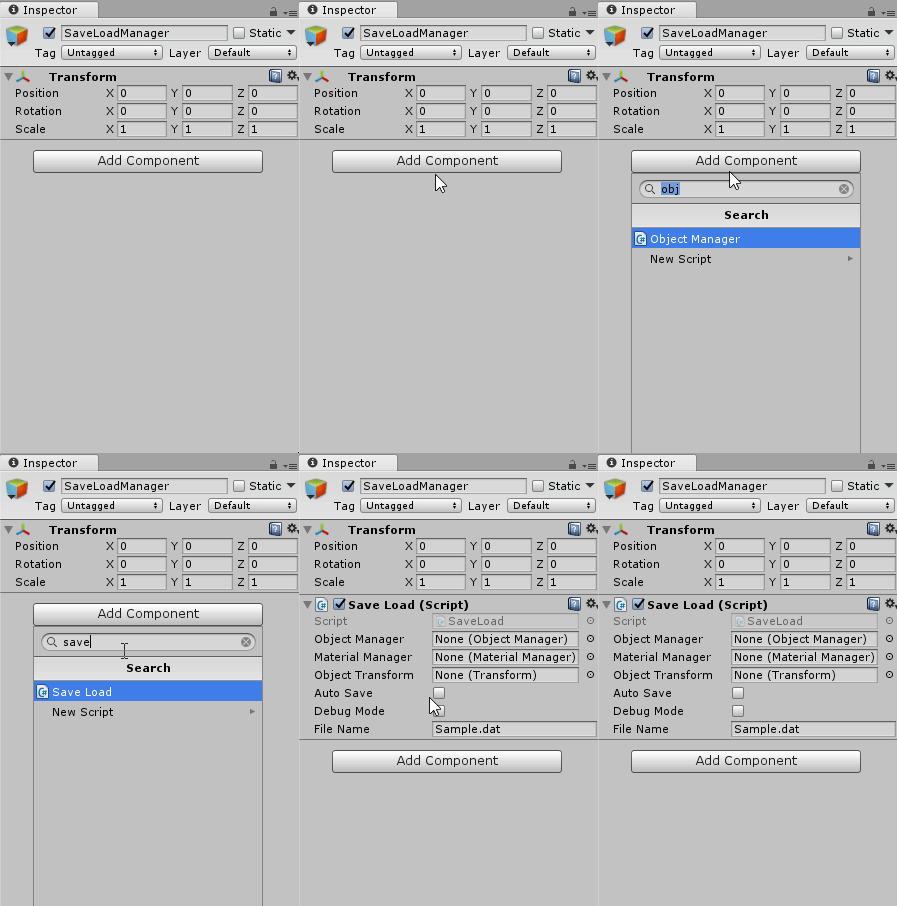
Set the SaveLoadManager’s references to each of the Managers in the Scene (Object Manager, Material Manager), so it can save and load the appropriate data for each.
What is the SaveLoadManager?
This component does the actual saving of the Scene while in Play mode. You can test this out by pressing Play and using the on-screen buttons to save, and then in a separate Play mode, clicking the Load button.
Note the File Name field is the name of the save file. After saving the Scene (using the on-screen GUI during runtime), you'll notice a file called Sample.dat in the Project window. This is the saved data in JSON format.
Explore — Sample.dat
Take a moment to open up the Sample.dat JSON file to get an idea of how the information is saved.
--------------------
- With the SaveLoadManager selected, click Add Component in the Inspector window and add the SaveLoad component.
- Drag the Object Manager from the Hierarchy to the Object Manager field in the Save Load component.
- Drag the Material Manager from the Hierarchy to the Material Manager field in the Save Load component.
- Drag the Car GameObject from the Hierarchy into the Object Transform field in the Save Load component.
- Click Play to test it out!
Whew! That was a lot of configuring, but at the end you've set up the Scene to save changes made during Play mode. These same components are used in the example project for persistent data.
7. Key Takeaways
You've now configured Save and Load.
By completing this tutorial, you’re now able to Save and Load the following in any Scene:
- Applied Materials
- GameObjects, toggled on and off, such as wheel sets, bodykits, spoilers, or different car models altogether.
- A GameObject’s Transform information (Position, Rotation, and Scale). In this case, the car’s Transform information.
