
Zoe - Setting up a Drag & Drop behaviour
Tutorial
Beginner
+10XP
5 mins
(26)
Unity Technologies
How to set the drag and drop system for snapping objects into targets.
1. Enabling Drag&Drop
Zoe also allows snap of objects on others or on specific locations thanks to the Drag and Drop system. For the system to work you need objects to be IOs and also targets (objects or Empty objects) to be IOs.
What we want in this second activity is the user to grab the red brick and snap it on top of the blue ones.
Expand Activity2 and select the Red_Brick in the Hierarchy. Convert it into an Interactive Object. Do the same for the Brick_Target.
Select the newly Red_Brick(IO) and under the Interactive Object setup enable manipulation, gravity and drag and drop:
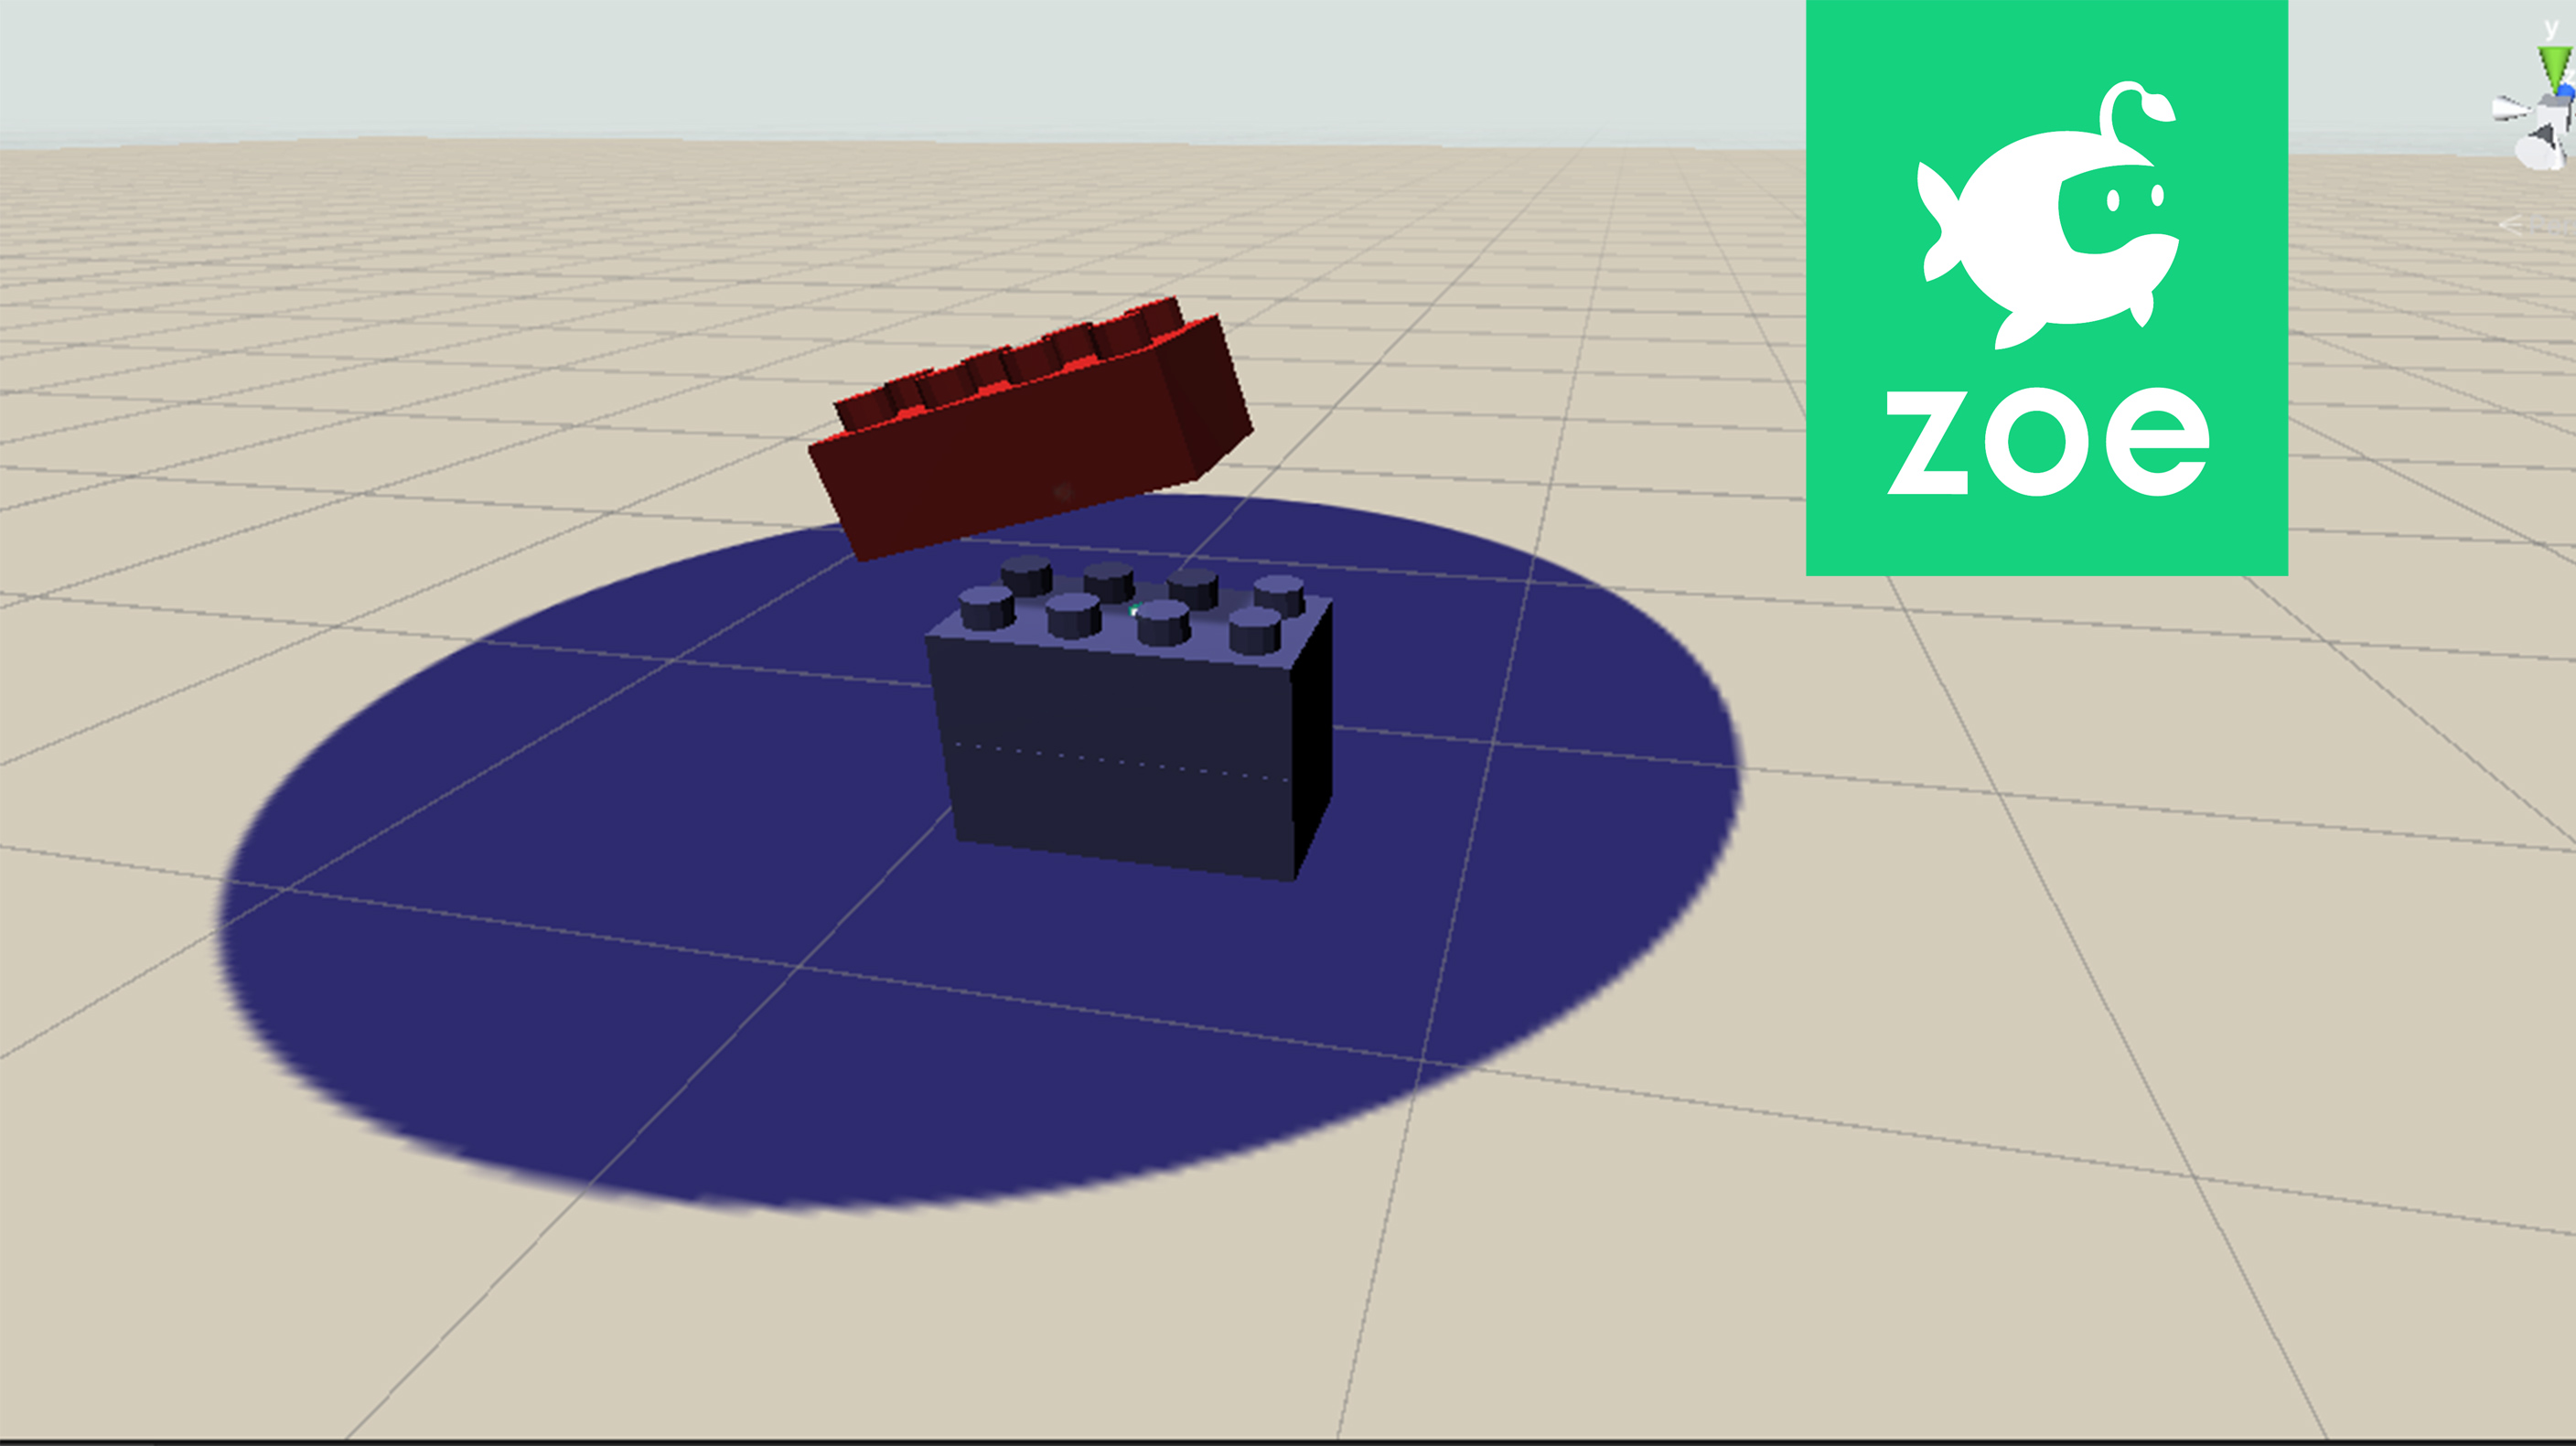
Under ‘Drop Targets’ select BrickTarget(IO). And make sure the center of the target is aligned with the top of the blue brick:
2. Drop Requirements
The Drag and Drop system allows you to also force a given orientation of the object when being dropped on the target. In this case we are going to make sure the user is dropping the object in the right orientation.
Under ‘Drop Requirements’ set the parameters as follows:
The requirements allow to control the position the user is trying to drop the object on the target. They can be set to make the task more or less difficult, requiring more or less precision.
Matching the X axis orientation means for example the object cannot be rotated 90° to be dropped:
When ‘Allow mirror’ is checked, it means that the object must follow the axis orientation but it does not matter in which direction. Here as the brick is symmetrical it can placed in both directions when matching the X axis:
Matching the Y axis orientation means the brick must be facing up, exactly like the target (and like the other bricks).
Check also ‘Snap on Drop’ under Drop Parameters to create an animation transition between the position the user is dropping the object and the final position.