
Create 3D sound effects
Tutorial
Beginner
+10XP
50 mins
121
Unity Technologies
In this tutorial, you’ll add sound to the waterfall and customize it to suit the scene needs.
By the end of this tutorial, you'll be able to:
- Explain the role of audio in supporting narrative and worldbuilding.
- Explain the role of audio in developing atmosphere.
- Simulate different types of audio sources by applying custom rolloffs.
- Describe the science of audio in digital environments.
1. Overview
With the character audio in place, you can now turn your attention to the environment and the audio effects that it should be producing. A major feature of the scene is a waterfall. Right now, the waterfall is silent, but in the real world, there would be dramatic ambient sound being produced. In this tutorial, you’ll add sound to the waterfall and customize it to suit the scene’s needs.
If you have access to headphones, it’s highly recommended that you use them for this tutorial, as this can make it easier to detect subtle changes in the audio as you customize the Audio Sources.
2. Add the waterfall sound
1. In the Hierarchy, right-click and select Audio > Audio Source. Rename the audio source “Waterfall Audio”.
2. In the Scene view, move the Audio Source to the bottom of the waterfall where it meets the pond.
3. Locate the AmbientWaterfall audio clip in the Assets > CreativeCore_Audio > Audio folder and add it to the Audio Generator variable of the Waterfall Audio Source.
Note: You can preview the waveform of the audio clips in the Project window.
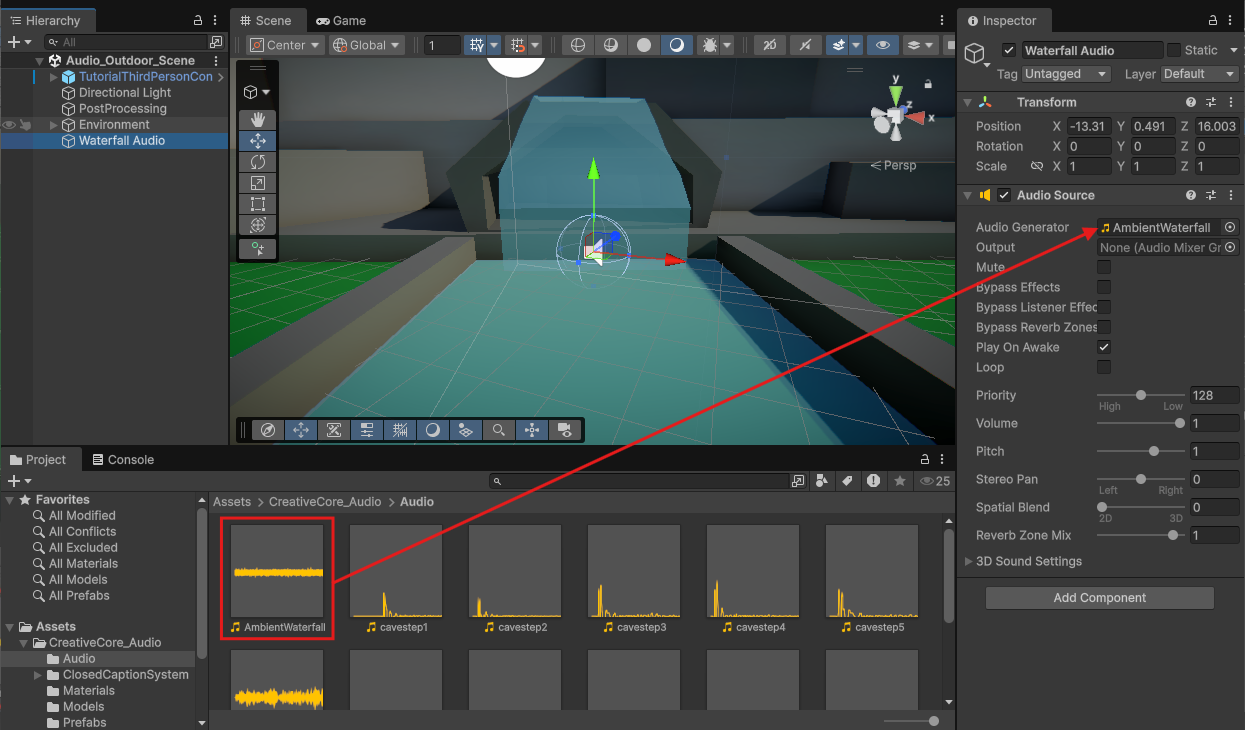
The waterfall will be an ambient sound that will play continuously as long as the user is in range to hear it, and it should begin playing as soon as the scene is active.
4. Enable Loop on the Audio Source so that the audio will repeat infinitely.

5. Playtest the scene.
You should hear the waterfall sound playing continuously; however, it doesn’t change in volume regardless of how near or far from the waterfall you move the player. This is because the audio source is currently set to 2D. Generally, sound sources such as this waterfall exist in 3D space, and so the audio source requires further adjustment.
6. Exit Play mode.
7. Set the spatial blend of the audio source to 3D.
With the source set to 3D, the minimum and maximum distances of the audio volume, represented in the scene by two spheres, will now be functional.
8. Adjust the minimum distance of the audio source by adjusting the scale of the inner sphere or setting the minimum distance value in the Inspector until it’s roughly the same size as the cave opening.
Because the scene is fairly small, it’s important to adjust the maximum distance of the audio source as well.
9. Adjust the maximum distance to be approximately 10 units.
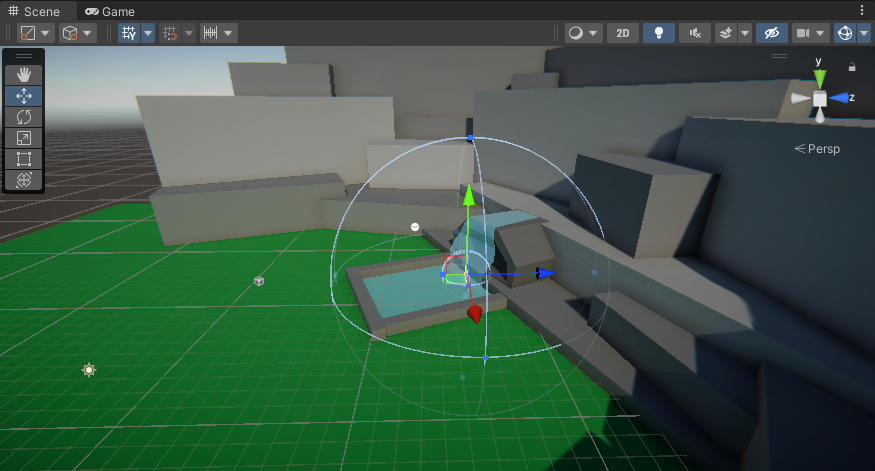
You’ll get into more detail regarding these values shortly, but for now, playtest the scene and note that the audio increases and decreases in volume based on the player character’s distance from the audio source.
3. Adjust the audio spread
Before you move on to make the next adjustment to the Waterfall Audio Source, take a moment to perform a small experiment:
1. Enter Play mode.
2. Move to the outer edge of the Max Distance of the Audio Source and turn the character to the right and left, taking note of what occurs to the audio.
As the player character turns to the left, the audio seems to pan into the right speaker (representing that the player character’s right ear is closer to the audio source) and significantly reduces or all together eliminates the volume in the left speaker. When you turn to the right, the audio becomes more dominant on the left. If you’re having difficulty hearing the changes, a pair of headphones will help.
The audio difference you’re hearing is managed by the Spread value in the 3D sound settings. By default, Spread is set to 0, meaning that the way that the sound is distributed by the speakers is based completely on the position of the audio source in the world. From a technical standpoint this behavior makes sense; however, in practice the effect can be jarring, as the sound seems to jump from one speaker to the other as the player moves.
3. Still in Play mode, change the Spread to 180.
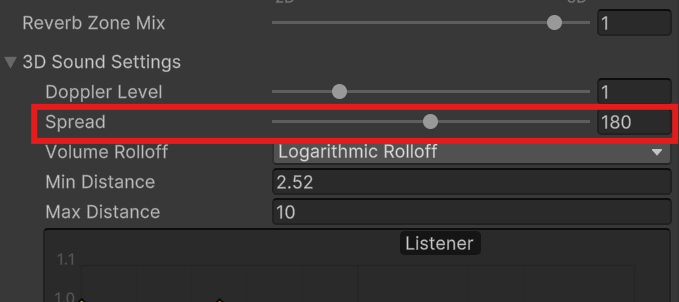
Notice how the audio becomes evenly balanced in both speakers. A Spread setting of 180 removes the positional relationship between the speakers and the audio source, leaving only the volume to change based on the player character’s distance.
4. Adjust Spread until you find a value that sounds correct to you and remember the value you decided on.
The transition from left to right when turning should not be jarring, but subtly noticeable. Consider how the position of an audio source in the real world affects your own perception. While you will definitely hear audio more distinctly with the ear closest to the sound source, you will still be able to hear the sound in your other ear as well.
5. Exit Play mode and set the Spread value back to the value you determined worked best for your scene.
You may have noticed that in order to find the correct value for you, you selected a number between 0 and 180. However, Spread goes to 360. Values between 180 and 360 perform the same function; however, the audio channels become inverted. This can be useful for certain situations and different player controller types, but in this situation, a value between 0 and 180 is appropriate.
4. Explore logarithmic rolloff
The audio now smoothly transitions between speakers, but there still remains another issue that you might have noticed. The waterfall audio is still audible, even outside of the Max Distance value. In fact, it seems as if Max Distance only represents the lowest volume an audio effect can have.. What’s happening here?
The reason for this behavior is due to the Audio Source’s Volume Rolloff type being set to Logarithmic Rolloff. Logarithmic Rolloff approximates the way that we perceive sounds in the real world, although due to the modifications made for this scene, it isn’t immediately apparent.
1. To better understand how Logarithmic Rolloff works, set the Max Distance back to 500.
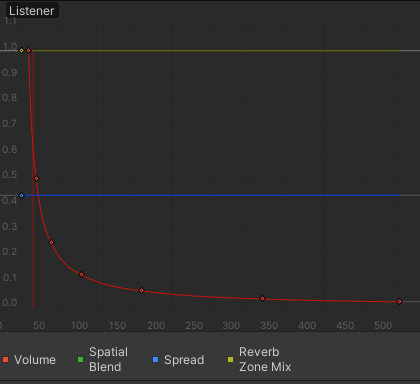
The graph that appears below the 3D sound settings is a visual representation of the different audio source settings. The red curve represents the rate of decrease in audio volume based on the Listener’s distance from an Audio Source. Note the steep drop in overall volume that occurs after a short distance, and then the prolonged transition to 0. This represents the sound's rate of decay, or the audio source’s attenuation.
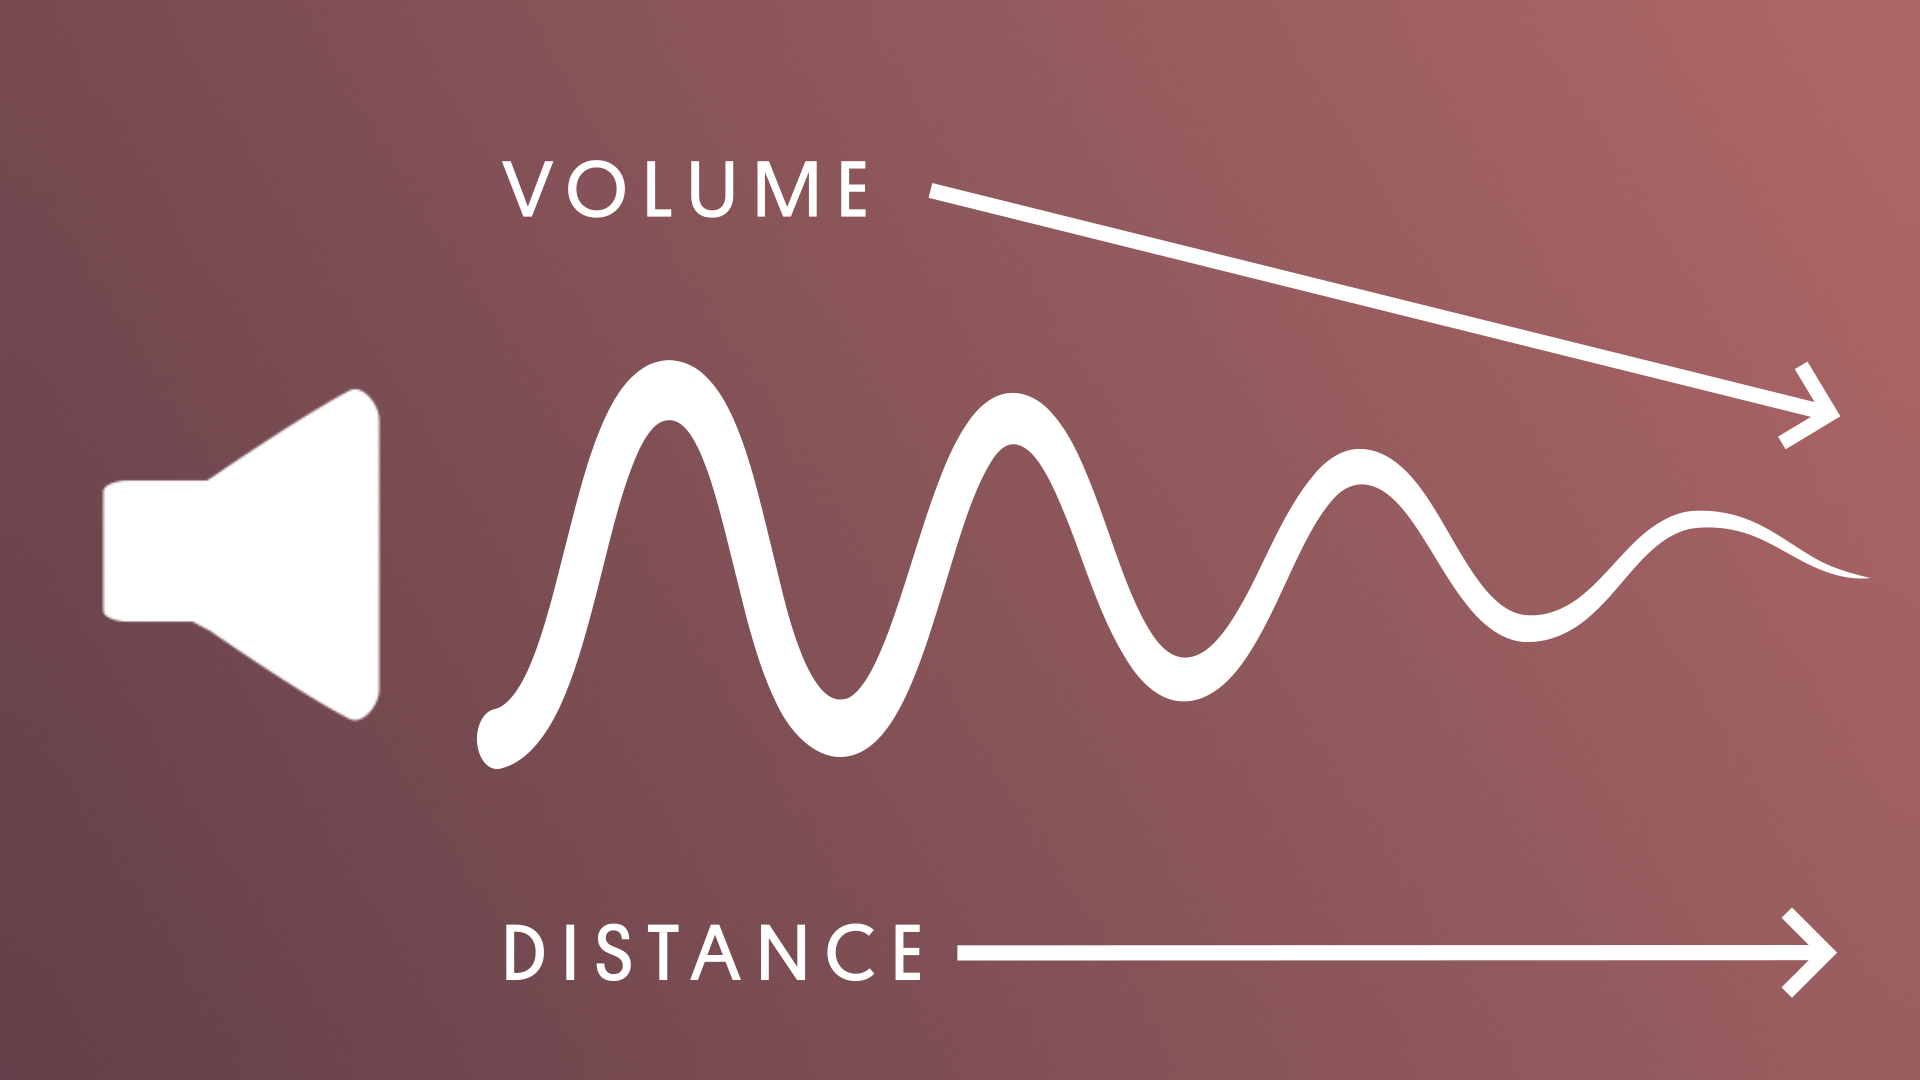
If you zoom out in the Scene view, you can get a sense of how huge the range required is for audio to fade out in a naturalistic way.
2. Set the Maximum Distance back to 10 and observe the changes to the graph:
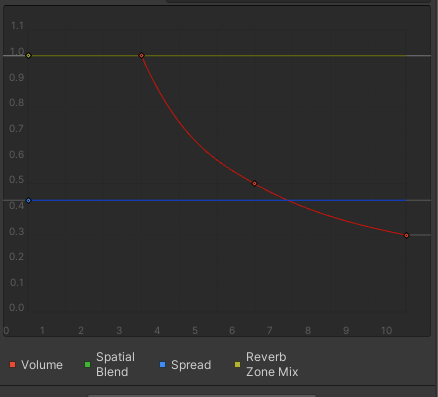
When setting the Max Setting to such a relatively small distance, the Logarithmic rolloff isn’t able to achieve its preferred attenuation curve. It tries to apply the appropriate curve, but comes up short--literally. Note that at the 10 unit max distance, the audio level stops at 0.3.
An important thing to understand about Max Distance in regards to Logarithmic Rolloff is that it does not represent when a sound stops being audible, but rather when a sound stops attenuating. The sound will continue to be audible at the ending attenuation rate for a significant distance from the audio source, but will eventually fade out.
To see this in action:
3. Enter Play mode and jump off the grass plane. Make note of how long the waterfall is still audible for and the distance you’ve dropped before it finally fades out.
4. Exit Play mode.
It’s for these reasons that Logarithmic Rolloff is a good option for large scale audio that should be heard from vast distances. In a more realistic version of this example, Logarithmic Rolloff would be ideal for something like a waterfall, which typically produces significant noise. However, what’s to be done for smaller scale projects or sound sources that would rapidly attenuate from a much closer distance?
5. Explore linear rolloff
1. Change the Volume Rolloff option from Logarithmic to Linear and note the change in the graph:
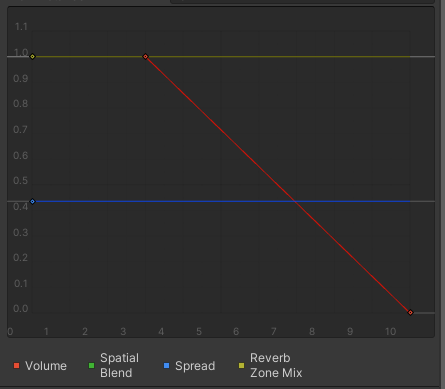
As might be expected from the name, the Linear Volume Rolloff option causes the volume to decrease at a linear rate. Importantly, even with the smaller values set for the Audio Source, the volume reduces to 0 at the maximum distance.
2. Playtest the scene and note the effects a Linear Rolloff has on the Audio Source.
When the player character is outside of the Max Distance radius, the waterfall audio isn’t present at all. However, as soon as the Max Distance radius is crossed, the audio begins to play abruptly, almost as if the sound was activated, rather than gradually coming into audible range. As the player character moves towards the source, the audio increases smoothly, which is nice, but not representative of how sound is experienced in the real world.
Linear Rolloff is best used for drawing attention to objects rather than being used for ambient audio sources. The linear volume increase makes it easier for players to get a sense of how close to the source they are, and if they’re moving in the right direction. It’s especially useful for Audio Sources that might be triggered, so the abrupt transition from inaudible to audible might go unnoticed.
For this specific use case, Linear is not a good solution. It has aspects that are needed – the sound becoming inaudible at the Max Distance – but the attenuation rate of Logarithmic Rolloff was a better fit.
6. Create a custom rolloff
Fortunately, Unity allows for custom volume rolloffs to be created, which is the correct course of action for this Audio Source. Let’s take what you learned from Logarithmic and Linear rolloffs and build something that uses the elements needed from both.
1. Change the Volume Rolloff to Custom Rolloff and note the new curve:
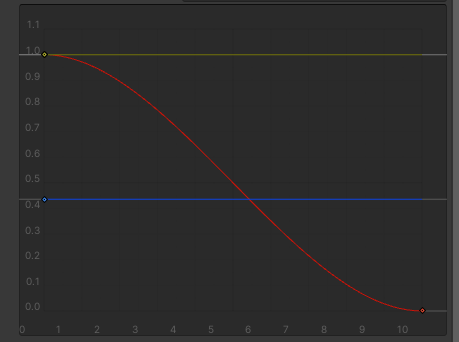
2. Playtest the scene to observe how the rolloff has changed.
Already the shift is more naturalistic than Linear. To edit the curve further,
3. Select the volume curve to make it the active curve.
4. Select the point at the 1.0 mark on the graph. This will activate the curve’s tangents:
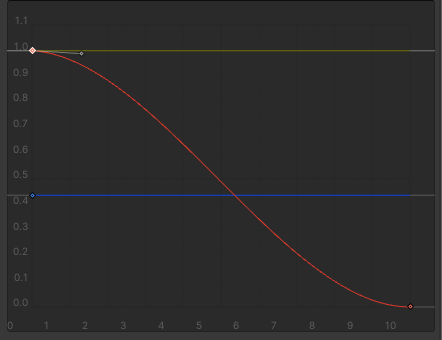
5. Left-click and drag the tangent to change the shape of the curve:
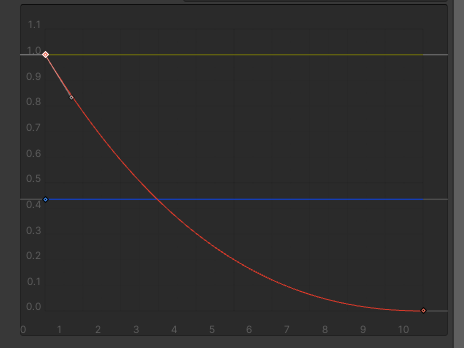
You may find that you need a few extra points on the curve to manipulate. You can do so by right-clicking on the curve and selecting Add Key.
Experiment with changing the behavior of the tangents. Points added to the curve have both left and right tangents. By default they move together as if connected; however, if you select Broken from the right-click menu, you can move them independently.
Moving the starting point along the X axis of the curve changes the Min Distance of the audio source.
6. Edit the curve until you find a configuration that works best for the waterfall.
Playtest the scene frequently and adjust until you’re satisfied with the overall audio effect for the waterfall. As a reminder, the goals to accomplish are:
- The sound of the waterfall fades out to zero after the player character moves a certain distance away.
- Once the waterfall is in audible range, there’s a logarithmic-like increase in volume with a slow initial volume increase that quickly increases as the player character gets closer to the minimum distance.
7. Adjust the audio listener
You may have noticed that there seems to be a delay between when the player character enters the range of the audio source and when the audio can be heard. The reason for this is because the audio listener in the scene is attached to the camera, which lags some distance behind the player character.
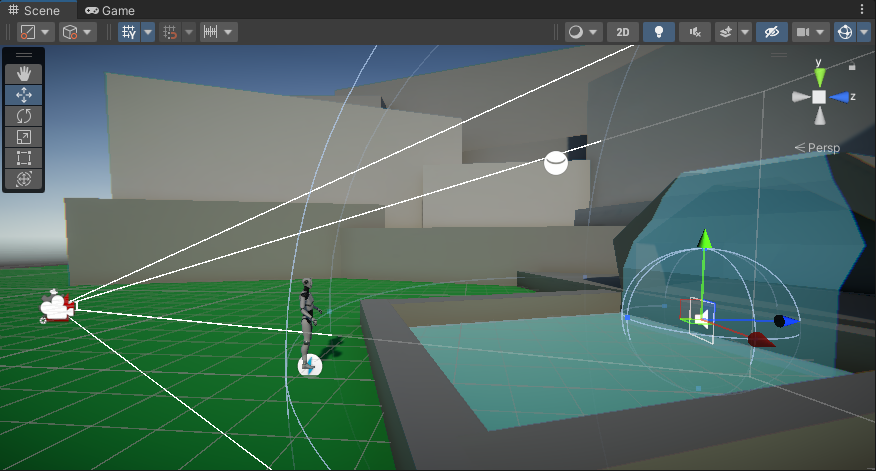
A good general guideline to follow is to attach the audio listener to the object that the user will be interacting with the world through. For experiences that offer a first person perspective, keeping the audio listener on the Main Camera makes sense: the Camera in that instance serves as the user’s eyes. However, this scene features a third person controller, meaning that the user is interacting with the world via the player character, and as such, the player character should have the audio listener. This will mean that the audio effects will change based on the location of the player character, which will match with the visual expectations we have for the scene.
1. Select the Main Camera in the Hierarchy and locate the Audio Listener in the Inspector.
2. Click on the three dots on the upper right corner of the Audio Listener component and select Remove Component.
3. Select the PlayerArmature GameObject in the Hierarchy. Add an Audio Listener by searching for it in Add Component.
4. Playtest the scene and notice how the audio has shifted.
8. Experiment with the Doppler effect
The Doppler effect is the change in frequency (and pitch) of an audio wave when an audio source moves relative to the audio listener. The most obvious case of this in the real world is when a fire truck drives by; the siren sounds higher-pitched when it’s approaching, and lower-pitched as it’s driving away.
Licensed under CC0 on freesound.org
In Unity, the Doppler Level property enables simulating this effect for audio sources. By adjusting the property, the frequency of the audio changes in real-time as the source moves relative to the listener.
For demonstration purposes in the video below, there is an audio source with classical music right next to the waterfall. To make this effect even more obvious, the Player Controller Move Speed and Sprint Speed value were also increased. Notice how the music gets higher and faster as the player runs towards the sound, but gets lower and slower as the player runs away.
If you’re curious, try to recreate this effect in your own scene!
9. Explore: Add more ambient audio
In the next tutorial you’ll add audio effects to the interior of the cave, but are there any other exterior effects that this project would benefit from?
- Add three new ambient sound sources to the scene and configure their volume rolloff accordingly.
- Consider the types of sounds that would make sense for the scene. What sounds are typically associated with the outdoors and water sources?