
Challenge: Recreate the scene
Exercise
Beginner
+60XP
30m
Unity Technologies

In this final challenge, you’ll be tasked with recreating one of your favorite scenes from media in Unity.
By the end of this tutorial, you'll be able to demonstrate your new skills in cameras.
1. Overview
Throughout this project, you’ve learned how to work with the technical aspects of Unity cameras, as well as some design considerations that go into selecting the right kind of camera for your environment. At the start of this project, you were asked to review some of your favorite media for camera inspiration. Now, you’ll be tasked with recreating one of your favorite shots in Unity!
2. Review what you’ve learned
In this project you explored camera usage both inside and outside of the Editor. In Unity, you learned how to:
- Define how a camera renders a scene using its Projection properties.
- Make an experience more accessible by modifying a camera’s Field Of View properties based on the application type.
- Determine when a situation calls for a perspective or orthographic camera.
- Control what a camera can see within its view with clipping planes and culling masks.
- Determine what kind of background the camera will render with Environmental properties.
You also explored many universal camera subjects, such as popular camera views and angles for interactive experiences.
3. Recreate a scene
In this challenge, you will select a dynamic scene from a piece of media and try to recreate it in Unity.
- Take a screenshot of your selected shot so you can compare it with the final outcome of this challenge.
- In Unity, use primitives to roughly recreate all of the set pieces in the scene, or alternatively, make use of assets you find in the Unity Asset Store!
- Once you’ve designed your set, try to recreate the camera setup from your screenshot.
- Once you’re finished, take a screenshot of your finalized shot and submit it along with your reference image.
You should expect to spend at least 30 minutes on this challenge.
Bonus: If you want an additional challenge, take what you learned in the Lighting and VFX projects and apply those skills to your scene as well. Try to replicate your reference image as closely as possible.
4. Criteria
You’ll know you’re successful if you’ve met this criterion:
- Your scene is recognizable when placed next to the screenshot of the original scene.
5. Next steps
Congratulations! You have completed the learning required for Creative Core Cameras.
You have the core skills and knowledge for one of the primary creative domains within the Unity Engine.
Now you’re ready to apply these skills in other projects! We can’t wait to see what you make next.
6. Submit your project
When you’ve completed this challenge, please submit and share your project. This isn’t required but it’s a great opportunity to share your progress and learn from the work of others.To submit your project:
1. Review the specific guidance for this challenge (above) and check your project to make sure that you have achieved the challenge criteria. Remember, there’s no deadline on submissions; you can take the time that you need to do this.
2. Take some screenshots or a screen recording of your project.
3. Add a submission title and description.
- Make sure to include the screenshots or video recording. If you have additional details to share about your process or the project that you have created, you can share them in the description too.
4. Set who can view your submission:
- Public: Anyone who views this tutorial.
- Private: Just you.
5. Select Save and preview submission.
6. Check your submission preview and then complete the CAPTCHA test and select Submit and continue.
Please login to submit
Complete this Tutorial
Submission Gallery

Tree Scene
Tree Scene using the Fantasy Forest Environment Asset from Unity Asset Store
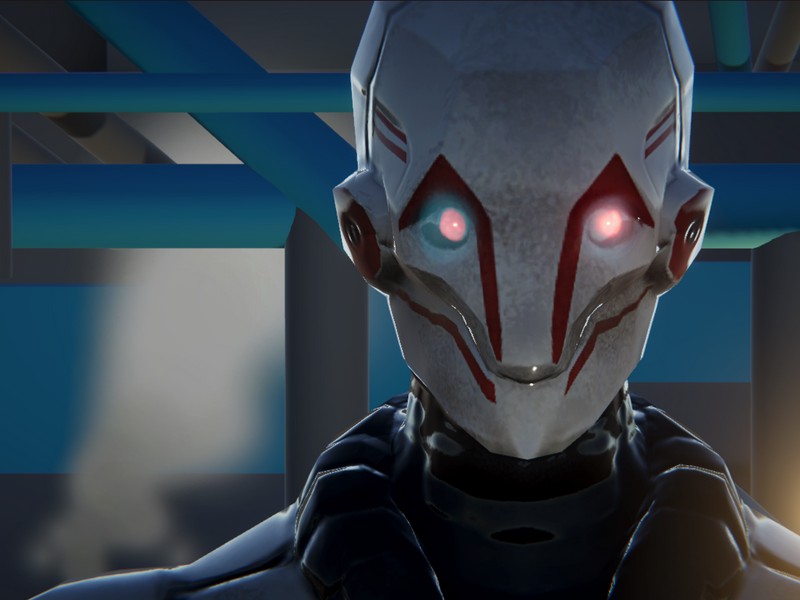
Ominous Terminator Salvation
Third Person straight-on view, character 1/3 to right. 1) Terminator-Salvation Screenshot from Den of Geek: - https://www.denofgeek.com/movies/terminator-salvation-director-reflects-on-movie-failure/ 2) "Cyber Soldier" free asset from Unity Store, Will Morillas: - https://assetstore.unity.com/packages/3d/characters/robots/cyber-soldier-52064 3) VFX Steam - Duration: 2, Looping, Start Lifetime: 2, Start Speed 1, Start Size: 1. Emission - Rate over Time: 80. Shape - Cone, Angle: 0, Radius: 0.2, Arc: 100. Velocity over Lifetime - Orbital X: 0.4. Color over Lifetime: Full Opaque -> Full Transparent. Size over Lifetime enabled. Noise - Str: 0.6, Freq: 5, Scroll: 5, Damping. Renderer - Material: Default-ParticleSystem. 4) Red Point Light Eyes made using Camera > Rendering > 'Post Processing' enabled. Found technique after I asked, "How to make distant objects fuzzy" to match the Movie screenshot. First step was 'Post Processing' in the Camera...coincidentally turned the eyes gorgeous with little reflections. Made me forget about the fuzzy background goal--I can wait until lesson...

The Shining Blood Elevator Scene
A perfect 1:1 recreation of the famous blood elevator scene from The Shining painstakingly recreated in Unity.

TO BATTLE!!!
fly my soliders

i will never leave you
song name: kimi no kioku laying animation: https://www.mixamo.com/#/?page=1&query=laying&type=Motion%2CMotionPack sitting animation: https://www.mixamo.com/#/?page=1&query=sitting&type=Motion%2CMotionPack tilt texture: https://assetstore.unity.com/packages/2d/textures-materials/realistic-concrete-texture-305716 cherry blossom: https://assetstore.unity.com/packages/vfx/particles/petal-particles-cherry-petals-157869

Blade Runner 2049 - Scene Recreation
An attempt to recreate a camera shot from the "Blade Runner 2049" using an orthographic projection.