Launch Your Games Career: Industry Access For UK Unity Creators
Realitjam’s Unity-Focussed UK Apprenticeship Program Is Here. UK Residents apply now

Lesson 6.2 - Research and Troubleshooting
Tutorial
Beginner
+10XP
30m
(1561)
Unity Technologies
Overview:
In this lesson, you will attempt to add a speedometer and RPM display for your vehicle in Prototype 1. In doing so, you will learn the process of doing online research when trying to implement new features and troubleshoot bugs in your projects. As you will find out, adding a new feature is very rarely as simple as it initially seems - you inevitably run into unexpected complications and errors that usually require a little online research. In this lesson, you will learn how to do that so that you can do it with your own projects.
Project Outcome:
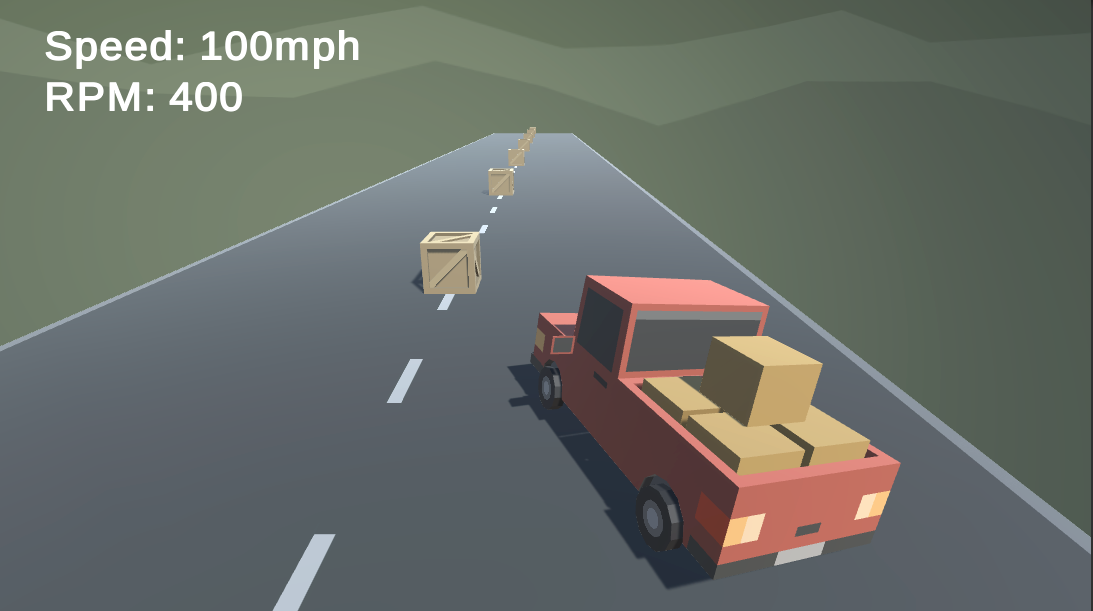
By the end of this lesson, the vehicle will behave with more realistic physics, and there will be a speedometer and Revolution per Minute (RPM) display.,
1. Make the vehicle use forces
If we’re going to implement a speedometer, the first thing we have to do is make the vehicle accelerate and decelerate more like a real car, which uses forces - as opposed to the Translate method.
- Open your Prototype 1 project and make a backup
- Replace the Translate call with an AddForce call on the vehicle’s Rigidbody, renaming the “speed” variable to “horsePower”
- Increase the horsePower to be able to actually move the vehicle
- To make the vehicle move in the appropriate direction, change AddForce to AddRelativeForce
Reminder: The Global/Local dropdown menu in the Scene view can be a helpful tool to orient an object the way you want it in space.
Global perspective is the view of the scene from the perspective of the world, where the position, rotation, and scale of objects are relative to the world itself. This is the default perspective when you open a scene in the Scene view.
Local perspective is the view of the scene from the perspective of a particular object, where the position, rotation, and scale of objects are relative to that object. This can be useful for editing objects in a more precise way.
2. Prevent car from flipping over
Now that we’ve implemented real physics on the vehicles, it is very easy to overturn. We need to figure out a way to make our vehicle safer to drive.
- Add wheel colliders to the wheels of your vehicle and edit their radius and center position, then disable any other colliders on the wheels
- Create a new GameObject centerOfMass variable, then in Start(), assign the playerRb variable to the centerOfMass position
- Create a new Empty Child object for the vehicle called “Center Of Mass”, reposition it, and assign it to the Center Of Mass variable in the inspector
- Test different center of mass positions, speed, and turn speed values to get the car to steer as you like
3. Add a speedometer display
Now that we have our vehicle in a semi-drivable state, let’s display the speed on the User Interface.
- Add a new TextMeshPro - Text object for your “Speedometer Text”
- Import the TMPro library, then create and assign new create a new TextMeshProUGUI variable for your speedometerText
- Create a new float variables for your speed
- In Update(), calculate the speed in mph or kph then display those values on the UI
4. Add an RPM display
One other cool feature that a lot of car simulators have is a display of the RPM (Revolutions per Minute) - the tricky part is figuring out how to calculate it.
- Create a new “RPM Text” object, then create and assign a new rpmText variable for it
- In Update(), calculate the the RPMs using the Modulus/Remainder operator (%), then display that value on the UI
5. Prevent driving in mid-air
Now that we have a mostly functional vehicle, there’s one other big bug we should try to fix: the car can still accelerate/decelerate, turn, and increase in speed/rpm in mid-air!
- Declare a new List of WheelColliders named allWheels (or frontWheels/backWheels), then assign each of your wheels to that list in the inspector
- Declare a new int wheelsOnGround
- Write a bool IsOnGround() method that returns true if all wheels are on the ground and false if not
- Wrap the acceleration, turning, and speed/rpm functionality in if-statements that check if the car is on the ground
PlayerController
using System.Collections;
using System.Collections.Generic;
using System.Numerics;
using UnityEngine;
using TMPro;

public class PlayerController : MonoBehaviour
{

    [SerializeField] float speed;
    [SerializeField] float rpm;
    [SerializeField] private float horsePower = 0;
    [SerializeField] float turnSpeed = 30.0f;
    private float horizontalInput;
    private float forwardInput;
    private Rigidbody playerRb;

    [SerializeField] GameObject centerOfMass;
    [SerializeField] TextMeshProUGUI speedometerText;
    [SerializeField] TextMeshProUGUI rpmText;

    [SerializeField] List<WheelCollider> allWheels;
    [SerializeField] int wheelsOnGround;

    private void Start()
    {
        playerRb = GetComponent<Rigidbody>();
        playerRb.centerOfMass = centerOfMass.transform.position;
    }

    // Update is called once per frame
    void FixedUpdate()
    {
        //Get Input from player
        horizontalInput = Input.GetAxis("Horizontal");
        forwardInput = Input.GetAxis("Vertical");

        if (IsOnGround())
        {

            //Move the vehicle forward
            //transform.Translate(Vector3.forward * Time.deltaTime * speed * forwardInput);
            playerRb.AddRelativeForce(Vector3.forward * forwardInput * horsePower);
            //Turning the vehicle
            transform.Rotate(Vector3.up * Time.deltaTime * turnSpeed * horizontalInput);

            //print speed
            speed = Mathf.RoundToInt(playerRb.velocity.magnitude * 2.237f);
            speedometerText.SetText("Speed: " + speed + " mph");

            //print RPM
            rpm = Mathf.Round((speed % 30) * 40);
            rpmText.SetText("RPM: " + rpm);
        }
    }

    bool IsOnGround()
    {
        wheelsOnGround = 0;
        foreach (WheelCollider wheel in allWheels)
        {
            if (wheel.isGrounded)
            {
                wheelsOnGround++;
            }
        }
        if (wheelsOnGround == 4)
        {
            return true;
        } else
        {
            return false;
        }
    }
}
6. Lesson Recap
New Concepts and Skills
- Searching on Unity Answers, Forum, Scripting API
- Troubleshooting to resolve bugs
- AddRelativeForce, Center of Mass, RoundToInt
- Modulus/Remainder (%) operator
- Looping through lists
- Custom methods with bool return